- Woocommerce
- Shopify Apps
- WordPress
This document provides a step-by-step guide on integrating multilingual functionality. If your website already supports multiple languages, our Product Options & Addons make the integration seamless. The steps below guide you through the process, but if the language is already added, feel free to proceed to the next step.
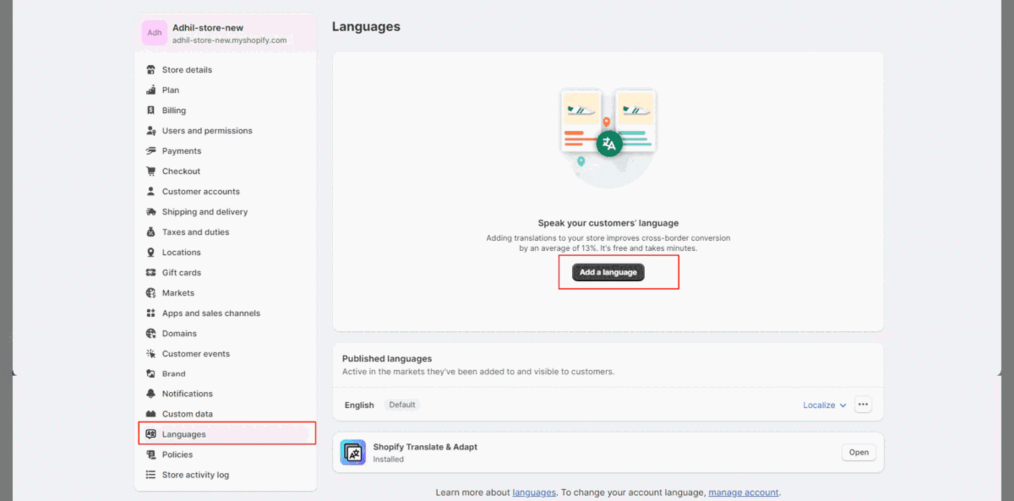
Shopify admin >Settings > Languages> Add a Language >> choose any language to be translated >> Assign to market >> Done
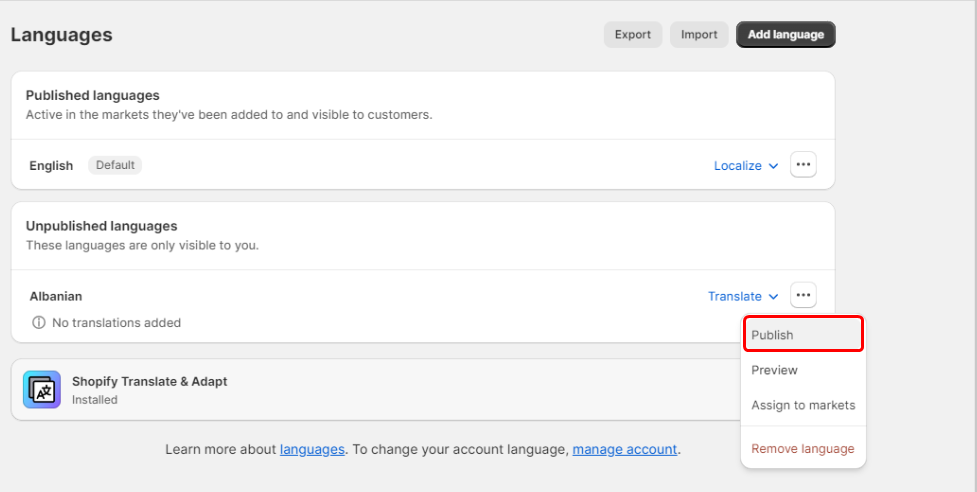
Then select and click on Publish.
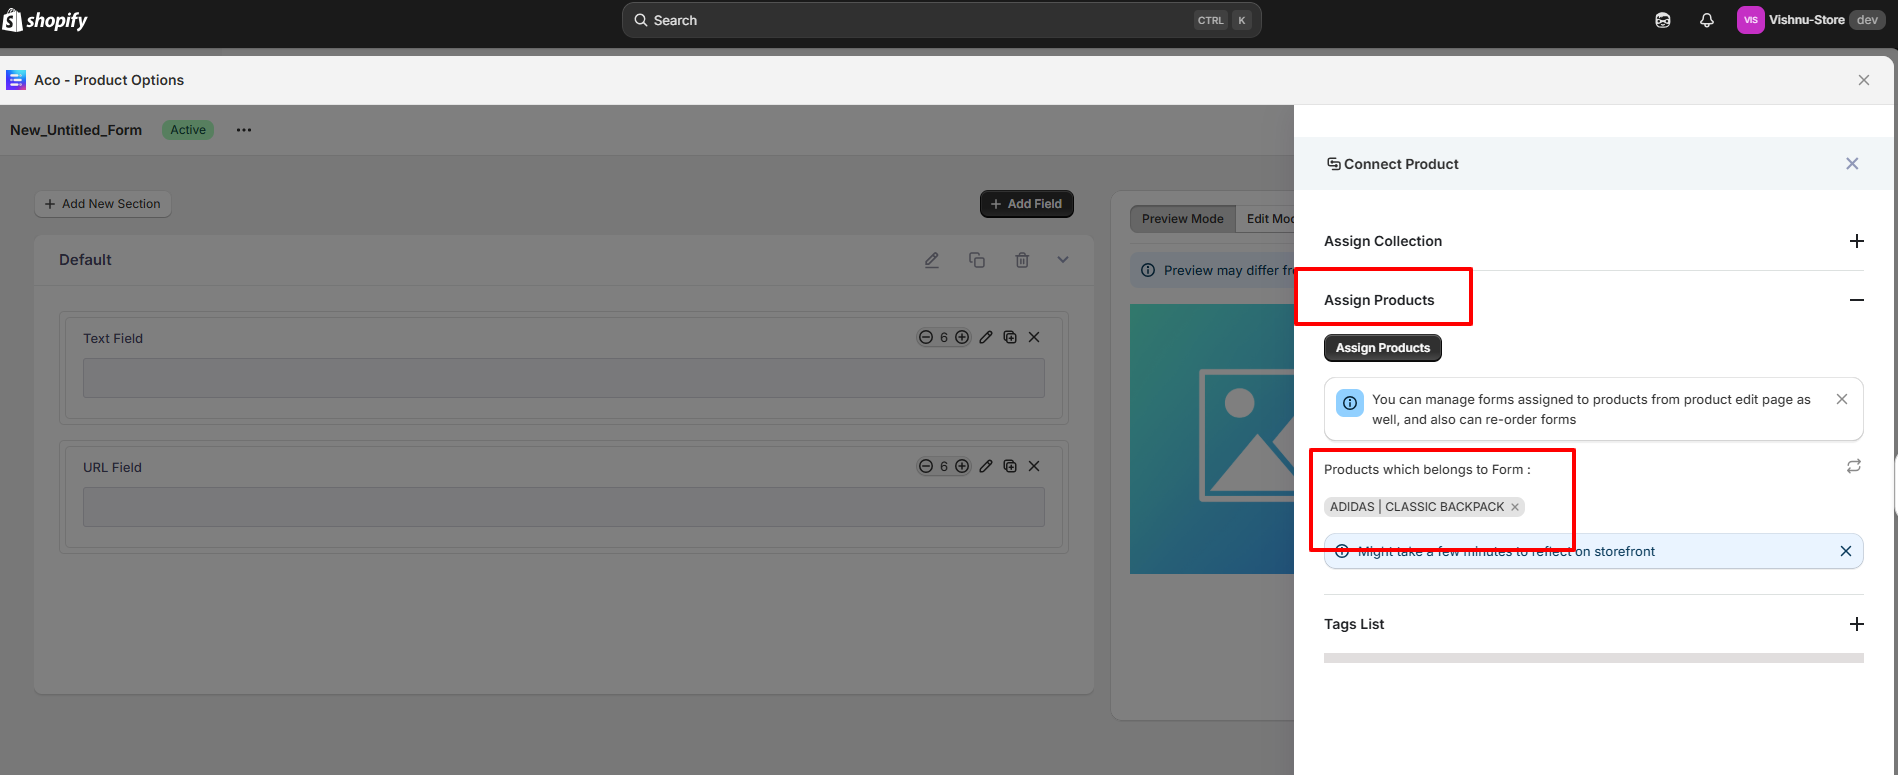
Let’s check how to configure product addons.
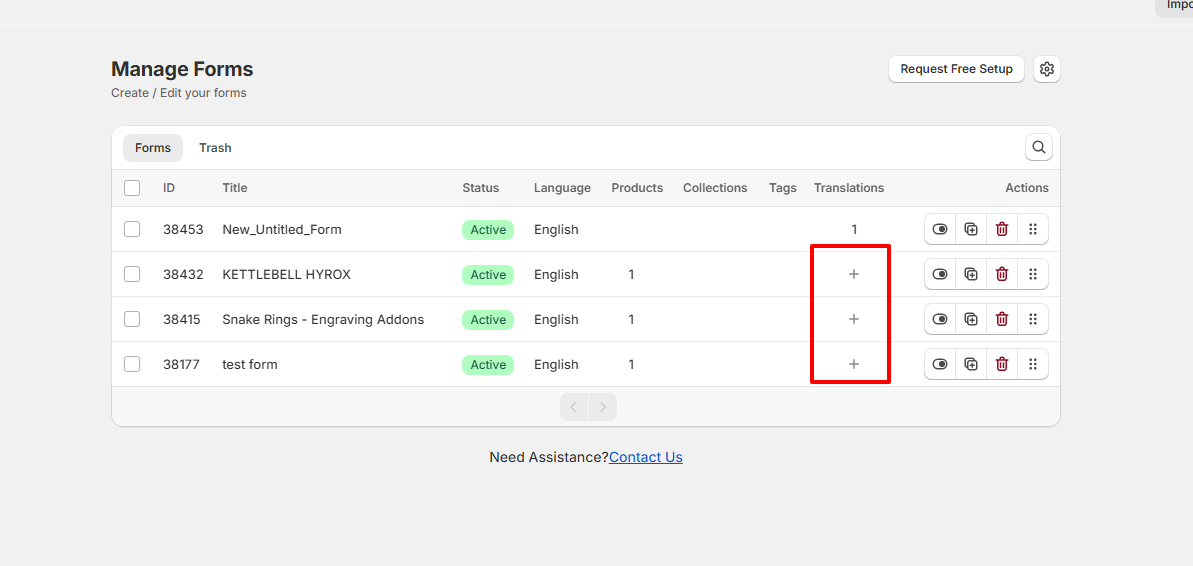
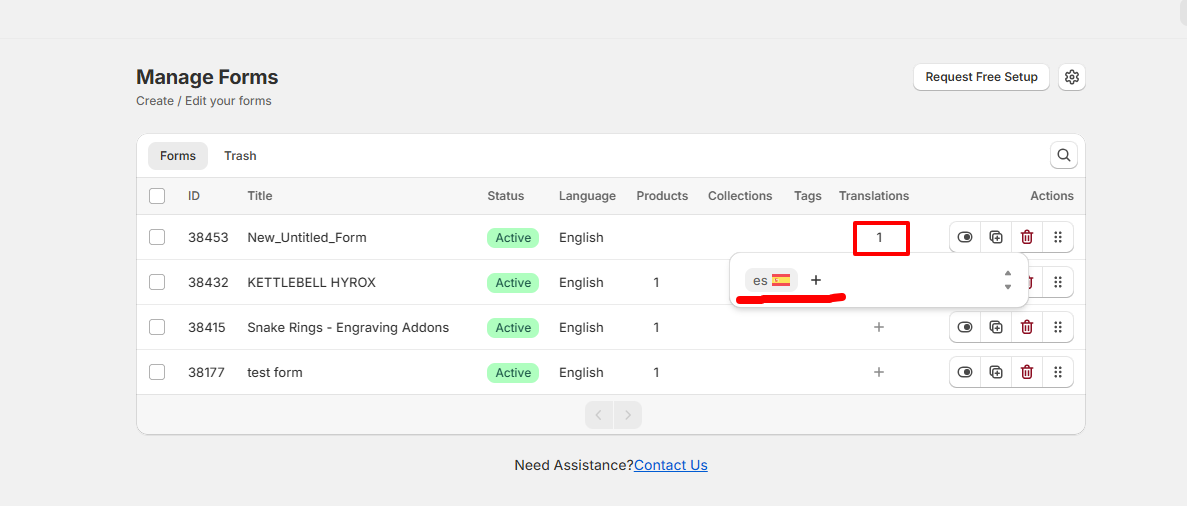
Or you have an alternative way to select the language by clicking on the add button.
Refer to the screenshot below.
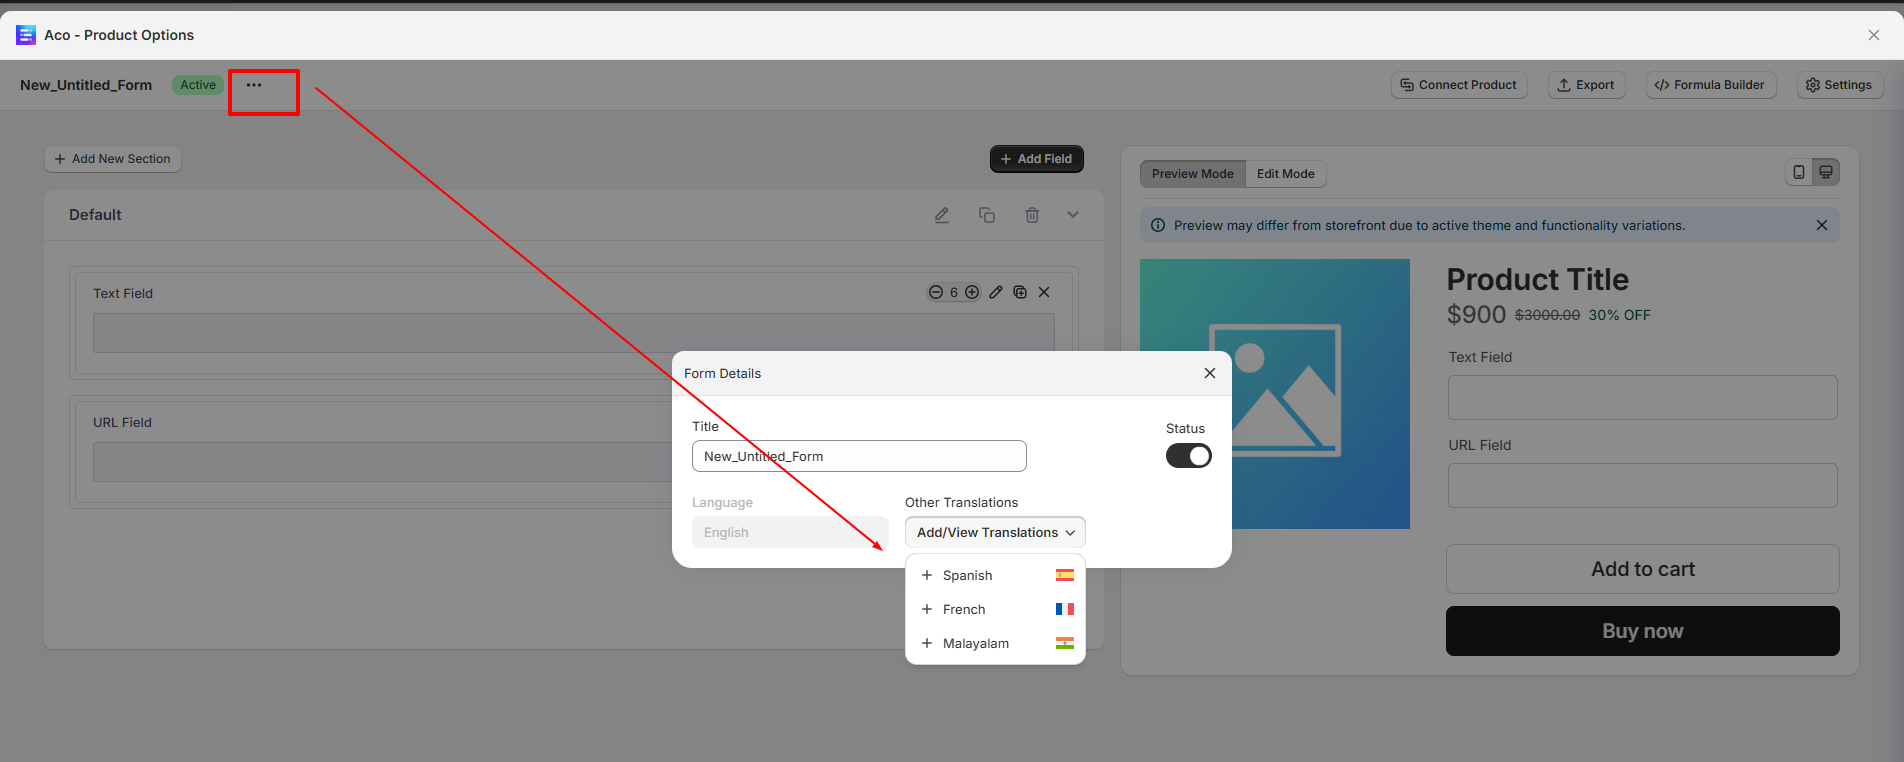
However, if you have already translated the page, you can edit it by clicking on the edit button.
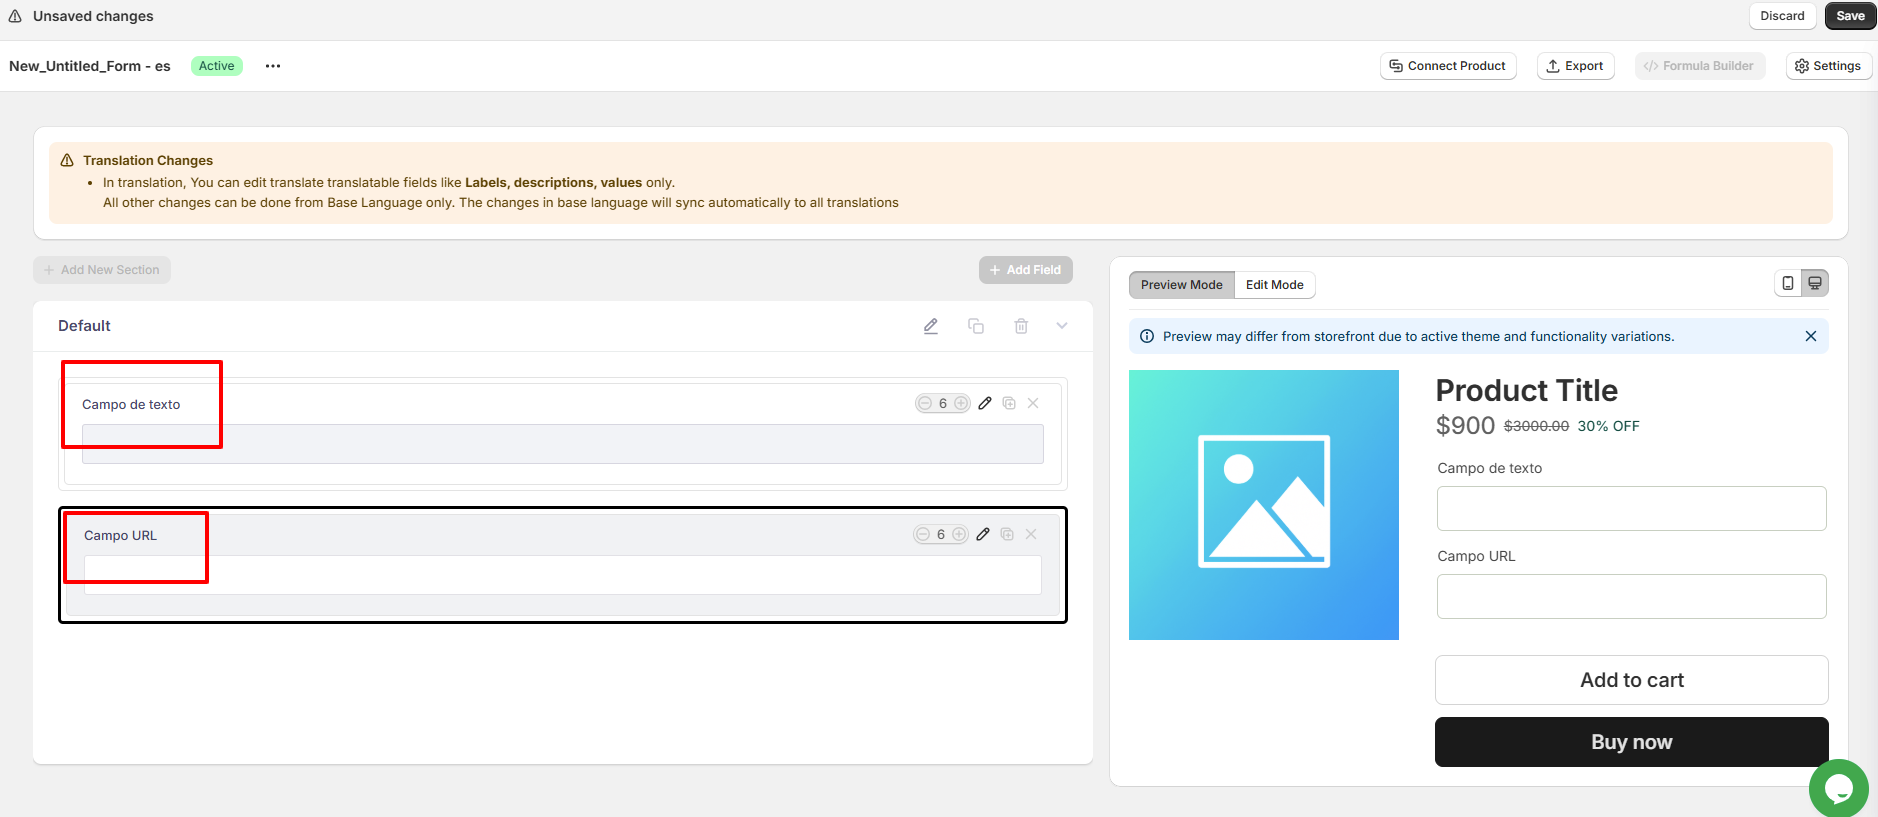
Now, You’ll get a copy of the original. This can be used for translation purposes. Then Change the title and labels to the language you have selected.
Click on the Save Changes button to save it.
Please note that, in the copy, you can only edit translatable fields like Labels, descriptions, and values.
All other changes can be done from Base Language only. The changes in the base language will sync automatically to all translations.
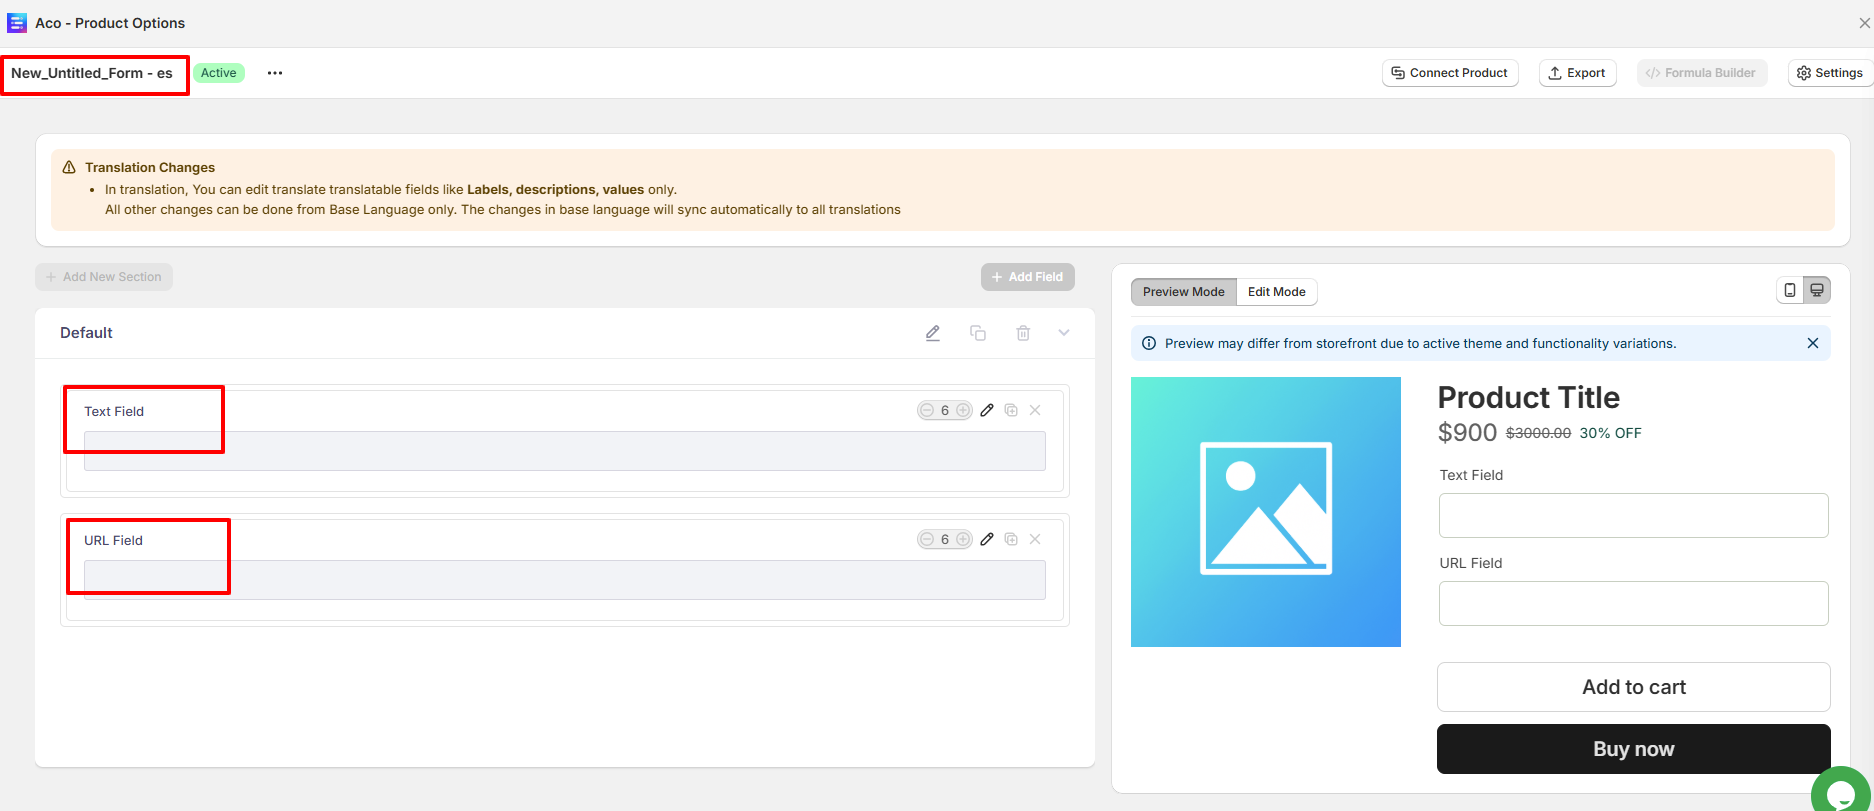
Also, note that you can assign the form to the product only in the base language.
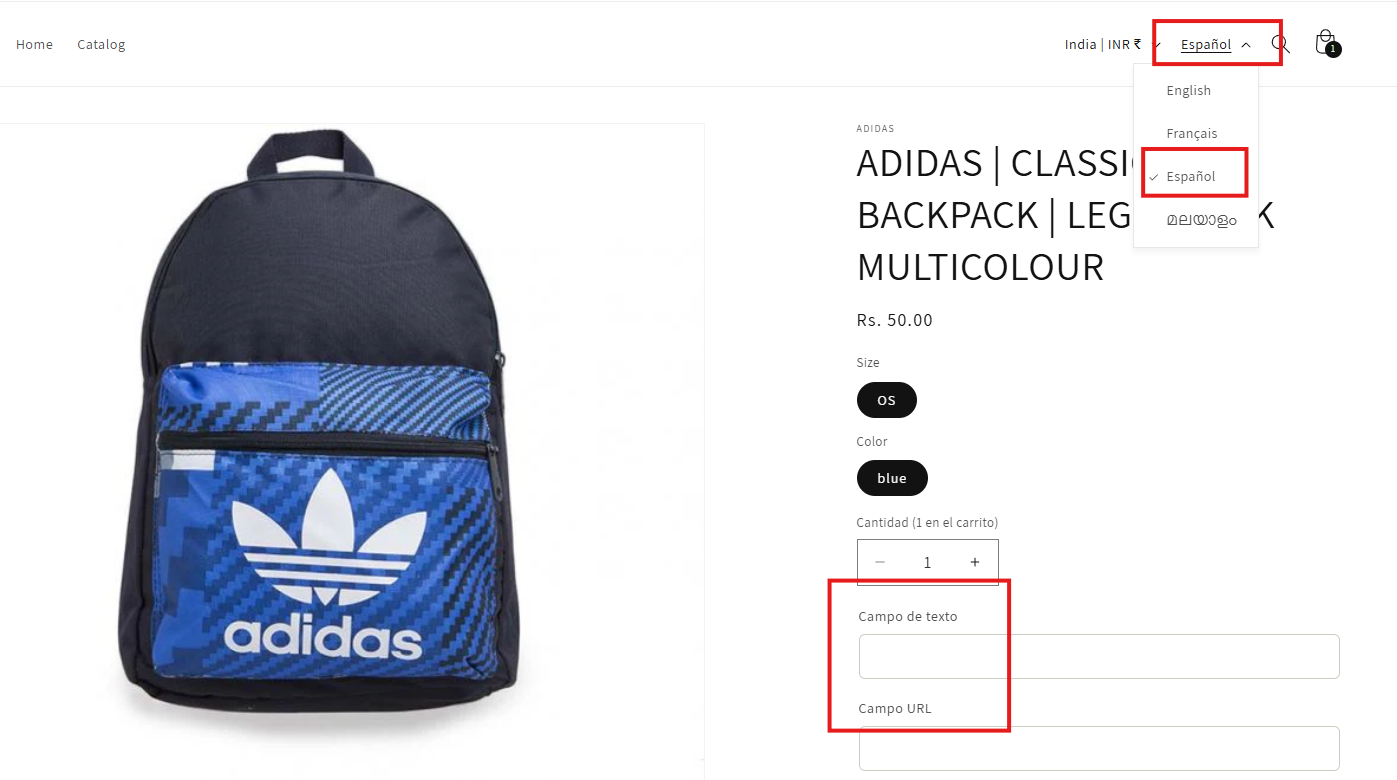
To show the change, Please click on the language to be translated from the product page.
If you have questions about our plugin(s), are experiencing issues with any of our plugin


 Login
Login
 Cart
Cart BUY THIS PLUGIN