- Woocommerce
- Shopify Apps
- WordPress
1. Open the Shopify App Store and Search Shopeo :-
Go to the Shopify App Store and type Shopeo in the search bar.
From the search results, click on the app listing to open the app details page. Here, you can review the features, screenshots, and description to understand what the app offers.
2. Click “Install App”
Once you’re on the app page, click the Install App button.
You will be redirected to your Shopify admin where Shopify will request permission for the app to access necessary store data.
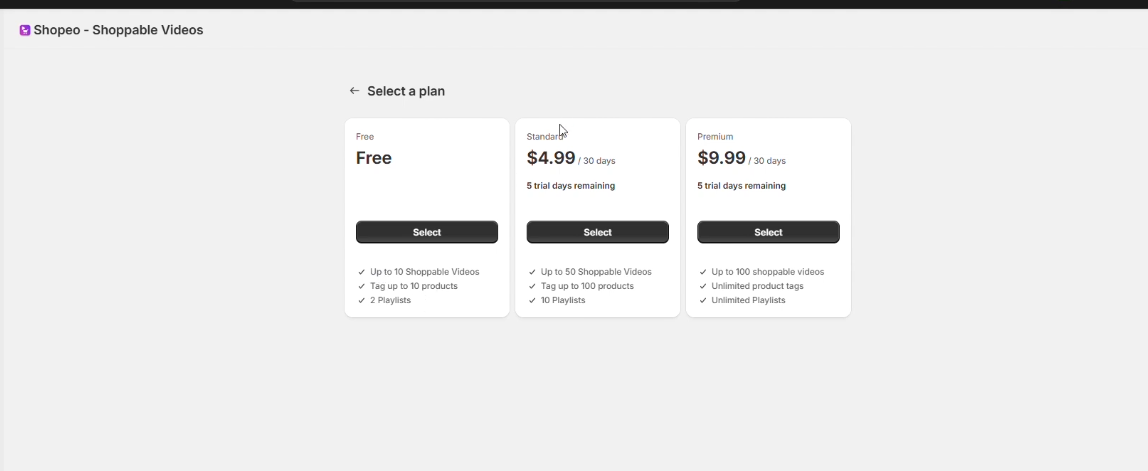
3. Review Pricing Plans and Their Limits
After installation, you will be shown the available subscription plans. Each plan includes different limits and features:
Carefully review each plan to understand what best suits your store’s scale and requirements.
4. Choose a Plan That Fits Your Requirement
Select the plan that aligns with your expected usage (number of videos, playlists, products, and advanced features). Click Choose Plan to continue.
5. Complete the Payment Step
For paid plans, you will be taken to a secure Shopify billing confirmation page.
Confirm and approve the charge to activate the selected plan.
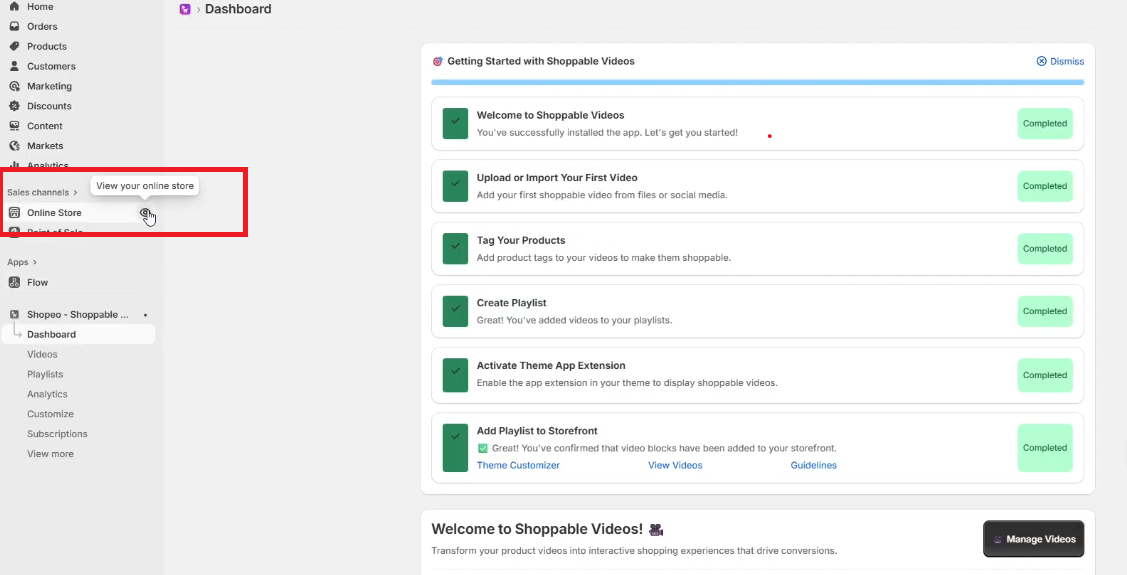
6. Get Redirected and Open the App Dashboard
Once the billing step is completed, you will be automatically redirected to the app.
The Shopeo App Dashboard will now be accessible from your Shopify → Apps section, where you can start uploading videos, creating playlists, and configuring settings.
After installation, you will be redirected to the dashboard, which includes the following main sections:
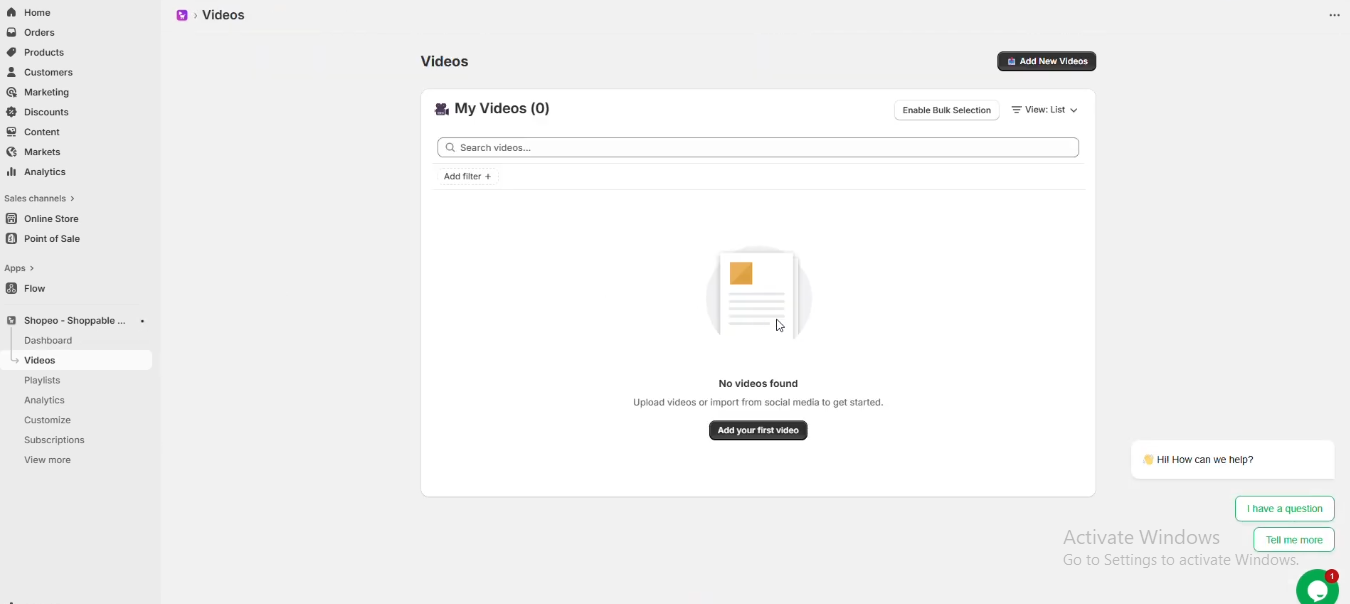
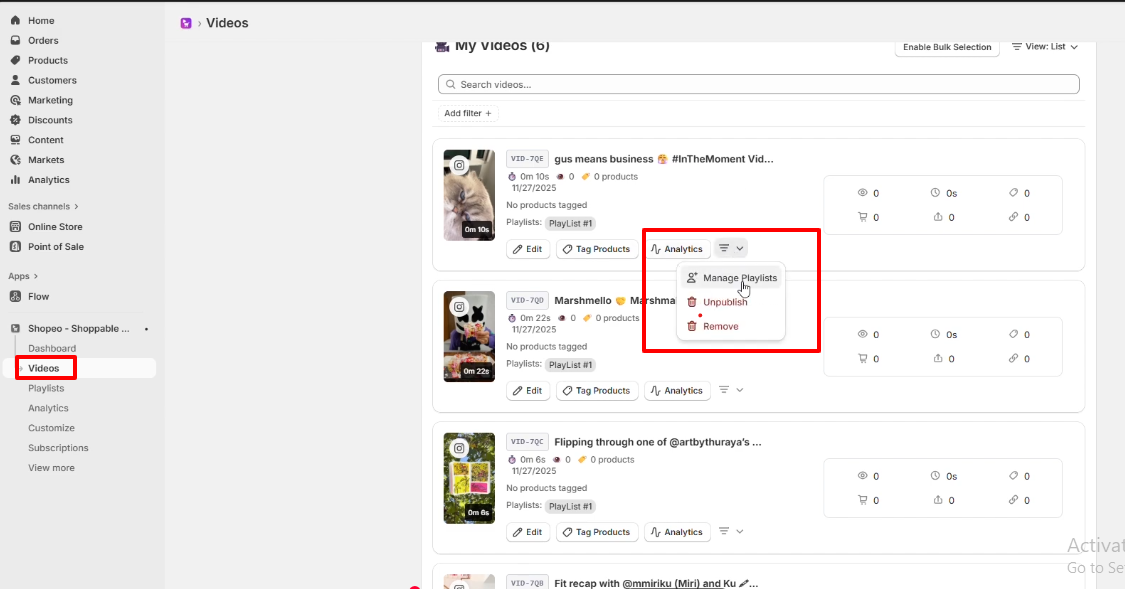
1. Videos
This section displays all the videos you have uploaded or imported.
From here, you can:
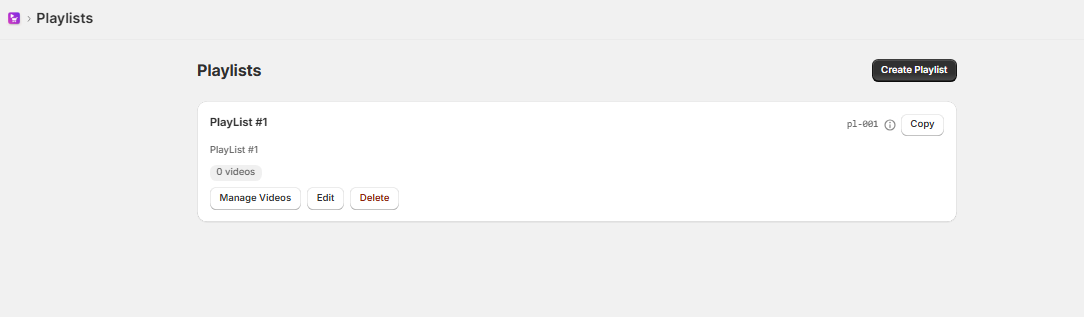
2. Playlists
Create and organize playlists to display multiple videos together on your storefront.
You can:
3. Analytics
The Analytics section provides a complete overview of how customers interact with your shoppable videos. These real-time insights help you understand performance, engagement, and conversions

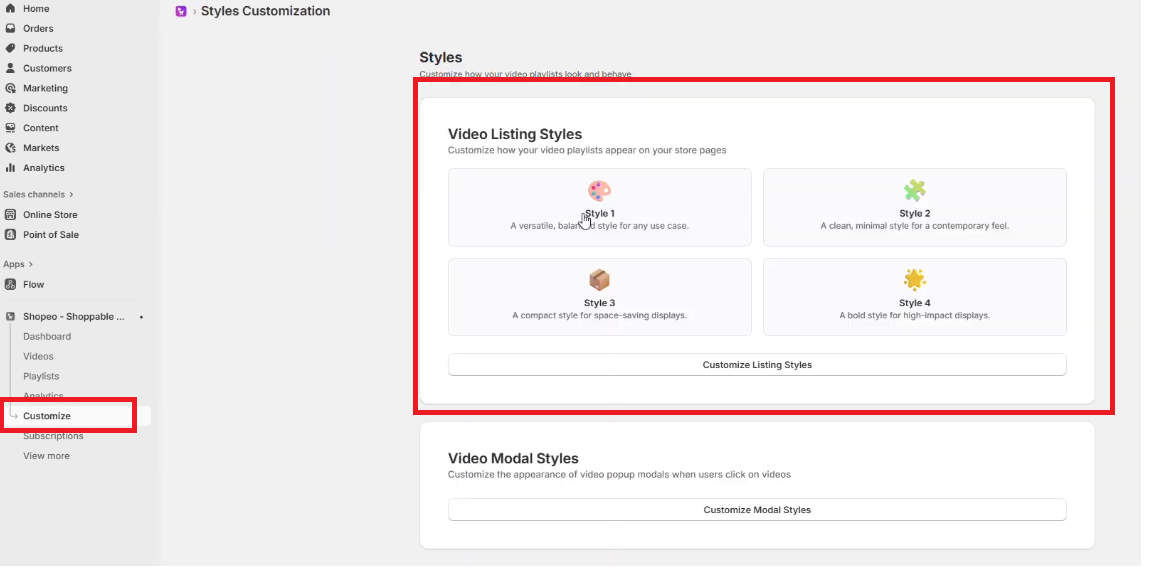
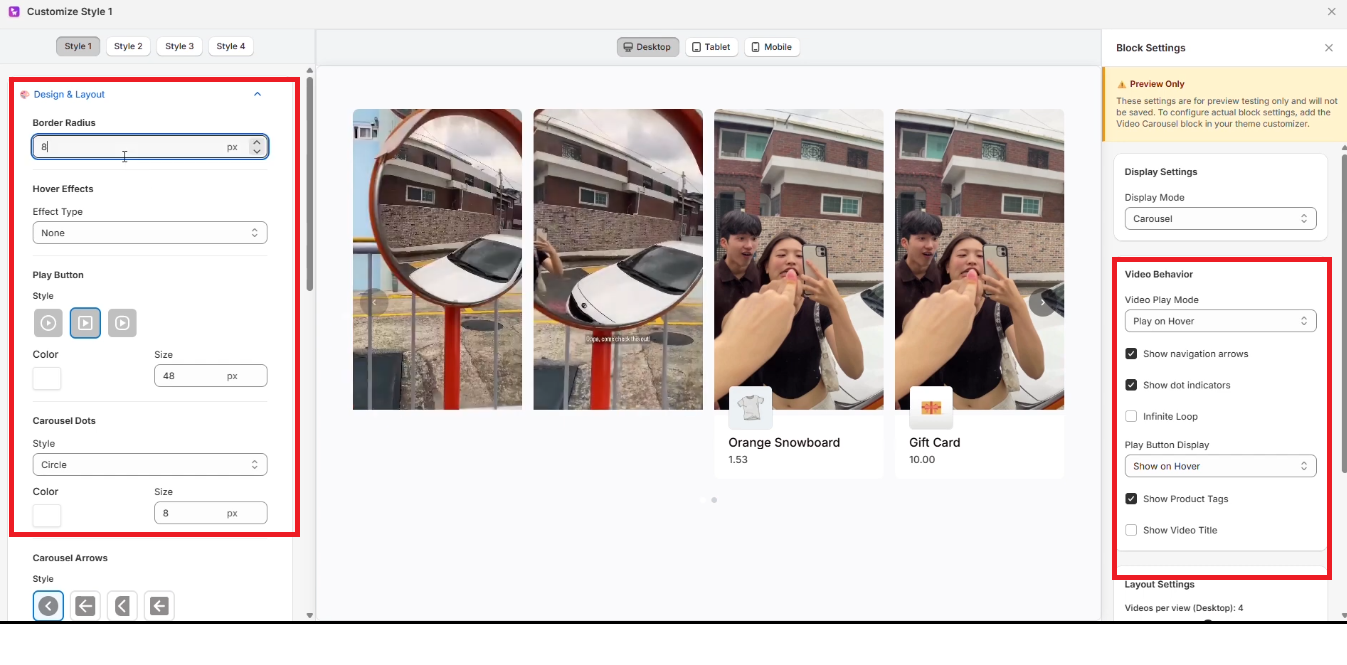
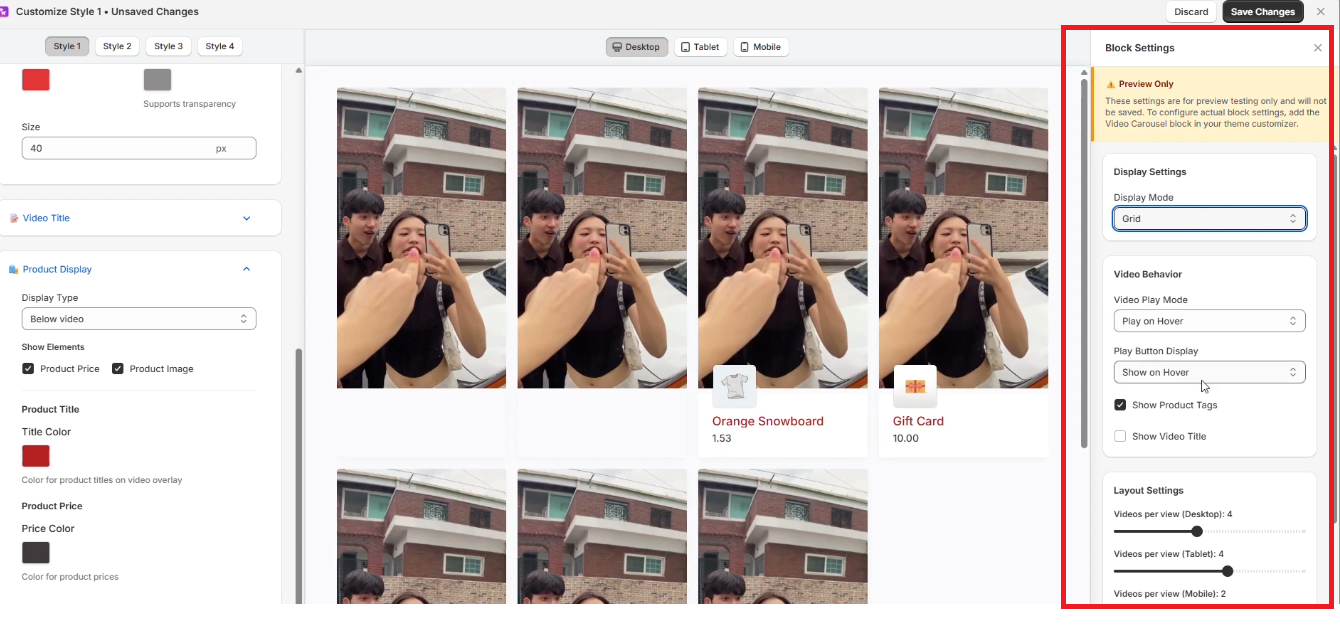
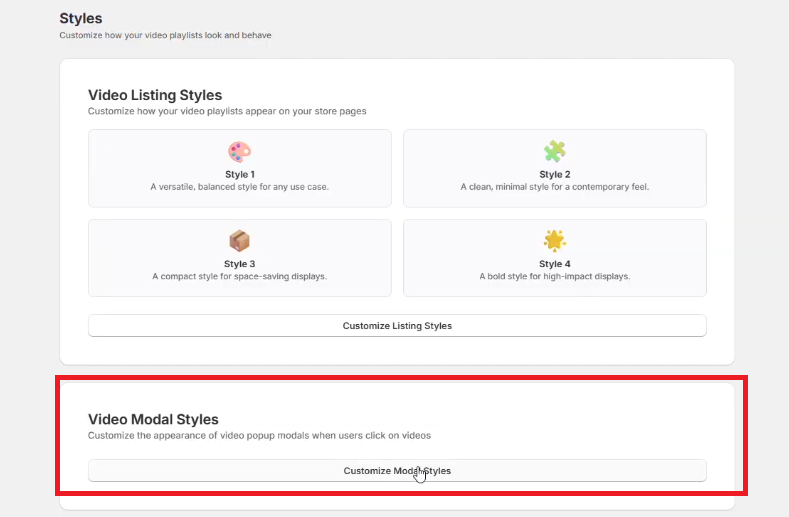
4. Customize
Customize how your video playlists look and behave
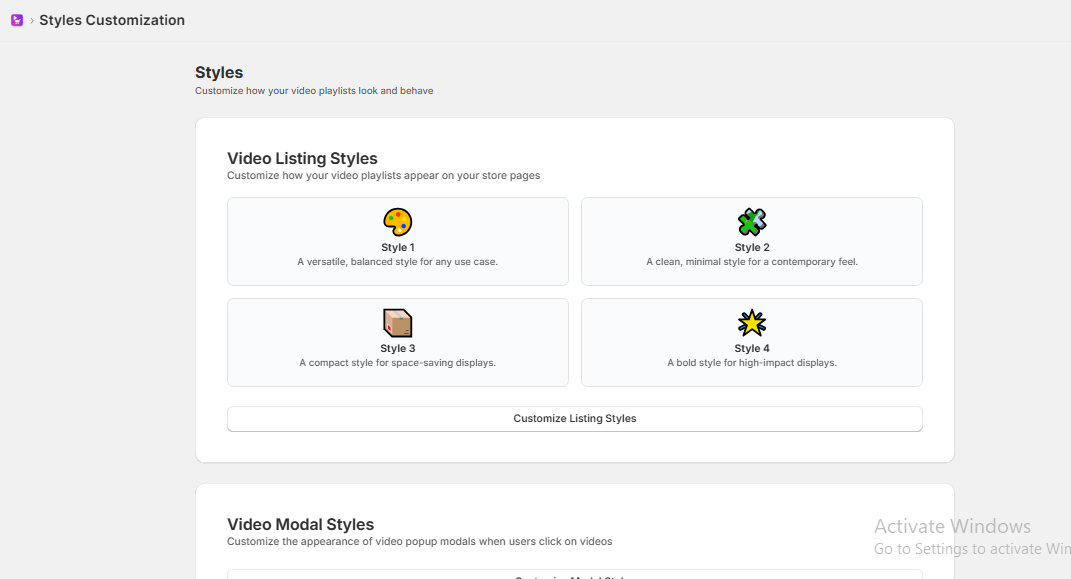
You can explore the different styles and make changes as needed. You can customize the playlist icon, carousel dots, arrows, product display styles, and more.
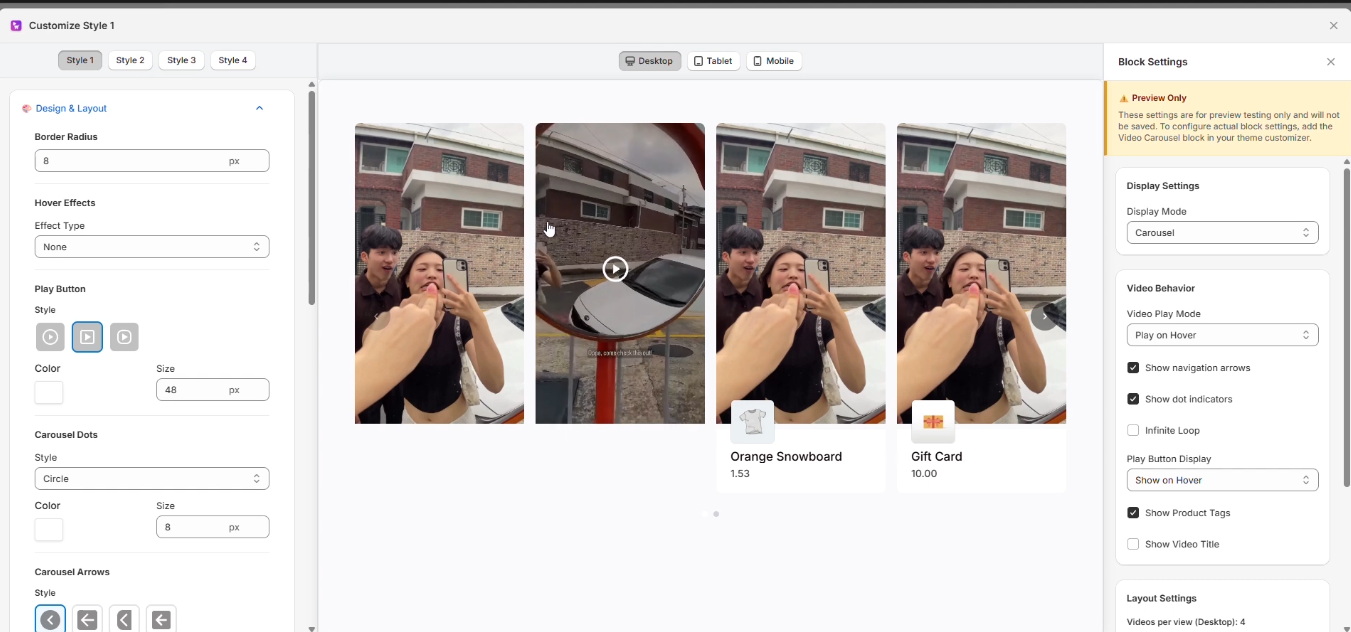
The block settings panel shows a live preview of how the block will look based on the various settings you choose.
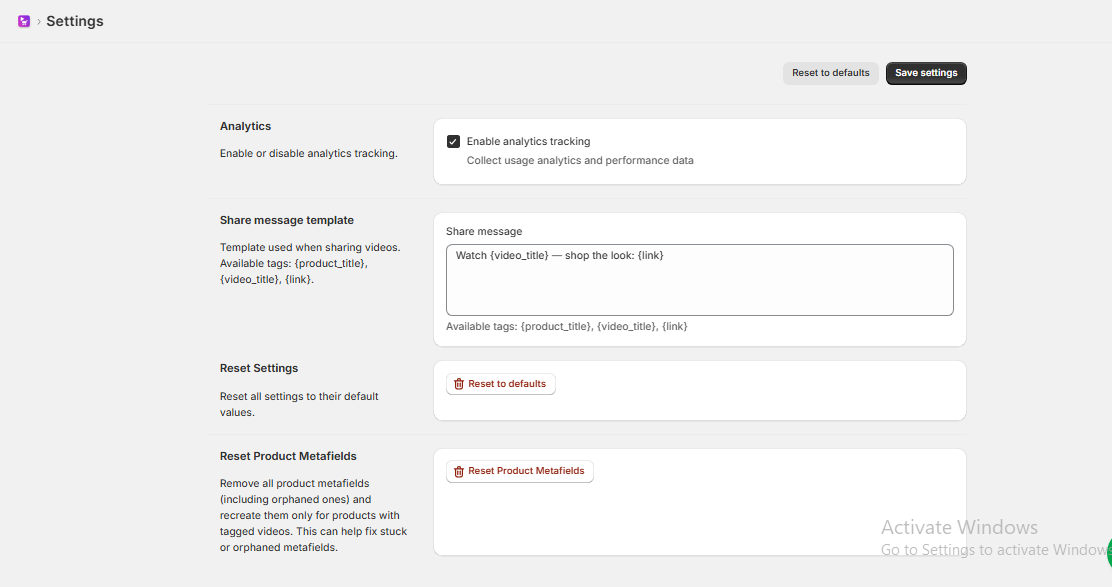
5. Settings
Manage overall app configurations
1. Click the “Add Video” Button
From your app dashboard, click the Add Video button.
You will see two options:
2. Uploading a Video From Your System
Select the Upload option if you want to add a video stored on your device.
3. Importing Videos From Social Media
Next, choose the Social Media Import option to fetch videos directly from online platforms.
Example 1: #Import from Instagram
You have two ways to import Instagram content:
#1. Import from the Instagram channel
After entering the username or link:
You will now see all imported videos displayed on the screen, each with its own status indicator.
#2. Import Using a Direct Instagram Reel Link
Playlists help you organize your videos in a structured way and control how they appear on your storefront. Below is the step-by-step workflow for creating and managing playlists.
1. Access the Playlist Page
Navigate to the Playlists section from the dashboard.
Here, you will see a default playlist already created for you.
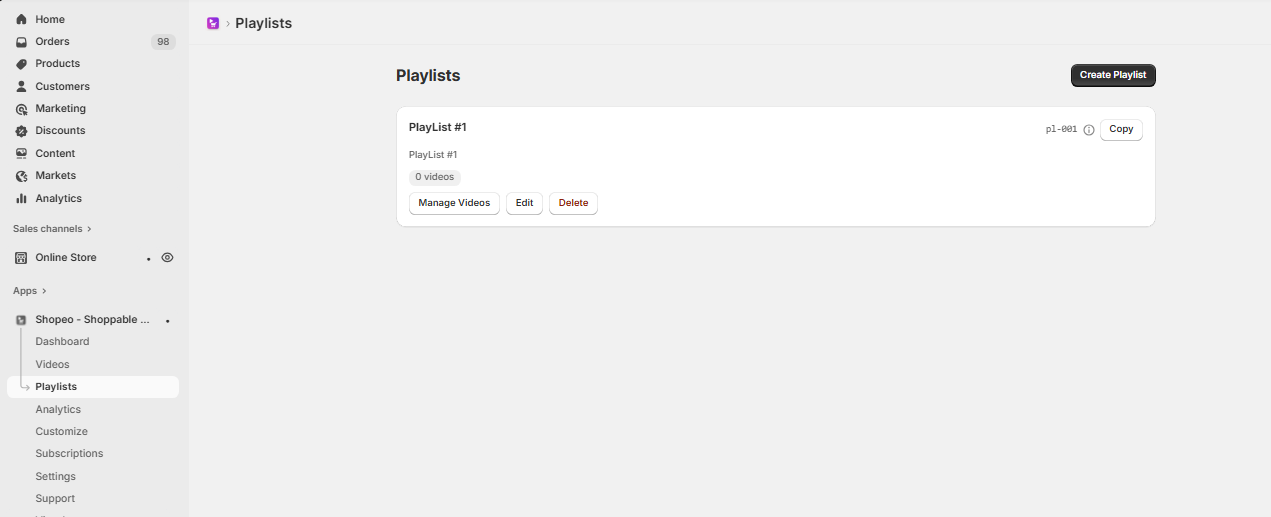
2. Creating a Playlist
Click Create Playlist on the playlist to open its details.
Since the playlist is empty initially, click the Create Playlist button to start creating a new one.
Add the playlist name and description
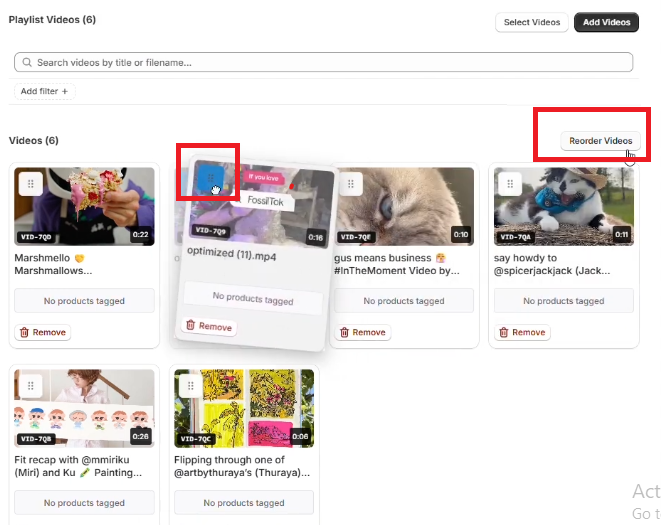
3. Add Videos to the Playlist
When you click Add Video, a modal appears displaying all your uploaded or imported videos.
The selected videos will be instantly added to the playlist.
4. Reorder Videos
Inside the playlist, you can drag and reorder the videos.
This allows you to control the exact display order on the storefront, ensuring your most important videos appear first.
5. Assign Playlists Directly From the Videos Page
Alternatively, you can assign a video to a playlist directly from the Videos page.
Each video has a playlist selection dropdown.
Simply choose the desired playlist, and the video will be added automatically.
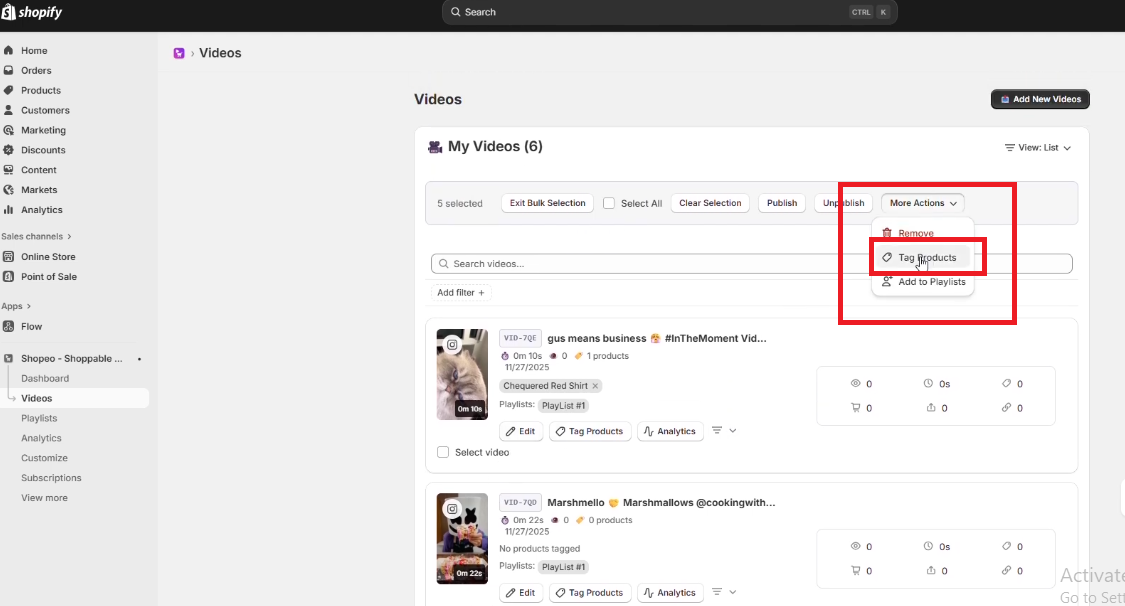
Product tagging allows you to link Shopify products to your videos so customers can shop directly while watching. You can tag products in bulk or individually depending on your needs.
1. Bulk Product Tagging
To tag products to multiple videos at once:
All selected products will be applied to every selected video, making it easy to manage large batches of content.
2. Individual Product Tagging
If you want to tag products for each video separately:
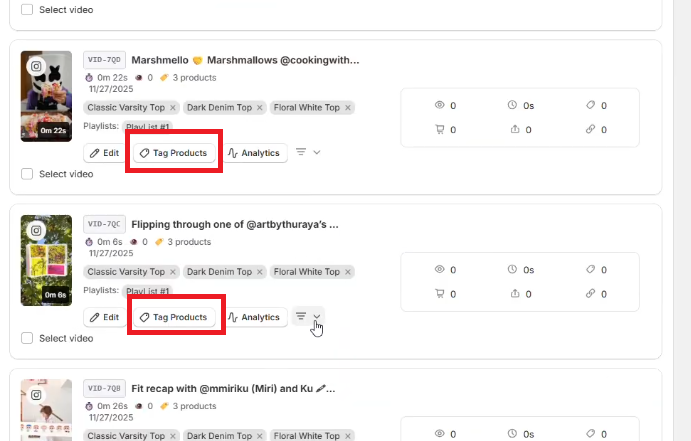
This allows you to create precise product-to-video relationships—perfect when each video promotes different products.
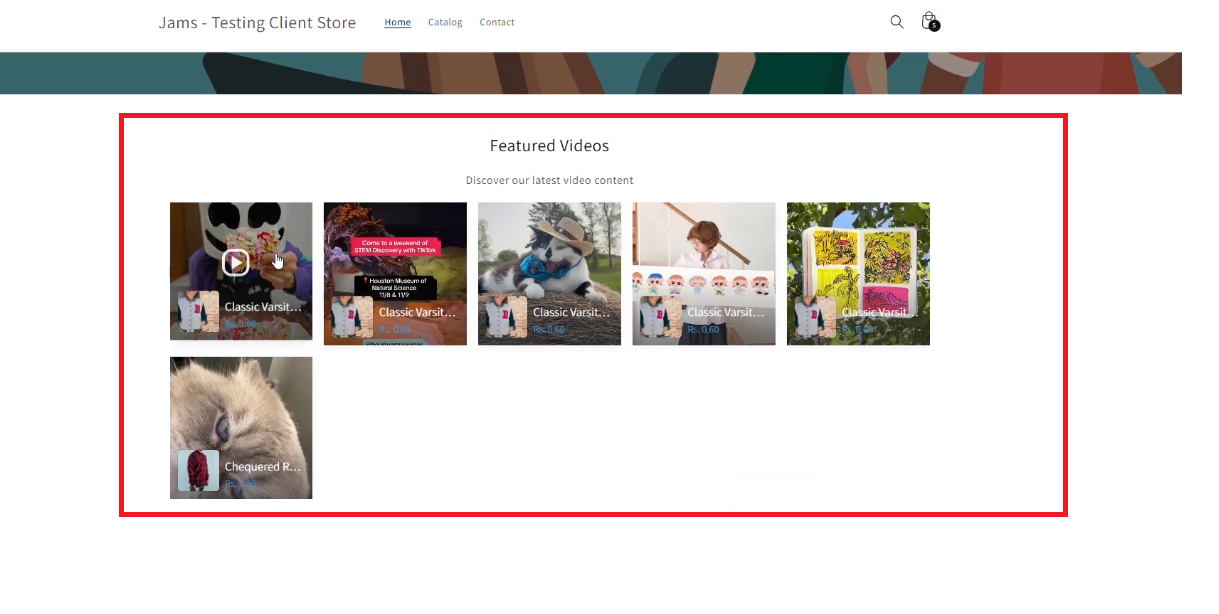
To display your shoppable videos on your storefront, you must enable the theme app extension and add the Shopeo video block to your theme. This step is essential for making playlists visible on any page.
1. Enable the Theme App Extension
From the onboarding steps in the app dashboard:
Click the Activate Extension button
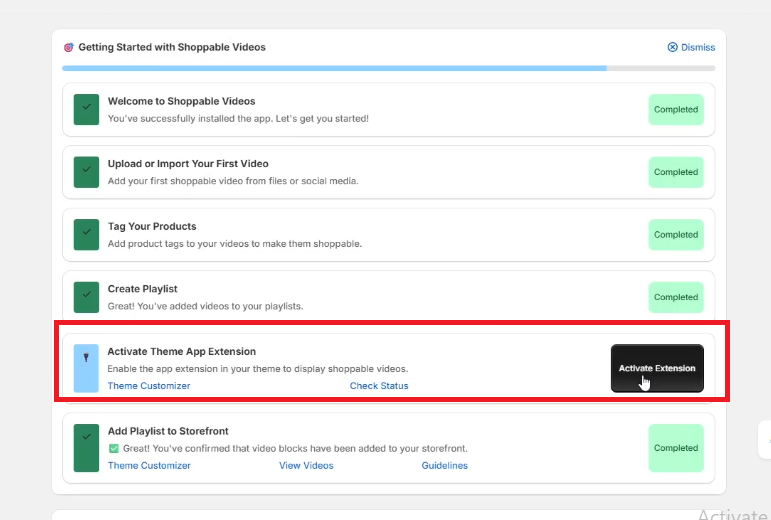
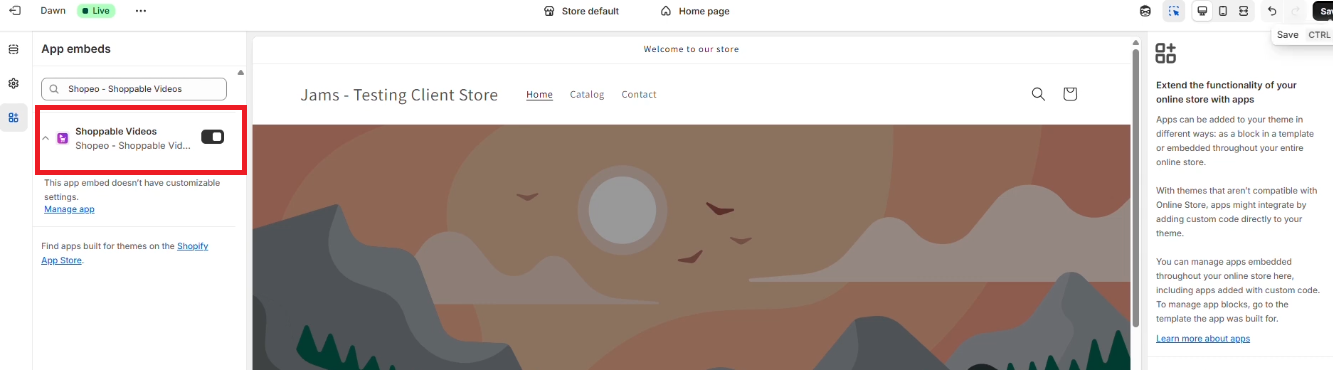
Click Save to apply the change
Once enabled, your theme becomes capable of displaying Shopeo video elements.
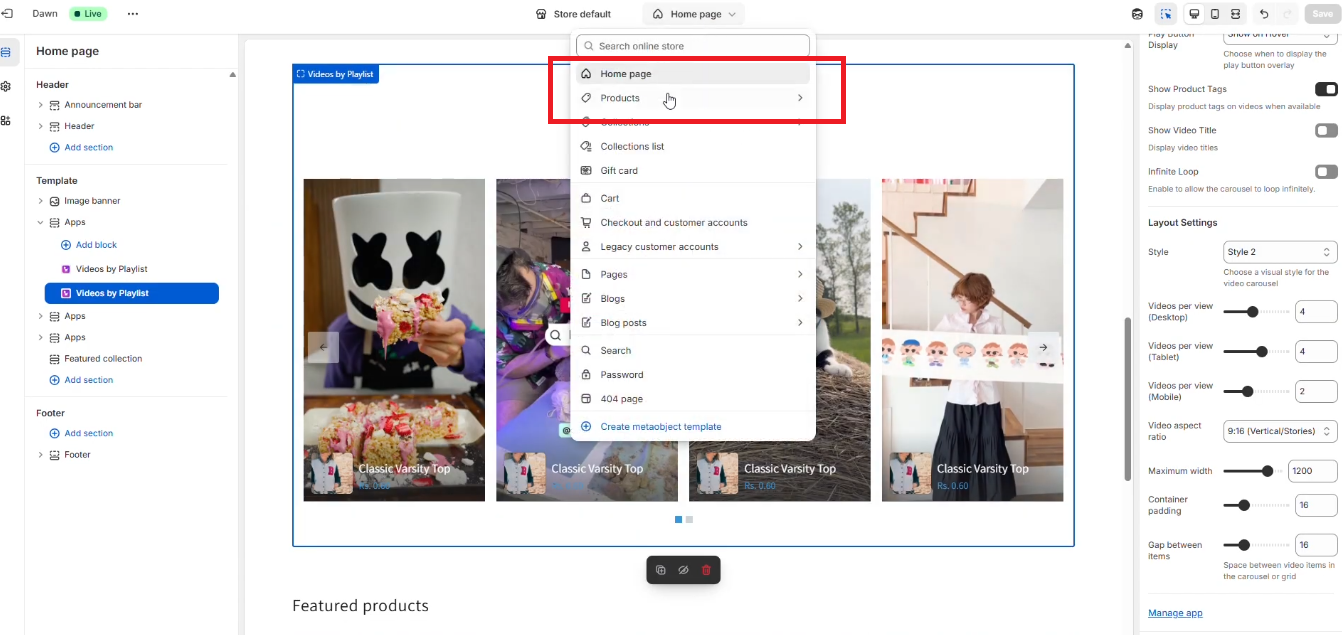
2. Add the Shopeo App Block to Your Theme
After enabling the extension:
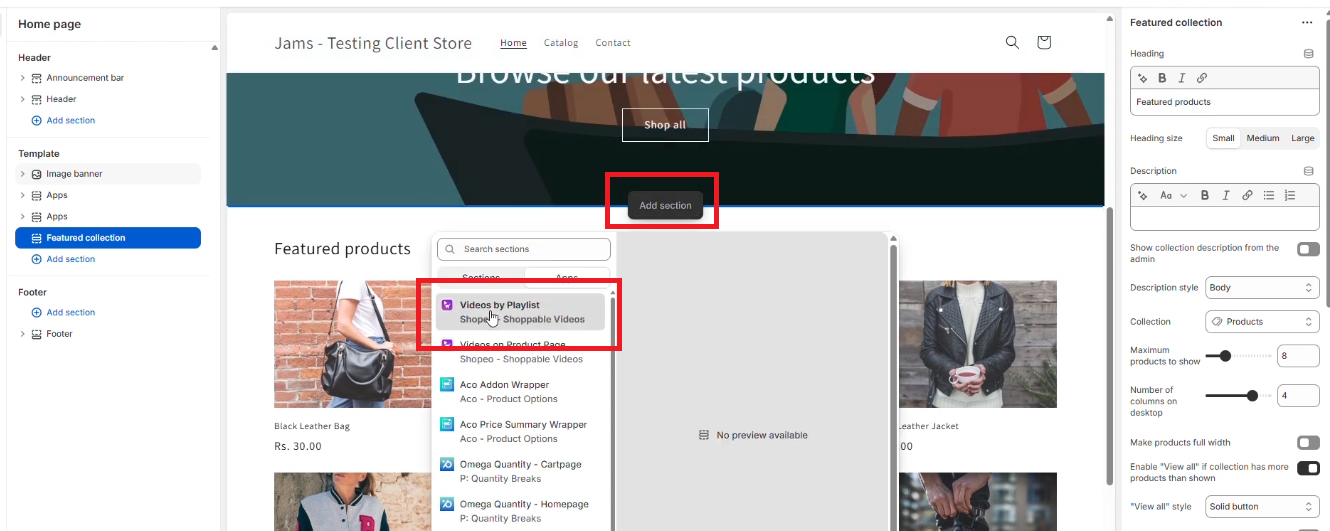
This block is responsible for displaying the shoppable video playlist on your storefront.
3. Insert the Playlist ID
Inside the app block settings:
You can change this Playlist ID anytime if you want to swap between playlists on different pages or templates.
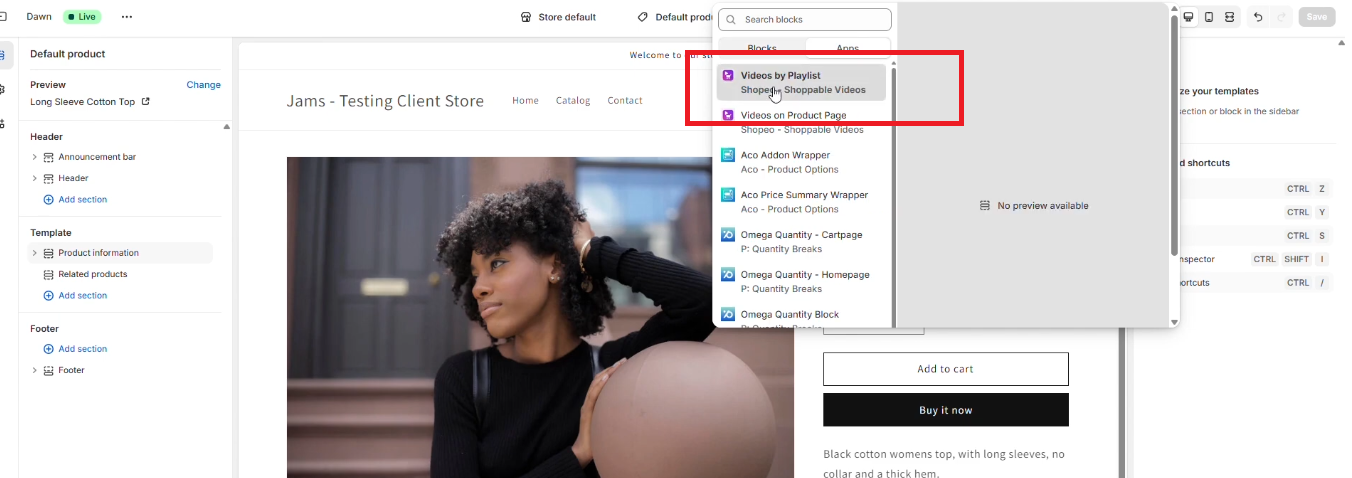
4. Add to Product Template
You can also add Shopeo video playlists directly on product pages:
This allows you to show product-specific or curated video content right next to your product details.
The Shopeo app gives you full control over how your videos appear on your storefront. You can adjust layout, visibility, style, and behavior to match your design preferences.
1. Set Display Mode: Grid or Carousel
By default, the display mode is set to Grid, but you can switch it to Carousel anytime.
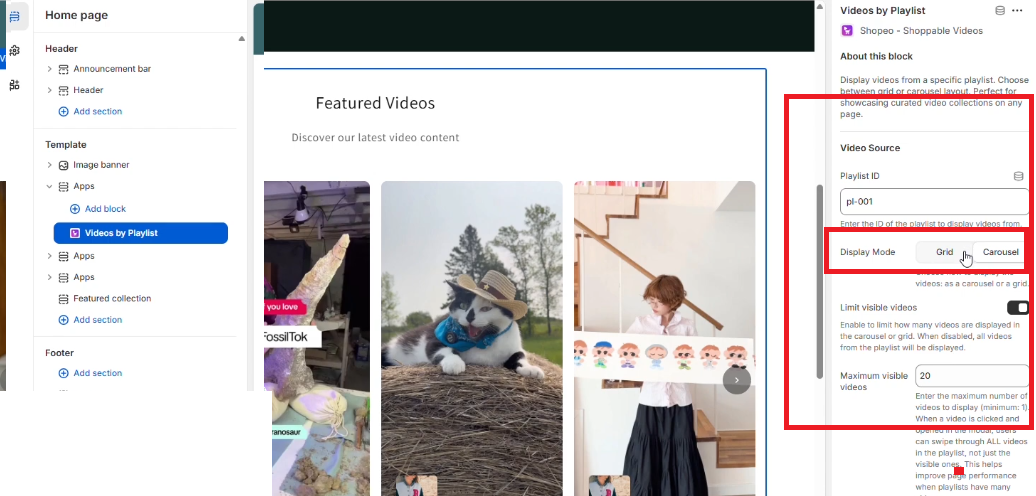
This lets you choose the layout that best suits your page design.
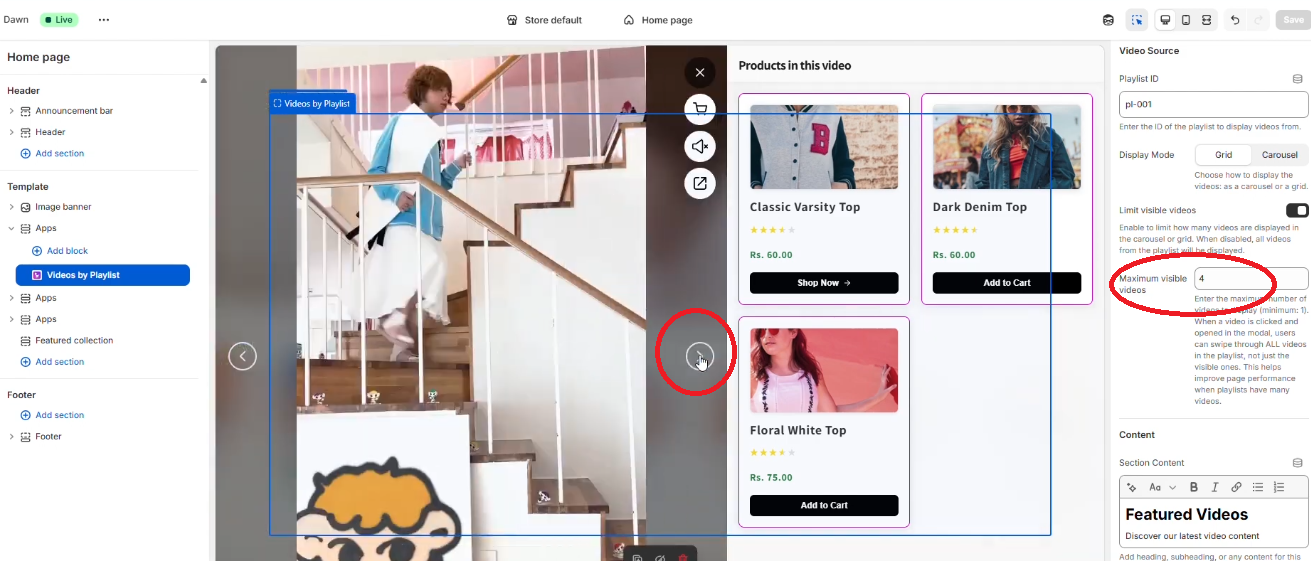
2. Control the Visible Video Limit
The Visible Videos setting allows you to choose how many videos are shown initially in the block.
For example:
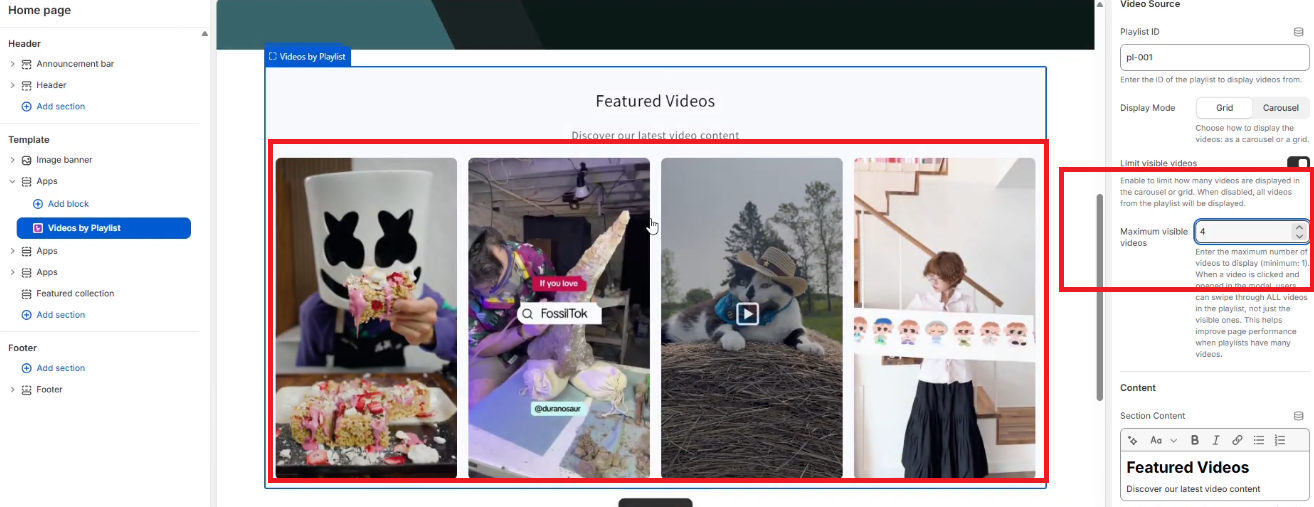
This keeps the layout clean while still allowing access to all videos.
3. Display Tagged Products
You can enable or disable the option to show tagged products in the main grid.
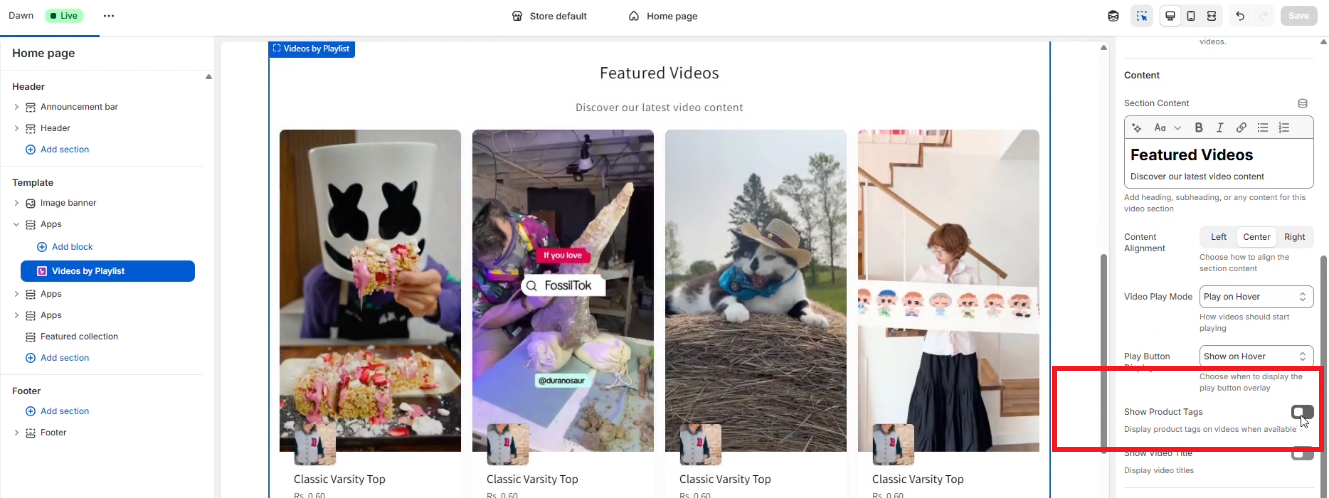
This allows you to keep the grid minimal while still offering shopping functionality.
4. Manage Style Presets
From the app dashboard, you can create multiple Style Presets.
You can create multiple style presets and select the one you require
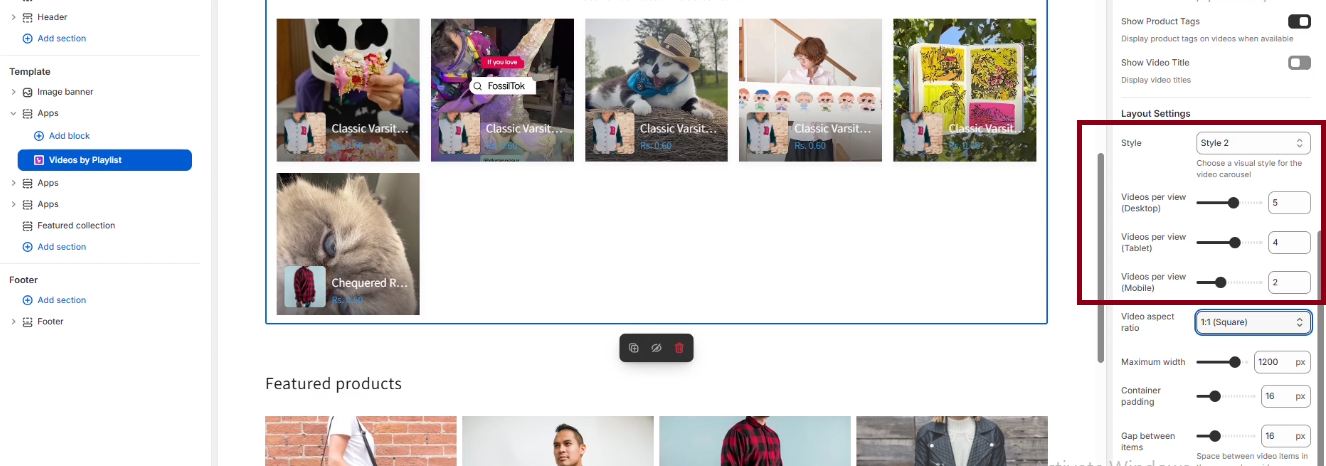
5. Adjust Aspect Ratio
Control how your video thumbnails appear by selecting an aspect ratio.
Common options include:

Changing the aspect ratio instantly updates the video layout on the page.
6. Multiple Layouts by Duplicating Blocks
You can duplicate the video block inside the Theme Customizer to test different styles side-by-side.
For example:
This makes it easy to visualize and choose the best layout for your storefront.
Once your playlists, tagging, and theme setup are complete, it’s important to verify how everything appears and functions on your storefront. Follow the steps below to ensure the videos and shopping experience work smoothly.
1. Open Videos on the Storefront
Visit the storefront page where the Shopeo playlist block is added.
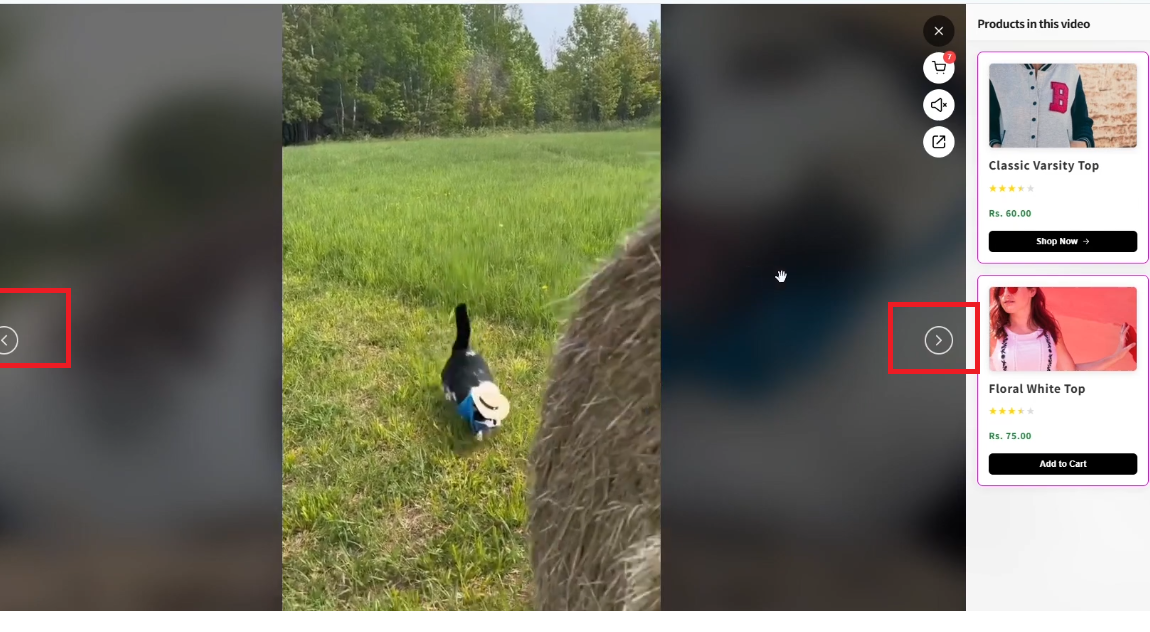
2. Interact With Tagged Products
Inside the video popup:
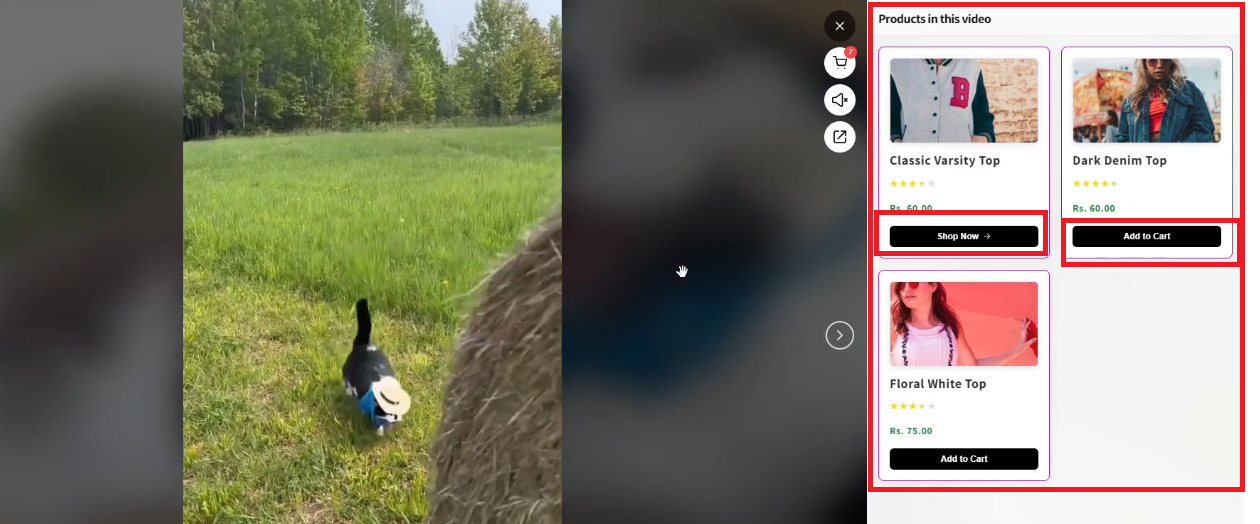
This confirms that product tagging and shoppable interactions are working properly.
3. Mute/Unmute Video Audio
Use the audio toggle to mute or unmute the video.
Make sure the sound control responds correctly and maintains the preferred state when navigating between videos.
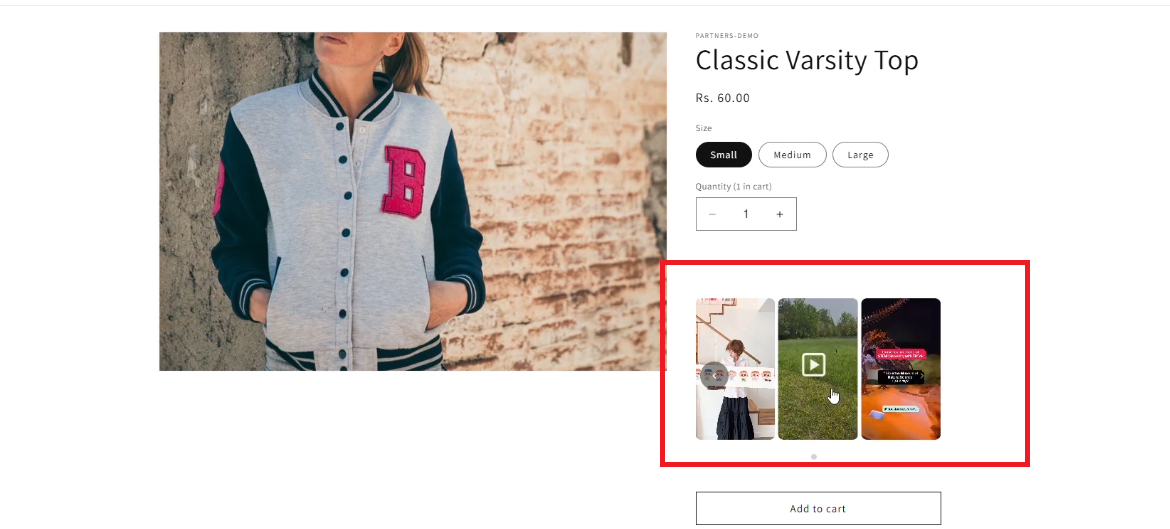
4. Verify Videos on the Product Detail Page (PDP)
If you want videos to appear on product pages:
Now, visit the product detail page on your storefront:
The Shopeo app allows you to analyze video performance and fully customize the appearance of your playlists and video popups. This helps you optimize both engagement and visual branding.
1. View Analytics Reports
Open the Analytics section from the app dashboard. Here, you can review detailed reports for:
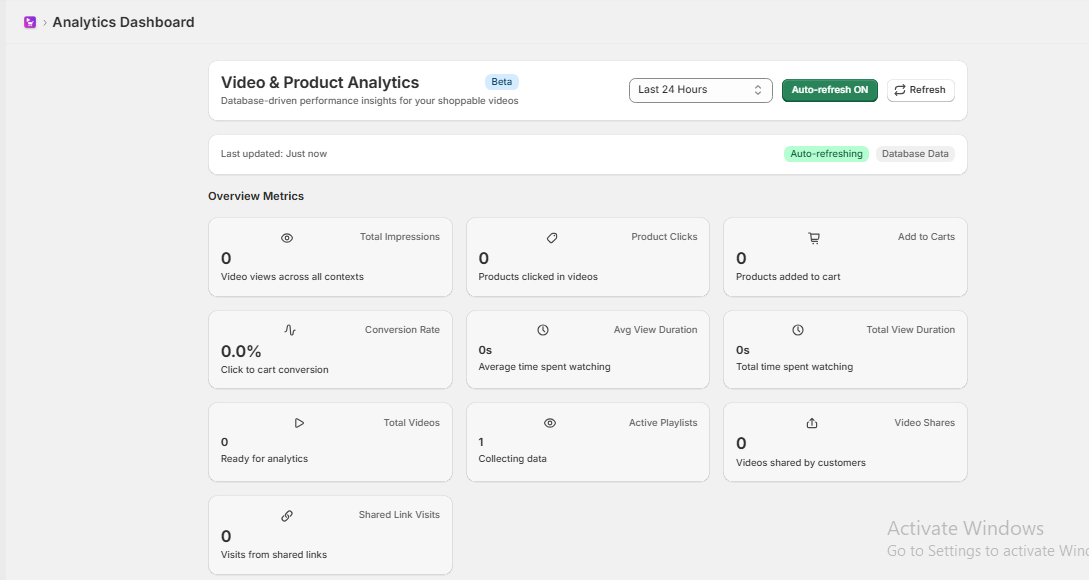
This data helps you understand what content performs best and how users interact with your videos.
2. Customize section
From the customize settings you can customize how your videos and playlist elements look on the storefront.
You can change:
This allows you to match the app’s UI to your store’s branding.
4. Live Preview in Block Settings
As you adjust each setting, the live preview updates instantly.
This helps you see exactly how your playlist or video popup will look before saving any changes.
5. Video Popup Layout
The app offers two popup styles when a user opens a video:
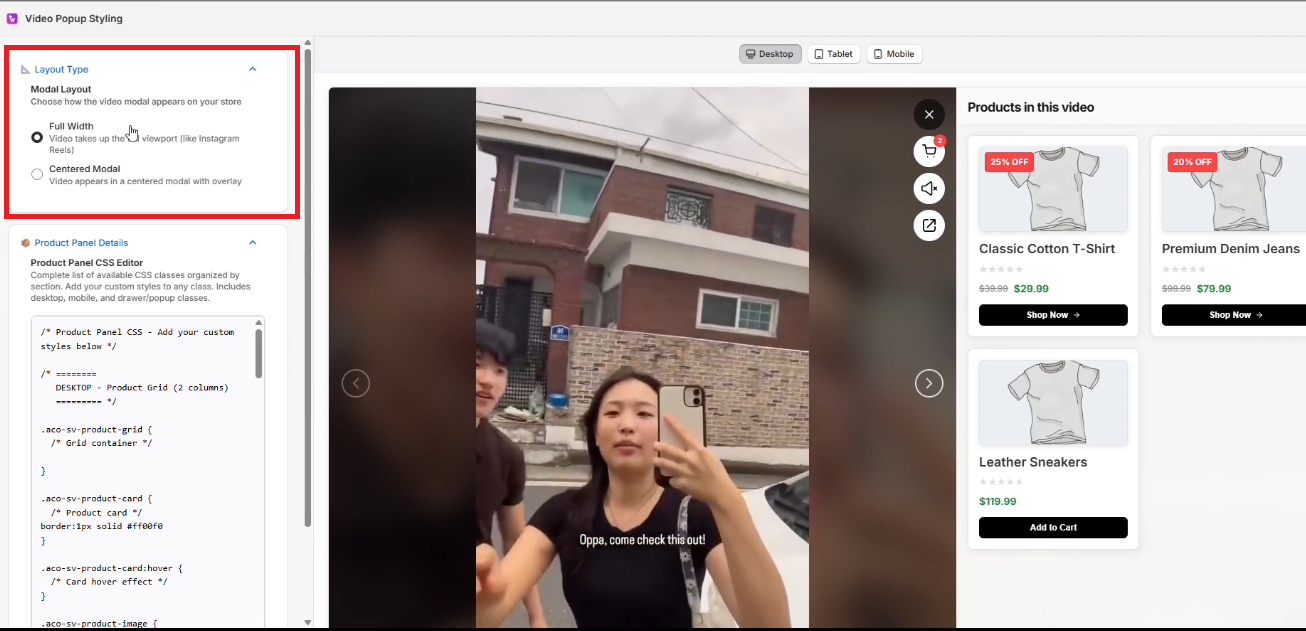
Switch between these layouts based on your store theme or viewing preference.
6. Edit Product Panel CSS
For advanced customization, you can modify the CSS of the product panel directly within the style settings.
This allows you to:
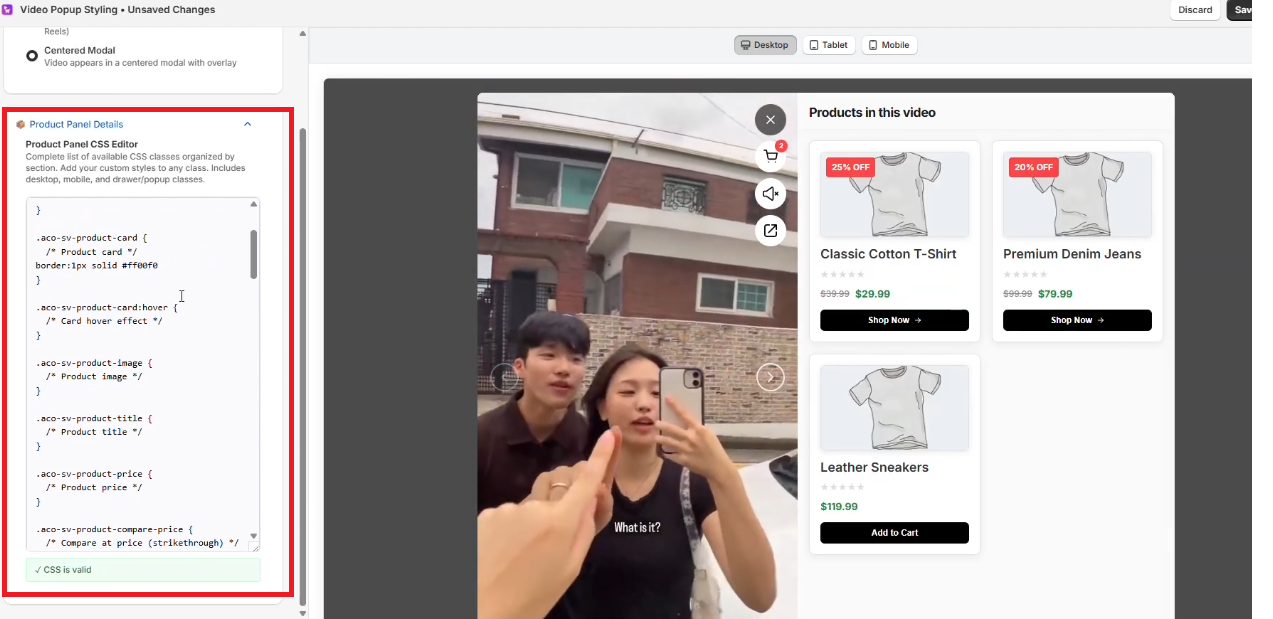
Use this option if you need deeper customization beyond the standard settings.
If you have questions about our plugin(s), are experiencing issues with any of our plugin


 Login
Login
 Cart
Cart