- Woocommerce
- Shopify Apps
- WordPress
Flexible payment plans with features can be made to make the payment in various schedules such as days, weeks, months, or years.
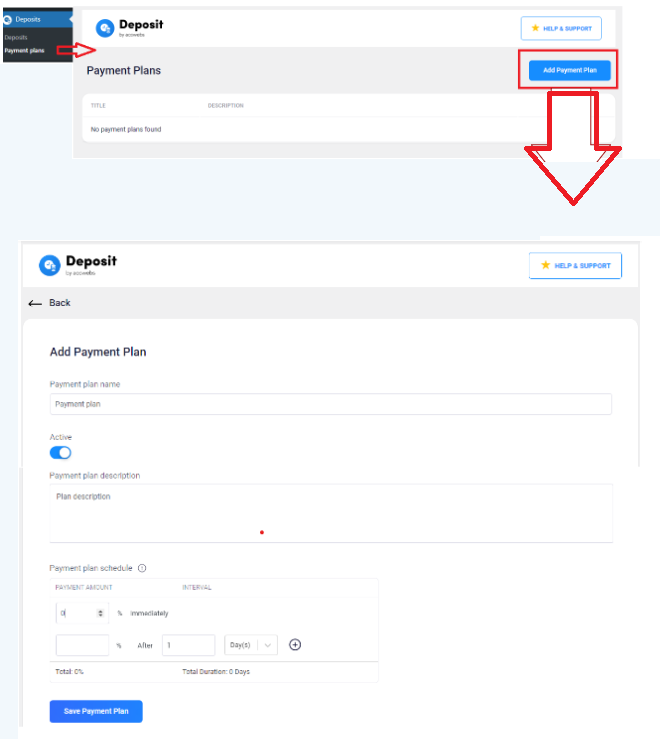
Step 1:
Please configure the “payment plan schedule” from the “payment plan” sub-section
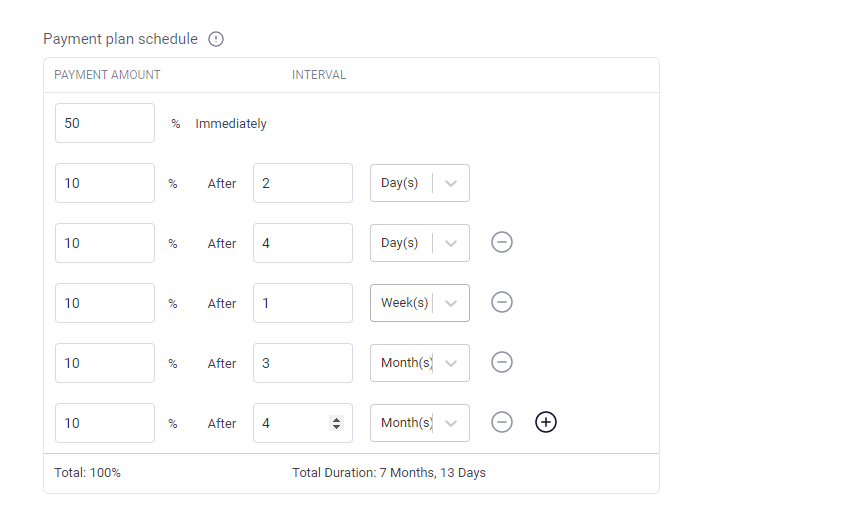
Make sure that the total payment amount should be equal to 100%.
The setting of the woocommerce deposit payment plan schedule is completely based on the admins’ desire and the customer cannot set any payment plan.He/she can only select from the pre-defined plans.
Step 2:
Assign a payment plan name and payment plan description for the plan created. Then change the status to active. Also, make sure to save the payment plan created.
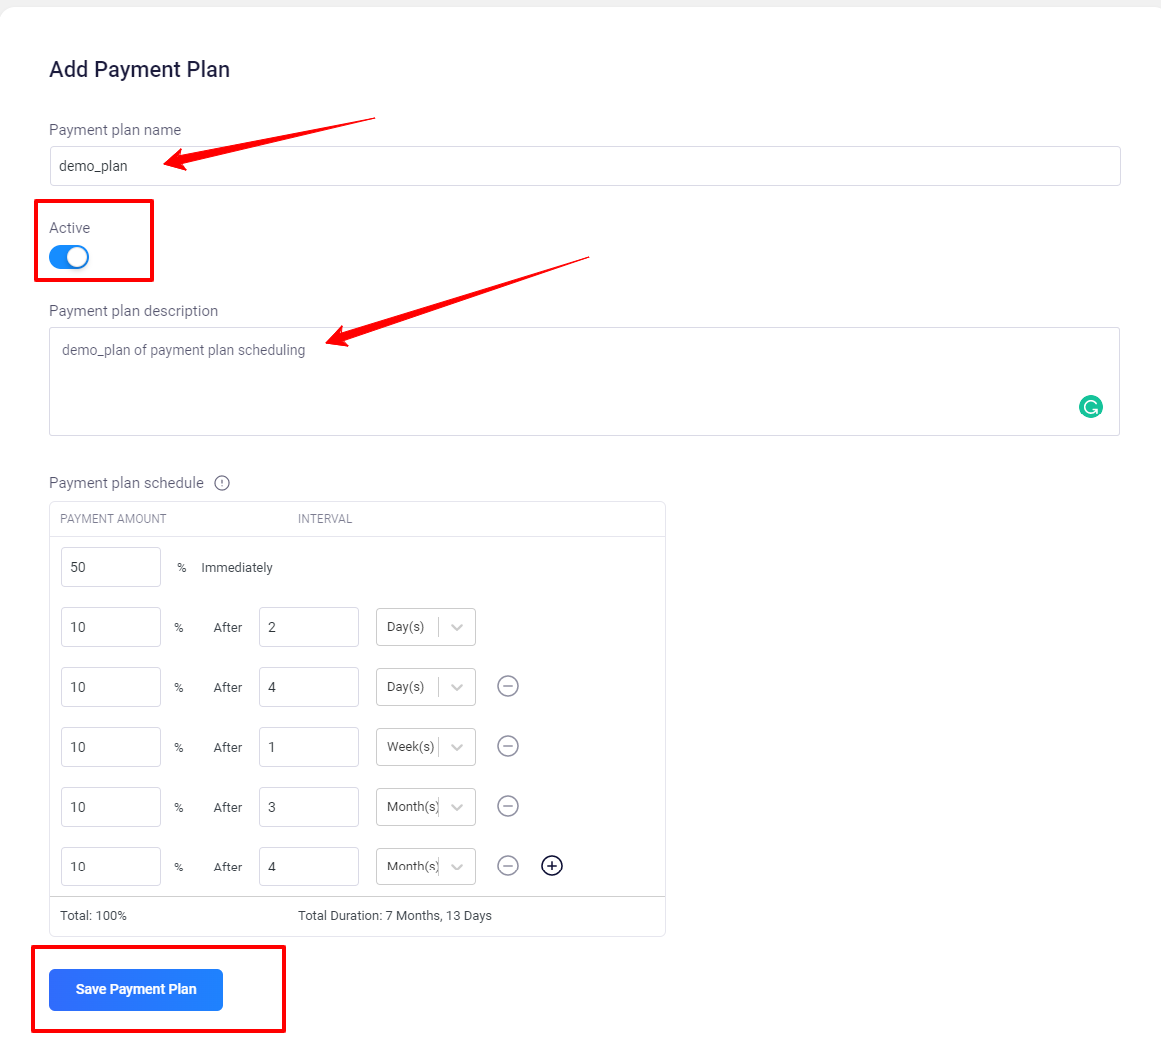
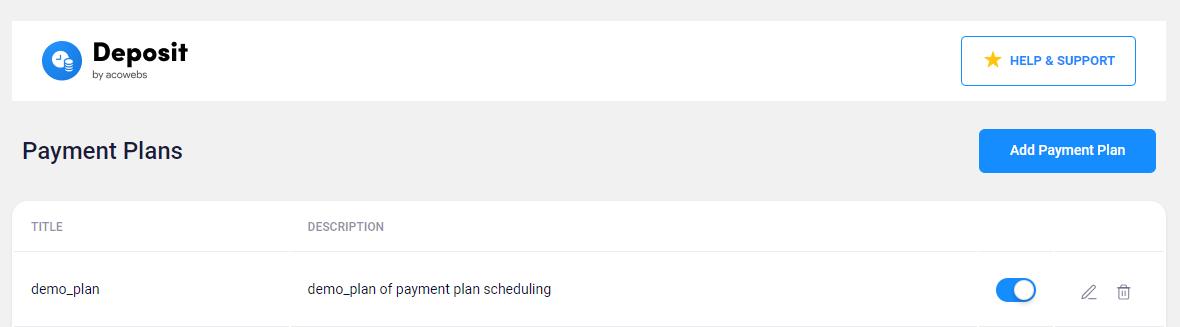
Doing the above steps will result in creating a payment plan.
Step 3:
Navigate to Deposits >> General Settings, change the deposit type to “payment plan” and assign the created payment plan.
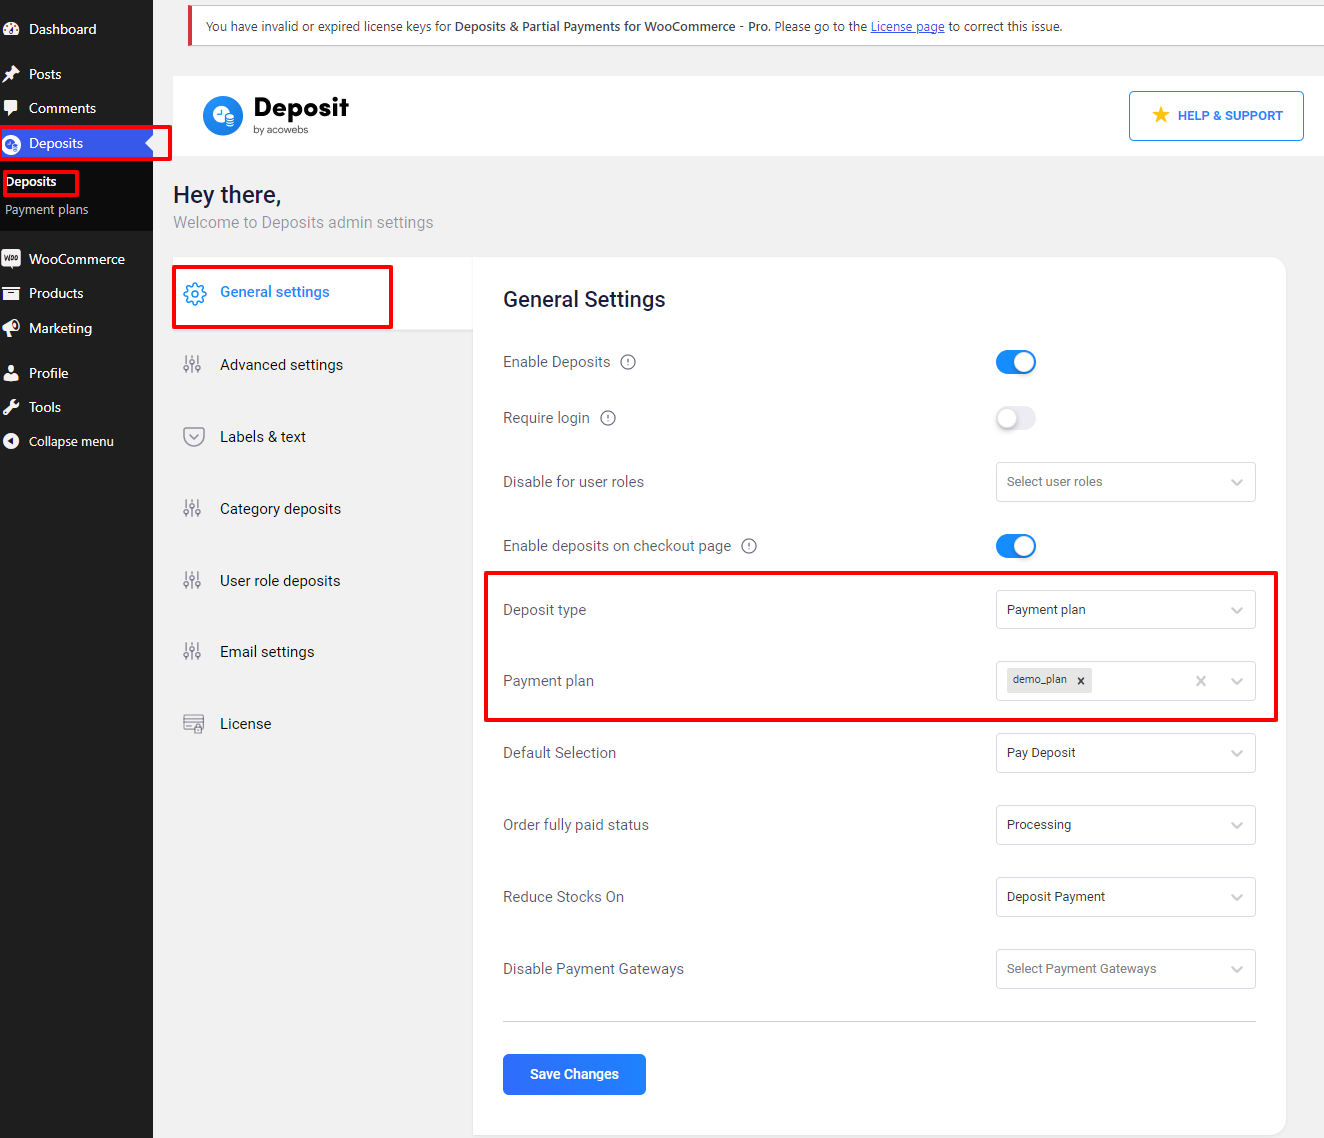
Note: You can also assign multiple payment plans if multiple ones are active.
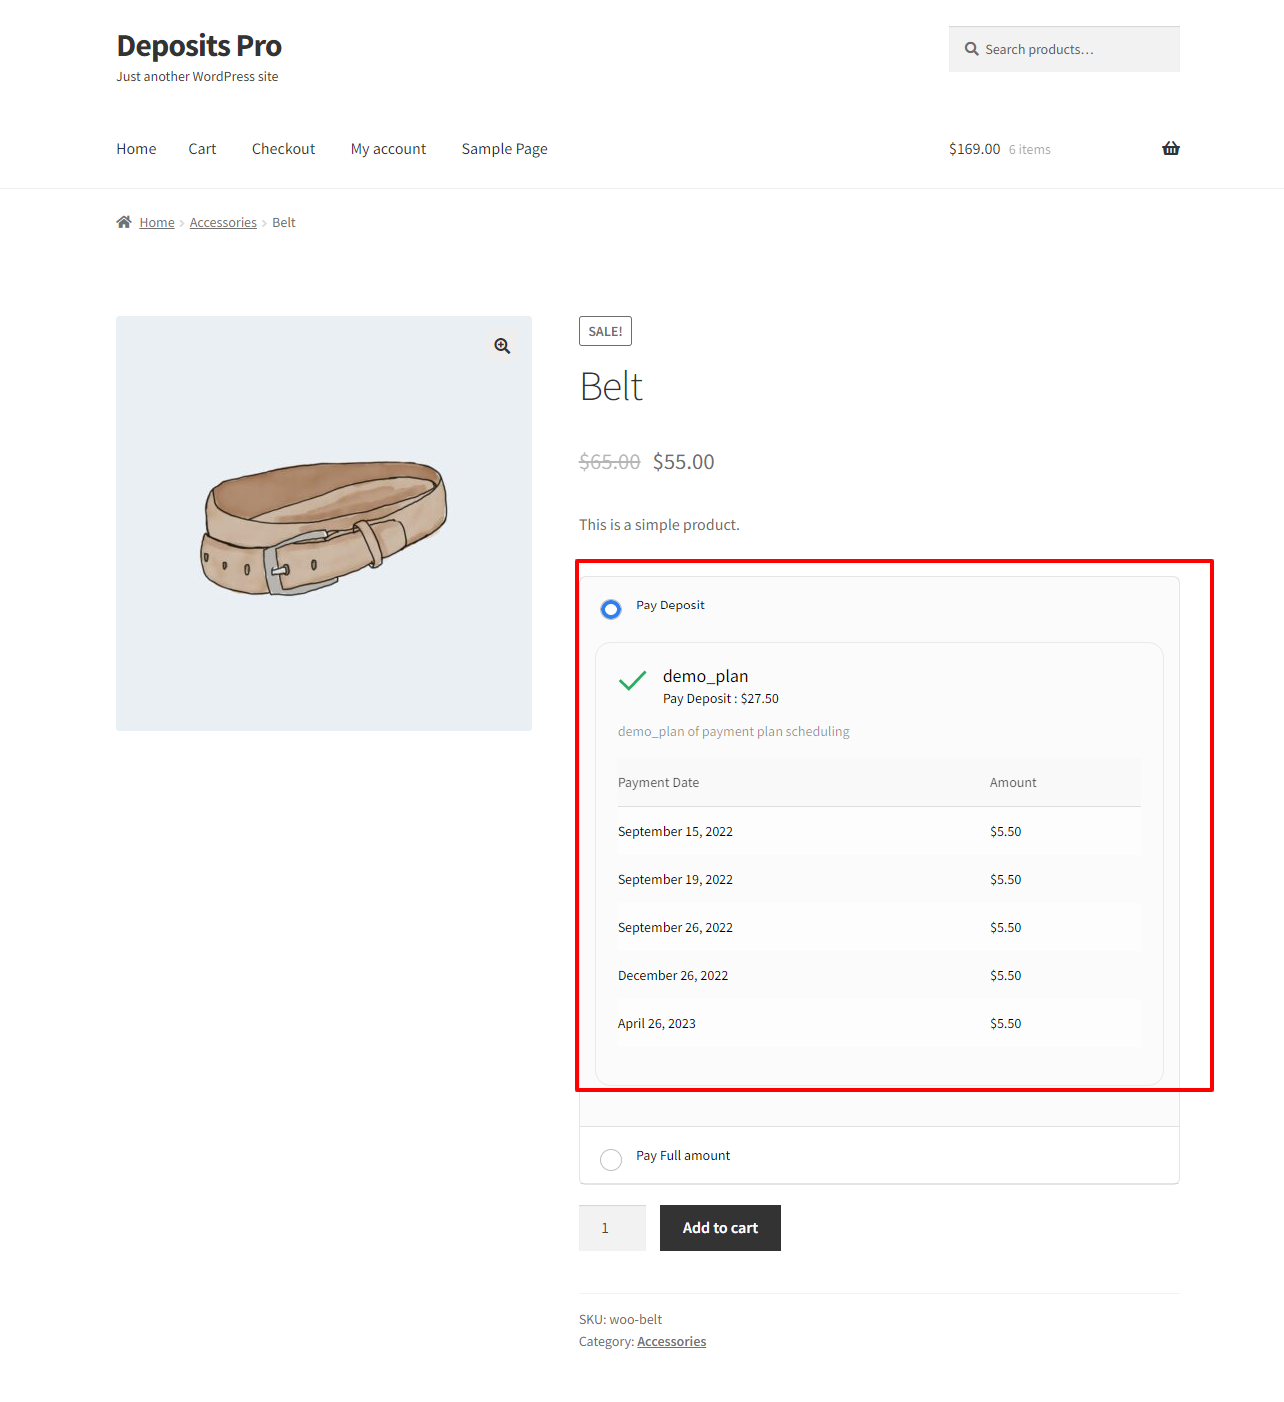
Step 4:
The assigned payment plan will be reflected on the front-end product page and checkout page(if the “Enable deposits on checkout page” option is enabled).
If you have questions about our plugin(s), are experiencing issues with any of our plugin


 Login
Login
 Cart
Cart BUY THIS PLUGIN