- Woocommerce
- Shopify Apps
- WordPress
Instructions regarding Installation and activation, please visit: Installation & Activation
After installing the WooCommerce Deposits Plugin, you can see a new menu “Deposits” in the WordPress admin menu bar.
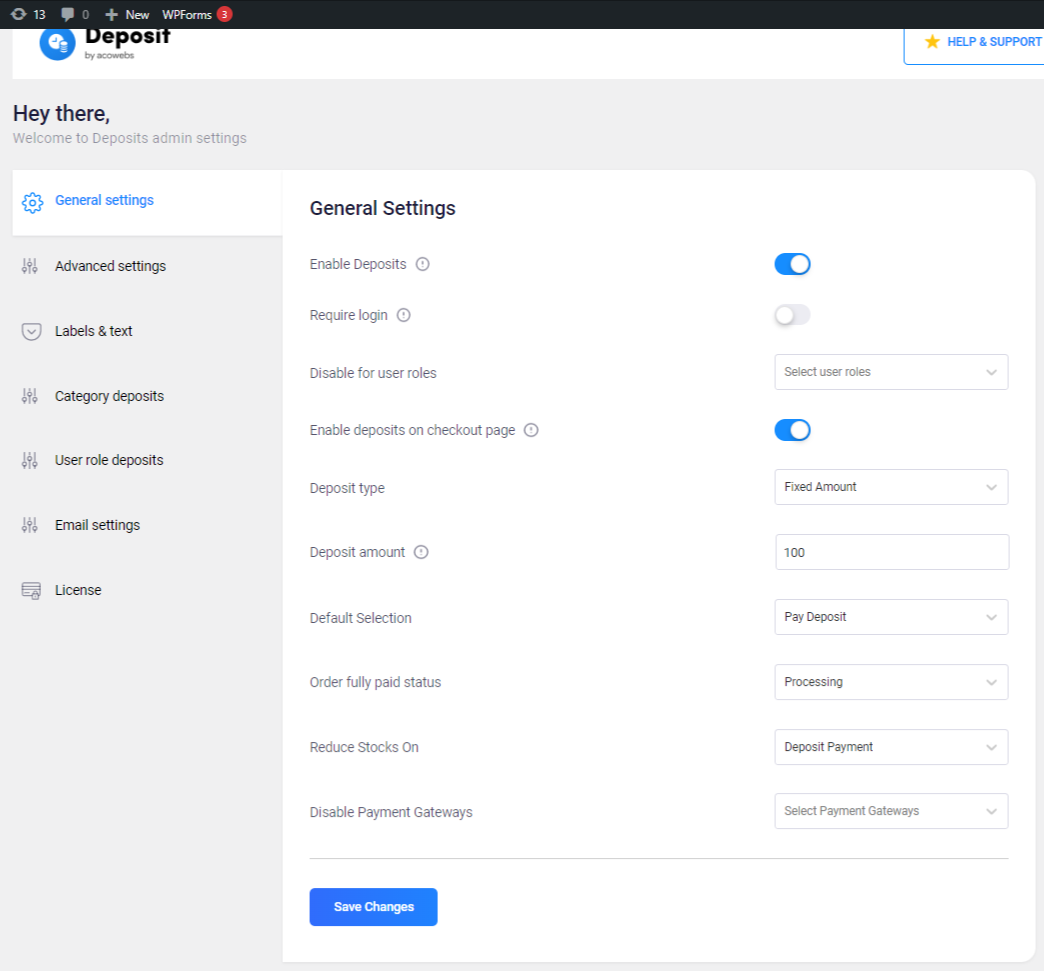
1. Enable Deposits: Let you enable or disable the deposit with one click enable/disable button.
2. Require Login: Allowing deposits only for logged-in customers.
3. Disable for User roles: To disable deposits based on the user-specific roles.
4. Enable deposits on checkout page: Let you make deposits on the total cart amount instead of making it per product. The product level deposit rules will be overridden with this feature.
5. Deposit type: To define the type of deposit
Mainly contain 3 types
A) Fixed Amount: Define a fixed amount for the deposit amount
B) Percentage: Define a percentage of the total amount as a deposit
C) Payment plan: Flexible payment plans with features to make the payment in various schedules such as days, weeks, months, or years.
6. Deposit amount: Define the default deposit amount.
7. Default selection: Set either Pay full or Pay Deposit as your default payment selection
8. Order fully paid status: Assign processing / completed status for paid orders
9. Reduce Stocks On: To reduce the stock count based on the defined selection
10. Disable Payment Gateways: Restrict the usage of certain payment gateway services available while the user makes any deposit transaction.
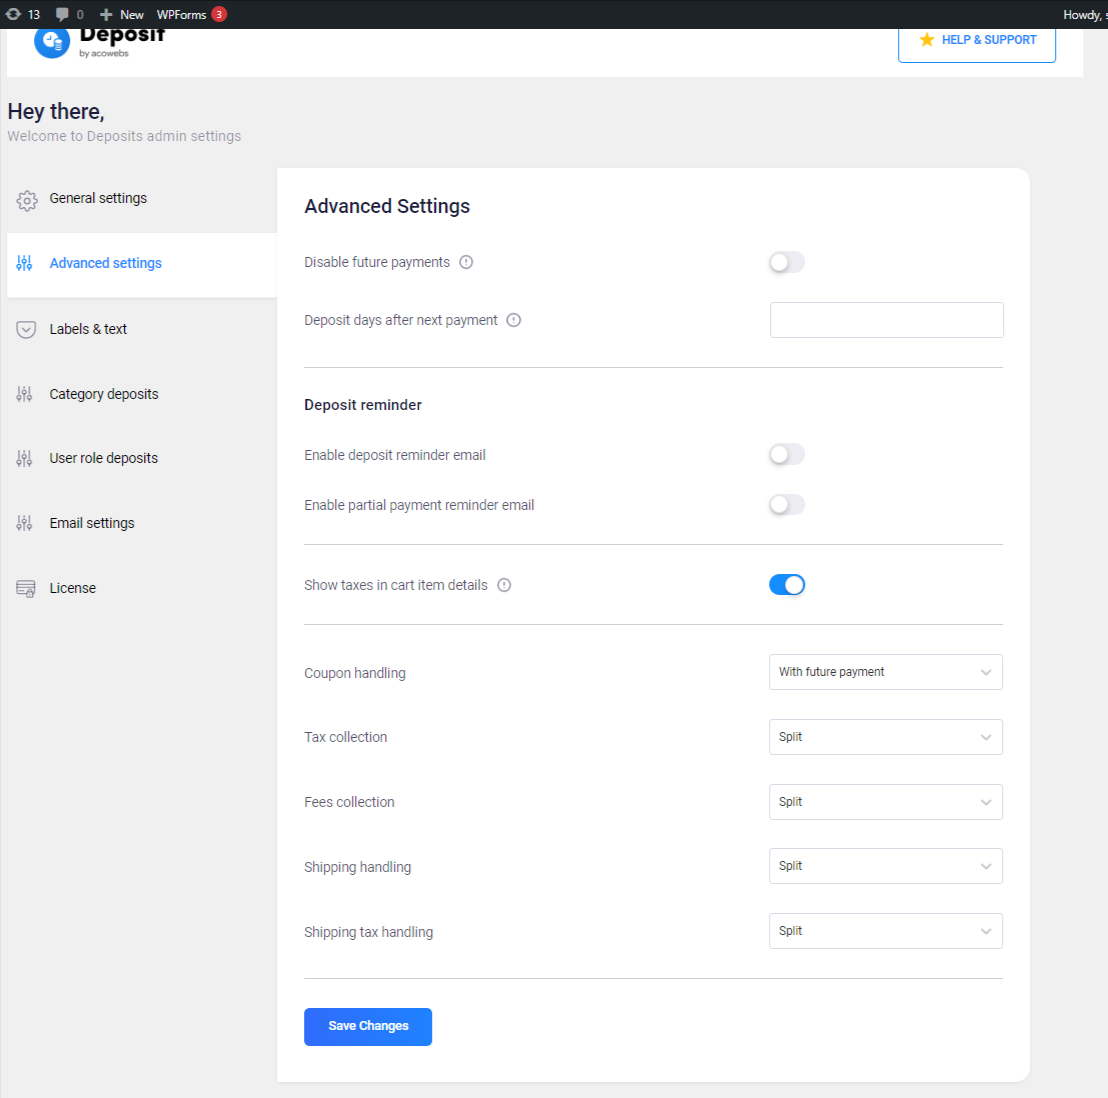
1. Disable future payments: Deny the customer from making any future payment beyond the deposit.
2. Deposit days after next payment: Define the number of days for the next payment. (Only for deposit payments)
Email notifications can be sent to the customers for every transaction. The email reminders can be set and sent out automatically to remind customers about deposit dues
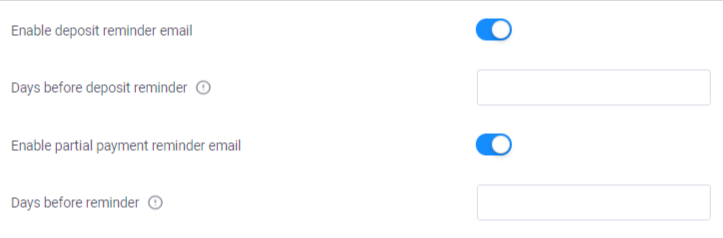
1. Enable deposit reminder email: A reminder mail will be sent to the recipient notifying them about the deposit that they need to be pay
2. Days before deposit reminder: define the number of days to send the remainder
3. Enable woocommerce partial payment reminder email: A reminder mail will be sent to the recipient notifying them about the due amount to be paid for the partially purchased product.
4. Days before deposit reminder: define the number of days to send the remainder
Enabling this option will show taxes as part of deposits displayed in cart item details
You can decide to choose and manage the additional costs involved like tax, fee, shipping, coupon, etc.
1. Coupon handling: The handling fee can be assigned with future payment, with the deposit, or can be split between both
2. Tax collection: The tax fee can be assigned with future payment, with the deposit, or can be split between both
3. Fees collection: The fee collection can be assigned with future payment, with the deposit, or can be split between both
4. Shipping handling: The shipping handling fee can be assigned with future payment, with the deposit, or can be split between both
5. Shipping tax handling: The shipping tax fee can be assigned with future payment, with the deposit, or can be split between both
With the label customization feature, you can Customize the plugin texts from the admin interface.
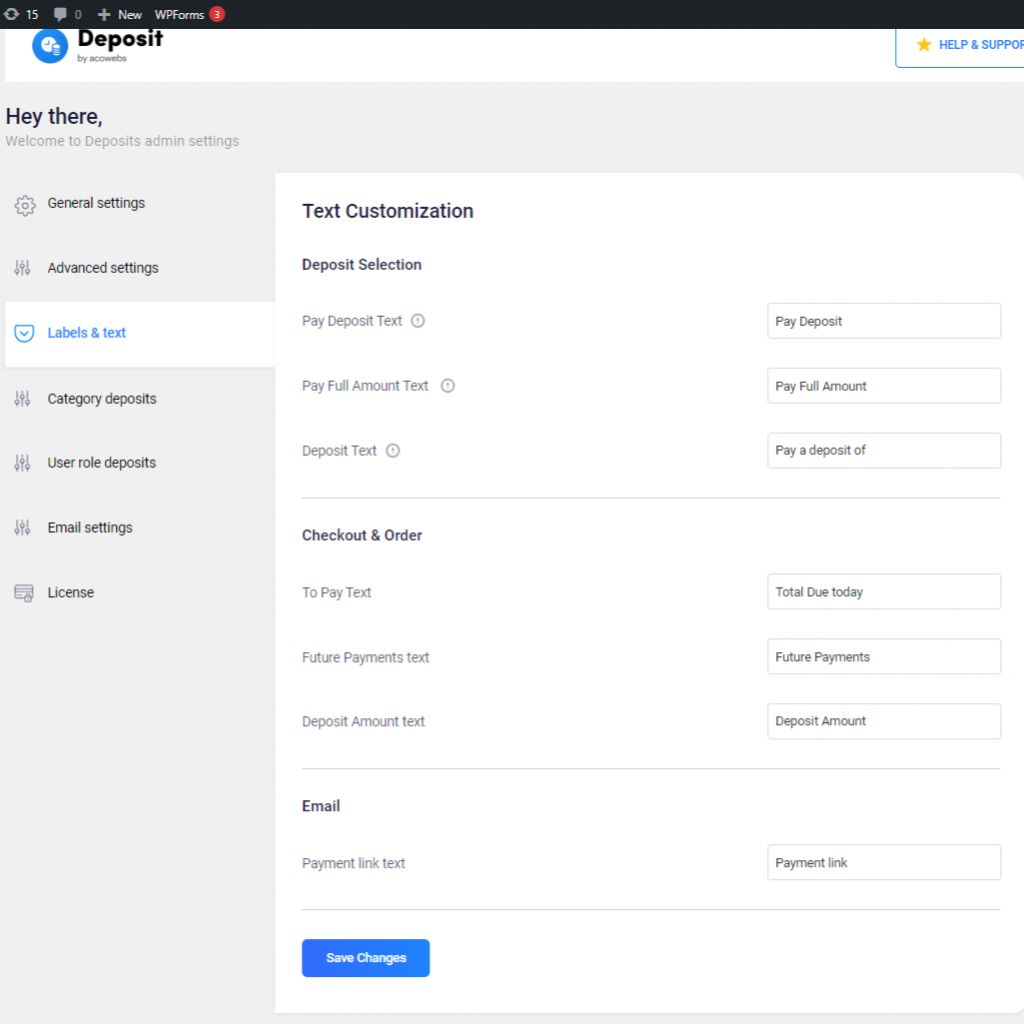
Here you can have options to change the text for Pay Deposit Text, Pay Full Amount, and Deposit Text.
1. Pay Deposit Text: Change the text for the “Pay Deposit” button form here
2. Pay Full Amount Text: Change the text for the “Pay Full Amount” button from here.
2. Pay Full Amount Text: Change the text for the “Pay Full Amount” button from here.
3. Deposit Text: Change the text for the Deposit value display
Here you can have options to change the text for the checkout and order details page
1. To Pay Text: used to change the To Pay text
2. Future Payments text: used to change the Future payment text
3. Deposit Amount text: used to change the deposit amount text.
1. Payment link text: change the Payment link associated text from here
The deposits can be calculated automatically based on the product category you already have.
Add rules and assign them to a particular category of products.
1. Add Rule: Used to add new rules so that they get displayed on the category deposits page
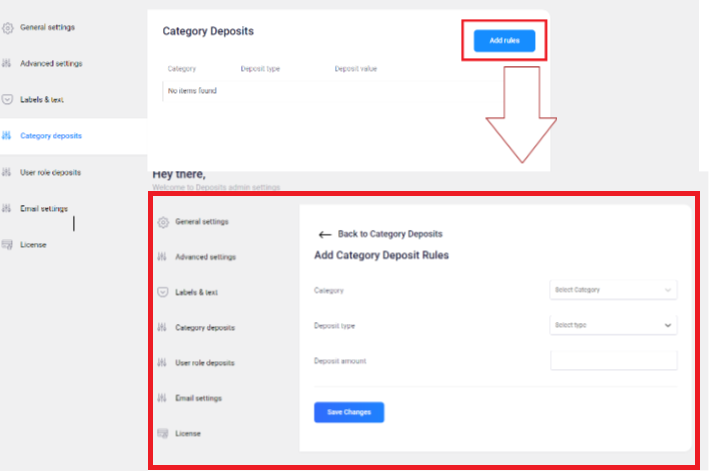
1. Category: Used to define which category you need to apply deposit options
2. Deposit type: select the required deposit options
3. Deposit amount: Used to specify the amount required for your specific category (in numerical)
The User Role option lets you set the deposits based on the user-specific roles.
The deposits can be created by clicking the” Add New” button.
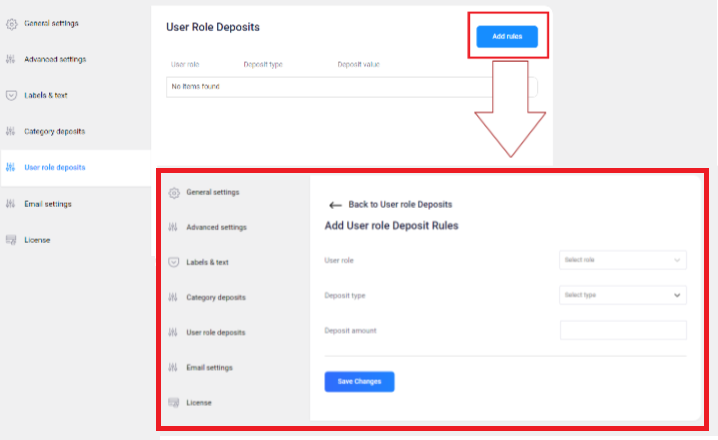
1. User role: Lets you set the deposits based on the specific user roles
2. Deposit type: select the required deposit options
3. Deposit amount: Assign the deposit amount for the user you created
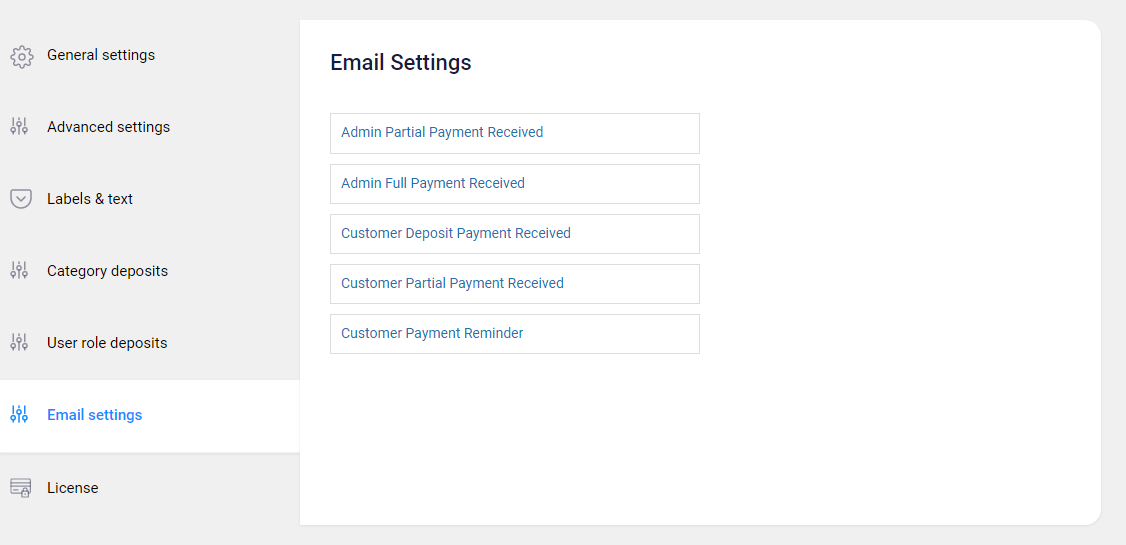
The email setting is used to configure the admin/customer email based on the deposit options
1. Admin Partial Payment Received: This option is used to configure the emails which are sent to the admin when a partial payment is paid for the product purchased
2. Admin Full Payment Received: This option is used to configure the emails which are sent to the admin when full payment is paid for the product purchased
3. Customer Deposit Payment Received: This option is used to configure the emails which are sent to the customer, notifying them that a deposit amount has been received for the product.
4. Customer Partial Payment Received: This option is used to configure the emails which are sent to the customer, notifying them that a partial payment has been received for the product.
5. Customer Payment Reminder: This option is used to configure the emails which are sent to the customer, reminding them of the due amount for the purchased product.
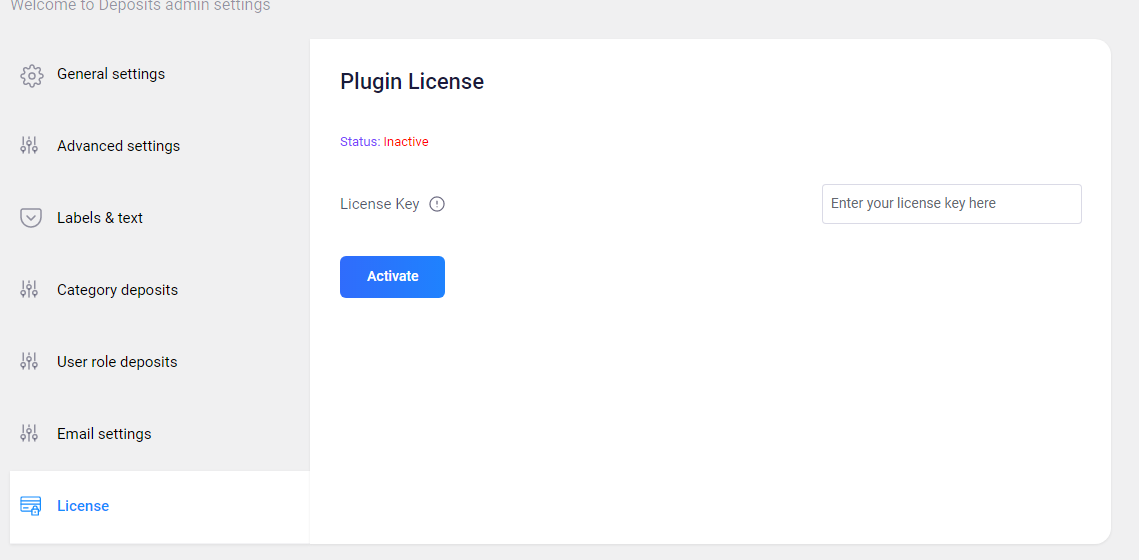
1. License Key: Here you can add and activate plugin License Key to get future updates and bug fixes.
If you have questions about our plugin(s), are experiencing issues with any of our plugin


 Login
Login
 Cart
Cart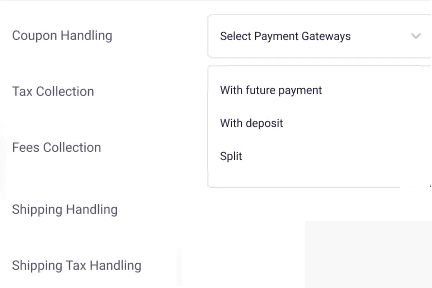
 BUY THIS PLUGIN