
To sync your WooCommerce store data with Google Sheets, you need to first install the WooSync Google Sheets Add-On and the Spreadsheet Sync for woocommerce plugin, and then connect them to complete the integration.
Follow the steps below to complete the setup.
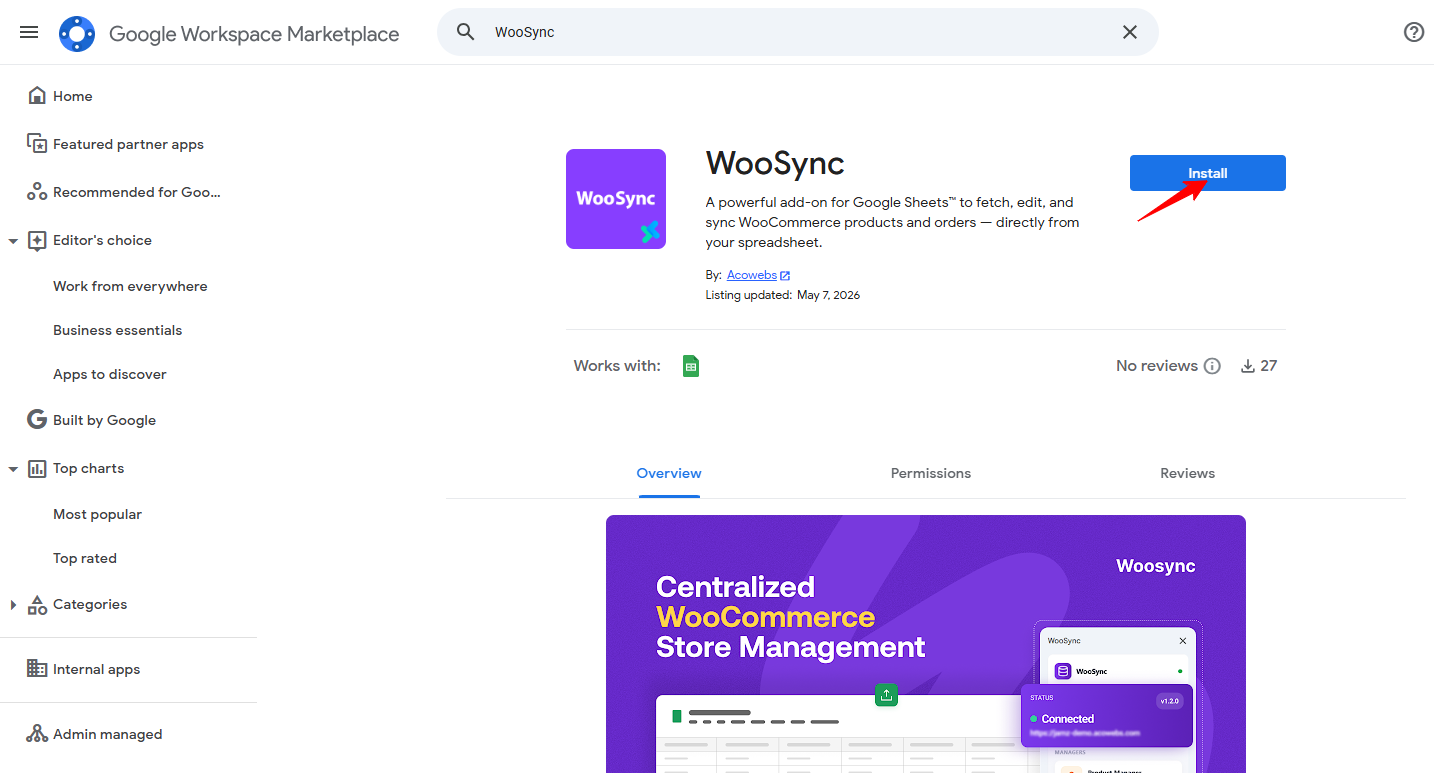
Open the Google Workspace Marketplace in your browser and search for “WooSync”.
From the search results, open the WooSync page and click the Install.
During the installation process, Google will ask you to grant the required permissions. Select your Google account, review the access permissions, and click Allow or Continue to proceed.
Once the permissions are granted, the WooSync Google Sheets Add-on will be installed successfully.
After installing the WooSync Google Sheets Add-on, open a new or existing Google Sheet. From the top menu, click Extensions → WooSync → Open WooSync.
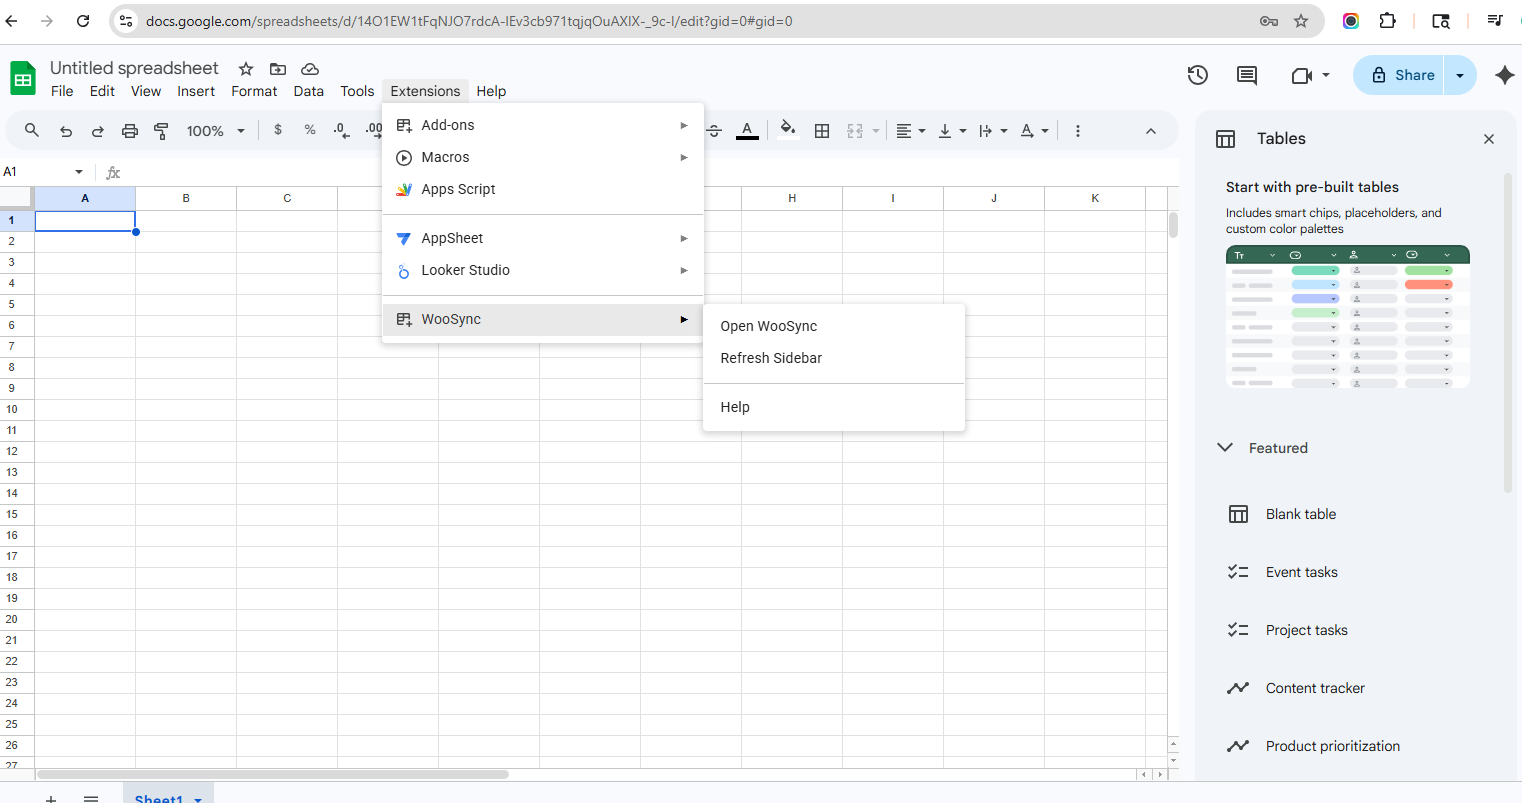
Once selected, the WooSync panel will open on the right side of your screen. From here, you can start setting up and connecting your store.
To connect your Google Sheet with your WooCommerce store, configure the add-on using your website details.
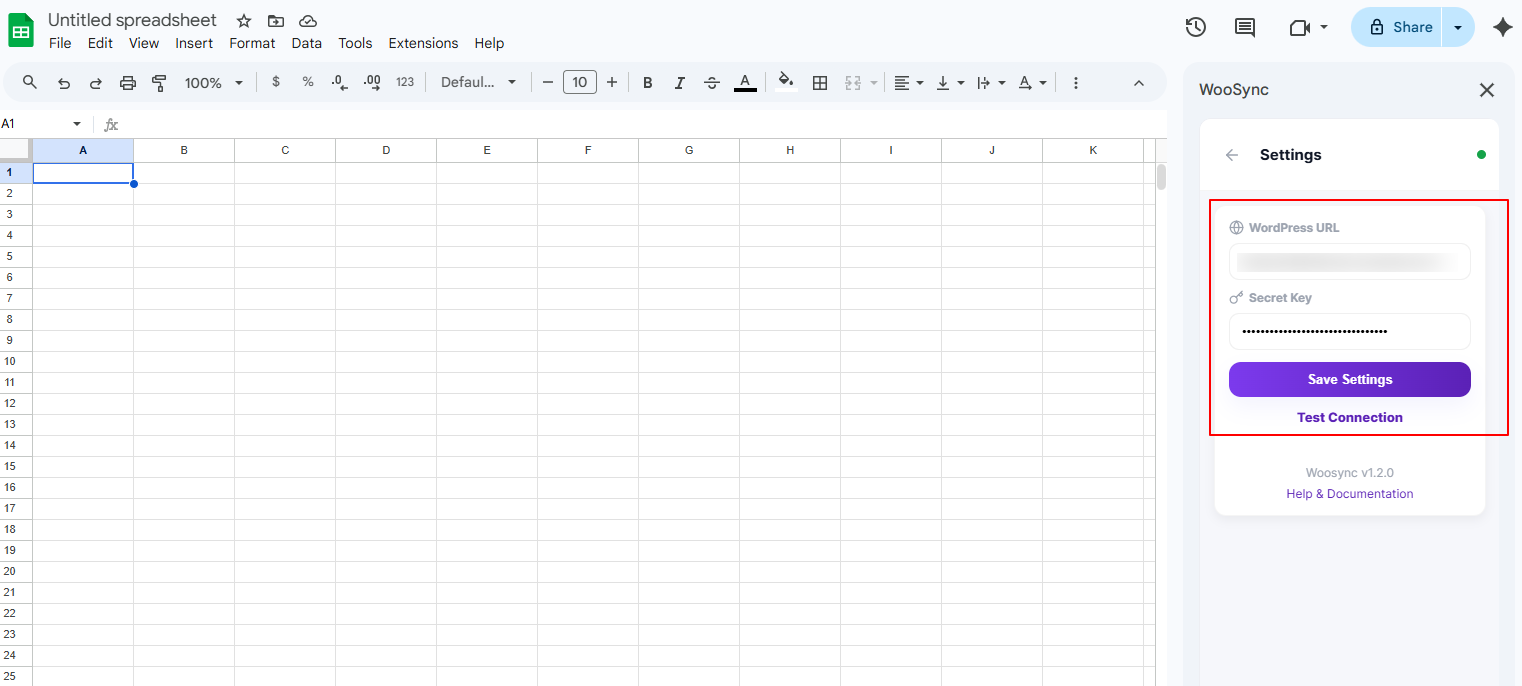
In the WooSync sidebar, open the Settings section. Now, you will see two fields:
In the WordPress URL field, enter your website address. Example: https://yourstore.com
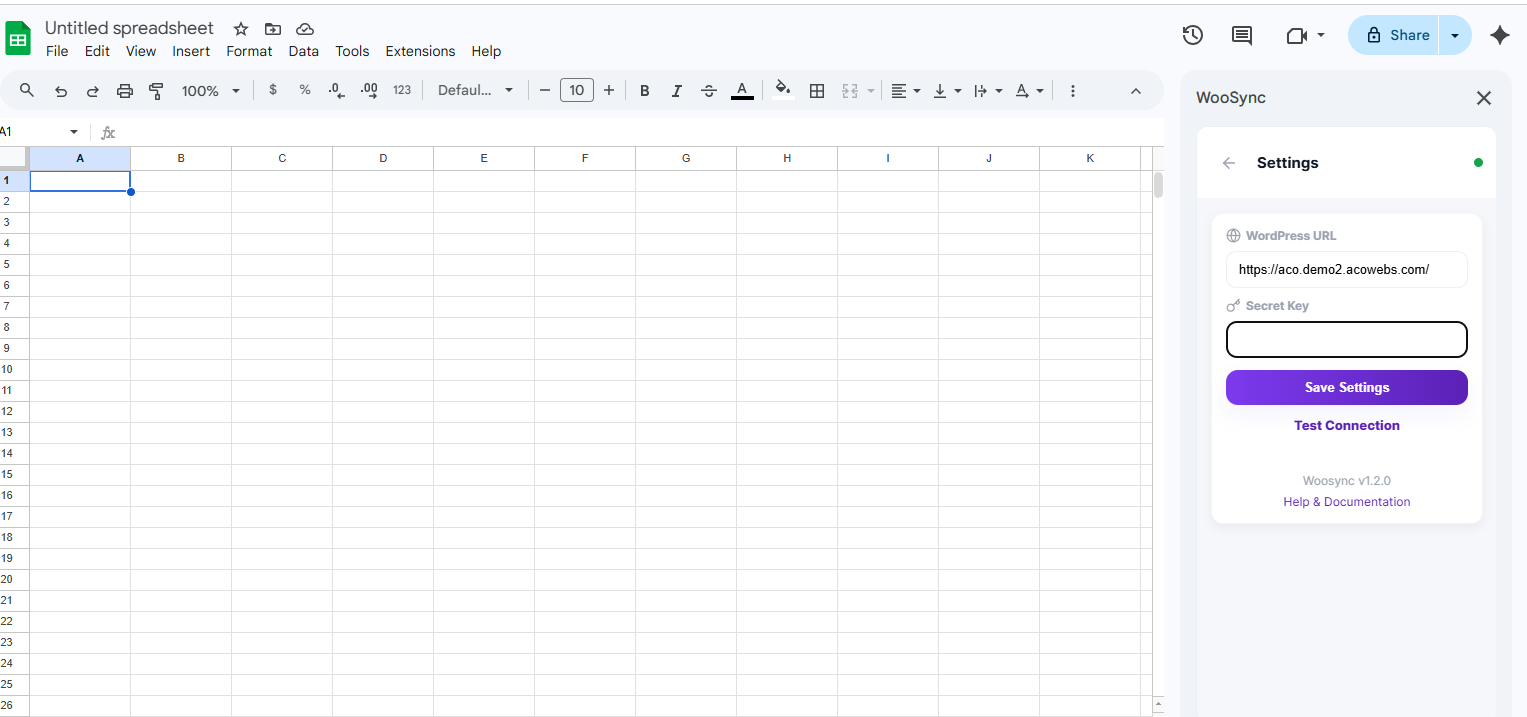
Next, you will enter the Secret Key (explained in the next step).
First, download and install the Spreadsheet Sync for WooCommerce plugin on your WordPress website.
After installation, go to the plugin settings. Here you will see a field called Google Sheet ID. Copy your Google Sheet ID and paste it into this field.
How to find the Google Sheet ID
Go back to your Google Sheet and look at the URL in your browser.
For example:
docs.google.com/spreadsheets/d/18O1EW1tNJO7rdcA-lEv8cb881tqjqOuAXIX-_9c-I/edit
The part between /d/ and /edit is your Google Sheet ID:
18O1EW1tNJO7rdcA-lEv8cb881tqjqOuAXIX-_9c-I
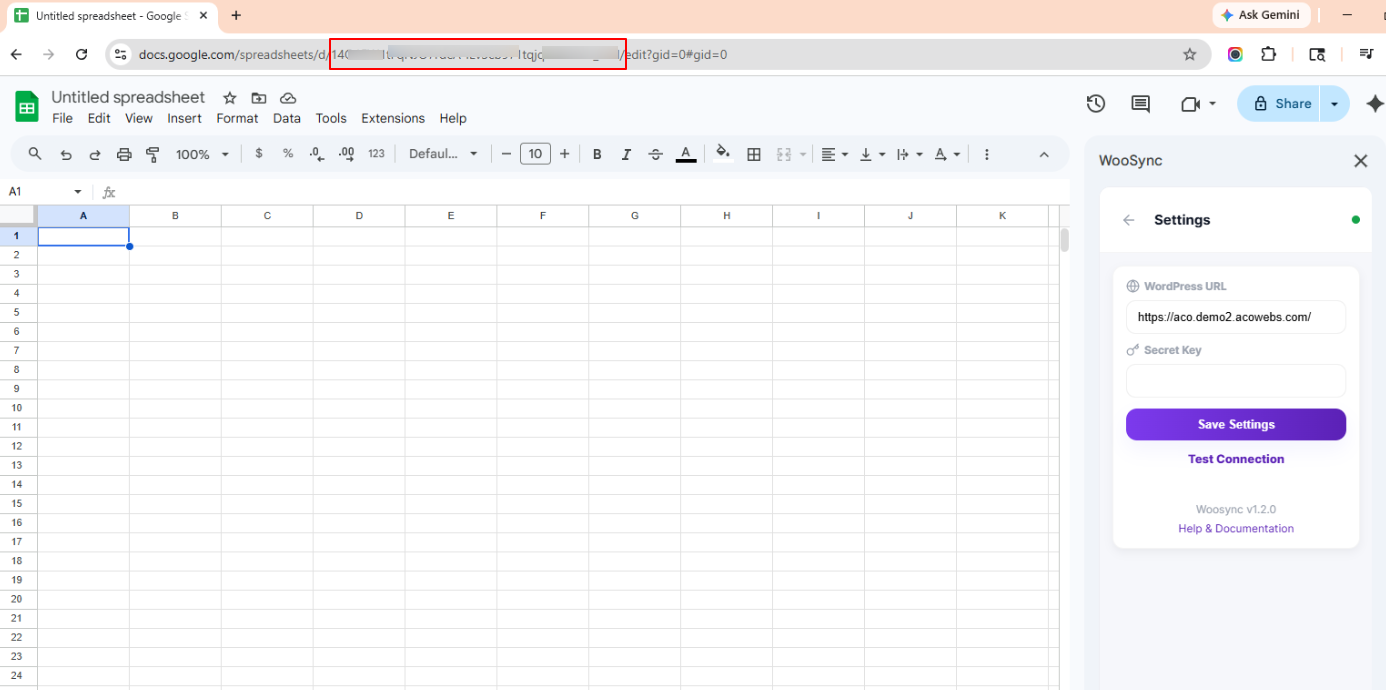
Paste this ID into the Google Sheet ID field in the Spreadsheet sync plugin settings.
In the same plugin settings page, you will find the Secret Key field. Click Generate New Key to create a new key, then save the settings.
After saving, a Secret Key will be generated automatically. Copy this key.
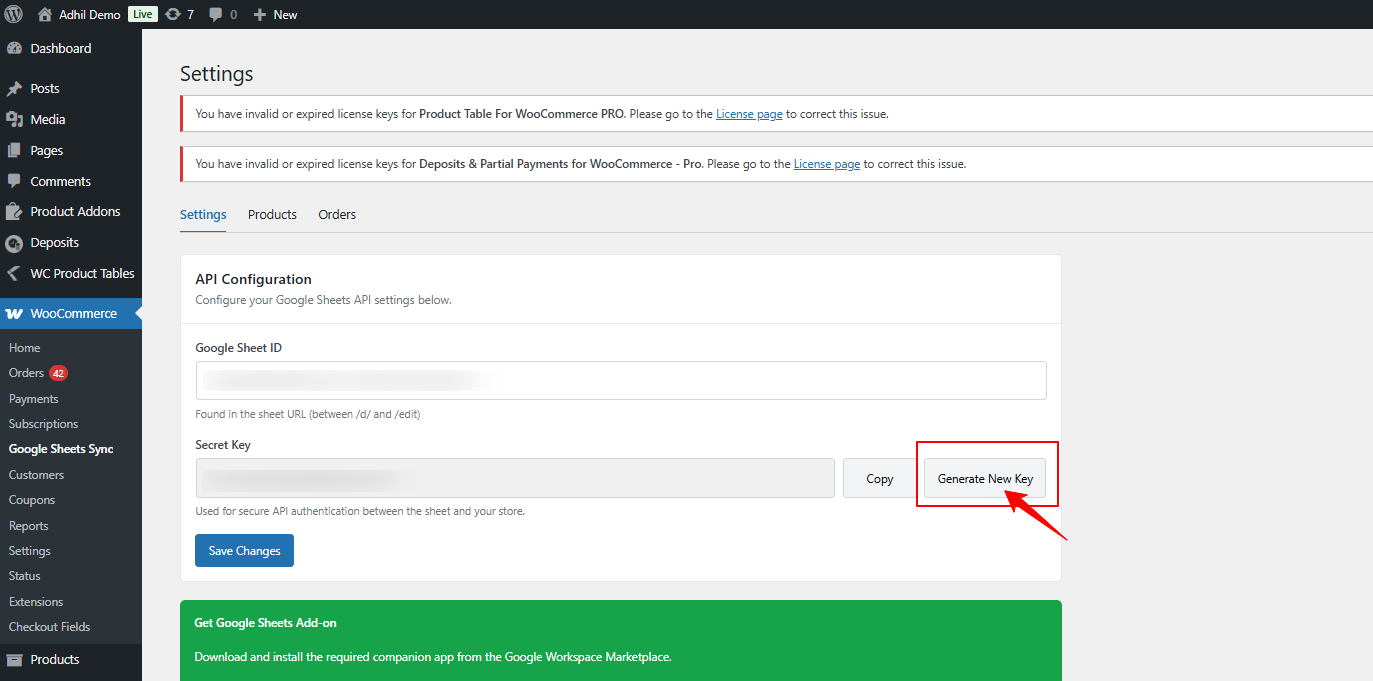
Now go back to your WooSync sidebar and paste it into theSecret Key field.
Once both WordPress URL and Secret Key are added, click Save Settings to complete the connection.
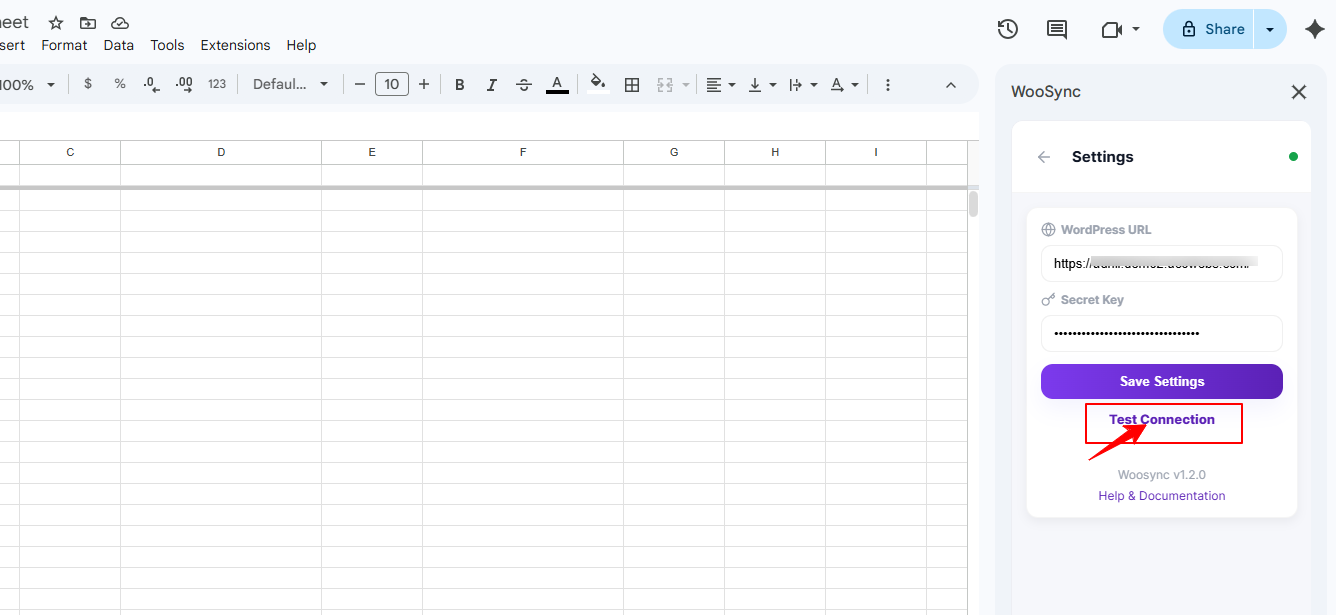
After saving the settings, click the Test Connection button.
This will check whether the add-on is successfully connected to your WooCommerce store.
Congratulations!
You have successfully installed and connected the WooSync Google Sheets Add-on with the Spreadsheet Sync for Woocommerce Plugin. Your WooCommerce store is now integrated with Google Sheets.
If you have questions about our plugin(s), are experiencing issues with any of our plugin


















 Login
Login
 Cart
Cart