- Woocommerce
- Shopify Apps
- WordPress
This guide is set up to help you offload your WordPress Media Library to a Digital Ocean Space using Offload Media swiftly and promptly.
Step 1: Log in to the DigitalOcean Control Panel
Have a DigitalOcean account? Login in here.
Don’t have an account yet? Sign up here
Step 2: Create your Spaces bucket
After logging into your DigitalOcean control panel, the next step is to create your space bucket.
To create a bucket, go to the Manage section in the left menu and click on Spaces Object Storage. Then, click Create Bucket in the top right corner to open the Create a Spaces Bucket page.
Select a data center region closest to your users and enter a unique name for your bucket. Once you’re ready, click Create a Spaces Bucket to complete the process.
If you plan to serve content globally, consider enabling the CDN. This helps reduce latency by caching content closer to end users.
Don’t forget to note the data center region name, as you’ll need it when configuring your offload plugin.

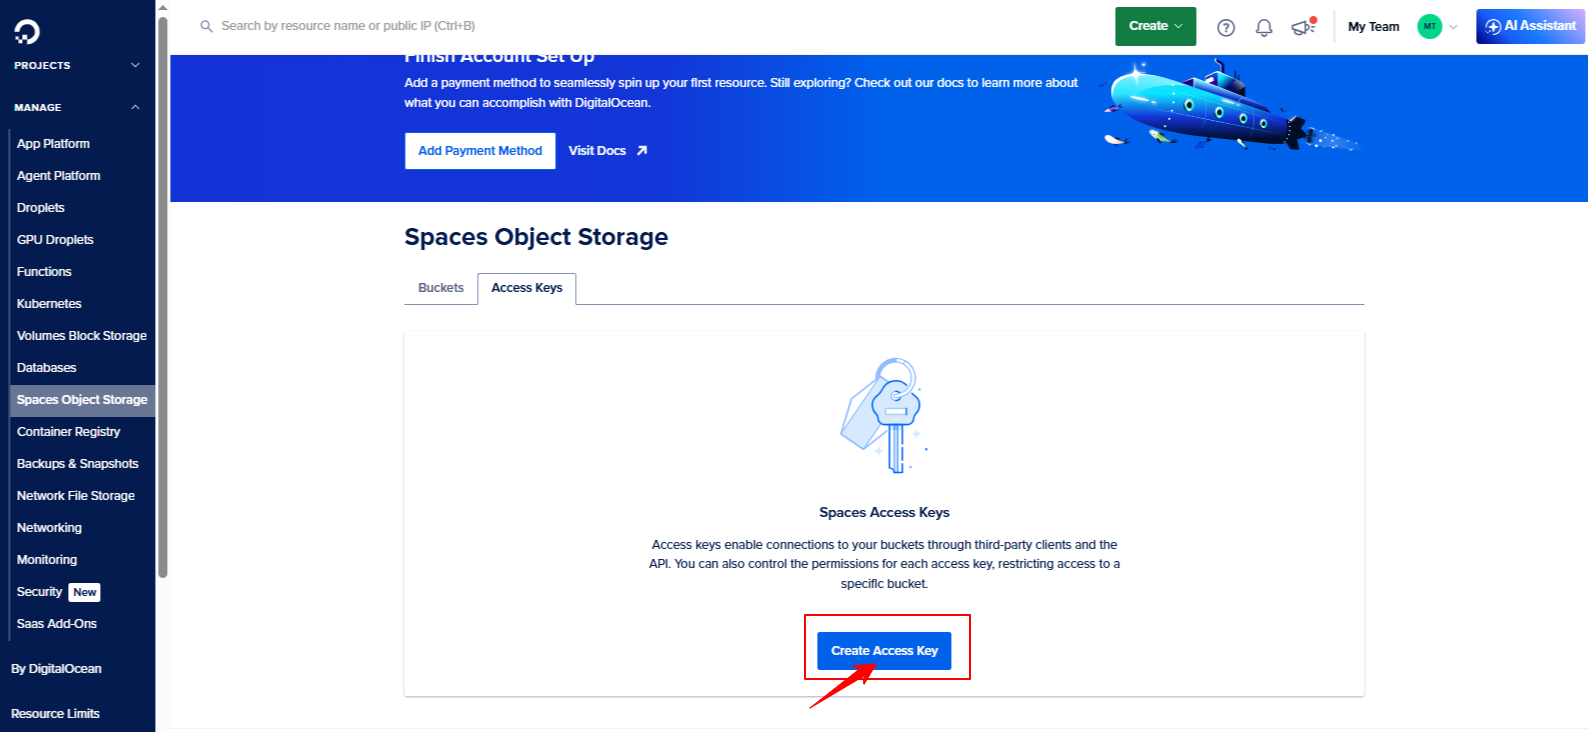
Step 3: Creating Access Keys
You’ll need to create access keys for Spaces.
Go to the Manage section in the left-hand sidebar and click on “Spaces Object Storage”. Then, click the “Create Access Key” button in the Access Key section.
A new window called “New Spaces Access Key” will open. Here, choose “Full Access ” under the select access scope. You can enter a name for the access keys if you’d like, or just leave it as it is. Finally, click “Create Access Key” to save your changes
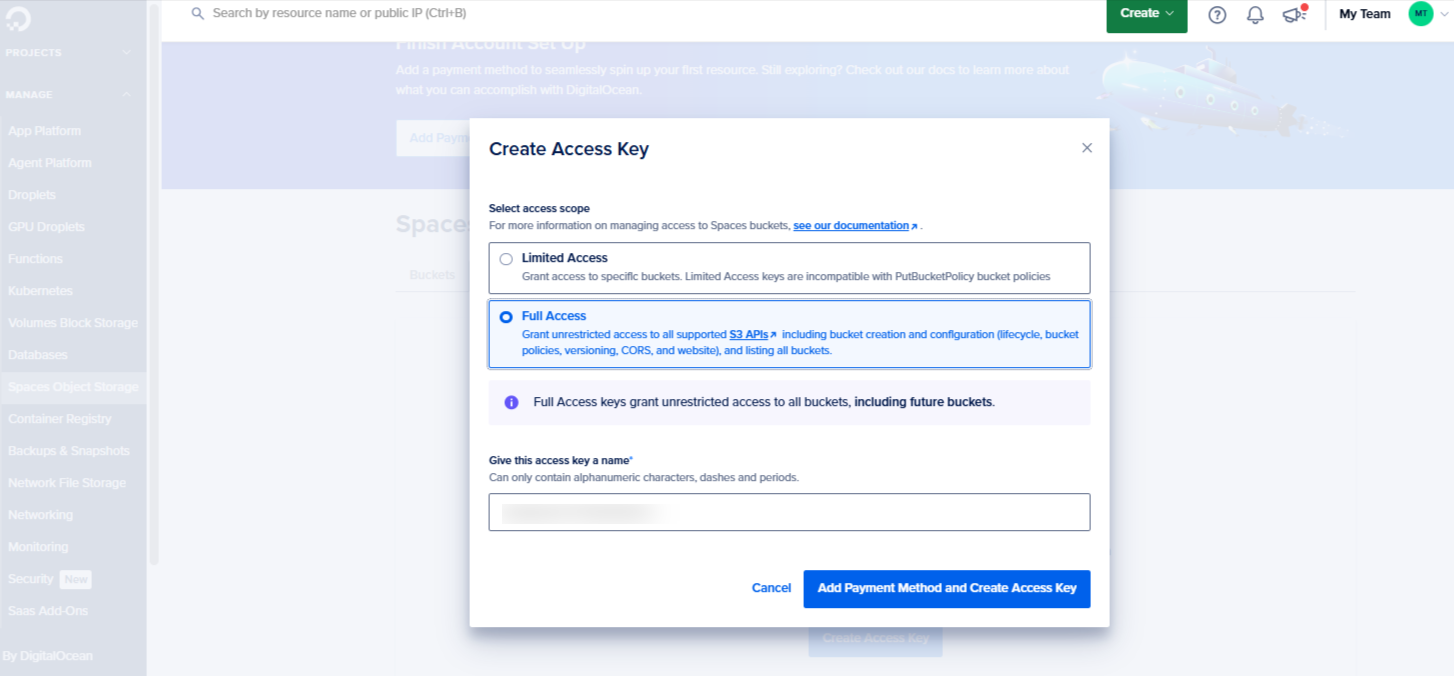
You’ll see the security credentials for the access keys, which include the Access Key ID and the Secret Access Key. Keep in mind that DigitalOcean will not show the Secret Access Key again, so make sure to copy both keys and store them somewhere safe. If you lose them, you can create a new set of keys, but the Secret Access Key won’t be retrievable later.
Step 1: Navigate to the Configuration Page
After successfully installing the plugin, go to the WordPress admin dashboard and select: Offload Media >> Storage provider
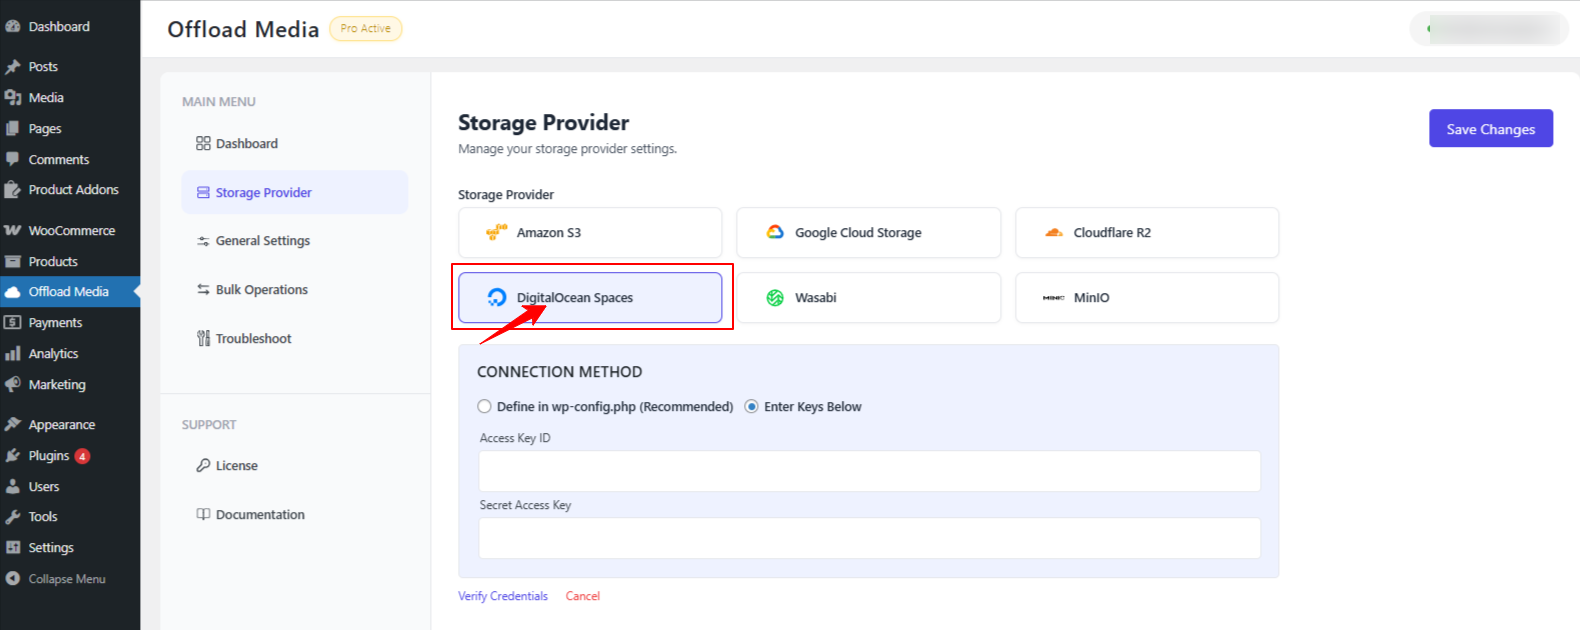
Step 2: Choose Your Cloud Service
On the service selection page, choose the cloud storage service you want to configure.
For this guide, we’ll select DigitalOcean Spaces.
Step 3: Enter DigitalOcean Credentials
Next, enter the credentials you previously created for your DigitalOceani account. This typically includes: Access Key ID and Secret Access Key.
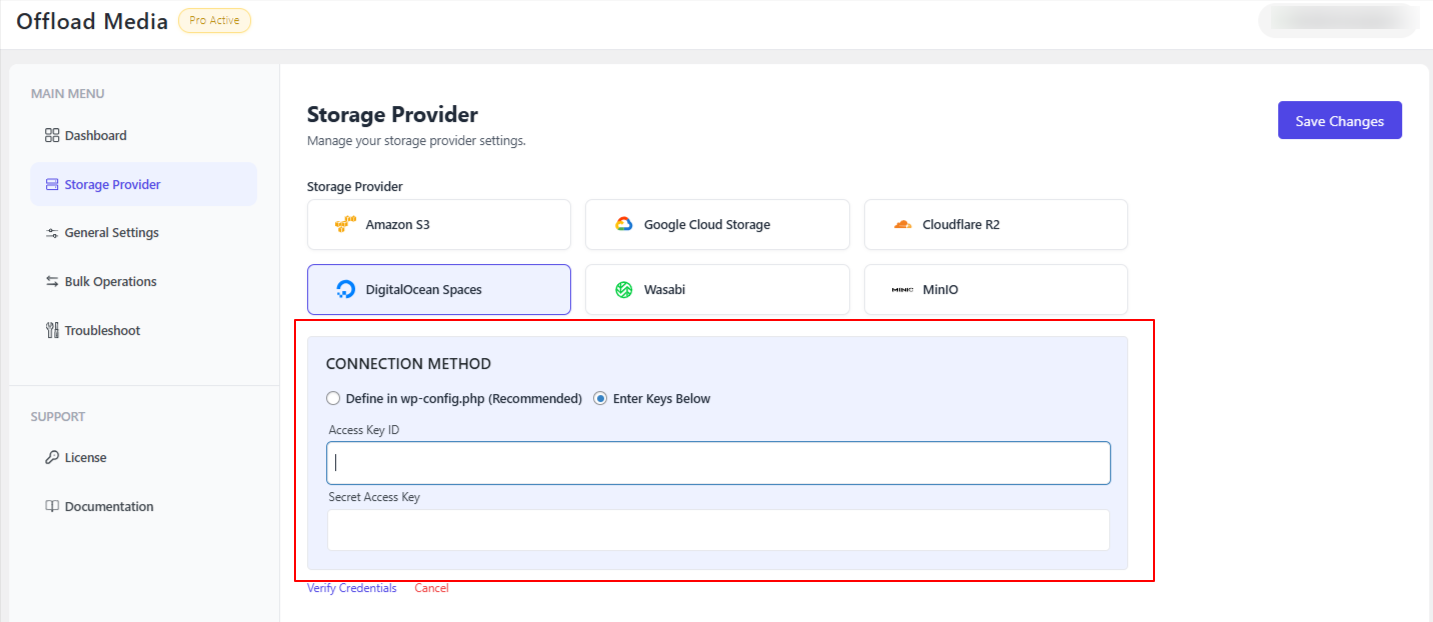
After entering the credentials, click “Verify Credentials” to confirm that the connection is valid.
Step 4: Select the Bucket
Once the credentials are verified, you will see an option to select a bucket from the list.
If you already have a bucket in DigitalOcean, simply select it from the dropdown.
If you do not have a bucket yet, you can use the “Create New” option to create a new bucket directly from the plugin.
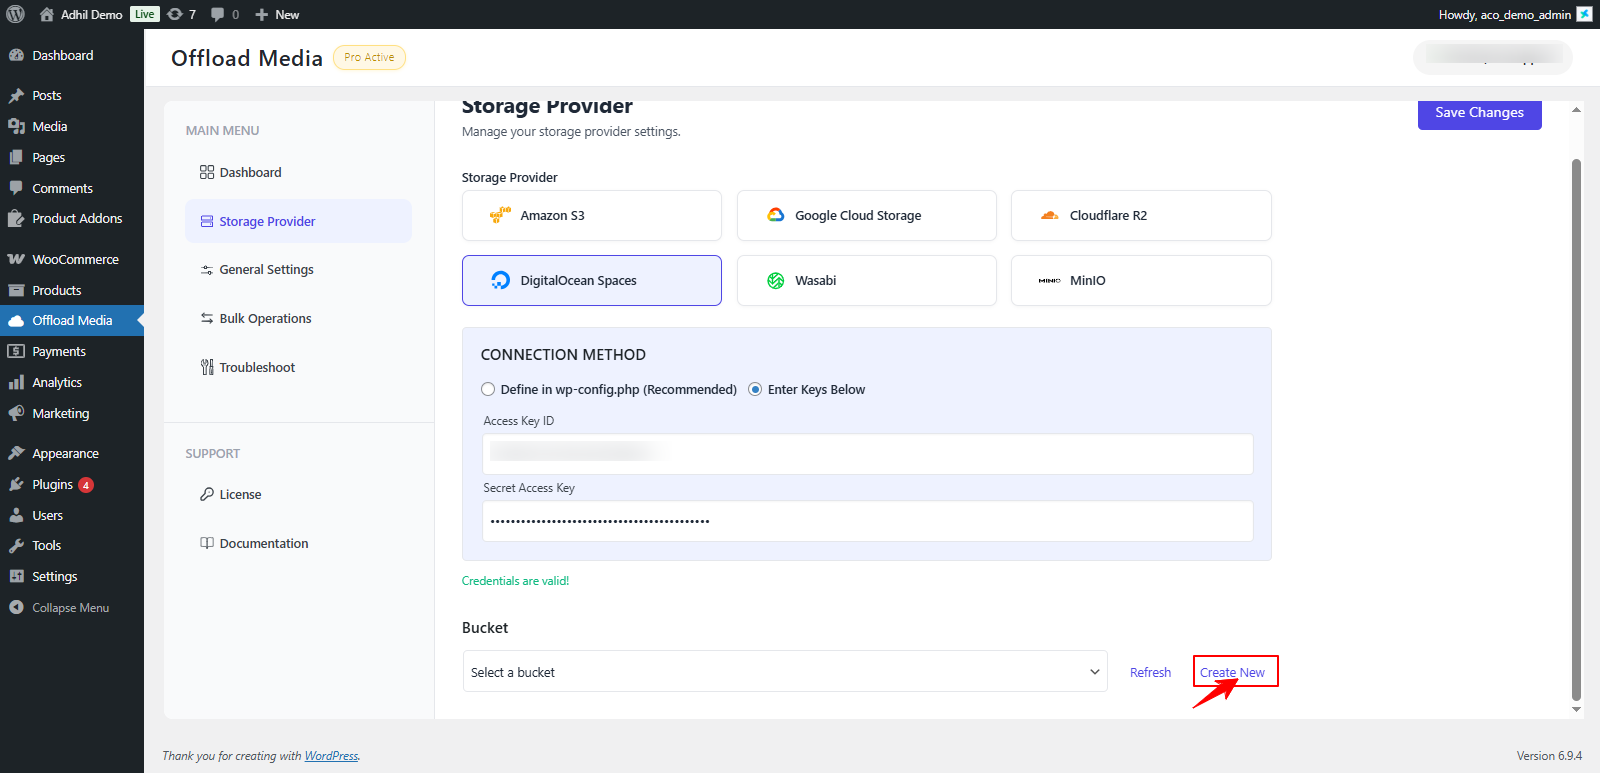
Once you have selected or created the bucket, click “Save Changes.”
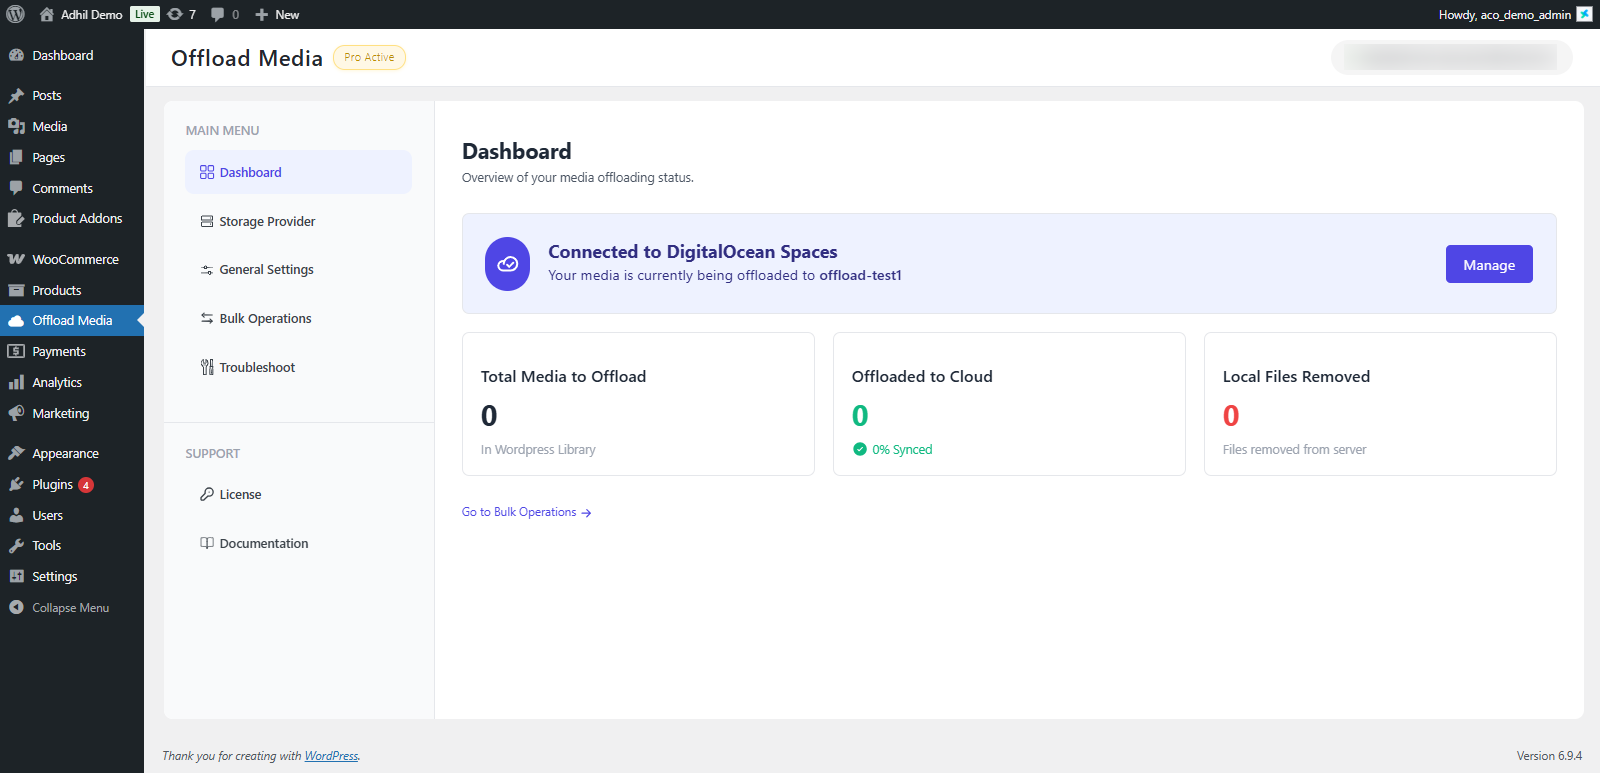
Configuration Complete
Congratulations! You have successfully configured the Offload Media plugin with DigitalOcean. Your media files are now ready to be seamlessly offloaded to your cloud storage.
If you have questions about our plugin(s), are experiencing issues with any of our plugin


 Login
Login
 Cart
Cart