Login
Login
 Cart
Cart
The surge in eCommerce has resulted in the rise of several eCommerce stores. Online electronics stores are a comfortable choice for people who want to buy electronic appliances, mobile phones, and other gadgets from their homes. There are several electronic gadgets available to ease the day-to-day life. You will rarely see people without any electronic device with them. In this modern age, it has become nearly impossible to live without relying on any one of the electronic items. Hence, electronic stores are always in business. This article will take you through the detailed steps of creating an eCommerce electronic store.
Why are electronics eCommerce stores popular?
Online electronic stores have emerged as a popular marketplace for purchasing goods. There are several advantages to buying electronics from online stores. One significant benefit is the availability of offers and deals. Online stores often offer products at lower prices compared to offline stores, especially during festive seasons and product launches. This is particularly beneficial for electronic gadgets like mobile phones, which can be purchased at significantly lower prices than in physical stores.
While shopping online for electronic gadgets, users can see the customer reviews of others who have purchased the same product before them. This is a significant benefit of shopping from online stores as the customers can see the product reviews with images and understand the personal opinions of the customers, such as the pros and cons of the product. On the product page of online stores, you can get detailed specifications of electronic gadgets, including product models and design details. You can compare the prices and product specifications with similar products from other brands. When purchasing from the store, customers might miss out on the extensive details of the product.
The most important benefit of online shopping is its 24/7 availability all year round. Customers can order products at their convenience and receive them at their doorstep. The physical commute to the store can be tiring, especially if there are no electronics stores in close proximity to where you live. These are some of the benefits of shopping electronics online. Electronic gadgets are always in demand, especially as electronic devices have become an inevitable part of the human lifestyle. Hence, setting up an eCommerce electronic store is a great business idea.
How to start an eCommerce electronics store
The first step towards opening an eCommerce electronics store is to create a website. Usually, website development is a difficult task as it requires coding and the expertise of a professional developer; however, nowadays, you can start a website even if you are unfamiliar with coding and programming languages. There are platforms like WordPress that help you with website development. WordPress is an open-source content management system that helps with your eCommerce website development and management. After creating the website, you can customise it in WordPress with the proper templates and plugins to match the style of your eCommerce store.
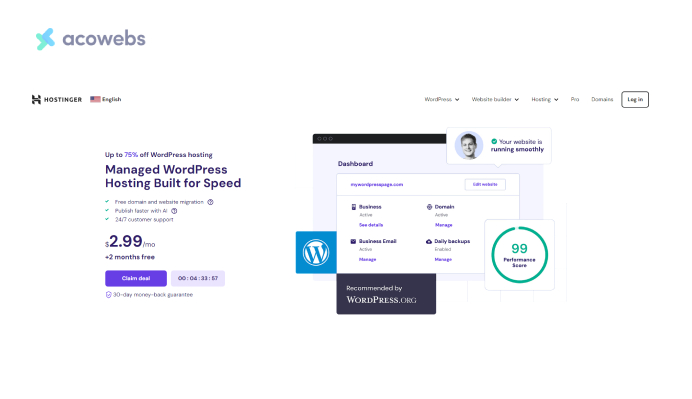
Manually setting up a website using WordPress is an easy but lengthy process; however, you can avail of the services of web hosting companies like Hostinger to set up a website with various available plans. We will explain the whole process involved in the eCommerce store development in 6 easy steps. Follow along to set up your electronics eCommerce store. Even though there are various hosting providers, we are choosing Hostinger to get the job done.
1. Select a hosting plan
To start a website, you need to select a hosting provider that hosts your website on a web server. To purchase the hosting plan, visit the Hostinger website, where you can select the hosting type and plan from the options available. Since we plan to open a website on WordPress, we can choose WordPress hosting, which has WordPress installation, optimization, and updation features. After selecting the type, select the preferred plan. After adding the plan to the cart, you can now choose the duration of the subscription. You will be asked to create a new Hostinger account. Now, complete the purchase by providing the necessary personal and payment details.
To set up the hosting plan, go to hPanel on Hostinger, log into your Hostinger account and go to the home section of the panel. Click on the setup button next to your order. You will start onboarding, but you can complete it later by clicking on the Hostinger logo.
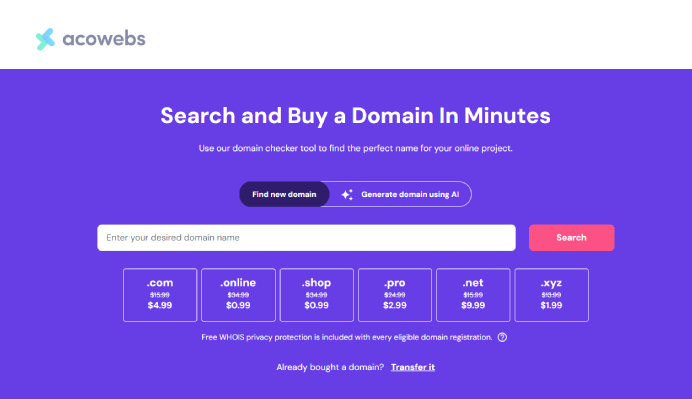
2. Buy a domain
The next step is to buy a domain address. The domain name will be your store’s online identity; hence, choosing a domain name should be a careful choice. Check the domain name availability or find a new domain. After selecting the domain name, add it to the cart and finish the payment and purchase. As you did with hosting, go to the home section of the hPanel, where you can set up the domain. After that, enter the contact information and finish the registration. After completing the registration, a verification message will be sent to the email address you provided. You will be redirected to the verification page when you click on the verification link. Then click on verify.
3. Add a website using WordPress
To add a website to your hosting plan, navigate to the website section and click Add or migrate a website. You will be then asked to specify the type of website. Further, you will get a page with two options: Create new website and Migrate website. You will need to click on Create a new website. In the final step, choose WordPress when asked to select a platform.
At the next step, you will be asked to create a WordPress account by entering the required details, such as the language and email address, and creating a password. Click on Continue.
The next step is selecting the plugins. You will be given a suggested list from which you can choose or skip and complete the step after setting up the website. Similarly, the next step is to select a template. Like the previous step, you can choose a theme from the suggested themes or skip and finish it after the website is set up.
In the next step, you will be asked to enter the website content, such as the brand name and business description. You can use the help of AI to complete these details. Like the previous steps, you can finish these steps later.
The next step is naming your website. Here, you will have to enter your domain name. You will get three options: Choose/Buy a Domain, Use an Existing Domain, and Claim a Free Domain. Since we have already purchased the domain from Hostinger, click on Choose a Domain.
After these steps, you will be taken to the finish set-up page. To finish WordPress installation on your domain, click on Finish setup. Go to the websites and click on the admin panel to manage your WordPress.
4. Install WordPress theme
WordPress has a number of themes that you can add to your website to enhance its aesthetic appeal and functionality. The themes are readymade solutions that improve the overall features and usability of the website without having to code everything. Choose the theme according to your website’s type.
For this store, we are choosing the Phlox theme, which is compatible with electronics and tech stores. Phlox’s primary features are live drag-and-drop and easy page customisation.

This theme’s peculiarities include a user-friendly interface and responsive design. Phlox has more than 80 ready-to-use templates. WPML integration makes the store multilingual with easy page and content translation. The theme is most compatible with Elementor, a WordPress page builder plugin.
To install the theme, click Add new theme on the WordPress dashboard. Search for Phlox and then click on the install button. After clicking on the activate button, you are good to go. The theme will be listed in the options, which can be selected to access the theme’s dashboard, where you can customise it.
5. Install WordPress plugins
Now that you have your WordPress website, the next step is to convert it into a WooCommerce store. To transform a standard WordPress website into an eCommerce store, install the WooCommerce plugin. It is packed with several features necessary for eCommerce store management. You can also add other plugins to your WordPress website to enhance the functionality of your online store.

To install WooCommerce and other plugins, go to the add new plugin option in the plugin tab on the dashboard. Search for the WooCommerce plugin and click on the install button. Fill out the details on the WooCommerce tab and click on “Let’s go” to finish the set up.
Let’s introduce other WooCommerce plugins to easily customise your online store and make your store function better.
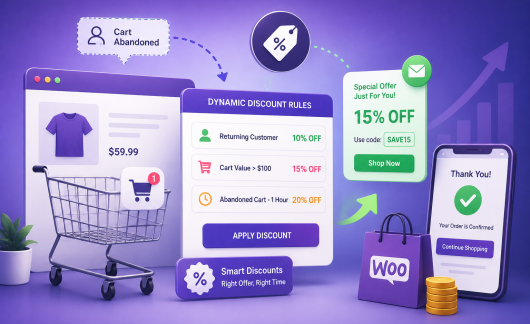
WooCommerce Dynamic Pricing With Discount Rules
One of the main reasons customers purchase from an online store is the attractive discounts and offers on products during special sales. This plugin can be used to set different discount types for the products in the store. With this plugin comes options to set discounts according to different criteria like the number of product orders, the amount spent by the customers, user roles, etc. Electronics stores usually come up with huge discounts on products during the festive season or on special days. With this plugin, you can schedule discounts for any date so that you need not fear missing out on adding a discount on a particular day. There is an option to set timers on products, which can be used to set countdown timers on products on sale to let the customers know when a sale ends. WPML and PolyLang Support are other features that this plugin comes with. Purchase and explore more features of WooCommerce Dynamic Pricing With Discount Rules.
WooCommerce PDF Invoices and Packing Slips
The WooCommerce PDF Invoices and Packing Slips is necessary to any online store as it help with creating packing slips and invoices for a streamlined order delivery process. The plugin comes with features such as auto-attaching customised invoice PDFs along with the order confirmation email. You can generate and download packing slips and PDF invoices in bulk. Apart from these, you can customise and print information from the orders listing page, like delivery notes, shipping labels, credit notes, and dispatch labels. These features help simplify the packaging and shipping process. Store owners can also manually add the invoice start numbers. You can also add a brand identity by printing the invoice with inbuilt Google font support. With the WPML and PolyLang support, the plugin offers compatibility with multiple languages, even with right-to-left language scripts like Arabic.
Apart from these, Acowebs has several other WooCommerce plugins that add a fine touch to your WooCommerce store.
Follow the given steps to install additional plugins.
After purchasing the plugin, you get a downloadable zip file. Now navigate to the plugin section on the dashboard, click on add new, and then select Upload the plugin. Attach the zip file and click on the install button, then click on finish to activate the plugin. You will see a plugin license key box on the dashboard’s product addon button. The license key can be copied from the product purchase confirmation page. Add the license key and click on the activate button. On the setting page of the product add-ons, go to the license activation section to confirm whether the activation is successful.
6. Online store management
The final step in creating an online store is adding the products, payment details, shipping details, and setting up tax rates.
After the website is all set, now it is time to make your store ready for the market with products. To add products, go to the products section in the WordPress dashboard and select Add New. In the space provided, enter the product name and its description. In the product data section, select a product type from the dropdown. The options available are simple products, for individual products; grouped products, for collections of products that users can buy as a bundle; external or affiliate product, for affiliate marketing; and variable products, for products with color or size variations.
Fill in the necessary details such as product type, price, stock, and attributes. On the right menu, you get options to add product categories and product tags. You can add a product image to be featured on the page under the product image or product gallery. When adding multiple product images, uploading the products in CSV file format is better.
Under the publish section, you have options to make the product public, private, or password-protected. Either of the last two options can be selected if you do not want to publish the product immediately. You have the option to schedule the publish date and time, which is useful during exclusive product launches. Before hitting the publish button, click the preview button to see how the product page looks.
The next step is to set up the payment gateway. From the WordPress dashboard, select the WooCommerce settings. Click on the payments tab at the top and add the preferred payment gateway.
To set up tax rates, go to the WooCommerce settings and select the general tab. Click on the box near enable tax rates and calculations. A tax tab will appear, where you can configure the tax options. Also select the necessary options, such as tax display, tax calculations, etc., and click on save changes.
To set the shipping rates, navigate to the shipping tab, where you can customize the rates. Click on add shipping class and fill in the required information, such as the shipping zones, shipping class, and shipping destinations.
In the WordPress dashboard, under the WooCommerce section, there are options such as customers, store analytics, orders, system status, and a coupons tab. Click on each of these to get information regarding your eCommerce store and manage it.
Happy Selling!
Building an online store may seem strenuous at first, but with these six simple steps, you can successfully create your electronic eCommerce store in no time. After the store is created, make sure to continuously check the page speed, responsiveness, and security to identify and take necessary measures to enhance performance. Update and optimize the store regularly to improve its functionality.
Acowebs are the developers of Woocommerce Custom Product Addons which is a optimized, lightweight, and fruitful plugin that is simply the best to add extra product options using its custom form builder easily. WooCommerce custom fields also comes with drag and drop form builder, 22+ field types and custom price formula.