The WooCommerce Product Labels plugin allows you to apply badges to specific products or categories using Product Lists.
Product Lists make it easier to apply the same badge to multiple products. You can create a list by selecting individual products or by selecting products based on categories or tags. You can also exclude specific products from a selected category or tag.
Step 1: Create a Product List
To create a product list:
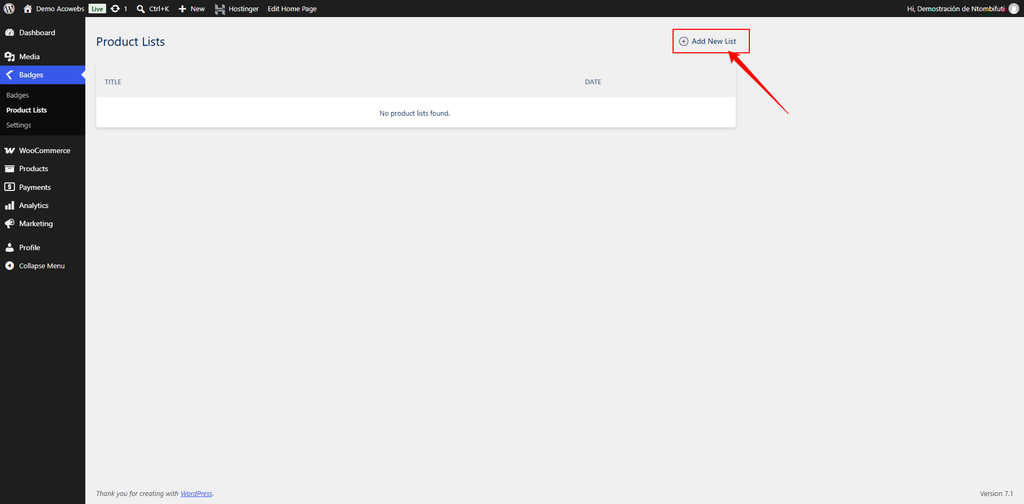
Go to Badges → Product List in your WordPress dashboard.
Click Add New List to create a new product list.
If you already have a product list, open it to edit the list.
Enter the required product list settings.
Step 2: Create a Product List with Selected Products
You can create a product list by selecting products individually.
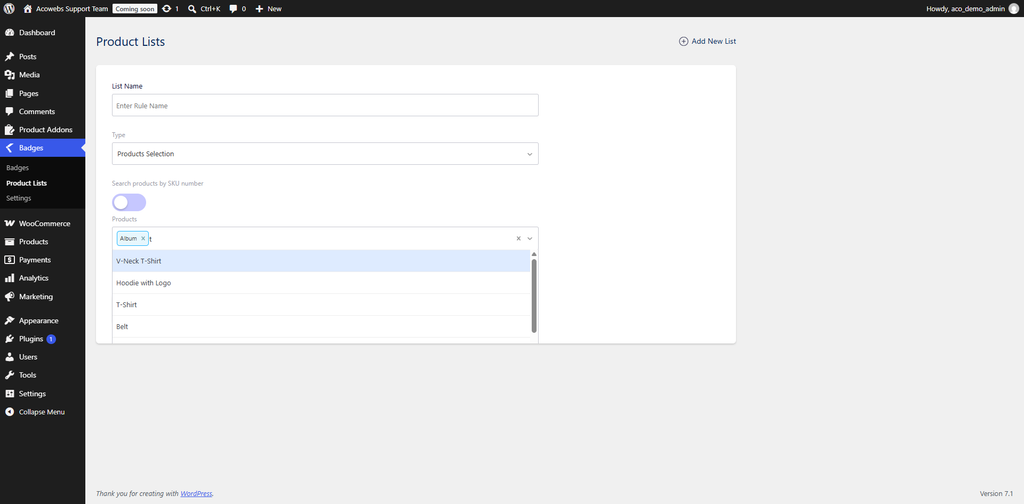
Enter a List Name to identify the product list.
Set Type to Products Selection.
In the Products field, select the products you want to add to the list.
You can add multiple products to the list as required.
Step 3: Create a Product List with Categories or Tags
You can also create a product list based on categories or tags.
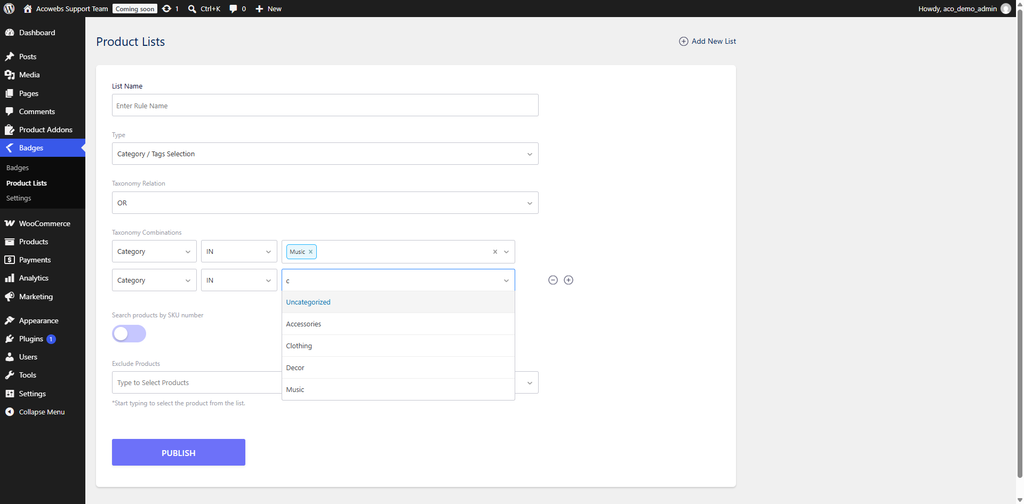
Enter a List Name.
Set Type to Category / Tags Selection.
Set the Taxonomy Relation to OR or AND.
Use OR when products matching any of the selected categories or tags should be included.
Use AND when the selected categories or tags need to be combined according to your required logic.
Configure Taxonomy Combinations by adding the required categories or tags.
If you want to exclude specific products from the selected categories or tags, add those products to the Exclude Products field.
This allows you to create a product list based on categories or tags while excluding individual products when required.
Step 4: Publish the Product List
After completing the product list configuration:
Review the list settings.
Verify that the required products, categories, or tags are selected.
Check the Exclude Products field if you have configured any exclusions.
Click Publish to save the product list.
Your product list is now ready to be assigned to a badge.
Step 5: Assign the Product List to a Badge
Once the product list has been created, you can assign it to a badge.
Go to Badges in your WordPress dashboard.
Click Add New Badge to create a new badge, or open an existing badge.
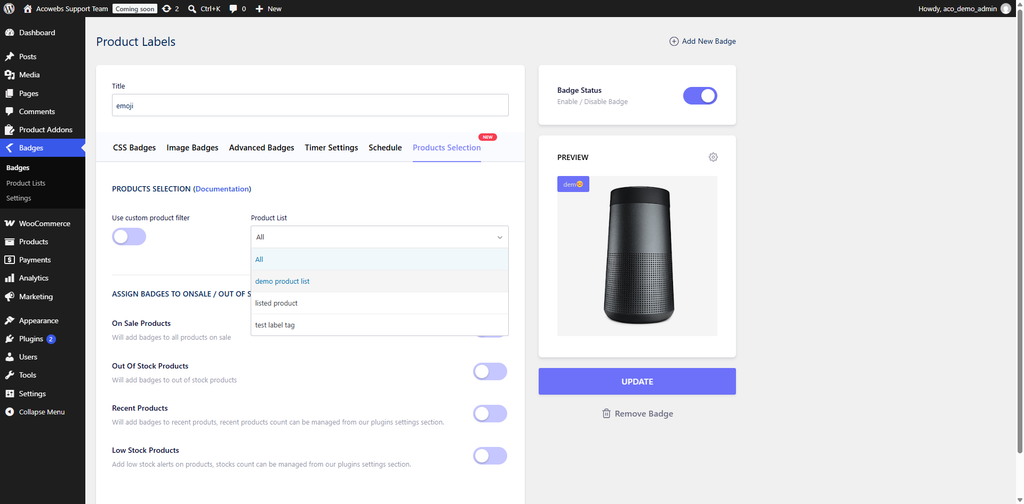
On the badge edit page, click the Products Selection tab.
Locate the Product List dropdown field.
Select the product list you created.
The badge will now be associated with the products included in the selected product list.
Step 6: Publish the Badge
After assigning the product list to the badge:
Review the badge configuration.
Verify that the correct Product List is selected.
Click Publish to publish the badge.
The badge will be displayed on the products included in the selected product list.
If you need any assistance or have questions, you can contact our support team through either of the following options:




















 Login
Login
 Cart
Cart BUY THIS PLUGIN