
You can automatically display a badge on products that are currently on sale using the WooCommerce Product Labels plugin.
First, create a new badge by following our guide:
How Do I Create My First Product Badge in WooCommerce?
Once the badge has been created and configured, proceed to the Products Selection tab.
After configuring the badge appearance:
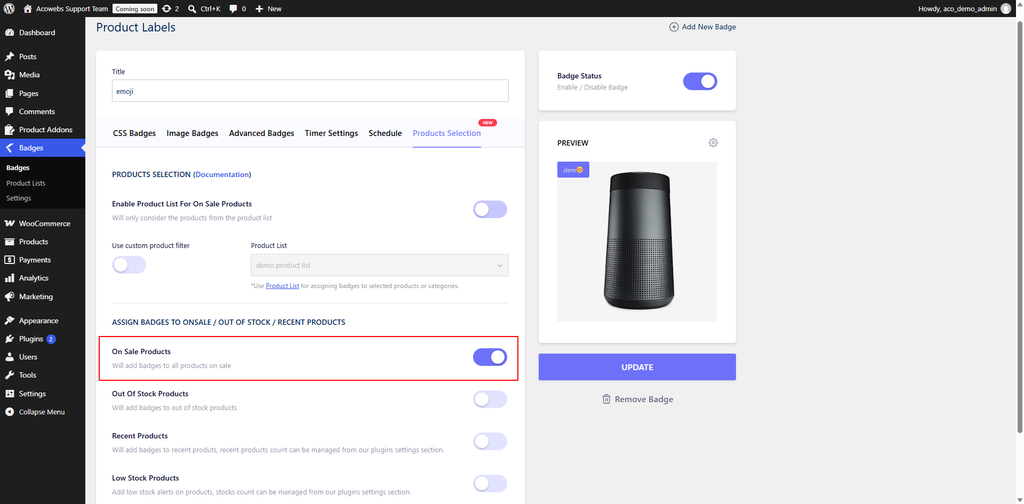
If you want to display the badge only on sale products that belong to a specific product list:
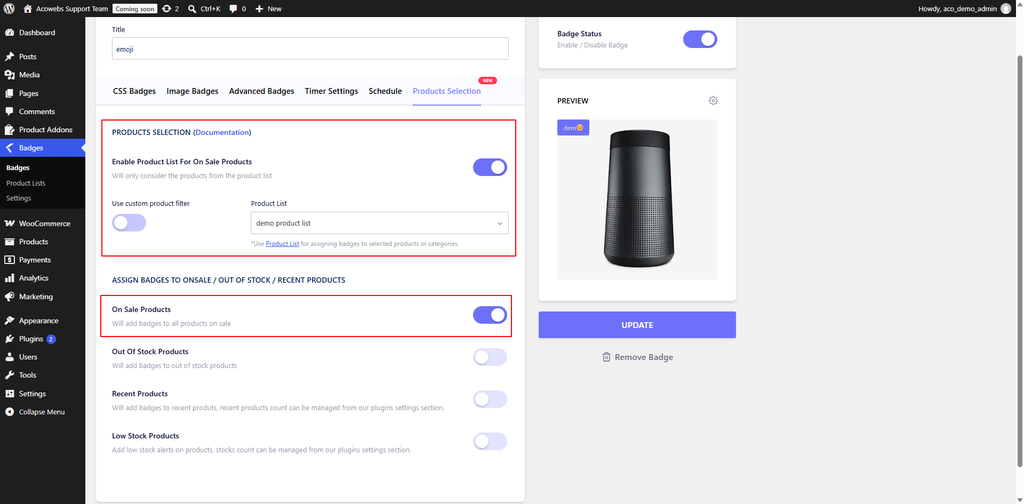
Once you have finished configuring the badge:
The badge will now be displayed automatically on the applicable sale products.
If you need any assistance or have questions, you can contact our support team through either of the following options:
If you have questions about our plugin(s), are experiencing issues with any of our plugin





















 Login
Login
 Cart
Cart BUY THIS PLUGIN