Login
Login
 Cart
Cart
As a business owner, it can be challenging to ensure consistent revenue streams, especially with unpredictable sales cycles. But what if there was a way to guarantee a steady income stream? Customers want convenience and reliability, which makes subscription services a great way to meet their needs. That’s where WooCommerce Subscription & Recurring Payments comes in.
With the ability to set up automatic recurring payments, you can offer customers the convenience of automatically recurring payments while you enjoy the stability of predictable revenue. This comprehensive guide will show you how to add subscriptions to your WooCommerce store and maximize your revenue potential. We’ll walk you through all the steps, from setting up the payment system to managing customer subscriptions.
What is WooCommerce Subscription & Recurring Payment?
WooCommerce Subscription & Recurring Payments is a payment feature developed that allows you to sell subscription-based and recurring products and services in your WooCommerce store.
Let’s say you sell a product or offer a service that customers regularly use, such as a monthly box of snacks or a t-shirt-of-the-month club. With this feature, instead of manually processing payments for each sale, you can set up a recurring payment system that automatically charges customers on the same schedule every time.
Why Use Subscription & Recurring Payments in Your WooCommerce Store?
Using subscription and recurring payments in your WooCommerce store can be a great asset to your business. Here are a few reasons why:
Maximize Revenue Potential
Giving your customers a choice to pay for your product or service via subscription and recurring payments is an excellent way to ensure a steady, dependable revenue stream for your business. This is especially beneficial if you provide items or services that your customers require regularly.
Build Customer Loyalty and Retention
Customers who sign up for a subscription or recurring payment plan are more likely to develop an ongoing relationship with your product or service. The result is increased loyalty and continued patronage over time.
Reduce Customer Churn
Customer churn is the rate at which customers stop doing business with a company. A high customer churn rate can be a problem, as customers are no longer engaging with the business and may be choosing to do business with a competitor. However, with subscription and recurring payments, you provide a convenient and hassle-free way for customers to continue using your product or service regularly, making them less likely to churn.
Enhance Customer Convenience
You’re making your customers’ life easier by offering subscription and recurring payments. Instead of remembering to process payments manually, they are assured that their payments will be taken care of automatically.
Giving your customers a choice to pay for your product or service via subscription and recurring payments is an excellent way to ensure a steady, dependable revenue stream for your business. This is especially beneficial if you provide items or services that your customers require regularly. Implementing effective sales tools can further optimize your revenue streams and ensure sustained business growth over time.
Better Cash Flow Management
With subscription and recurring payments, you have a more predictable source of income each month or year. You can easily forecast your earnings and expenses, making budgeting and financial planning much more efficient. This can help you to better manage your cash flow and plan for future growth.
How to Enable Subscription & Recurring Payments on Your WooCommerce Store
Activating recurring payments on your WooCommerce store is surprisingly simple with the Subscriptions & Recurring Payments for WooCommerce plugin. Let us show you how it works!
Features of the plugin
The Subscription and Recurring payments plugin stand out from similar plugins due to its feature-rich capabilities. Here are some of the highlights:
- You can easily convert any product to a subscription-based product, regardless of if it’s variable, simple, or grouped.
- It offers multiple billing schedules that you can tailor to meet your store’s needs.
- The PayPal payment gateway is integrated, making automatic recurring payments easier.
- The plugin provides a hook and filter for applying other payment gateways that allow automatic recurring payments.
- Customers can manually renew their subscriptions using any WooCommerce payment gateway and get an automatic email receipt and invoicing.
- The plugin can automatically rebill failed subscription payments, guaranteeing you don’t miss out on revenue due to payment processing glitches.
- As an admin, you can set up the plugin to cancel subscriptions automatically on failed payment attempts.
- Due to the plugin’s flexible subscription management system, subscribers can easily manage their subscription plans, including upgrading or downgrading.
- It ensures that you and your customers are informed about successful subscription payment processing through integrated automatic emails and renewal notifications, eliminating any surprises.
- By providing detailed reports, the plugin enables you to monitor recurring revenue and track the number of active subscribers easily.
It’s amazing how packed the plugin is with features, right? You can get all these features at no cost in the Subscription and Recurring Payments for WooCommerce free plugin.
That’s not all. If you need more advanced functionalities that offer you more control over customizing your subscriptions and recurring payments, all you need to do is upgrade to the plugin’s pro version.
For as little as $29, the WooCommerce Subscription & Recurring Payments pro version offers you these advanced features:
- Both free and paid trial is supported.
- Stripe and PayPal payment gateways are integrated.
- Access to subscription coupons. Customers can use a vast selection of coupons for various subscription products.
- You can easily customize all the labels, buttons, and message text from the backend according to your preferences.
- By enabling the “one-time shipping” option, your users can pay shipping fees once during their subscription period.
- With the subscription limit feature, you can limit the number of subscriptions a single subscriber can have, whether single or multiple.
- You can set the start and end time for subscription products orders
- You can send multiple payment reminder messages, so you’ll not have to worry about customers forgetting their obligations.
- There are numerous hooks and filters available for developers to work with.
- It supports Rest API.
- It’s compatible with WPML.
- Acowebs plugin assistance is available.
The best part is there’s even more, with exciting new features in the works! Let’s take a look at the plugin in action. In the next section, we’ll demonstrate how it works.
Getting Started with WooCommerce Subscription & Recurring Payments
Let’s go through the steps you need to follow to get started with WooCommerce Subscription & Recurring Payments.
Step 1: Installing the Plugin
As mentioned earlier, the WooCommerce Subscription & Recurring Payments plugin has a free and premium version. Below, we’ll show you how to install and activate both versions on your WooCommerce store.
Installing the Free Plugin
There are two methods to choose from:
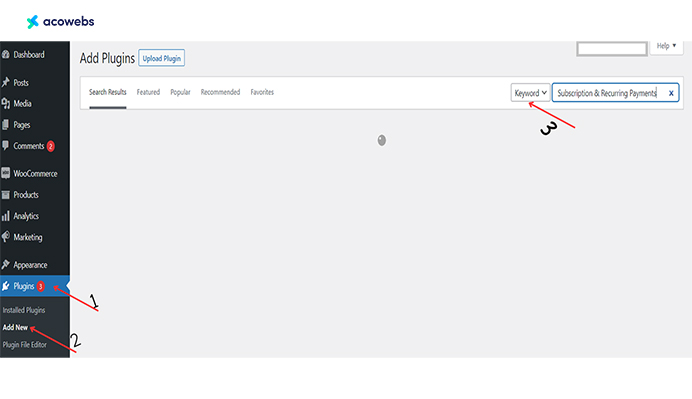
A. Install the plugin from your WordPress dashboard
Log into your WordPress store and go to Plugins > Add New. Search for Subscriptions & Recurring Payments.
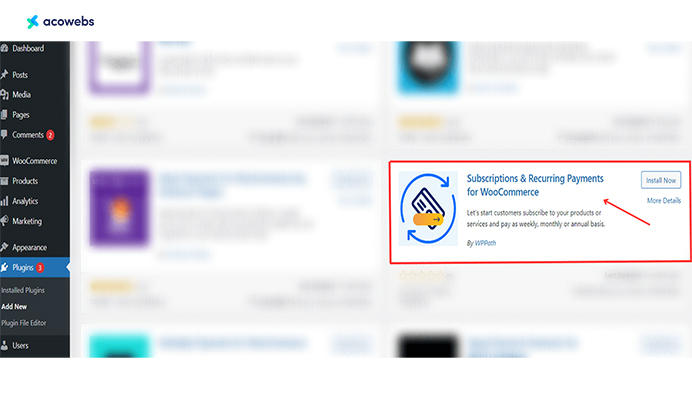
Once you find the one by WPPath, click Install Now.
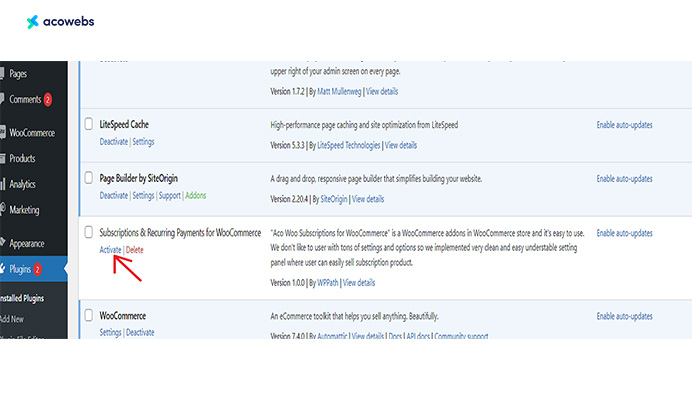
After installing the plugin, go to your list of installed plugins and activate it.
B. Download and upload the ZIP file
Download the Subscriptions & Recurring Payments Plugin from the WordPress.org plugin repository.
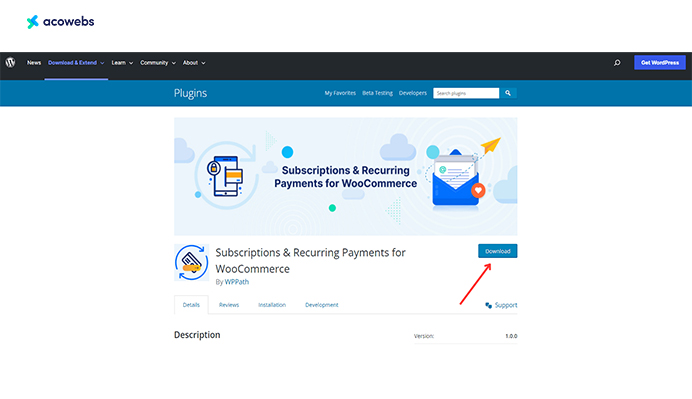
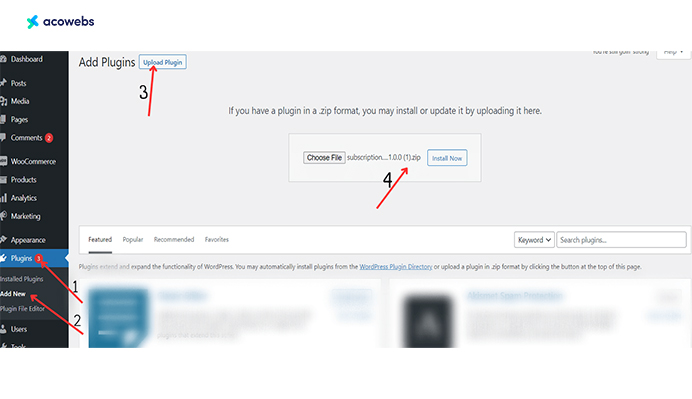
Once you’ve downloaded the ZIP file, log into your WordPress store and go to Plugins > Add New > Upload Plugin.
Select the ZIP file from your computer and click Install Now. Once the plugin is installed, you’ll need to activate it by clicking Activate.
Installing the Premium Plugin
If you’d like to take advantage of the advanced features included in the premium version of this plugin, purchase and install it following these simple steps! It’s a small price to pay for all that extra power.
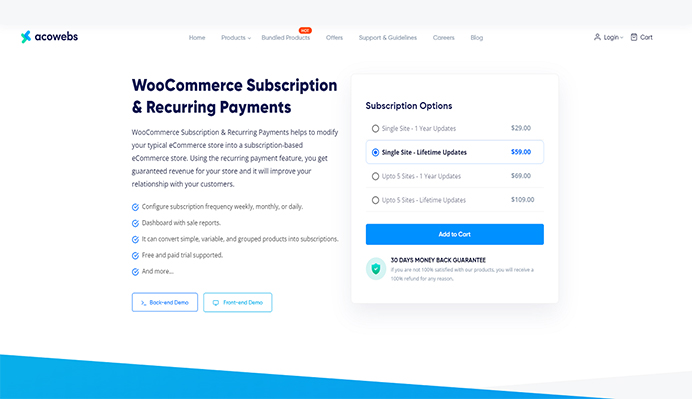
- Visit the WooCommerce Subscription & Recurring Payments page on the Acowebs website.
- Select the plan that suits your needs, and click “Add to Cart. (If you are looking to get the best value for your money, we recommend selecting the 5-site lifetime update option.
- Click the “Place your order” button to add the plugin to your cart.
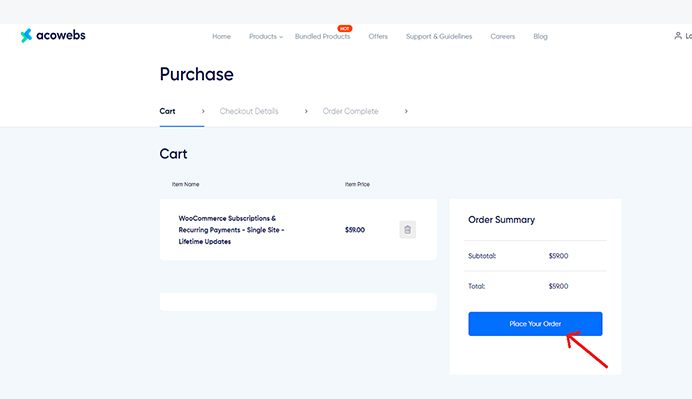
- Fill out your checkout details and select your preferred payment method.
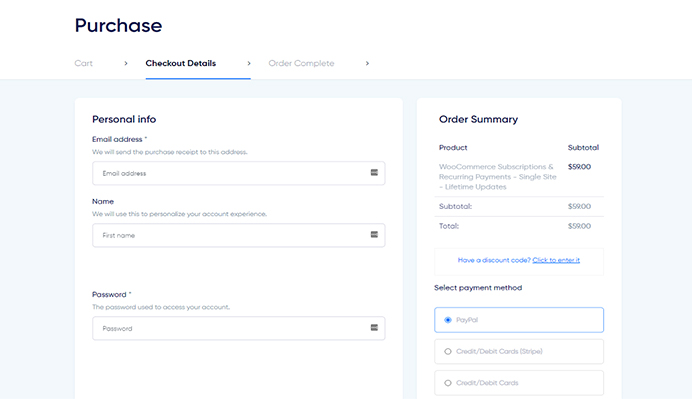
- After purchasing, you’ll receive a prompt to download the plugin’s zip file. Click it to complete the download!
- Once you have downloaded the file, return to your WordPress admin dashboard. Go to Plugins > Add New.

- Click on the Upload Plugin button.
- Locate and select the plugin file from your device or computer, then upload it.
Go to Plugins > Installed Plugins and activate the plugin. Now you can get started using the plugin’s premium version on your website!
After installing the Subscription & Recurring Payments plugin, you will notice a new option titled “Woo Subscriptions” on your WordPress Admin Dashboard Sidebar. Clicking on Woo Subscriptions. You’ll be taken to the subscriptions list page. This is where your subscription orders appear. Since we are just setting up, this list will be empty.
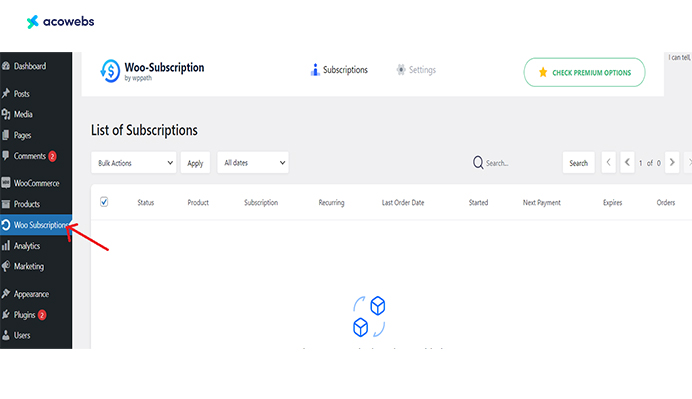
Next to the subscriptions tab is the settings tab. Click on the settings tab to get to the settings page. On this page, you’ll see four tabs. To effectively customize subscriptions for your website, let’s walk through these settings. We’ll start with the general settings.
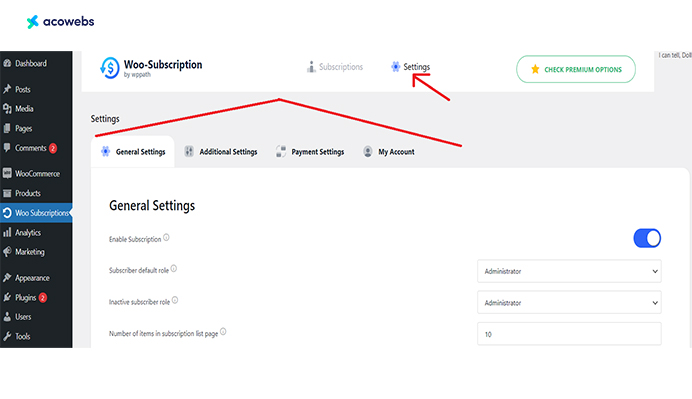
Step 2: Configure the General Settings
The General Settings tab is where you’ll find some of the most important configuration options in the General Settings tab.
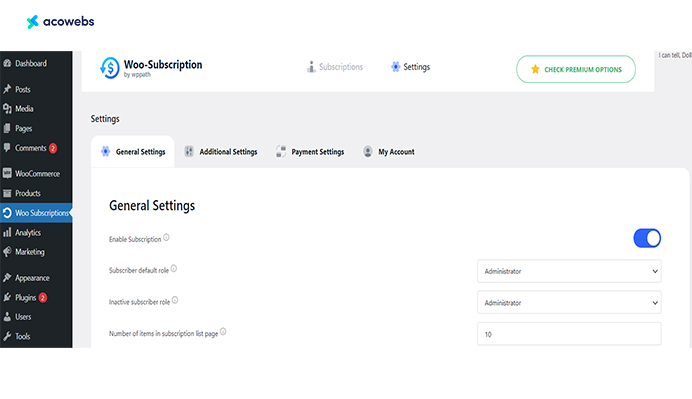
These are the options you can set up here:
- Enable Subscription: With the toggle switch, you can turn the Subscription feature on or off.
- Subscriber default role: This option allows you to select which user role should be assigned by default to users who become subscribers.
- Inactive subscriber role: Here, you can select the user role for users who are no longer active subscribers.
- Number of items on the subscription list page: This option allows you to set the number of items displayed on one page in your subscription list page, making it much easier to view and manage.
- Add to Cart Label: This option is only available in the pro version of the plugin. It lets you change the text on the add to cart button for subscription products.
- Place Order Label: It allows you to change the text on the place order button for subscription products.
- One-time Shipping: If you turn this option on, your customer can select the one-time shipping option during checkout. So, if a customer signs up for a recurring subscription that includes shipping costs, they will only be charged for shipping on the first payment, and subsequent payments will not include shipping charges. If you want this to apply to only some products, you can enable it on a product-by-product basis in the product editor.
- Charge Shipping Cost Only During Renewals of Subscriptions When Subtotal is 0: When you turn this option on, your customers will only be charged for shipping when their subscription is renewed. The subtotal of their order is 0. This feature is helpful for free trials or introductory offers, where shipping charges may not be practical on the initial order but are necessary for subsequent renewals.
- Apply Coupon Code Discount in Renewal order: This is a pro feature. If enabled, the discount applied to a subscription order will be applied to all subsequent renewals. You can use this feature to incentivise customers to continue their subscriptions.
Click the “Save Changes” button to apply them. If any of the changes you’ve made is causing issues, or if you simply want to start fresh, you can revert your settings to the original state with the “Reset Defaults” button.
Step 3: Configure the Additional Settings
The Additional Settings tab allows you to customize your subscription setup further.
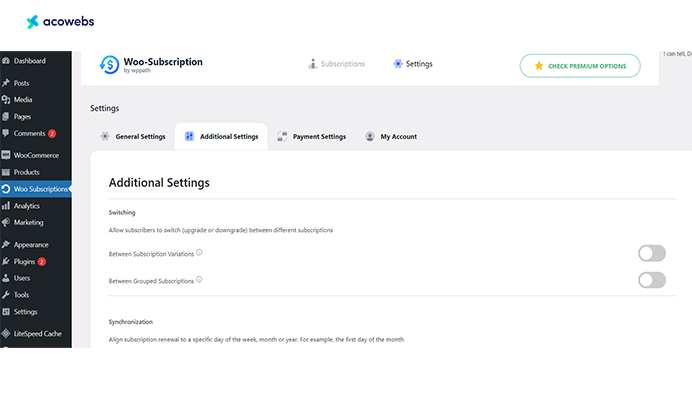
These are the additional functions you can set up here:
- You can enable Subscription Upgrades/Downgrades. In the “Switching” section, you can allow customers to upgrade or downgrade their subscription plans.
- There’s a “Switching between subscription variations” option. If you enable this option, your customers can switch between different options or variations within a subscription, giving them more flexibility.
- You can also enable or disable switching between grouped subscriptions. This means your customers can switch between different subscription groups without cancelling and resubscribing.
- You can turn on synchronized renewal to ensure that subscriptions are renewed on the same day of the week, month or year. For instance, you could set renewal for every month’s first day.
- If you want users to be able to order subscription products and non-subscription products together, you can enable the “Mixed Checkout” option.
- If you want your customers to be able to start the checkout process without having to pay anything, enable the $0 Initial Checkout option.
- You can give the designated shop manager or administrator the ability to access and adjust the store’s subscription settings by enabling the “Shop manager can manage the subscription settings” option.
- You can suspend a customer’s subscription account.
- You can set the highest number of active subscriptions that a customer can have at any given time in the Active Subscription Limit option.
- In the Total subscription allowed option, you can limit the number of subscriptions a customer can purchase over a specified time.
- You can set the maximum number of subscription products customers can add to their cart during a single transaction.
As usual, save your changes by clicking the “Save Changes” button.
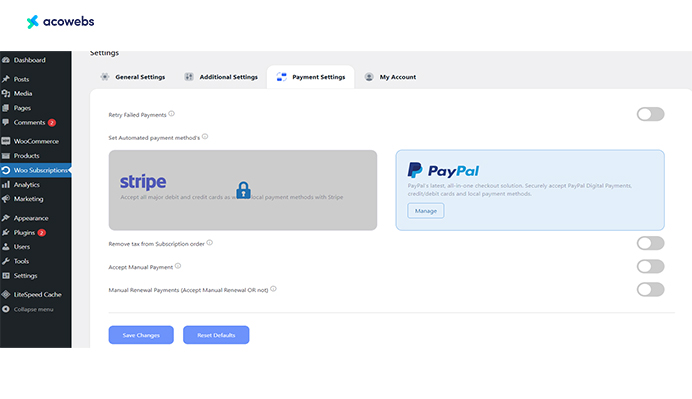
Step 4: Configure the Payment Settings
The Payment Settings tab provides a few options for configuring the payment methods for your subscription setup. The payment gateways available are Stripe and Paypal.
Here are the options you can configure:
- Retry Failed Payments: The plugin will automatically attempt to process failed subscription payments again if enabled.
- Remove Tax from Subscription Order: Taxes will not be applied to subscription orders if enabled.
- Accept Manual Payment: If you enable this option, customers can pay for their subscriptions manually.
- Manual Renewal Payments (Accept Manual Renewal OR not): You can allow renewing their subscriptions manually.
Click on “Save Changes” to save your settings.
Step 5: Configure the “My Account” Settings
The options in this tab include the following:
- Allow Subscribers to push their subscriptions: If enabled, customers can postpone their subscriptions to later.
- Allow Subscribers to Resubscribe: Customers can renew their expired or cancelled subscriptions.
- Allow Customers to cancel their subscriptions: Customers can end their subscriptions if enabled.
- Accept Early Renewal Payment: You can allow customers to renew their subscriptions before expiration.
- Load billing and shipping address in the subscription details: If checked, customers can view their billing and shipping addresses directly on their subscription details page.
- Auto-Renewal Toggle (Display the auto-renewal toggle): You can decide whether or not to display the auto-renewal toggle.
Click on Save Changes, and you’re all set!

Watch the Subscription & Recurring Payments Plugin in Full Swing
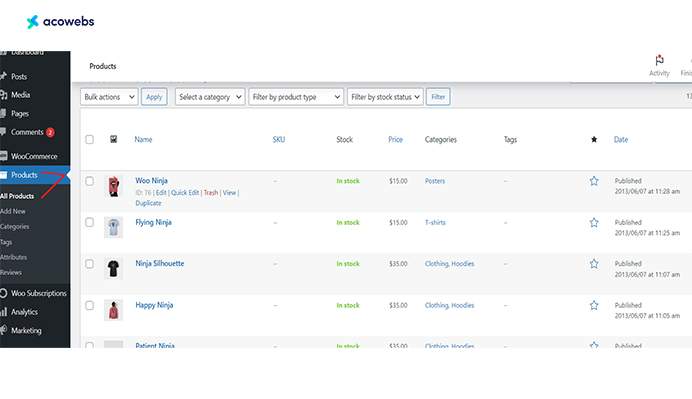
Now let’s try out your newly configured plugin. Go to Products > All Products to add a subscription option to an existing item. Alternatively, you can create a product from scratch.
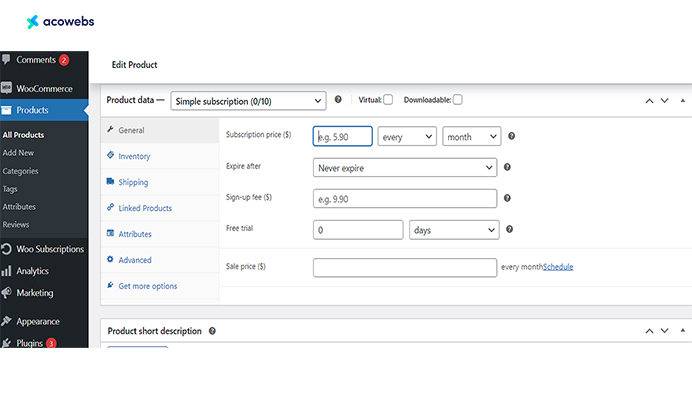
On the product page, scroll down to see the Product data box. Click on its dropdown menu where you should now see a Simple subscription type since WooCommerce Subscription & Recurring Payments has been installed – select that option!
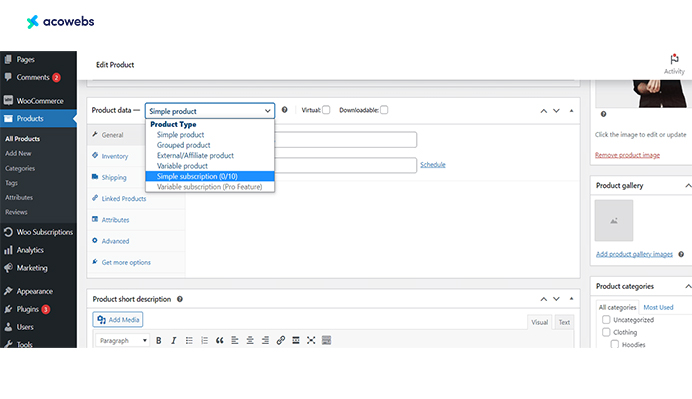
After selecting the Simple Subscription product, it reveals customizable fields such as subscription price, sign-up fee, free trial period, sale price, and subscription length. Fill out these fields and update the product.
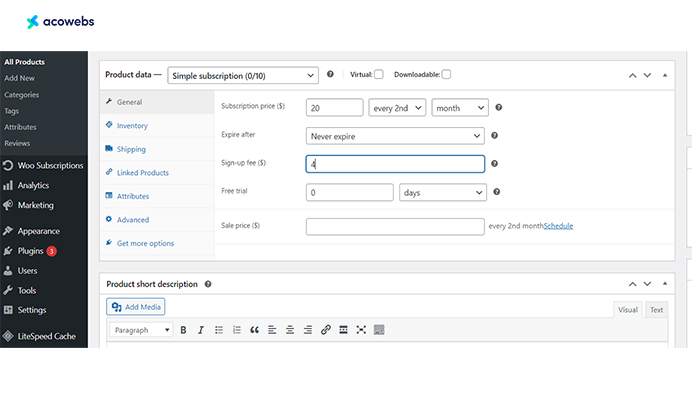
For example, let’s set the Subscription Price at $20 every two months, no expiration date and a $4 signup fee.
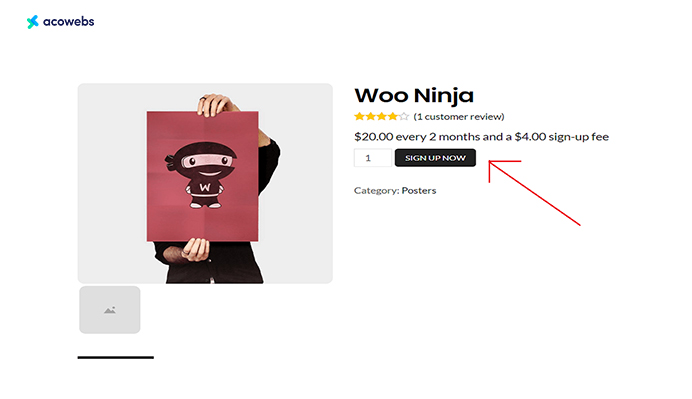
Now, go to the product’s page, and you should notice a Sign Up Now button along with all of the other product details you entered on the product page.
BONUS: 4 Strategies for Maximizing Revenue Potential with WooCommerce Subscription & Recurring Payments
- Offering Promotions and Discounts: Offering promotions and discounts are a fantastic way to incentivise customers to subscribe to your products or services. For example, you can offer a discount on the first subscription payment or a percentage off for a number of subscription renewals. This will help you increase conversions and encourage customer loyalty.
- Implementing Upsells and Cross-sells: Upselling and cross-selling involve offering customers additional products or services related to their subscriptions. For example, if a customer subscribes to a monthly beauty box, you can offer an upgraded version with additional products at a higher price. You can increase your average order value and overall revenue with this technique.
- Analyzing Sales Data and Optimizing Pricing Strategies: Analyzing sales data can help you understand customer behaviour and make informed pricing decisions. When you monitor subscription sign-ups, renewals, and cancellations, you can identify trends and adjust the pricing accordingly. For example, you can experiment with different subscription plans or pricing tiers to see what resonates best with your customers.
- Personalizing the Subscription Experience: Use customer data to personalize the subscription experience, such as recommending related products and offering personalized promotions and discounts.
Final Takeaway
Integrating WooCommerce Subscription & Recurring Payments into your store is a game-changer that can significantly boost your revenue potential. With the numerous features and flexibility of the plugin, you can easily customize your subscription plans, manage subscriptions effectively, and provide an excellent customer experience. And by implementing the strategies we’ve discussed, you’ll be able to attract more customers, retain existing ones, and optimize your pricing strategies. Take advantage of the opportunity to boost your revenue potential. Get started with this plugin today!
Acowebs are the developers of the WooCommerce Subscription & Recurring Payments that modifies your typical eCommerce store into a subscription-based eCommerce store. Using the recurring payment feature, you get guaranteed revenue for your store, and it will improve your relationship with your customers. We also have developed applications like Email Customizer and Designer For WooCommerce that helps you build and customize WooCommerce emails with a drag-and-drop user interface.