- Woocommerce
- Shopify Apps
- WordPress
1. After activating Variation Swatches for WooCommerce plugin, go to the menu Variation Swatches in WordPress left menu bar, you can see all the attributes.
2. Click on any attribute and you will be able to see the settings. You can select the attribute style, type ect from here.
For example, here is an attribute Color.
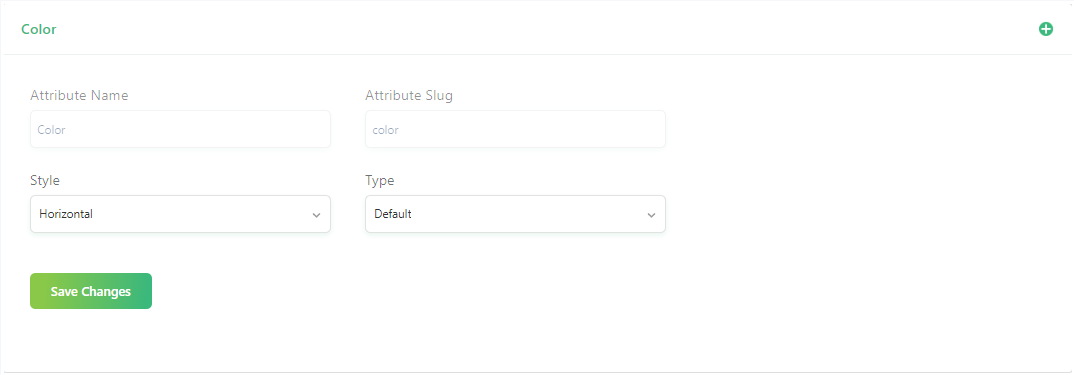
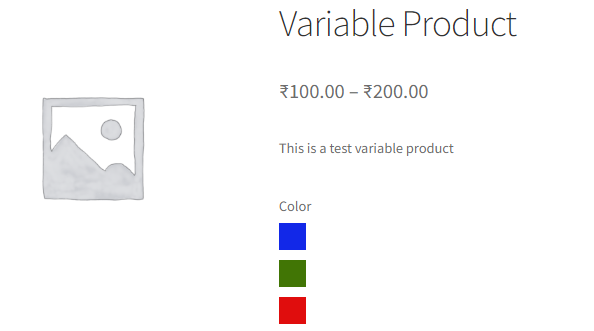
3. You can Style it as Horizontal or vertical.
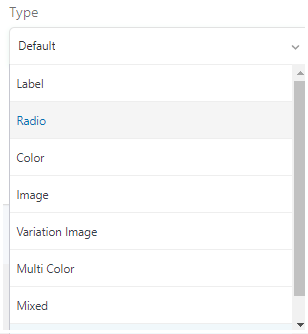
4. You can see different Types as below.
Label : Shows the variation labels only.
Radio : Shows the variation as a radio button with a name.
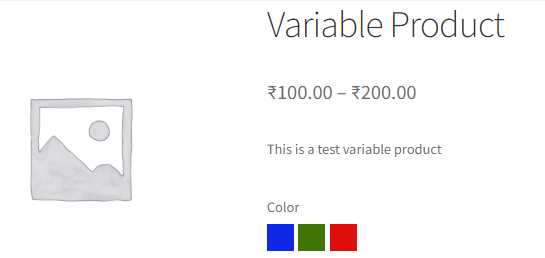
Color : Shown variation colors only. You can pick the color you want.
Image : You can add images here. That image will be shown as the variation.
Variation Image : Shows variation images.
Multi Color : Same as color, but you can choose two colors.
Mixed : Shows images, labels, and colors mixed, as your need.
Default : Shows variations as a dropdown.
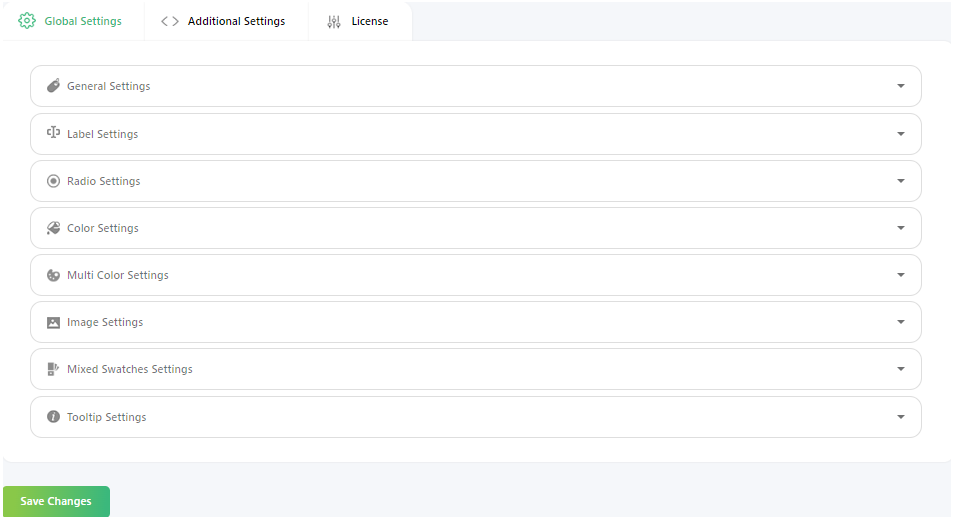
5. Now go to Dashboard-> Variation Swatches-> Settings. There you can see Global Settings, Additional Settings, and License.
You can see the different settings in Global settings.
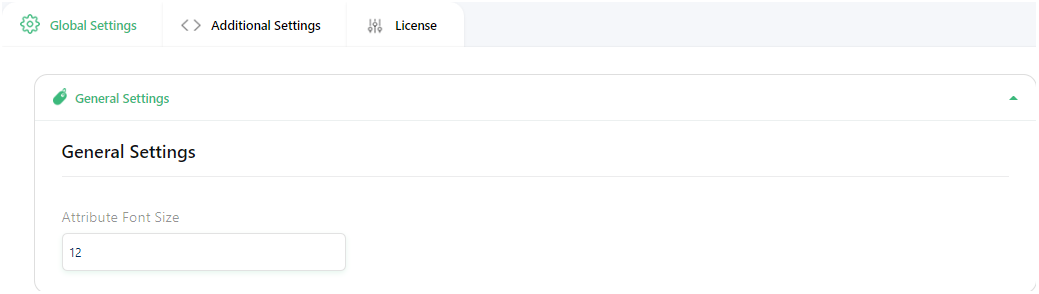
In Global Settings-> General Settings, you can change the Attribute Font Size.
The remaining settings are based on the Type of Attribute you chose in the Variation Swatches.
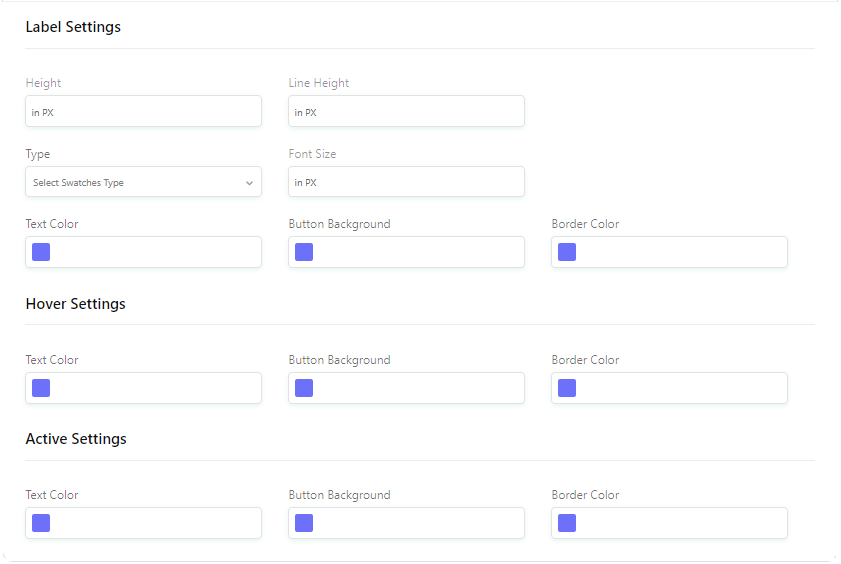
5.1 If you have selected the Type as Label, then you can change the label height, line height, type, font size, text color, background color, and border color followed by the Hover and Active settings in the Label Settings.
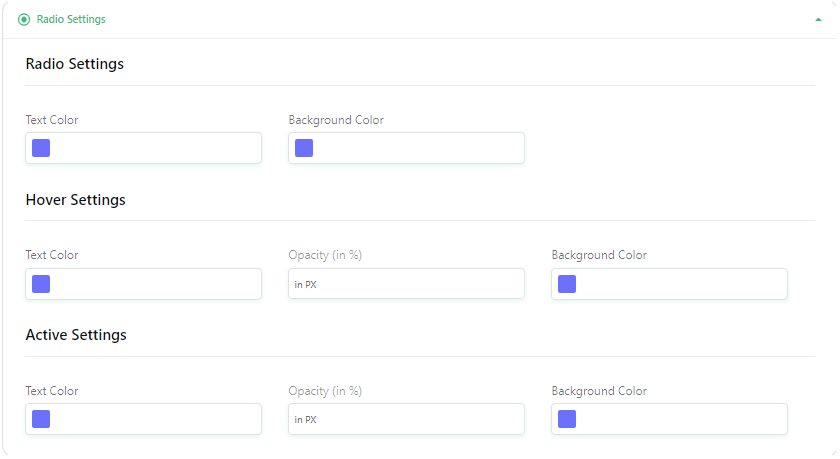
5.2 If you have selected the Type as Radio, you can change the text color and background color followed by the Hover and Active settings.
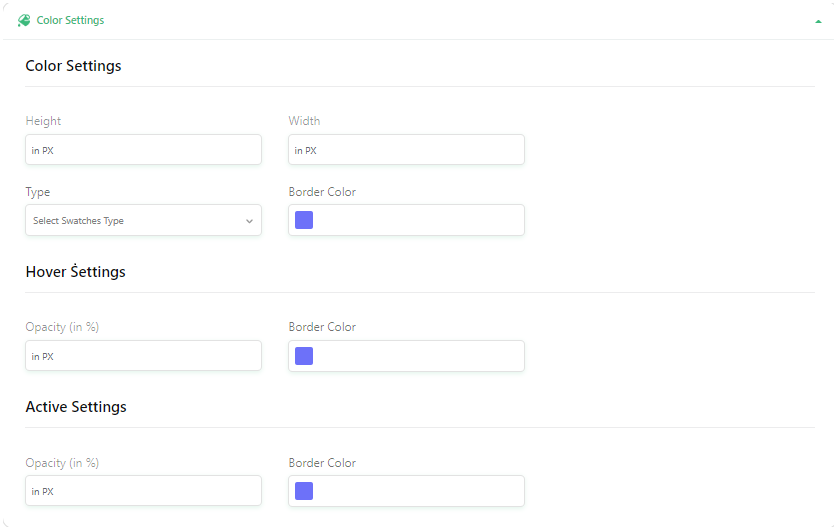
5.3 If you have selected the Type as Color, you can change the height, width, type, and Border color followed by the Hover and Active settings.
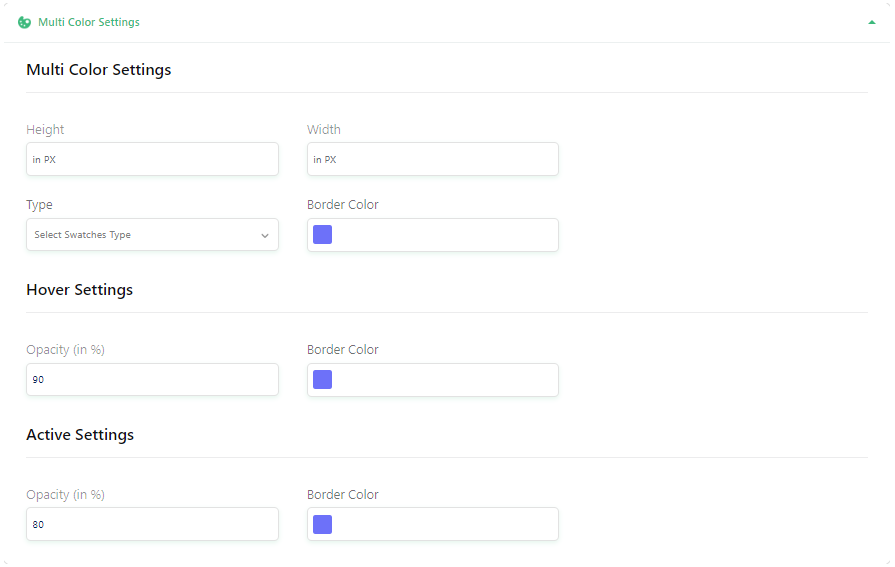
5.4 If you have selected the Type as Multi Color, you can change the Height, Width Type, and Border color followed by the Hover and Active settings.
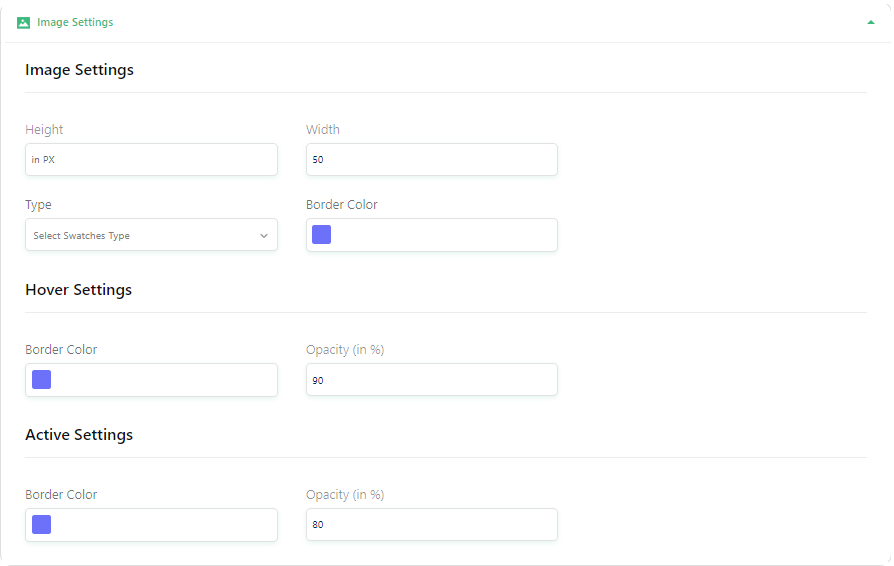
5.5 If you have selected the Type as Image, you can change the Height, Width Type, and Border color followed by the Hover and Active settings.
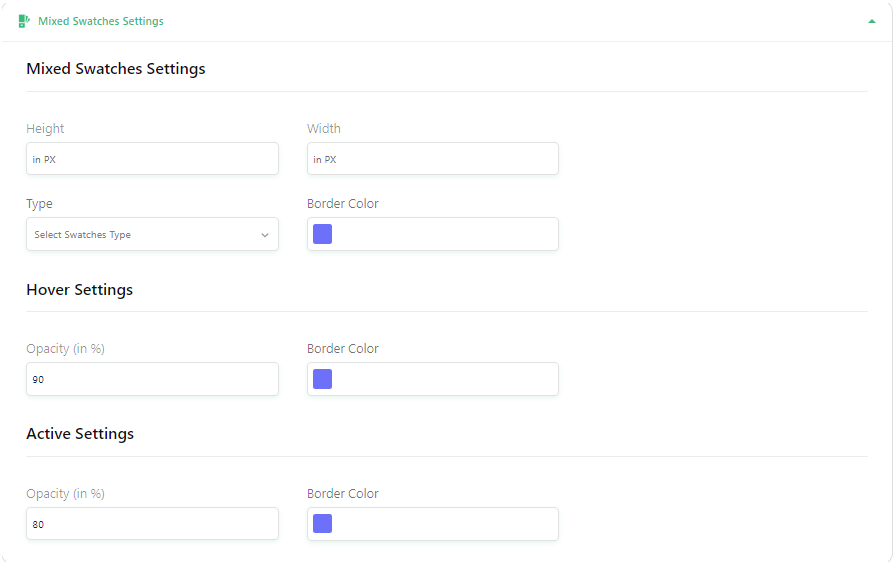
5.6 If you have selected the Type as Mixed Swatches, you can change the Height, Width Type, and Border color followed by the Hover and Active settings.
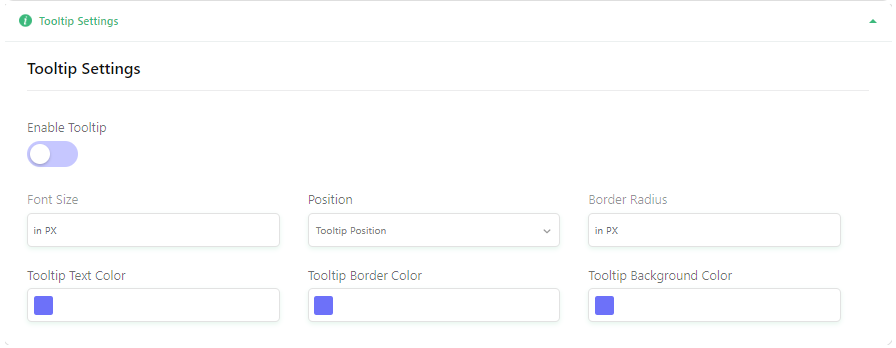
5.7 Finally, there is a Tooltip settings. There you can enable or disable it. Then you can change the font size, position, border radius, text color, border color, and background color.
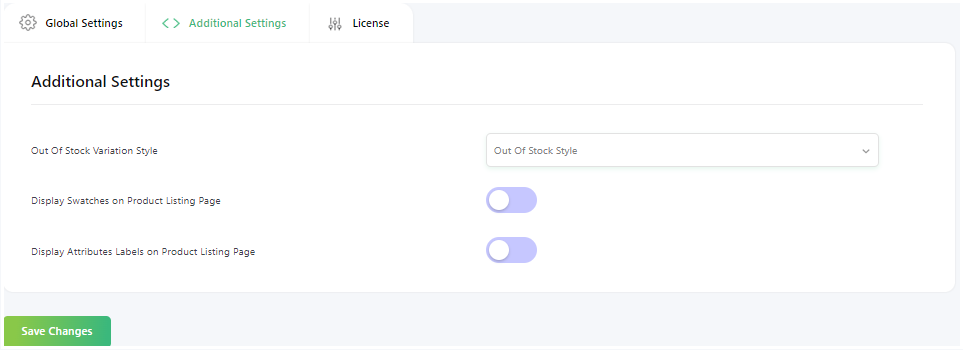
6. In Additional Settings, you can choose the Out Of Stock Variation Style as Cross, Blur, or Hide.
Then you can enable/disable Display Swatches on Product Listing Page and Display Attributes Labels on Product Listing Page.
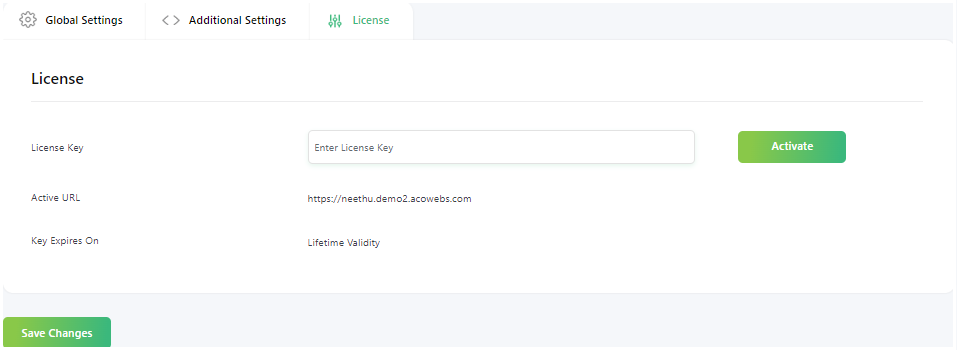
7. The final settings is for Licence. You can see your license key, Active URL, and Licence key expiration date.
If you are new and don’t know much about how to create a variable product, you can refer to the link https://woocommerce.com/document/variable-product/
If you have questions about our plugin(s), are experiencing issues with any of our plugin


 Login
Login
 Cart
Cart BUY THIS PLUGIN