- Woocommerce
- Shopify Apps
- WordPress
This detailed guide will walk you through the entire process of integrating Cloudflare R2 with Offload Media. We will cover how to create and configure an R2 bucket, generate API tokens, and adjust the plugin’s settings.
Follow these steps to successfully set up Cloudflare R2 with your offload media plugin.
Log in to your Cloudflare account and navigate to your Cloudflare Dashboard.
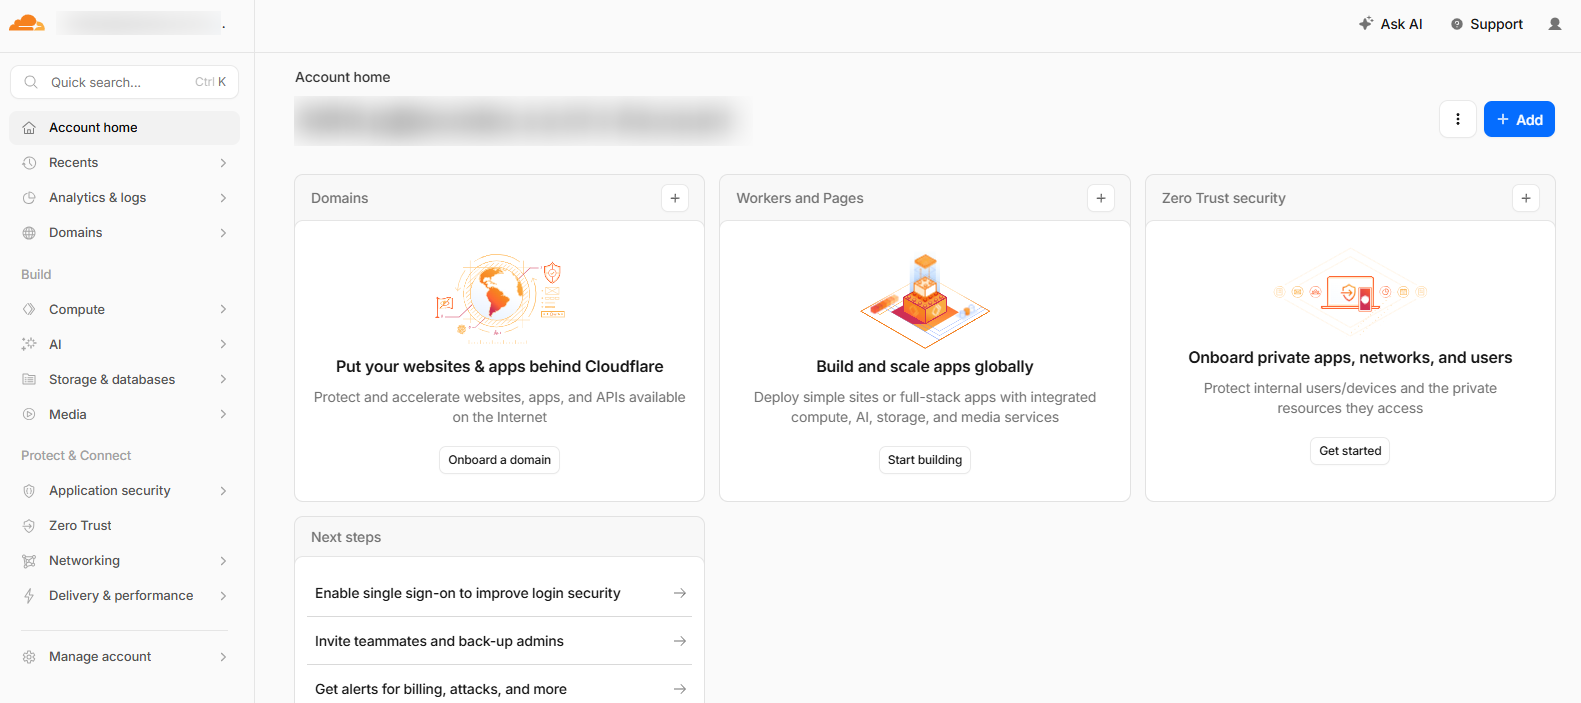
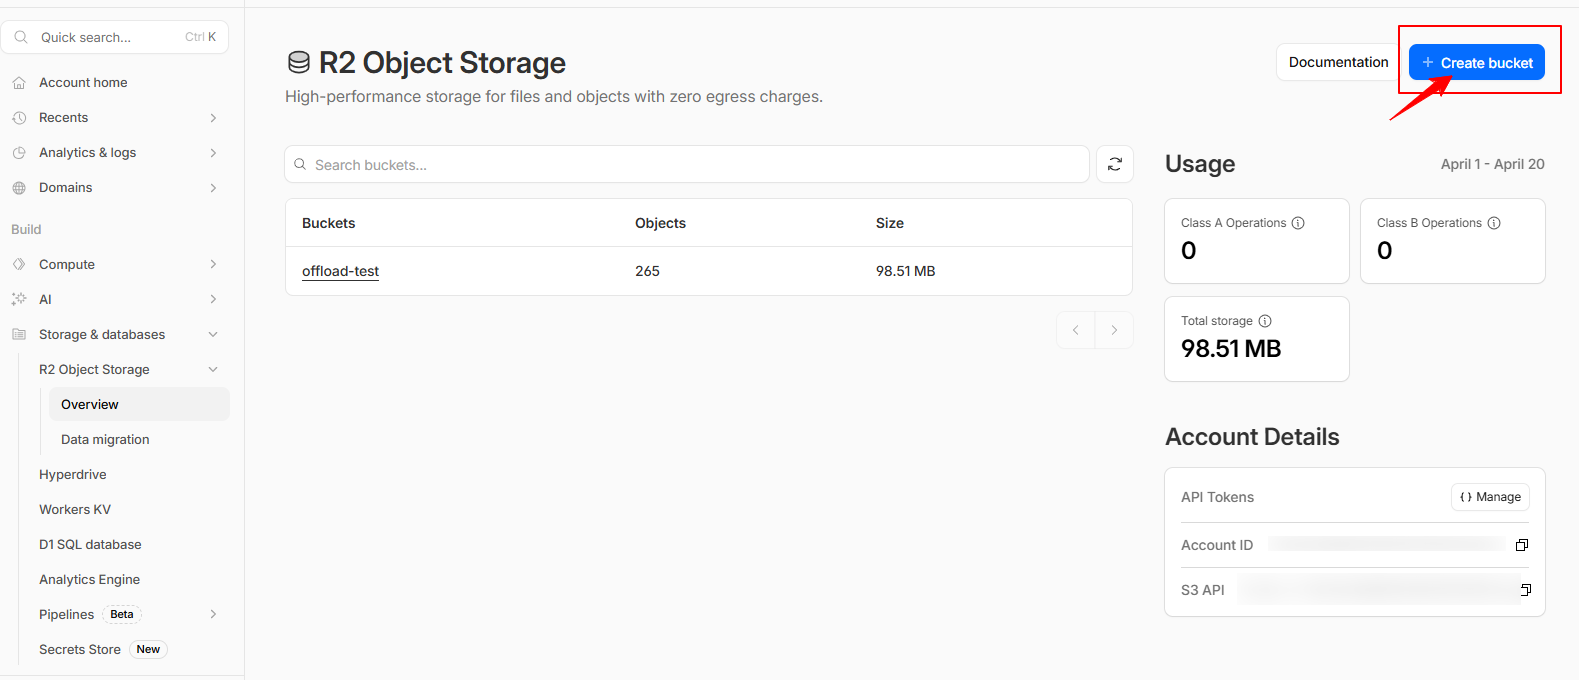
In the Cloudflare dashboard, use the left sidebar to go to Storage & Databases >> R2 Object Storage, then open the Overview section.
From there, click on the “ Create Bucket “ button to begin the process of creating your bucket.
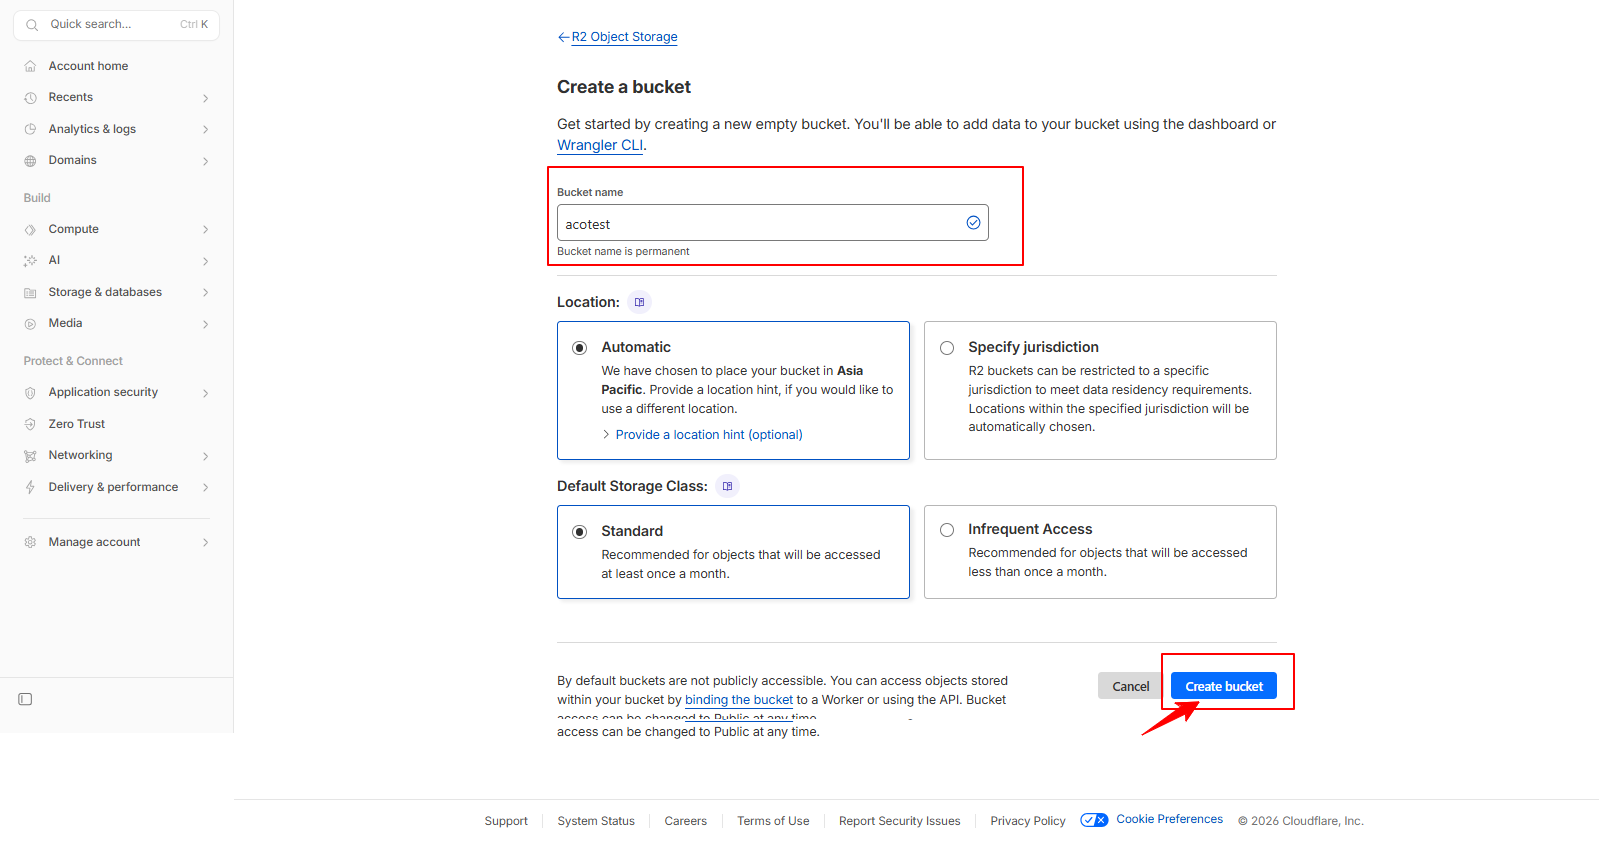
Enter a unique and identifiable name for your bucket.
Keep the remaining options as default without making any changes, and click “ Create Bucket “ to finalize the process.
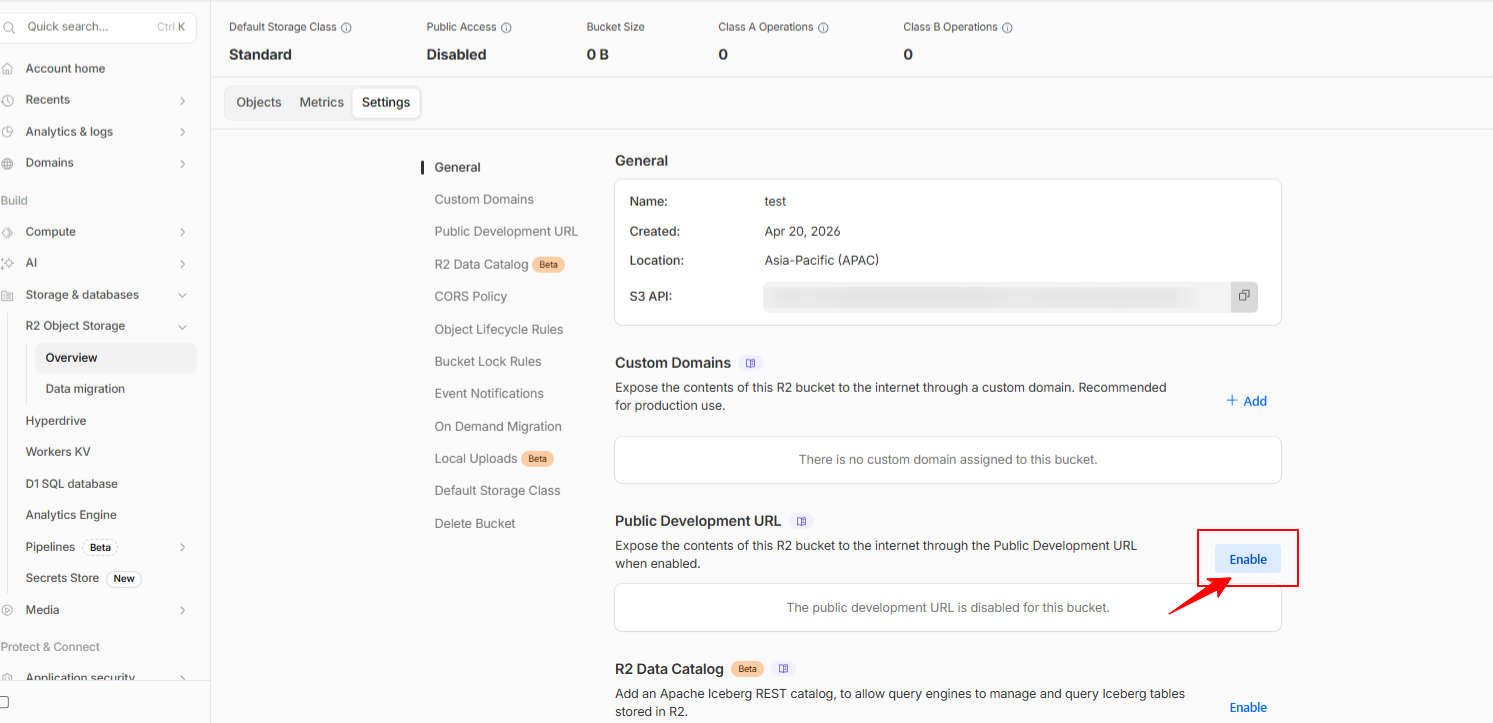
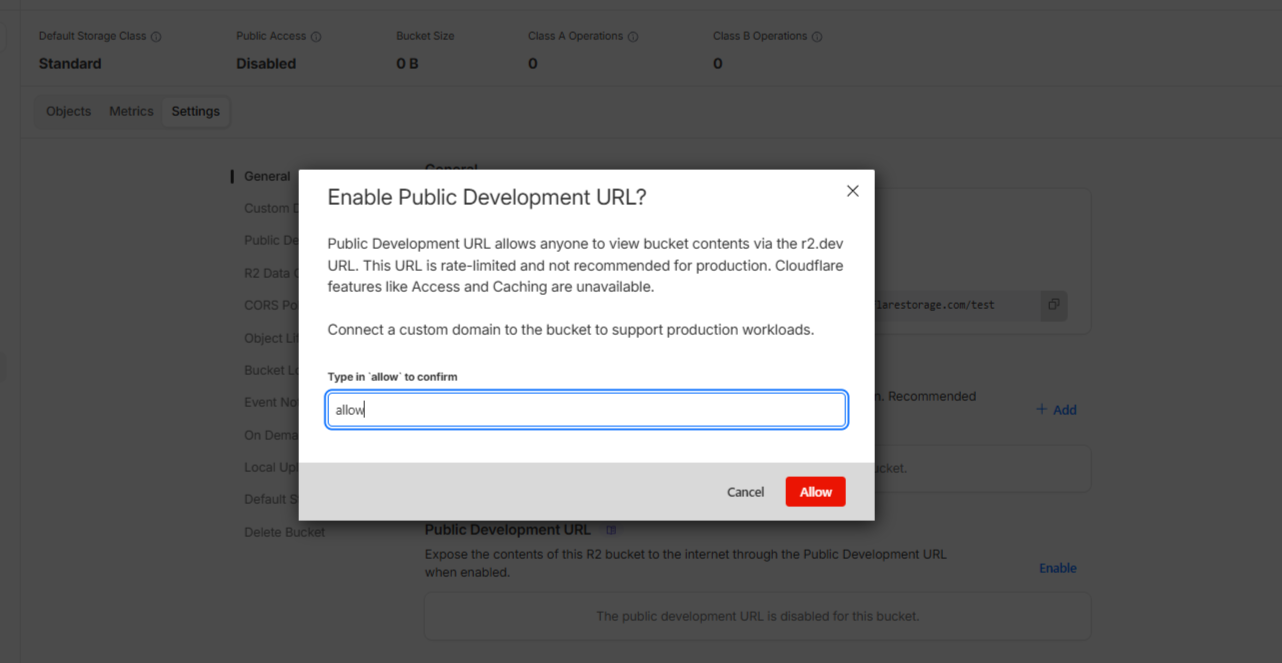
Once the bucket is created, Go to settings, and scroll down to the “Public Development URL” section on your bucket’s details page. Then,Click on “ Enable “ to enable access to your R2.dev bucket URL.
Then, A pop-up will appear, asking you to type “allow” to grant permission.
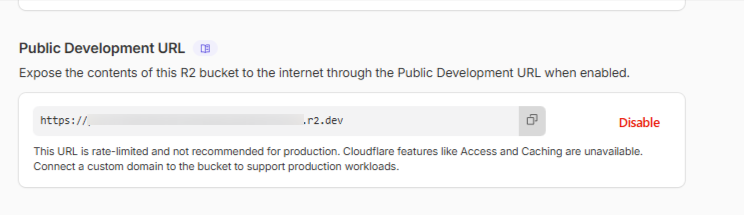
Now, from here, you will get the Cloudflare Bucket Public Development URL.
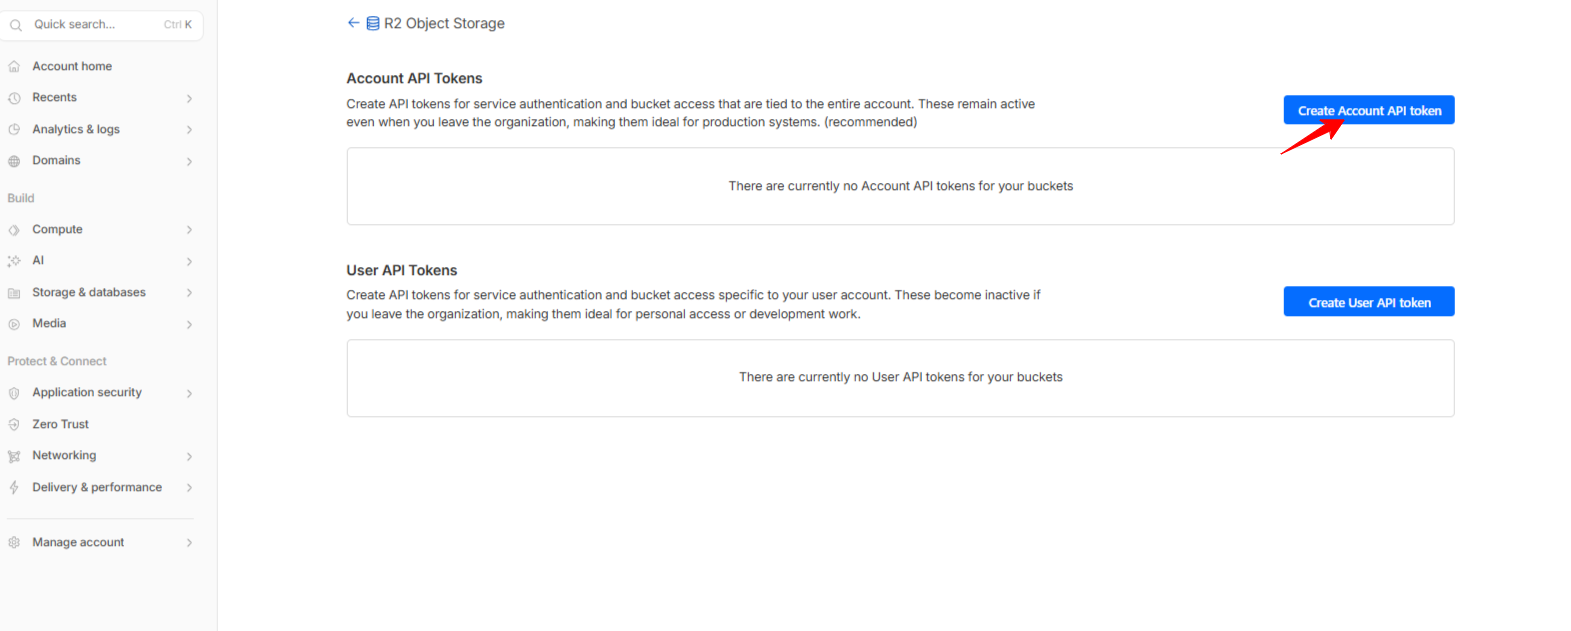
For creating Access key and secret key, return to your Cloudflare Dashboard >>Storage & Databases >> R2 Object Storage, then open the Overview section.
From the Overview window, click “Manage” under Account Details

This will redirect you to the R2 API page. Click the “ Create Account API Token “ button to begin creating your API token
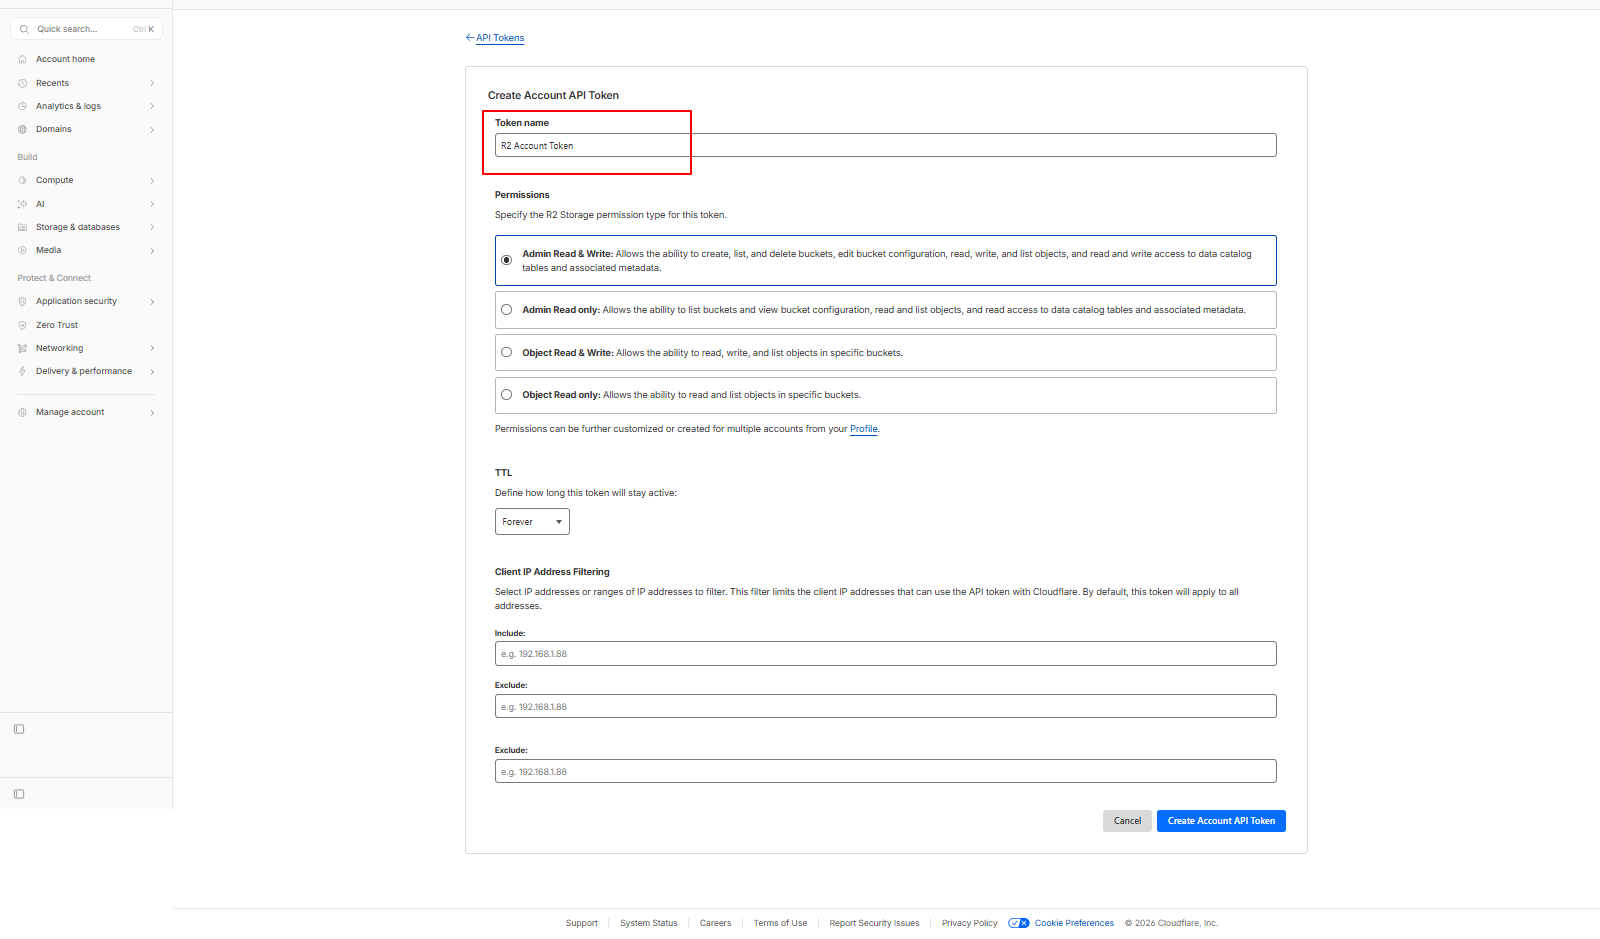
An API creation page will appear, where you’ll need to configure the settings for your API.
Start by assigning a name to your API. In the Permissions section, select “Admin Read & Write“.
Finally, click the “ Create Account API Token “ button.
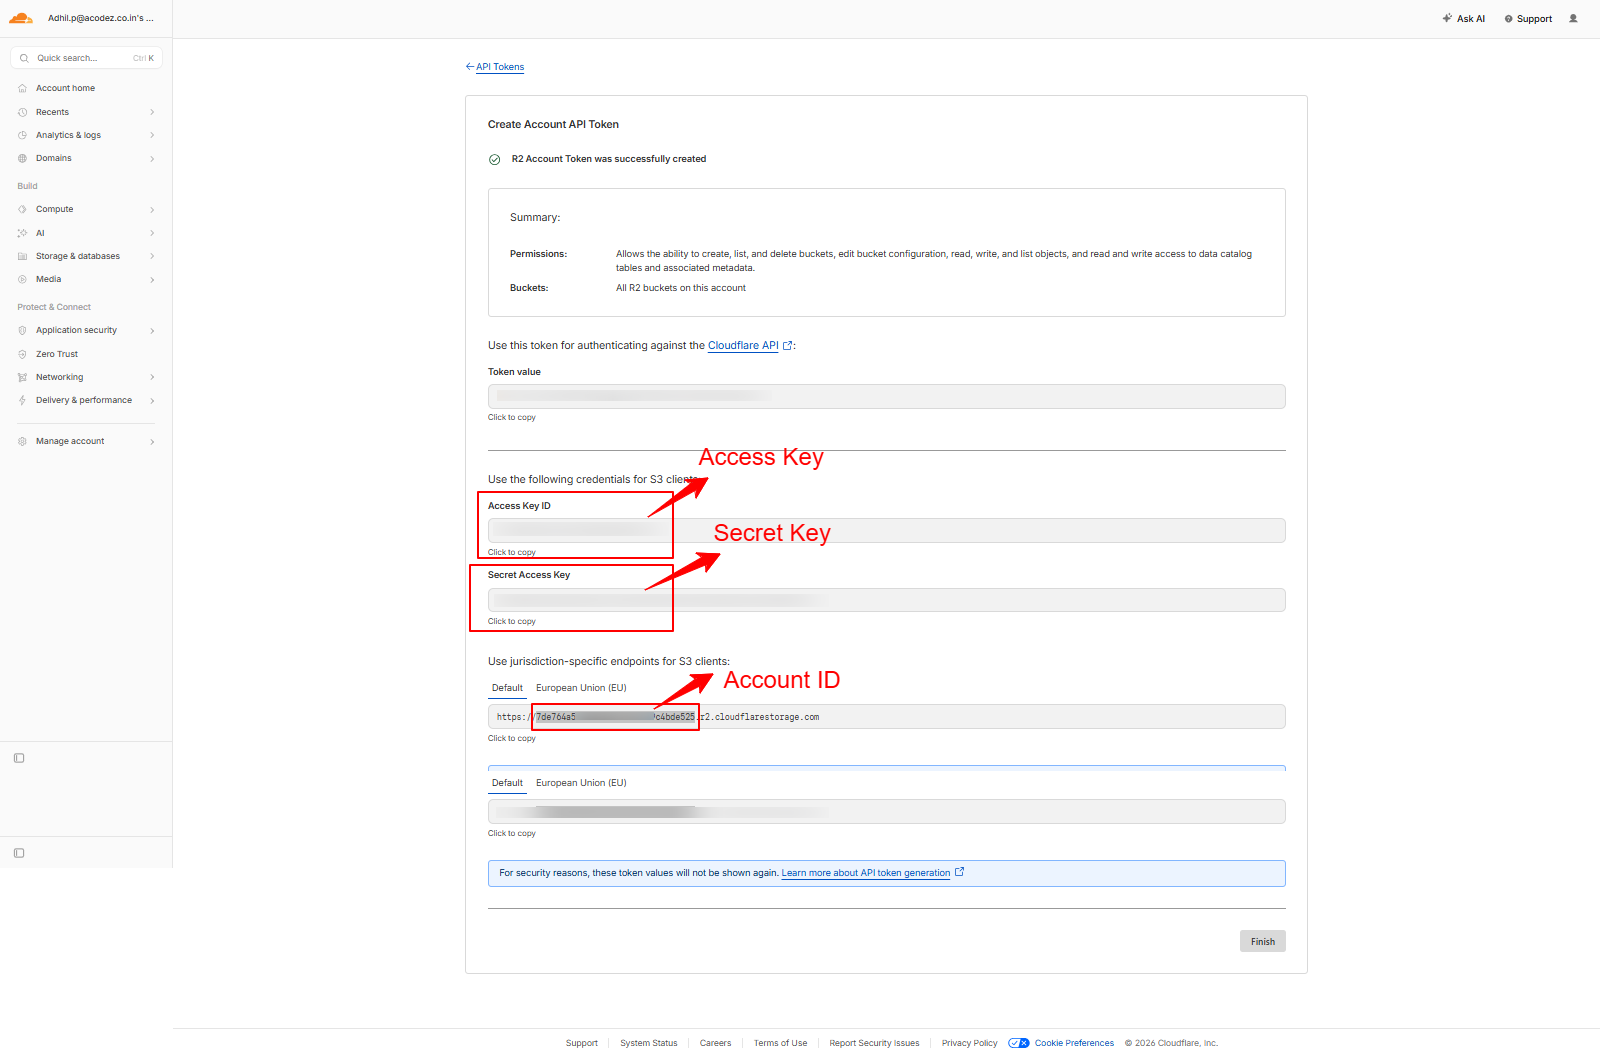
Here, you will find the Account ID, Access Key and Secret Key. Be sure to copy them right away, as you will not be able to access this page again later
Step 1: Navigate to the Configuration Page
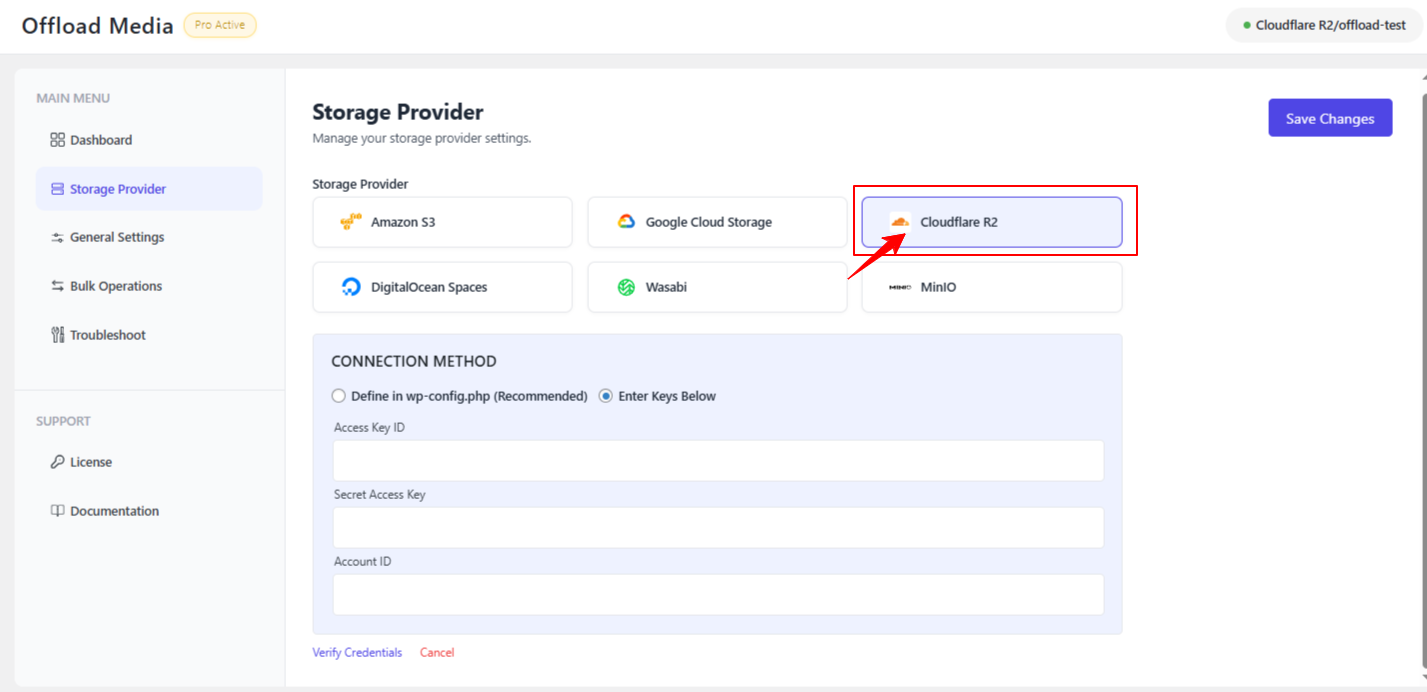
After successfully installing the plugin, go to the WordPress admin dashboard and select: Offload Media >> Storage provider
Step 2: Choose Your Cloud Service
On the service selection page, choose the cloud storage service you want to configure.
For this guide, we’ll select Cloudflare R2.
Step 3: Enter Cloudflare Credentials
Next, enter the credentials you previously created for your R2 account. This typically includes: Account ID, Access Key and Secret Key.
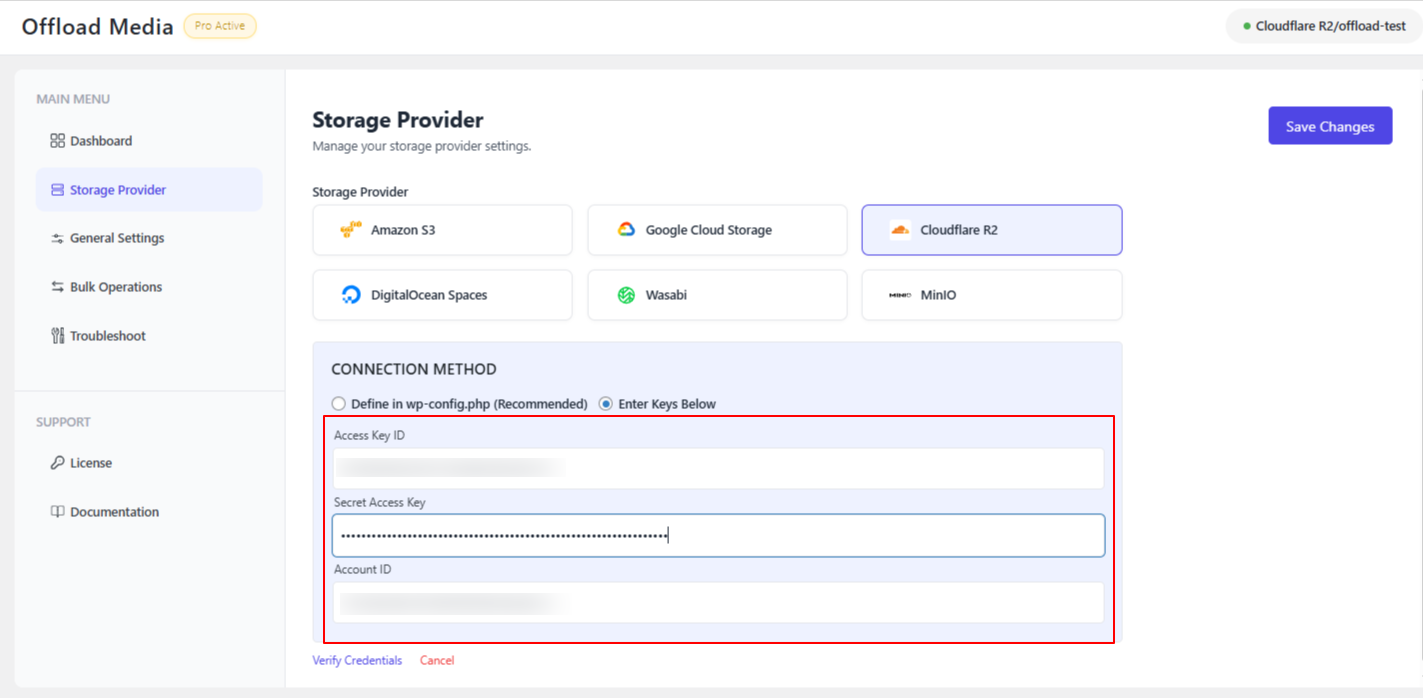
After entering the credentials, click “Verify Credentials” to confirm that the connection is valid.
Step 4: Select the Bucket
Once the credentials are verified, you will see an option to select a bucket from the list.
If you already have a bucket in Amazon S3, simply select it from the dropdown.
If you do not have a bucket yet, you can use the “Create New” option to create a new bucket directly from the plugin.
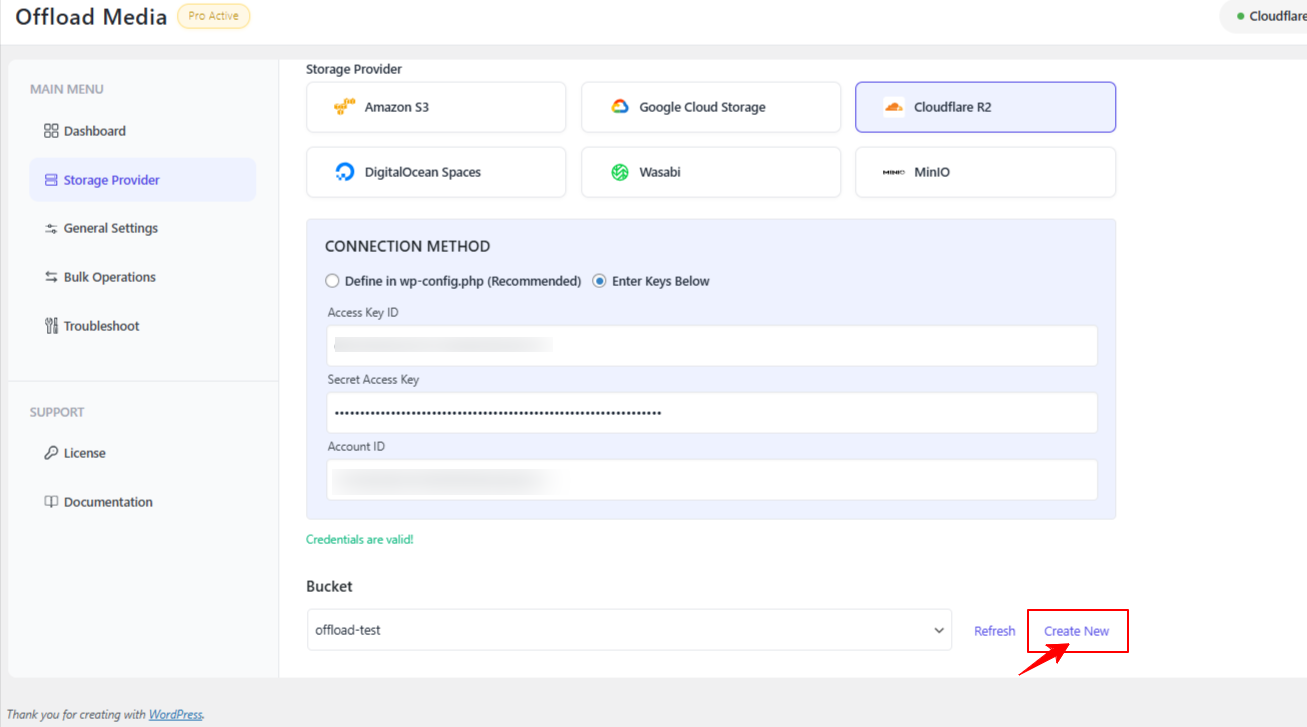
Once you have selected or created the bucket, click “Save Changes.”
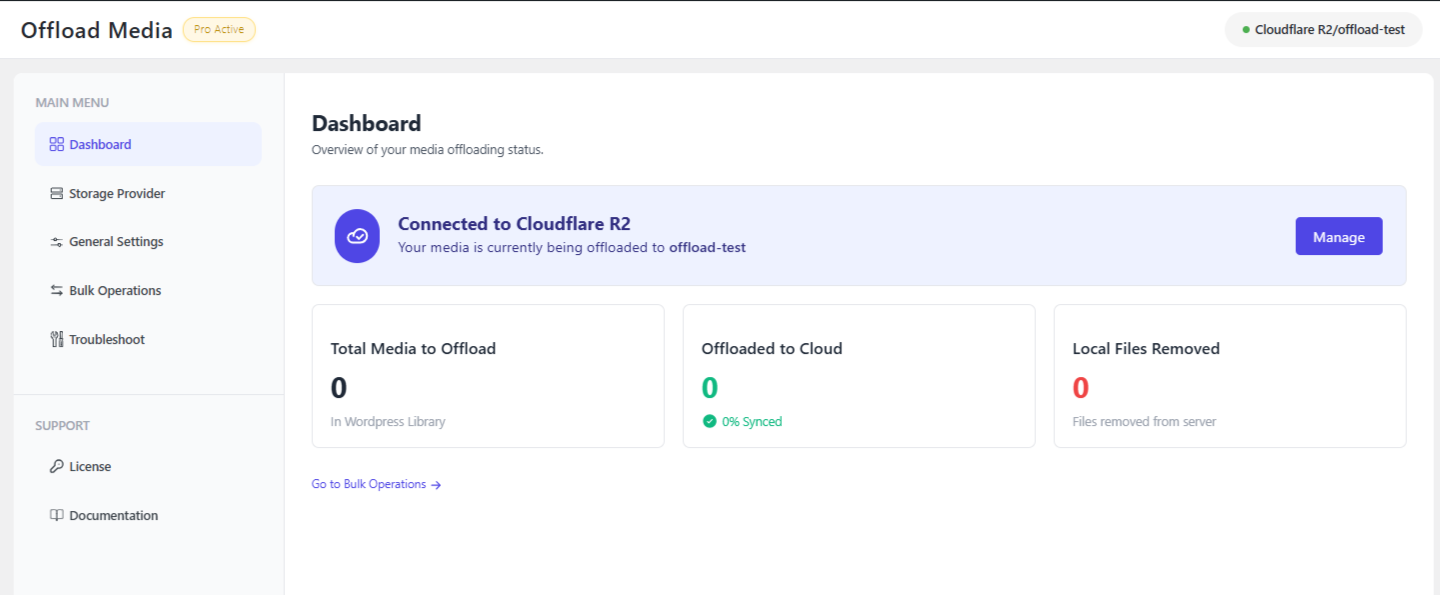
Configuration Complete
Congratulations! You have successfully configured the Offload Media plugin with Cloudflare R2.Your media files are now ready to be seamlessly offloaded to your cloud storage.
If you have questions about our plugin(s), are experiencing issues with any of our plugin


 Login
Login
 Cart
Cart