- Woocommerce
- Shopify Apps
- WordPress
This guide is set up to help you offload your WordPress Media Library to an Google Cloud Storage bucket using Offload Media swiftly and promptly.
A GCP (Google Cloud Platform) account is required to sign in from the Google Console Page.
If you do not have a GCP account you can simply sign up for a new account from the same page.
After logging into the console, you’ll need to create a new Service Account Key and save the file.
On the dashboard, search for “Credentials” and click on it from the search results.
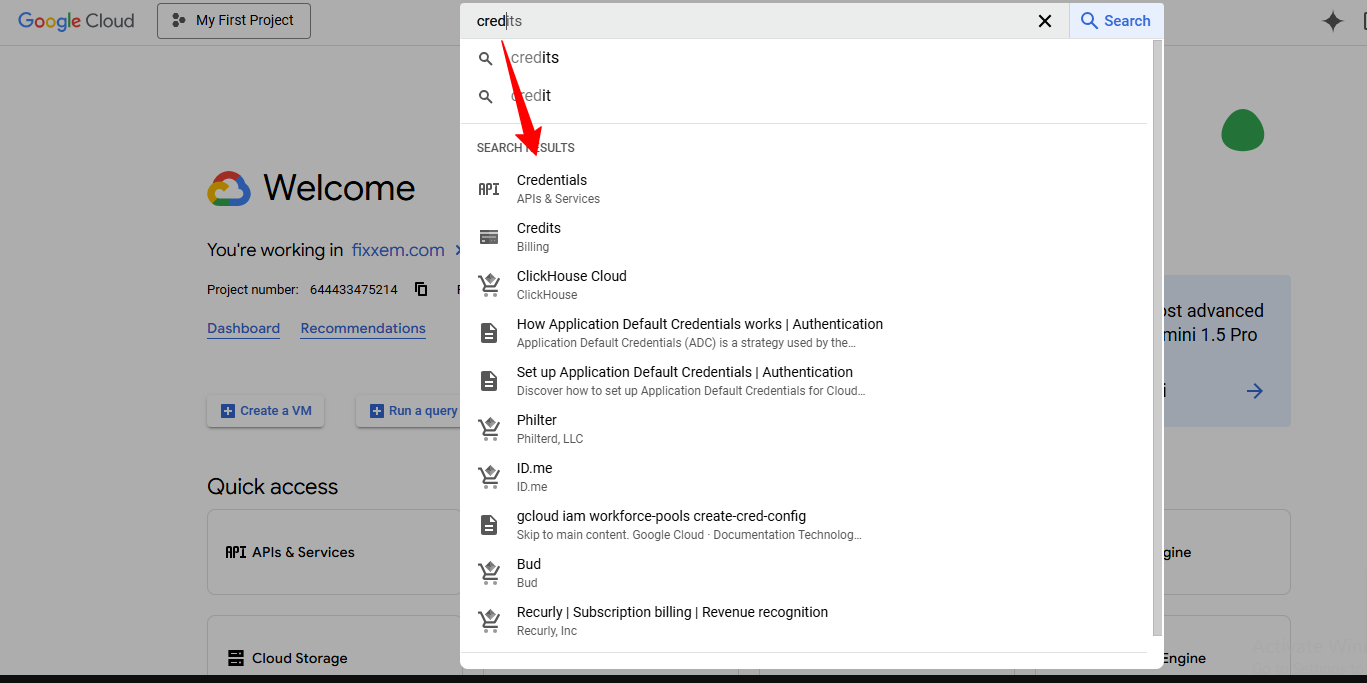
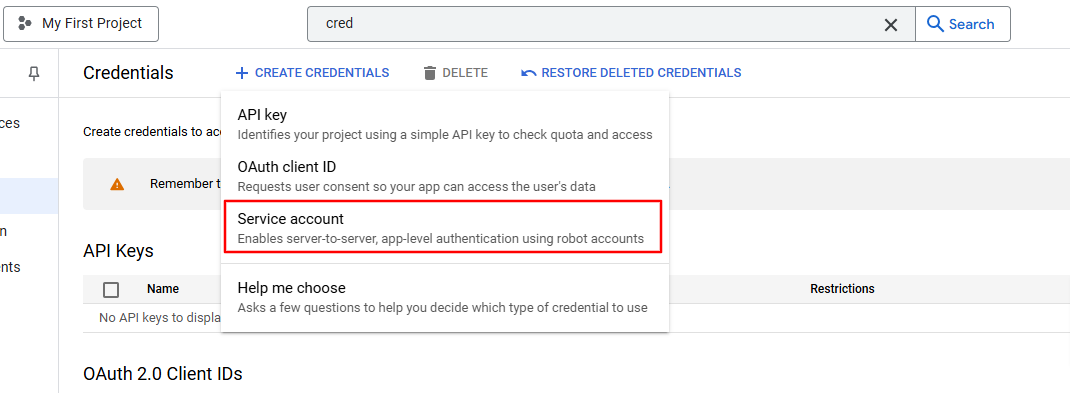
This will take you to the Credentials section under APIs & Services in the GCP Console for your selected project. From there, click “ CREATE CREDENTIALS “ and select “ Service account “.
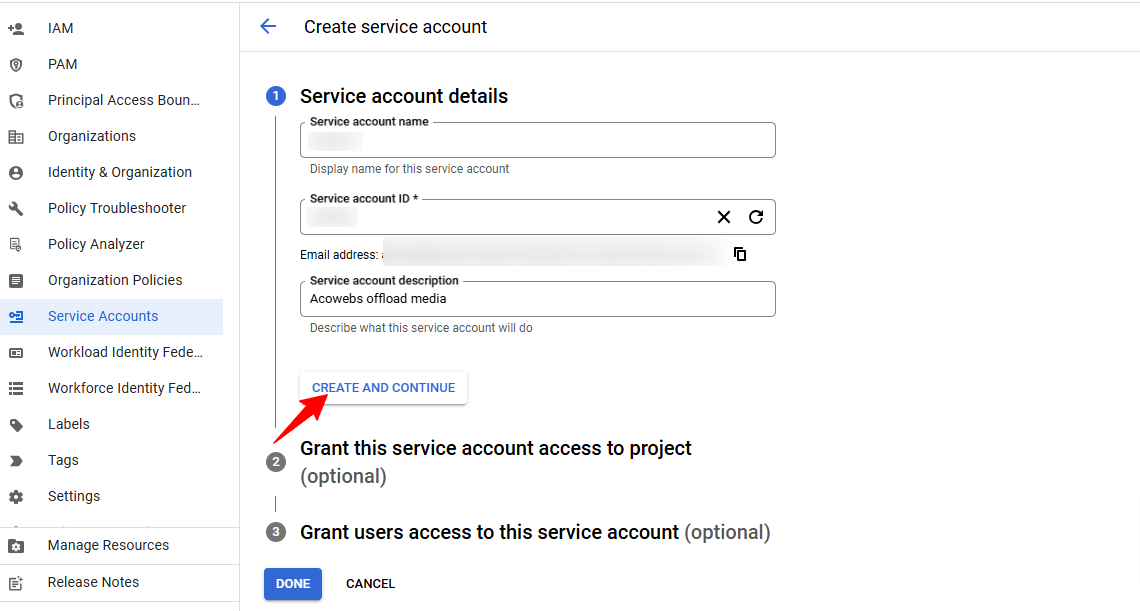
Enter a name and description for the service account under Service Account Details, then click “ Create and Continue “.
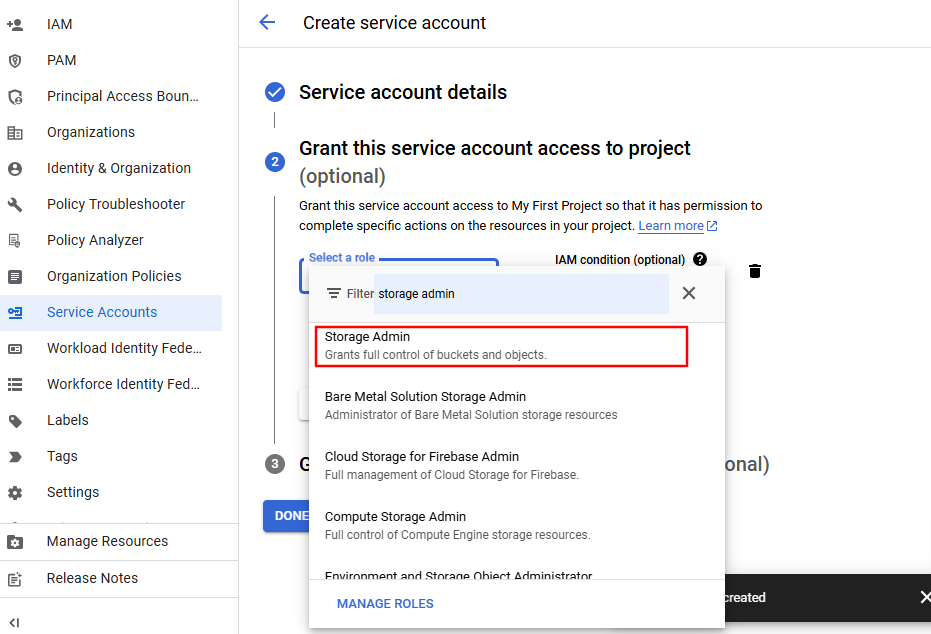
This will take you to the next step, where you can grant the service account the necessary access permissions. Then, Click the “ Select a role “ dropdown, then search for “Storage Admin” and click on it from the search results. The Storage Admin role provides complete control over all Google Cloud Storage (GCS) resources.
Click the “ Done “ button, the service account will be created.
Next, under the list of Service Accounts, you’ll find the newly created account. To edit it, either double-click on it or click the Edit button under the Actions column

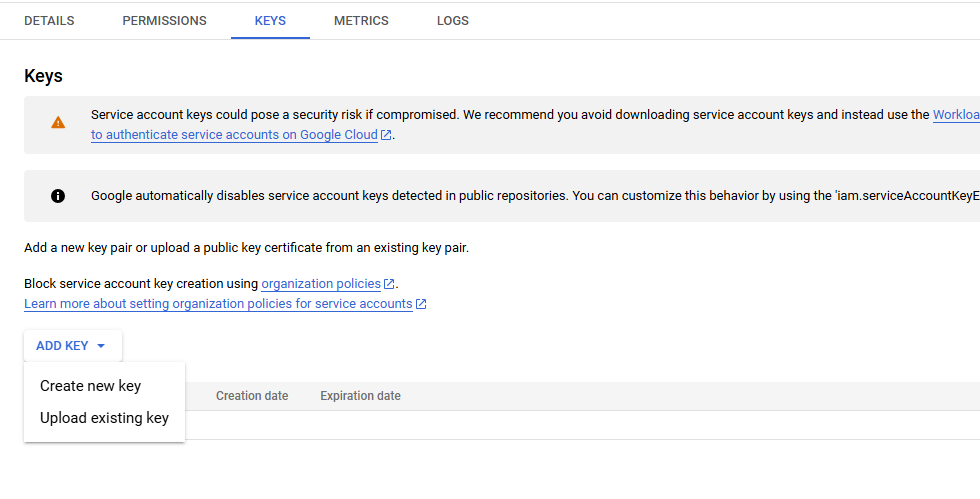
Once the page loads, the next step is to add a new key. On the left-hand side, you’ll see a Nav bar labelled “ KEYS” and click on it.

Next, navigate to the “Add Key” button and click on it. From the dropdown, select “Create new key“.
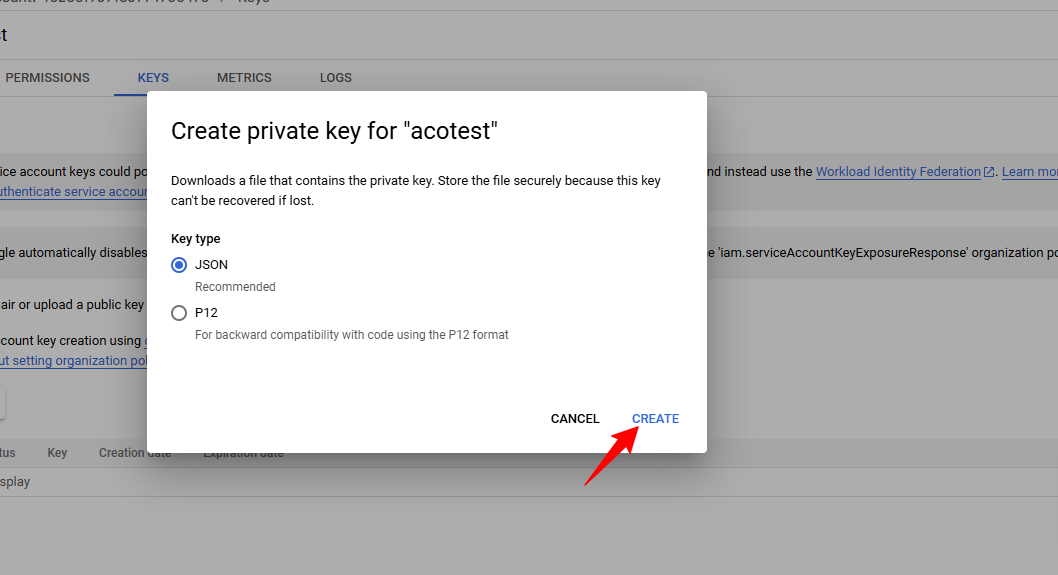
A pop-up will appear, prompting you to choose the key type. Leave the default “ JSON “ key type selected, then click the “ Create “ button to finish creating the new service account key and download the key file.
Step 1: Navigate to the Configuration Page
After successfully installing the plugin, go to the WordPress admin dashboard and select: Offload Media >> Storage provider
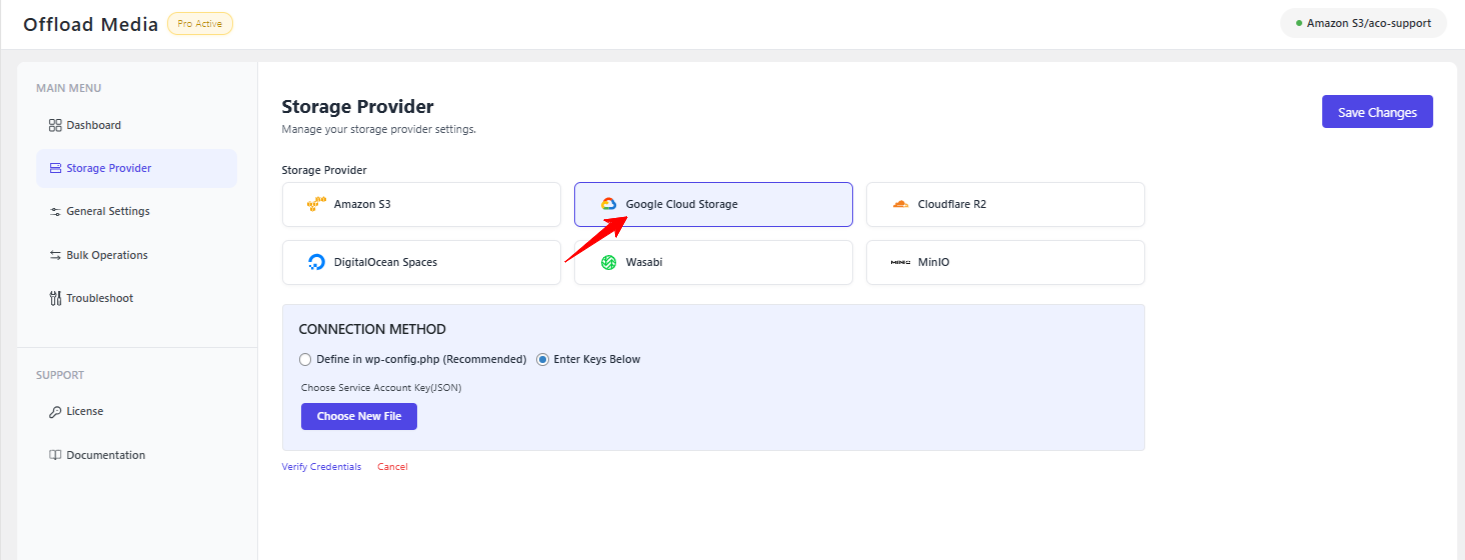
Step 2: Choose Your Cloud Service
On the service selection page, choose the cloud storage service you want to configure.
For this guide, we’ll select Google Cloud Storage.
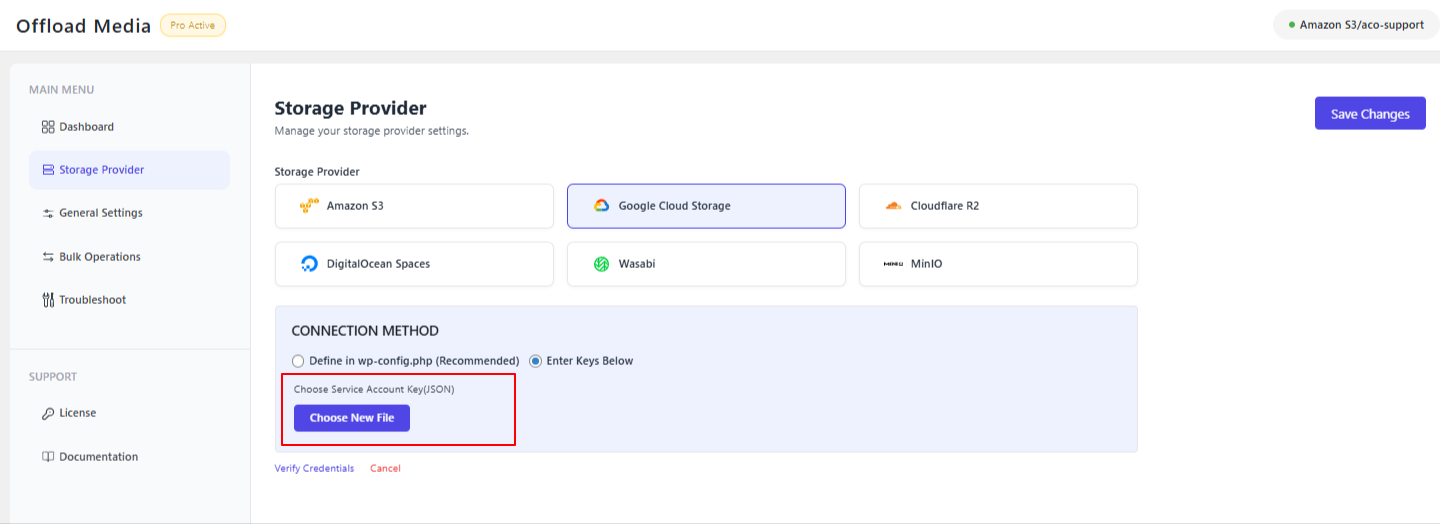
Step 3: Upload the Google Cloud Key file
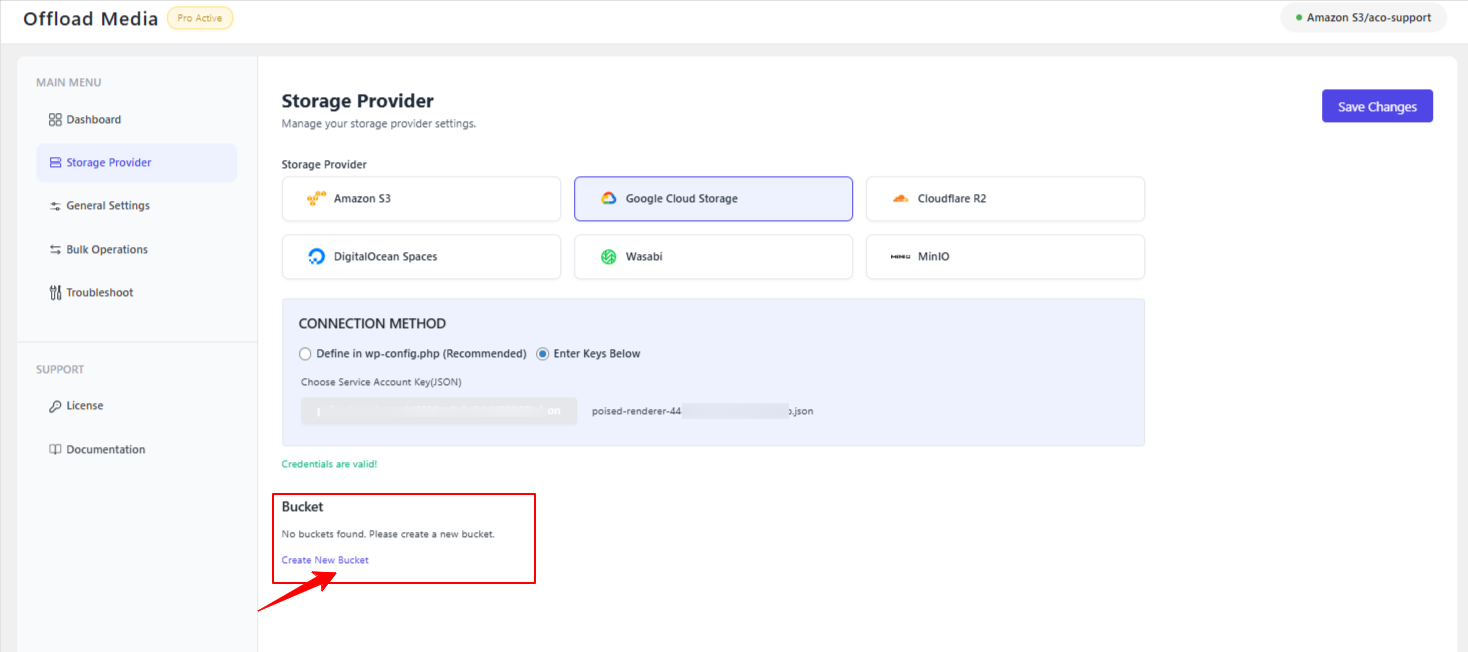
Next, you will see two connection methods: ‘Define in wp-config.php (Recommended)’ and ‘Enter Keys Below’. If you choose ‘Define in wp-config.php’, you can set it up directly in the wp-config.php file (recommended). Otherwise, you can select ‘Enter Keys Below’ to upload the downloaded file.
Here, we will click ‘Enter Keys Below’ to upload the previously downloaded Google Cloud JSON key file.
After entering the credentials, click “Verify Credentials” to confirm that the connection is valid.
Step 4: Select the Bucket
Once the credentials are verified, you will see an option to select a bucket from the list. If you already have a bucket in Google Cloud, simply select it from the dropdown.
If you do not have a bucket yet, you can use the “Create New Bucket” option to create a new bucket directly from the plugin.
Once you have selected or created the bucket, click “Save Changes.”
Configuration Complete
Congratulations! You have successfully configured the Offload Media plugin with Google Cloud Storage.
Your media files are now ready to be seamlessly offloaded to your cloud storage.
If you have questions about our plugin(s), are experiencing issues with any of our plugin


 Login
Login
 Cart
Cart