Knowledge Base

Hi, How can we help?

CHECKOUT FIELD EDITOR – BLOCK CHECKOUT

In the ever-evolving world of e-commerce, the Checkout Field Editor – Block Checkout plugin revolutionizes WooCommerce stores by allowing seamless customization of checkout fields within the modern block-based interface, ensuring a tailored and efficient shopping experience for your customers.


The checkout field editor for woocommerce consist of two checkout interface

  1. Classic Checkout
  2. Block Checkout

These interfaces can be switched easily using the select checkout mode option on the plugin’s home page.

Understanding Woocommerce block checkout 

WooCommerce Block Checkout is a modern feature introduced by WooCommerce to enhance the checkout experience in WordPress-based online stores. Unlike the traditional checkout process that relies on shortcodes and legacy templates, the block checkout leverages the WordPress Block Editor to provide a more flexible, customizable, and visually appealing checkout page directly within the editor environment.

Configuring the fields for block checkout.

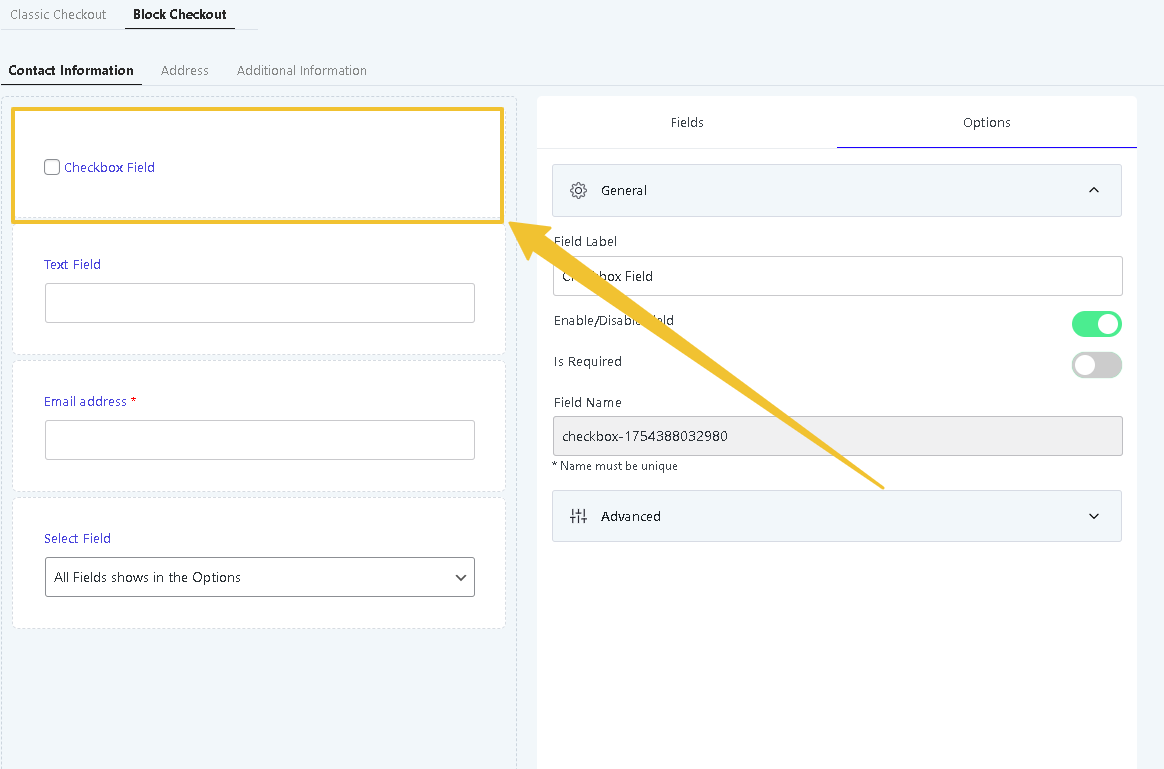
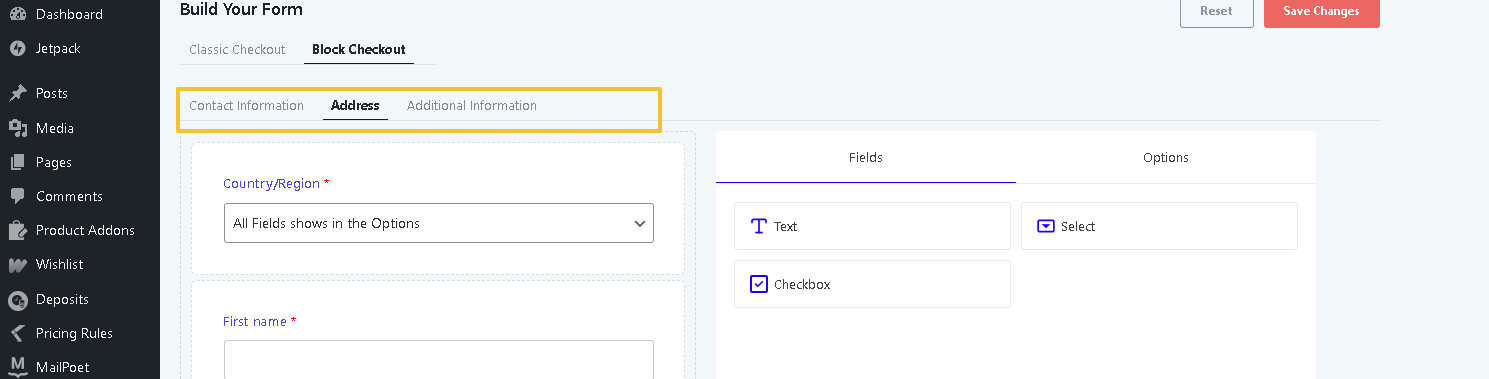
You can configure your checkout form for block checkout by drag and drop method with the wide variety of fields from the drag and drop section of the plugin.

  1. Text filed 
  2. Select field
  3. Checkbox field
  4. Number field

Text field:

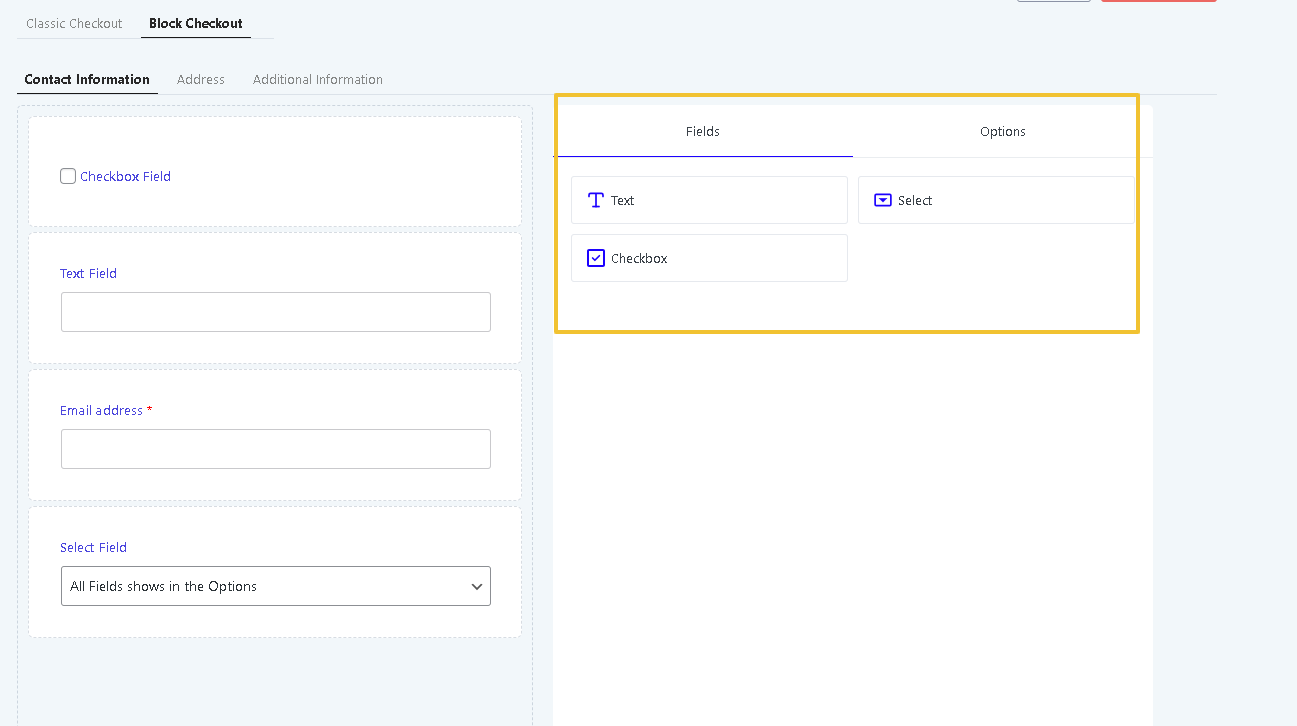
A basic input box that allows users to enter free-form text, such as names, addresses, or short messages. It’s versatile for collecting alphanumeric data without restrictions.

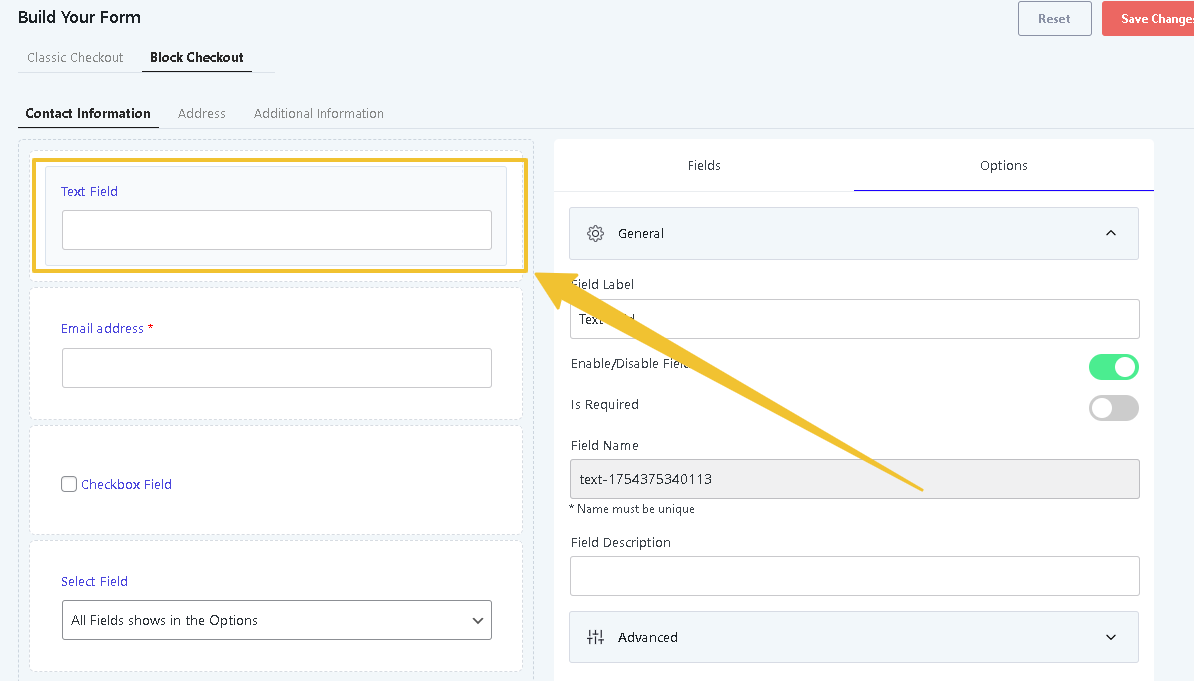
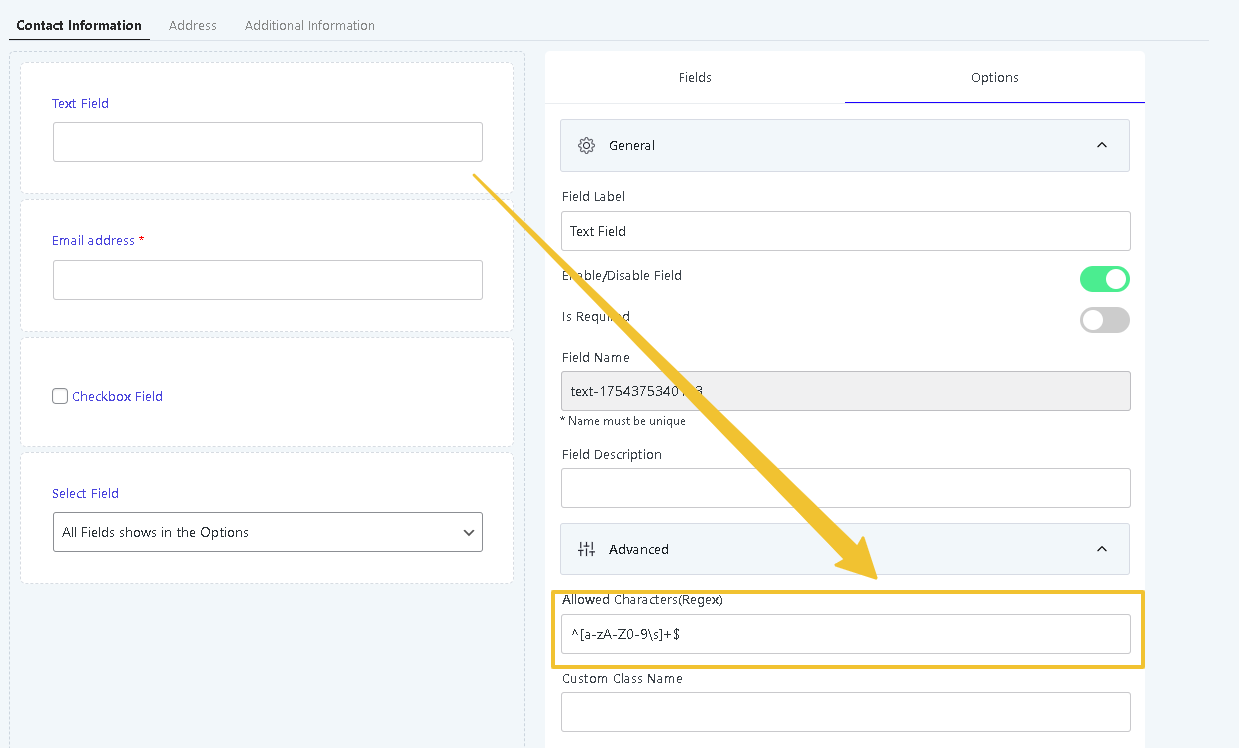
Advanced options on text field:

Allowed characters (Regex pattern): 

For general text validation (e.g., allowing letters, numbers, and spaces):

Example use: 

  1. ^[a-zA-Z0-9\s]+$ use case: Validates names or addresses without special characters.
  2. ^[a-zA-Z0-9._%+-]+@[a-zA-Z0-9.-]+\.[a-zA-Z]{2,}$ Use Case: In a text field for user registration forms

Select field:

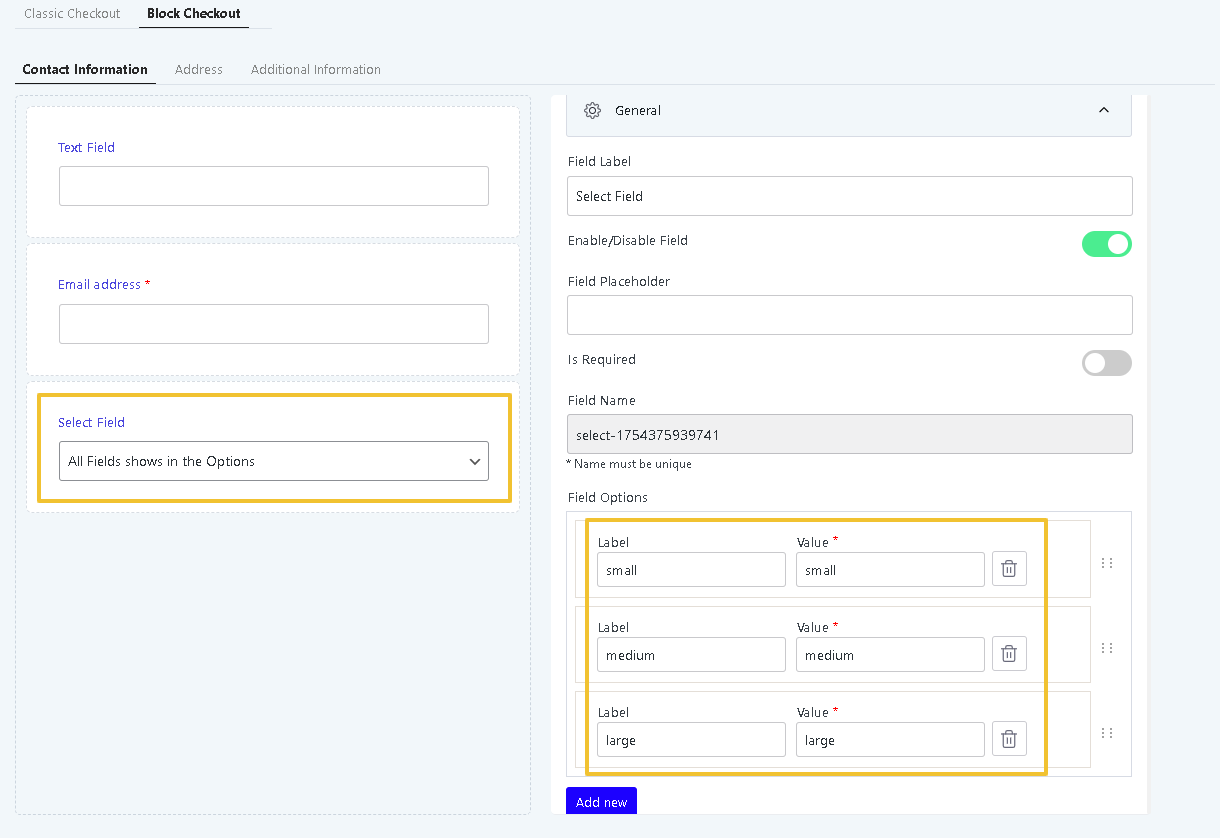
A dropdown menu where users choose from a predefined list of options, ideal for scenarios like selecting a country, size, or category to ensure standardized responses.

Checkbox field:

A toggle option that users can check or uncheck to indicate agreement, selection, or preferences, such as opting into newsletters or confirming terms. Multiple checkboxes can be used for multi-select scenarios.

Number field:

An input designed specifically for numeric values, useful for quantities, ages, or measurements to prevent non-numeric entries.

Reordering the field arrangement:

The field arrangements can be re-ordered easily by drag and place method and click on save changes button to replicate them on the front end.

Checkout page sections:

  1. Contact information: This section collects basic user details like email address and phone number, enabling order confirmations, updates, and communication to ensure a personalized shopping experience.
  1. Address fields: Dedicated to gathering billing and shipping addresses, including fields for street, city, state, ZIP code, and country, which are crucial for accurate delivery and payment processing.
  1. Additional information: An optional area for custom notes or extra details, such as order instructions, gift messages, or special requests, allowing users to provide any supplementary data not covered in other sections.

How to place a new order by using block checkout editor:

Lets reproduce a use case here as adding fields for collecting customer data from the contact information session of the checkout page.

Step 1: choose the block checkout from the checkout mode selector. Ensure that you are using the block editor on the checkout page.

Step 2: drag and drop the text field for collecting the customer name. Label the field as “first name”. Enable the required option to make the field mandatory. 

Step 3: repeat the process to add the text field as a second name field.

Step 4: add a checkbox field to check if the customer requires an additional service. Label the field as “Additional service”.

Step 5: Add a select field to the checkout editor to make the customer choose an option from the dropdown. Add the dropdown options 

Step 6: enter the label you need to add to each field as per your requirement.

Step 7: Add a number field and label as “contact number” to collect the contact number of the customer.

Step 8: placement of the fields can be adjusted by drag and place method from UI of the block editor.

Step 9: you can save the changes of the fields by clicking the “save changes” button.

Step 10: Once navigating to the shop page, add a product to the cart and click on proceed to checkout button to view the checkout page.

Step 11: the new block checkout page appears and the changes you have made will appear on the checkout page.

Step 12: place a test order after filling the field values required.
Step 13: Once placing the order, navigate to the backend order page >> order details to view the field values you have entered.

Step 14: The arrangement of the fields can be changed at any time by the admin by easily dragging and placing the fields at desired position.

Customer Support

If you have questions about our plugin(s), are experiencing issues with any of our plugin