- Woocommerce
- Shopify Apps
- WordPress
Instructions regarding Installation and activation, please visit: Installation & Activation
After installing the WooCommerce Product Labels, you can see a new menu appear in the menu bar called ‘Badges’.
There you have two sub-menu items; ‘Product lists’ and ‘Settings’.
Select the Badges to set labels for the products. It will redirect to a page like the one below. The list of badges will be displayed on the Woocommerce Product Badges page. The list will show the other details too like the title, label, type, style, date, date, and status.

Click on the Add New Badge to set a new Badge.
Clicking on Add New Badge will pop up a new window with different tabs. It has 5 tabs, depending on the version you are using, for free we have 2 tabs.
Premium version Badges are, CSS Badges, Image Badges, Advanced Badges, Timer Settings, Schedule
Fill the columns with the values you need to set.
Title: Enter the title of the badge.
To custom style these badges. If you select CSS Badges following options can be seen.
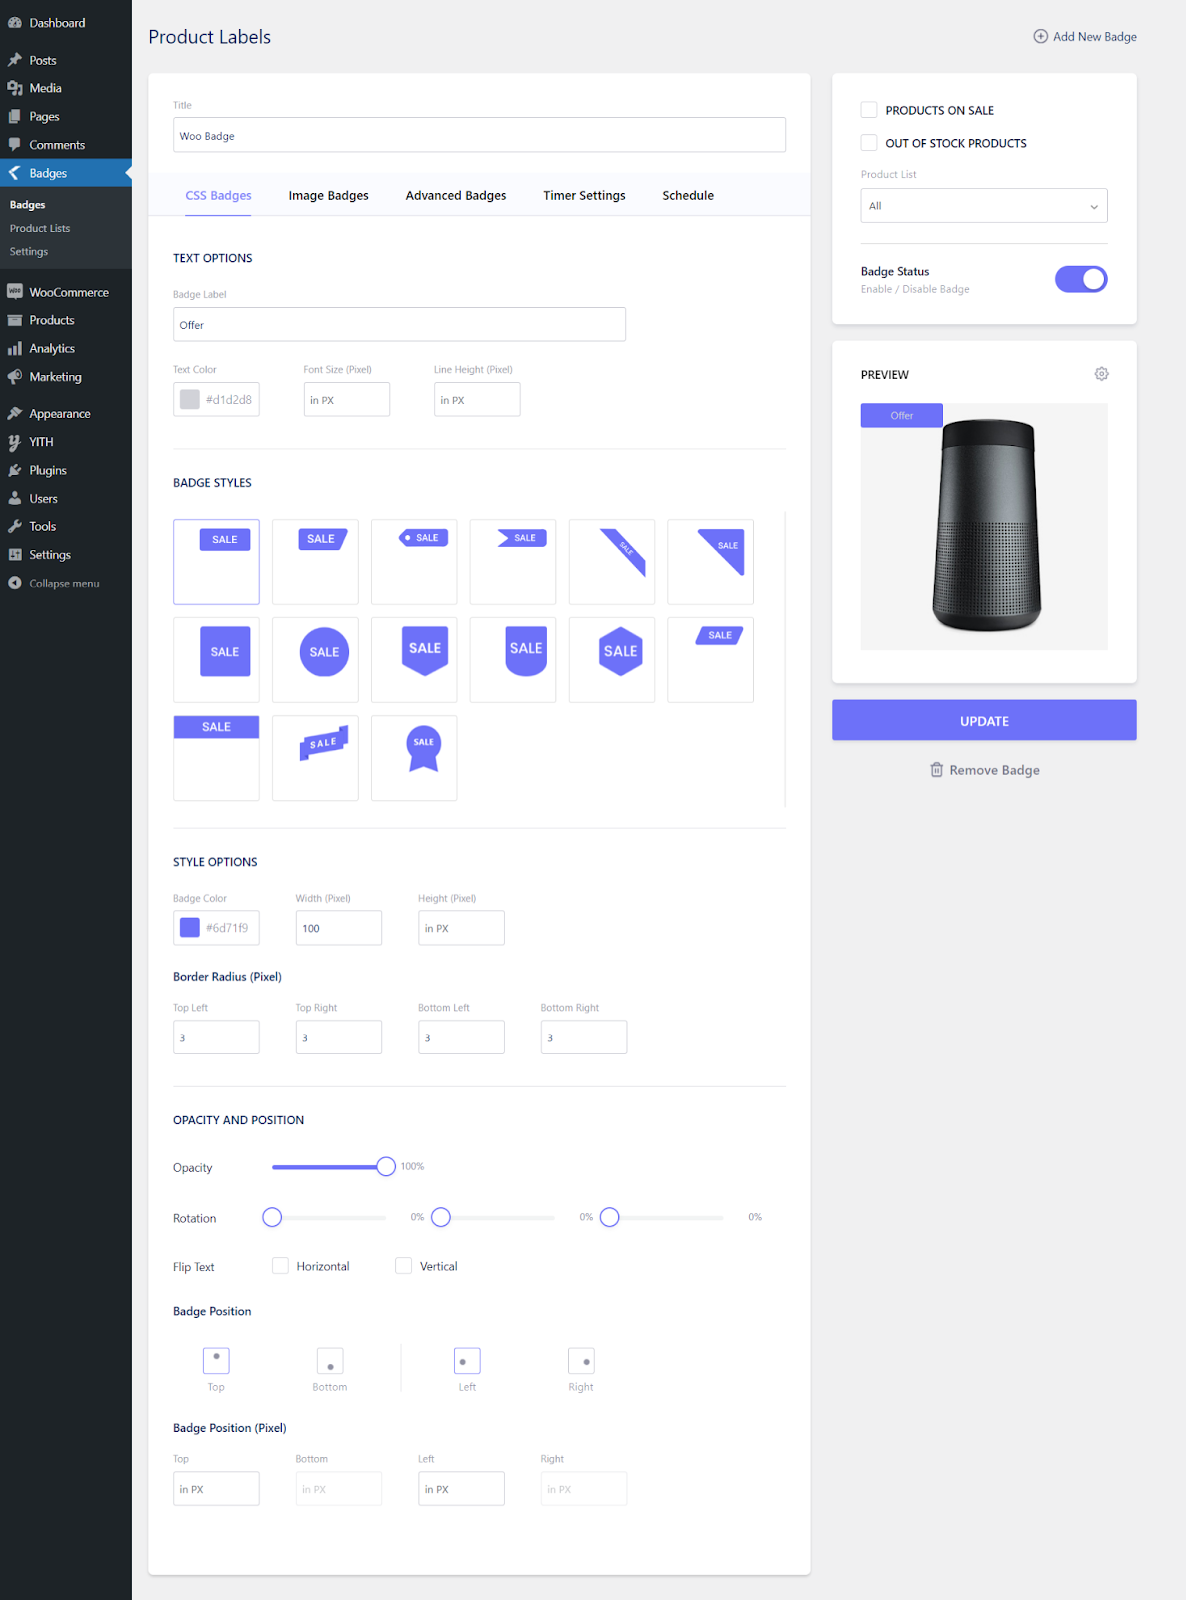
TEXT OPTIONS: Set Badge label, Text color, font size, and Line height in pixel.
BADGE STYLES: Let you select the styles for your badges.
STYLE OPTIONS: Let you Set badge Color, Width, and Height from here.
BORDER RADIUS: Let you Set the border radius in pixels from here.
OPACITY AND POSITION: Let you adjust opacity, Rotation, and let you flip text.
BADGE POSITION: Let you set the position of the badges to left, right, top or bottom.
BADGE POSITION(PIXEL): Let you specify the position of the badge in the pixel.
Another feature of the badge is to set it for the Products on sale or Out of stock products.
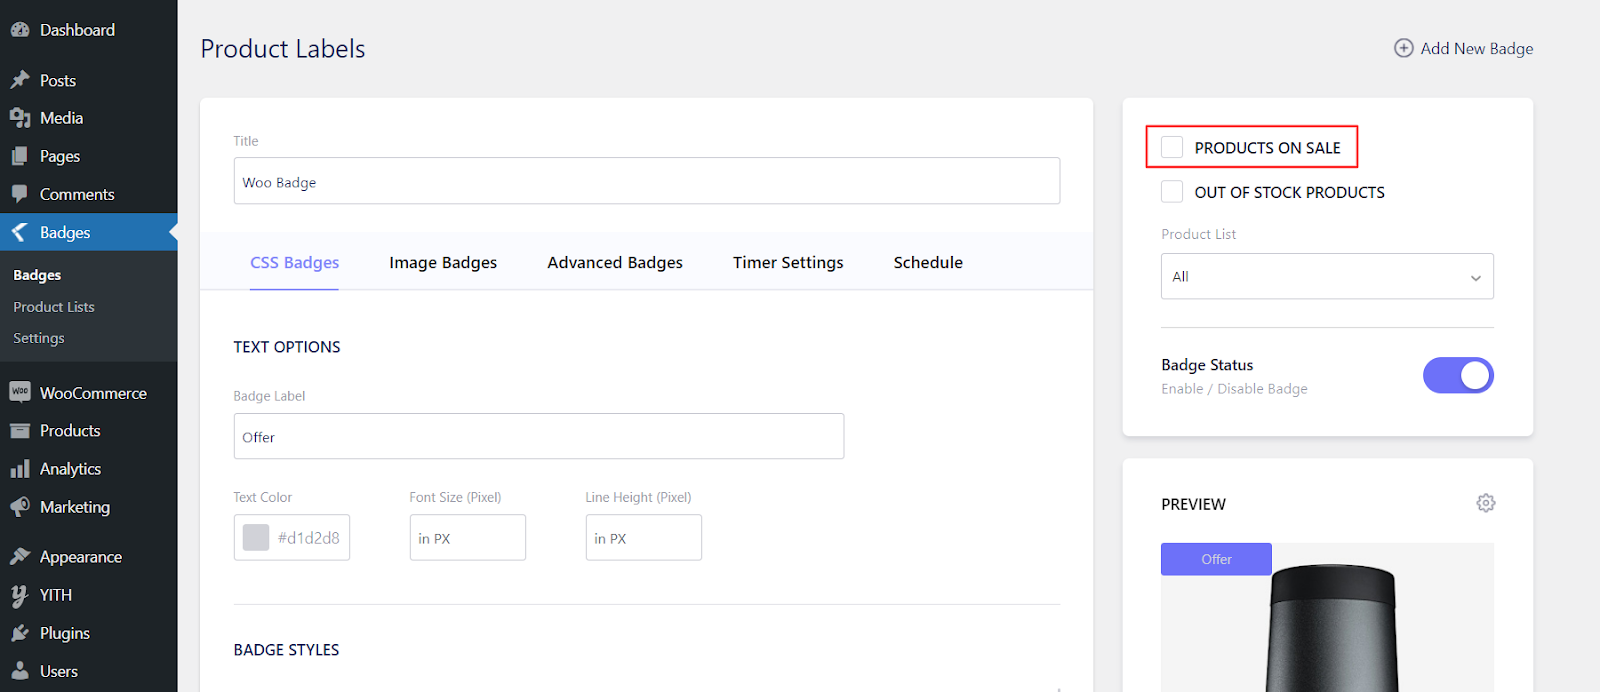
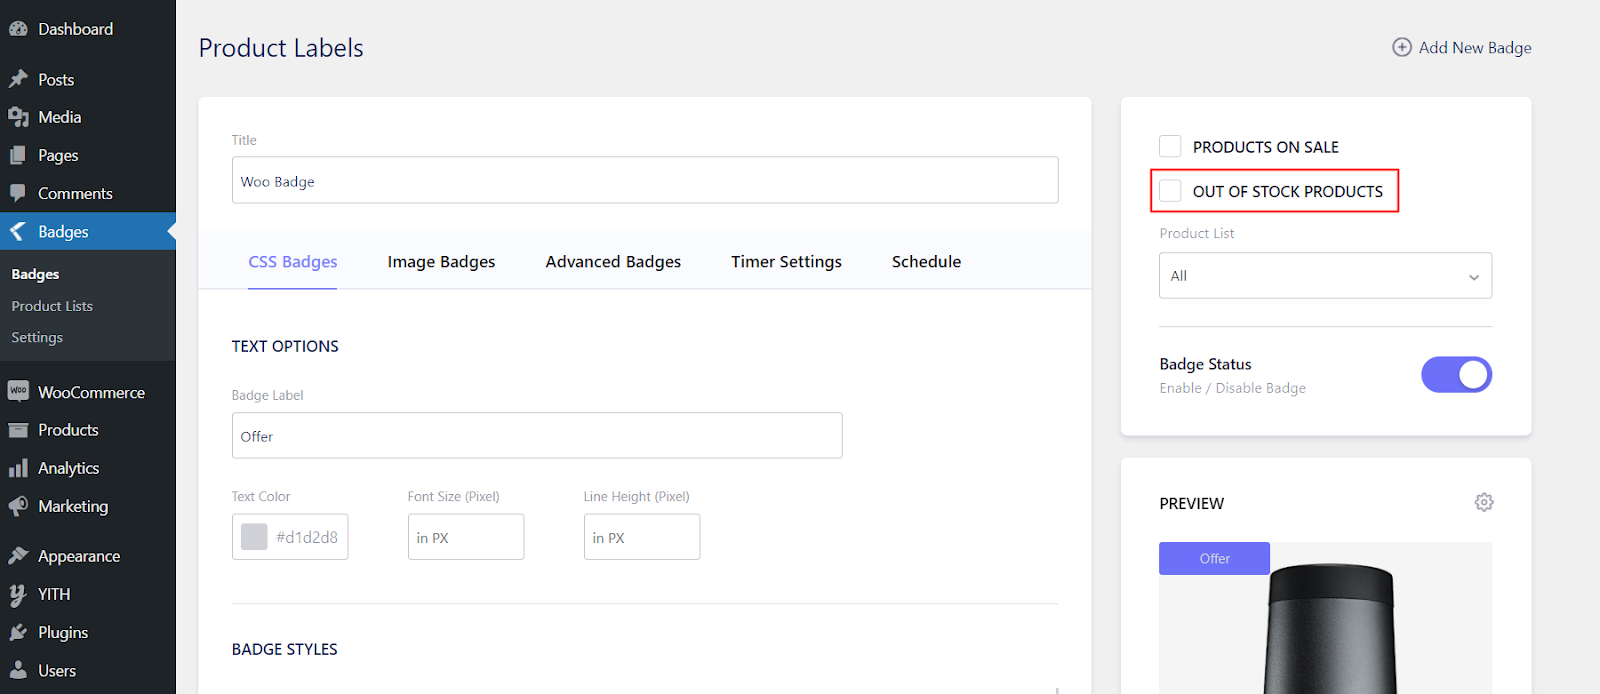
Select whether the badge must be applied for the product on sale or out-of-stock products.
Badge Status can be Enable or Disable according to your need.
It is more than 250+ predefined image badges to select from, to make it easier to select a badge or find a specific badge, you can use our filter option. We keep adding new badges, making the users stay updated with the current trends/festivals.
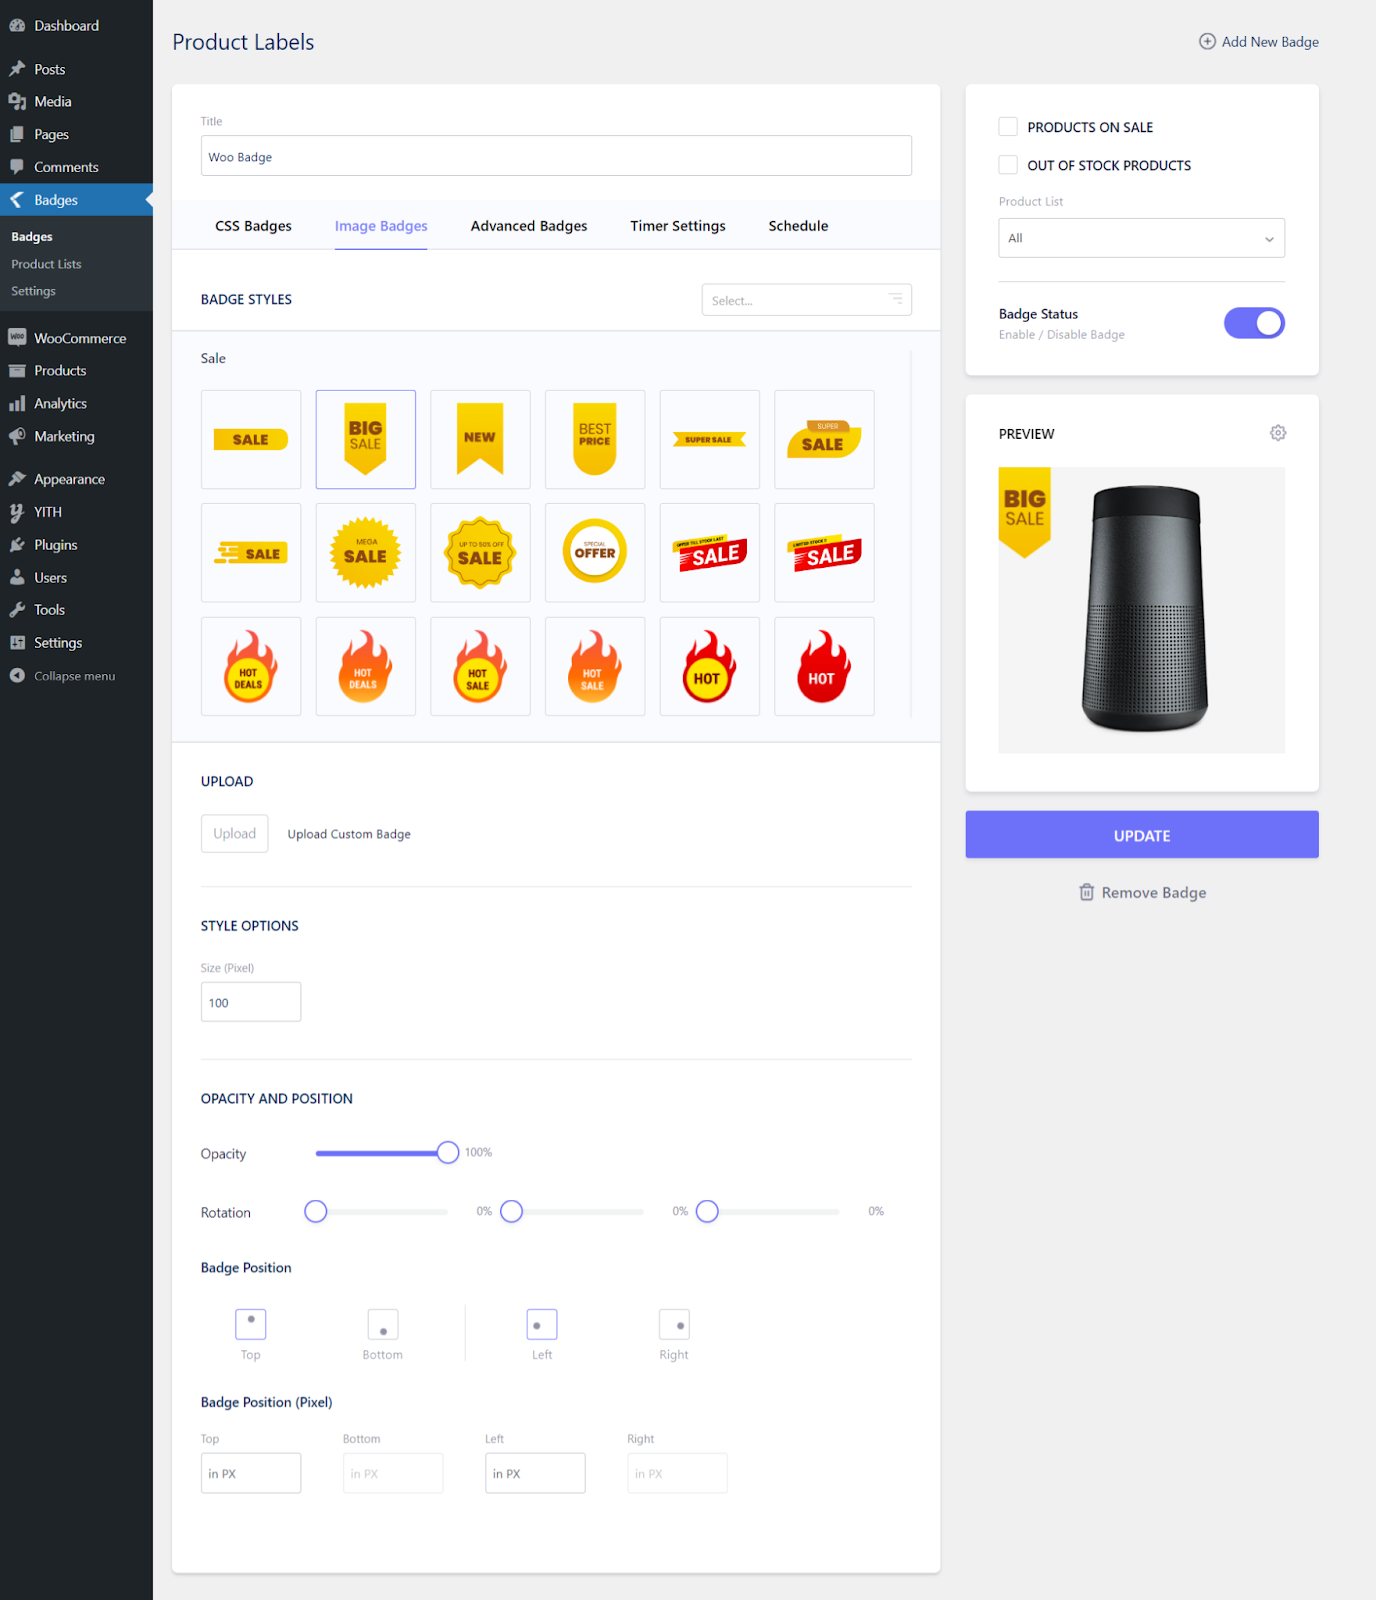
UPLOAD: To upload a custom badge
STYLE OPTIONS: Let you style the size of the text. You can set the size of the badge in pixels.
OPACITY AND POSITION: To set opacity and rotation.
BADGE POSITION: Set the position of the badges to left, right, top or bottom
BADGE POSITION(PIXEL): Let you set the position of the badge in pixel.
Looking for more customizable badge designs, we have a set of advanced badge designs which allows the users to customize or add different texts, customize the backgrounds, etc with ease
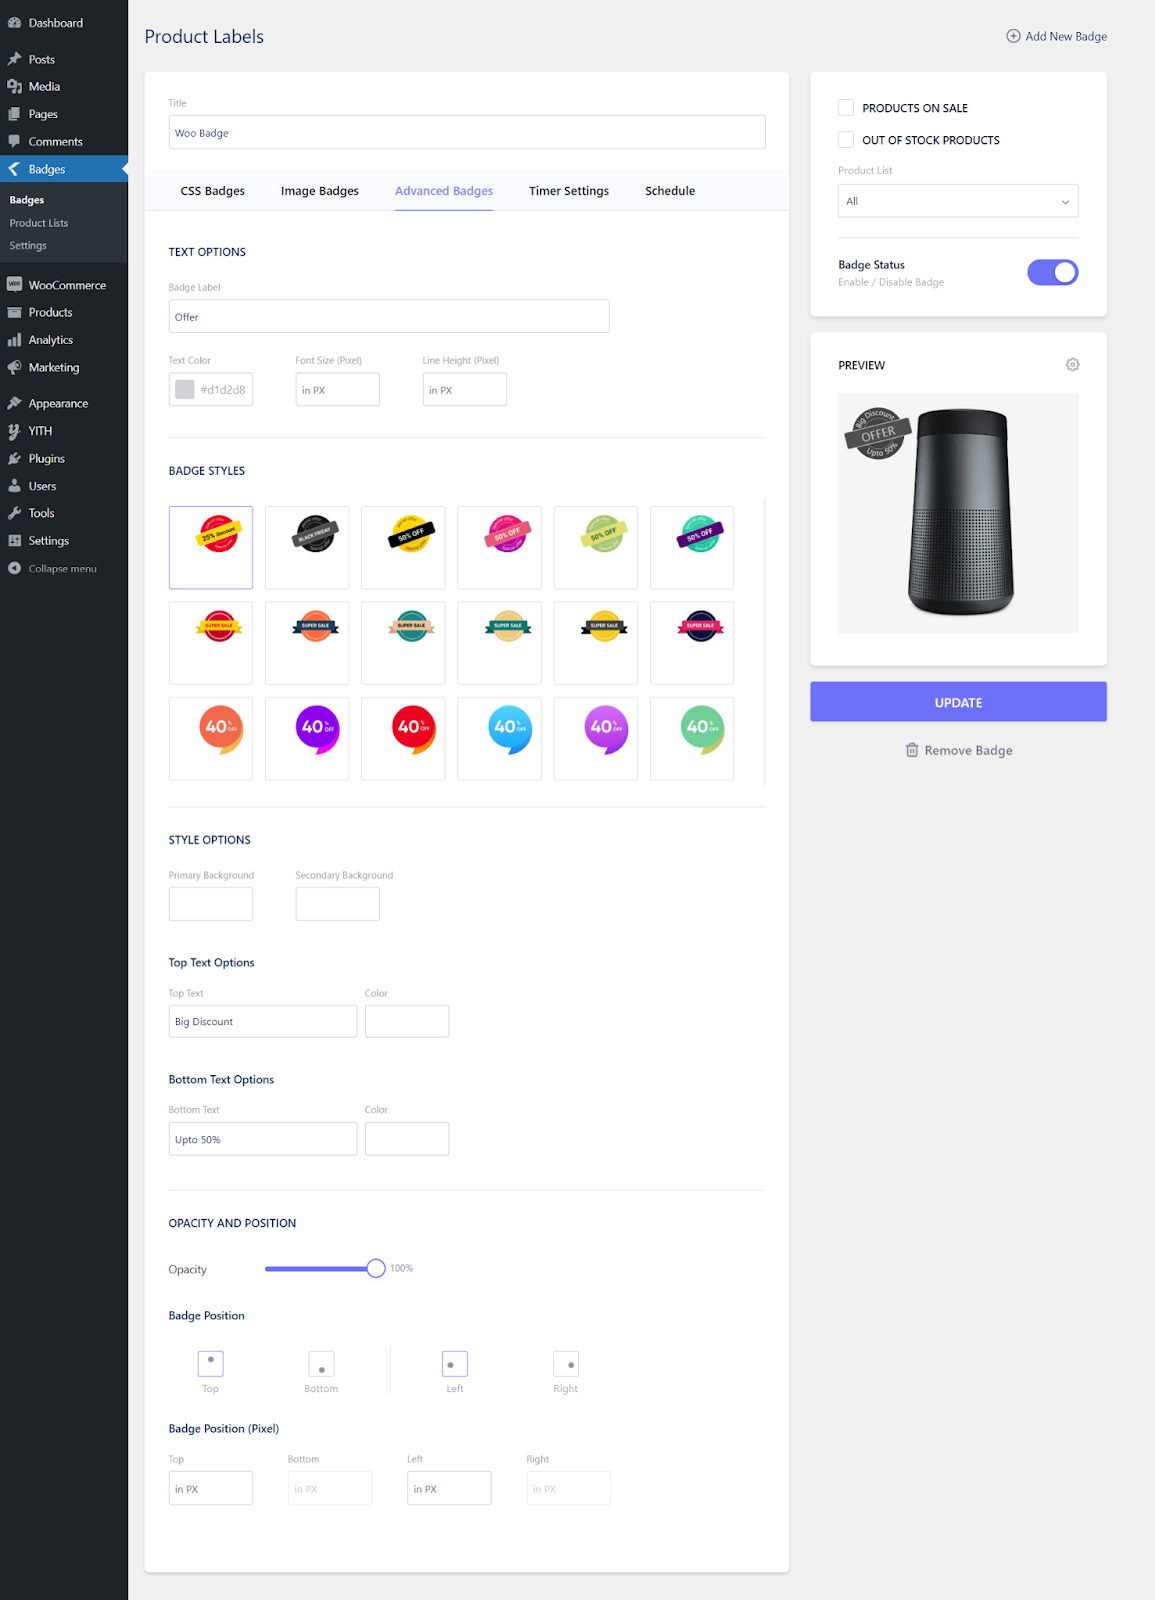
TEXT OPTIONS: Let you put a label for your badge and select Text color, font size, and Line height in pixel.
BADGE STYLES: Let you select the styles for your badges.
STYLE OPTIONS: Let you set primary background and secondary background from here.
OPACITY AND POSITION: Let you adjust opacity and rotation, and flip text.
BADGE POSITION: Set the position of the badges to left, right, top or bottom.
BADGE POSITION(PIXEL): Specify the position of the badge in pixel.
Need to add a countdown timer to your website? Our plugins help you to add countdown timers to the website with ease, with some predefined timer styles to select from, you can easily add timers that match your theme styles.
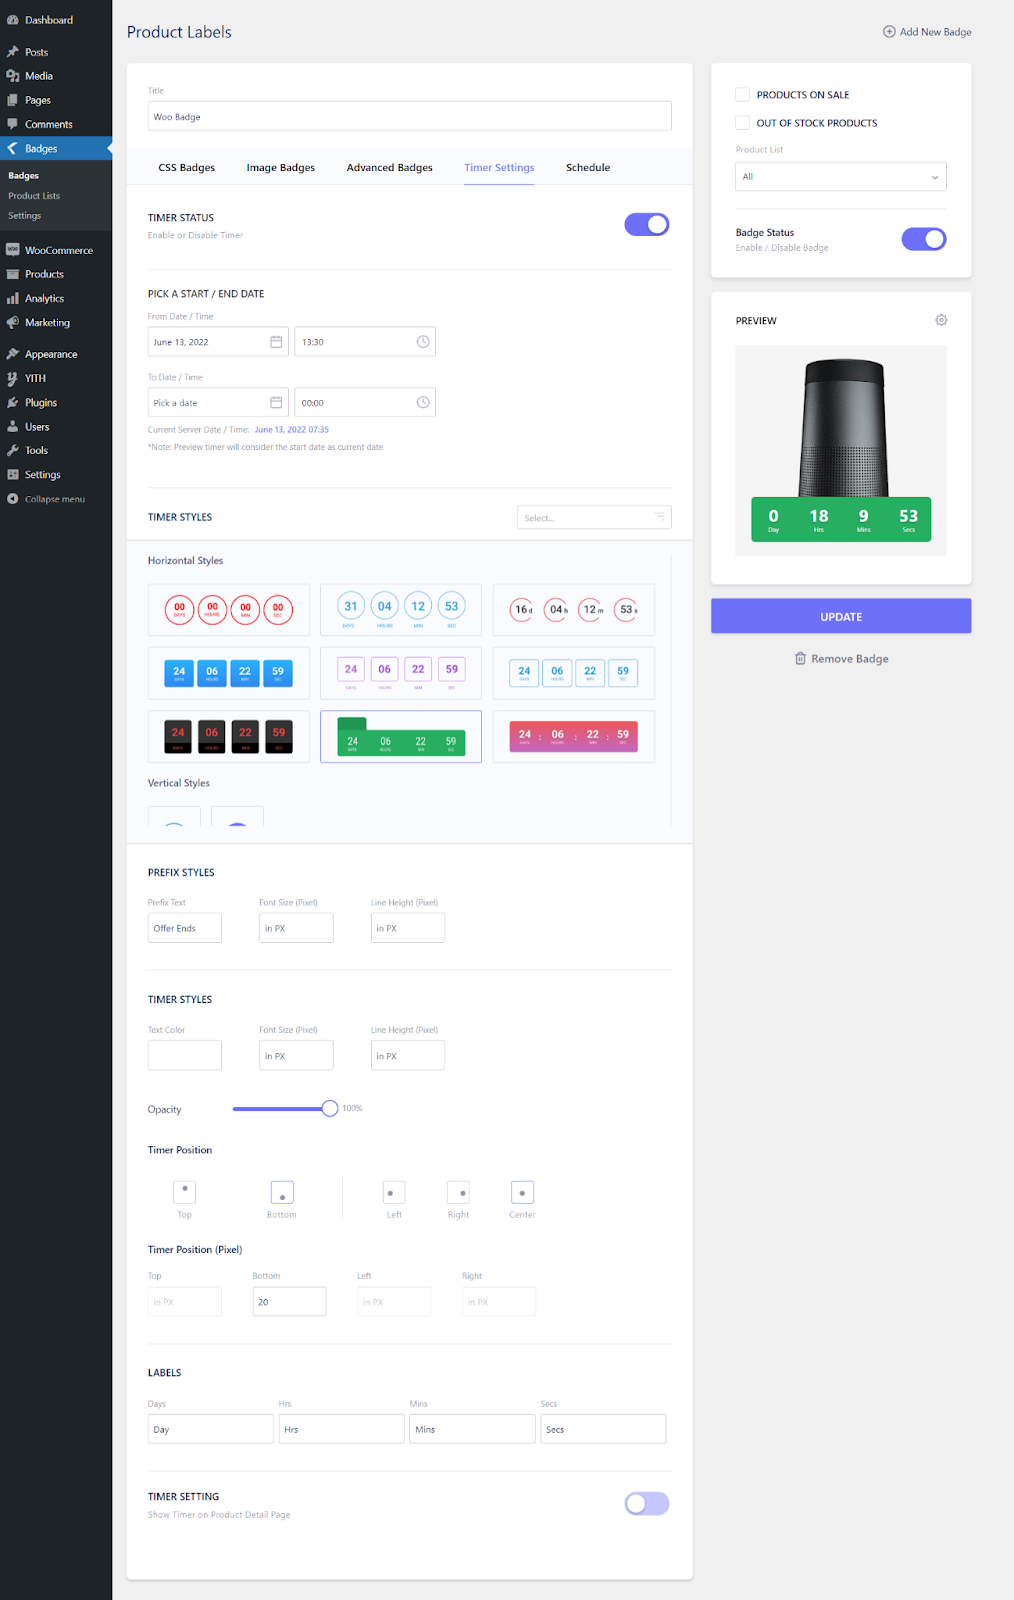
TIMER STATUS: If you want to on a timer for your label, then you can enable the timer status otherwise you disable it.
PICK A START / END DATE: Let you set a start date or end date.
TIMER STYLES: Let you choose the style for your timer like horizontal or vertical styles.
TIMER STYLES: Let you select Text color, font size, and line height.
OPACITY: Let you adjust the opacity of your badges.
TIMER POSITION: Let you choose the position of your Timer.
LABELS: Let you set the timing for your Timer.
You can set a From date/time and To date/Time and thus schedule the time for your label.

CUSTOM SCHEDULE: Let you schedule badges with a start date and an end date. You can choose the default Woocommerce product schedule for the products on sale.
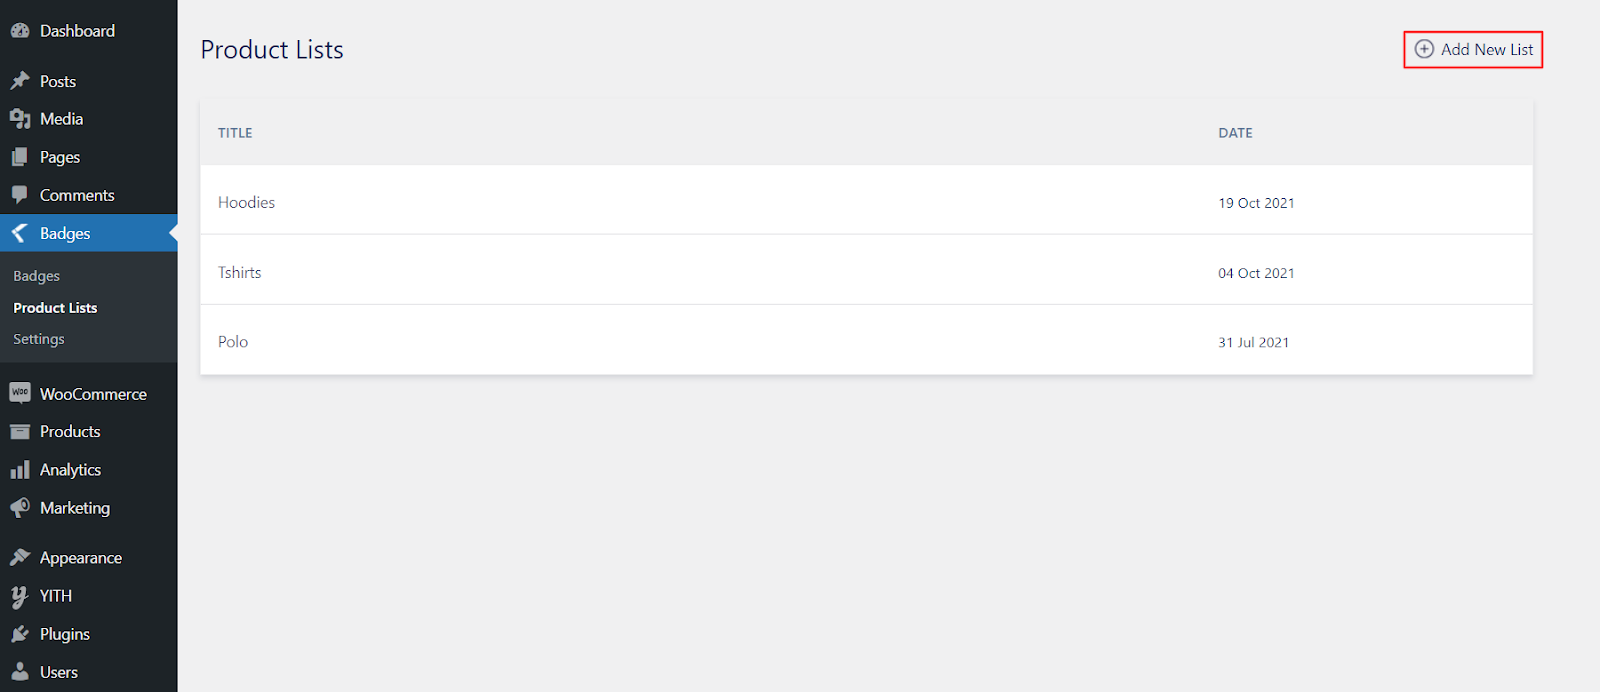
Click on the Add new list button to add a new product list.
If you need to limit the badges to a particular category or set of products, Product Lists helps you to create a list with a particular set of products or categories, you can select the list while updating or creating new badges.
List name: Select the Rule name here that you created before.
Type: Select list type from here. These are two types; Product Selection and Dynamic Request. The example for product selection is given below.
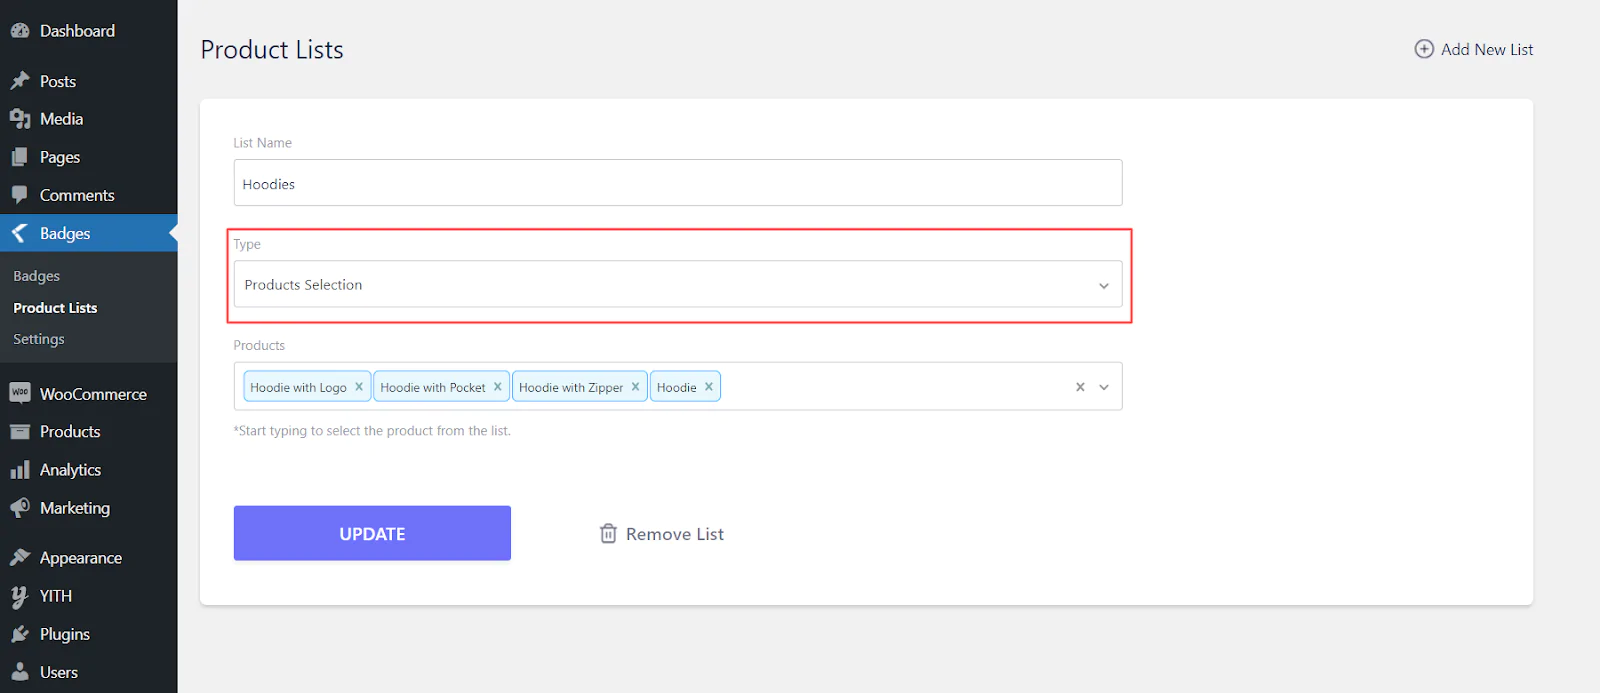
Products: Let you select products from the product list. Here you can start typing to select the product from the list.
The example for Dynamic requests is as follows.
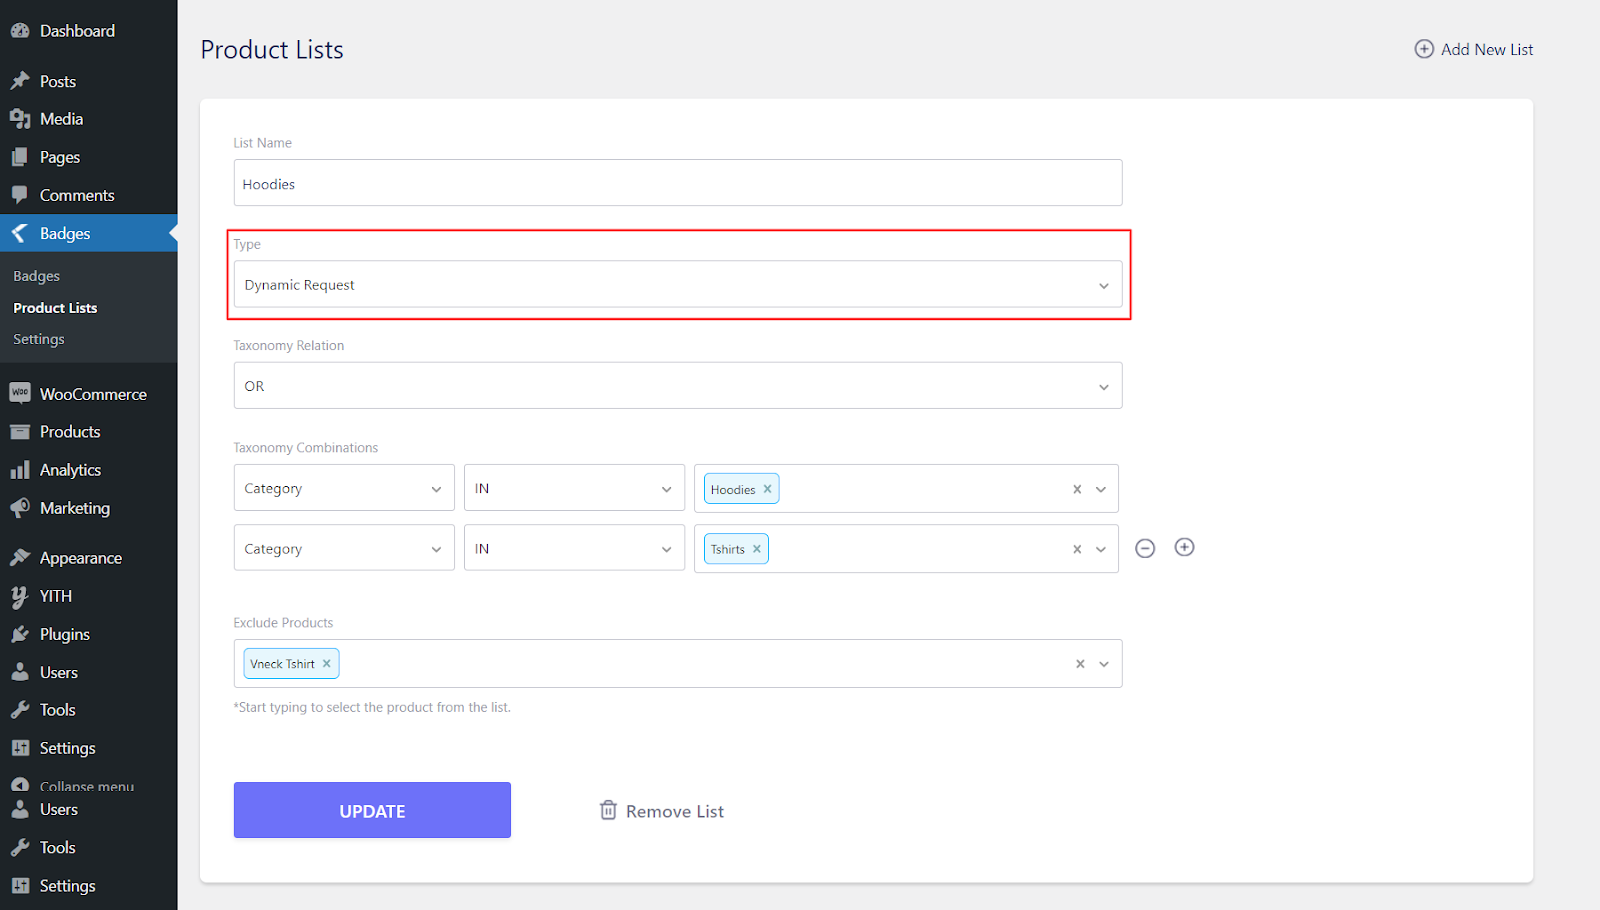
The dynamic request helps you to include the product categories and tags into the product list.
It provides three settings tabs and a key tab namely,

Hide Default ‘Woocommerce / Theme Sale Badges‘: Let you disable the woocommerce sale tag.
Show ‘Dynamic Pricing With Discount Rules for WooCommerce’ Product Lists: To enable this ‘Dynamic pricing rule with Discount Rules for woo commerce plugin should be installed on your site. So that pricing rules are applicable for both plugins.
Enable Product Loop Hook: We append the default option to the product thumbnail. Some themes don’t support it or overwrite it. In that case, we enable the product loop hook.
Enable Product Title Hook: Helps to hook labels to the product title. Enable this option to hook the label to the product title
Enable only if the badges are not getting displayed on your products or else this might cause multiple/repeated badges on the product.

Show Badge on Product Detail Page: Enable or disable the badge on the product detail page
Single Page Wrapper Class: By default, we use the default woo commerce structure or classes for appending the badges on the product detail page. If everything works fine on your website, just leave this field. For some product galleries or carousels, badges may be missing on the detail page, in that case just add the product wrapper class name to this field.

Show Timer on Product Detail Page: Let you enable Timer on Product Detail Page by enabling it.
Timer Position: To position the timer detail on the Timer detail page
Here you can add and activate the plugin License Key.

License key: For plugin updates and priority support please make sure you have an active license key. You can add and activate the plugin License Key to get future updates and bug fixes.
Key Expires on: Specifies the expiring date of the key.
If you have questions about our plugin(s), are experiencing issues with any of our plugin