- Woocommerce
- Shopify Apps
- WordPress
1. Download and install WPML and configure using the site key. You can translate the WooCommerce Wishlist by following the steps below.
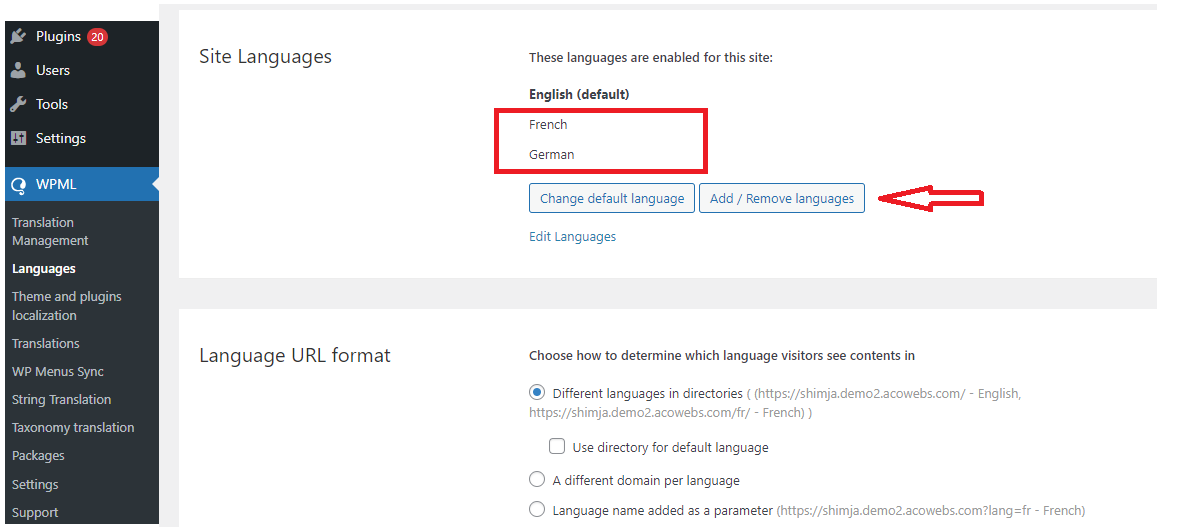
2. First, go to Dashboard-> WPML and add the languages you need.
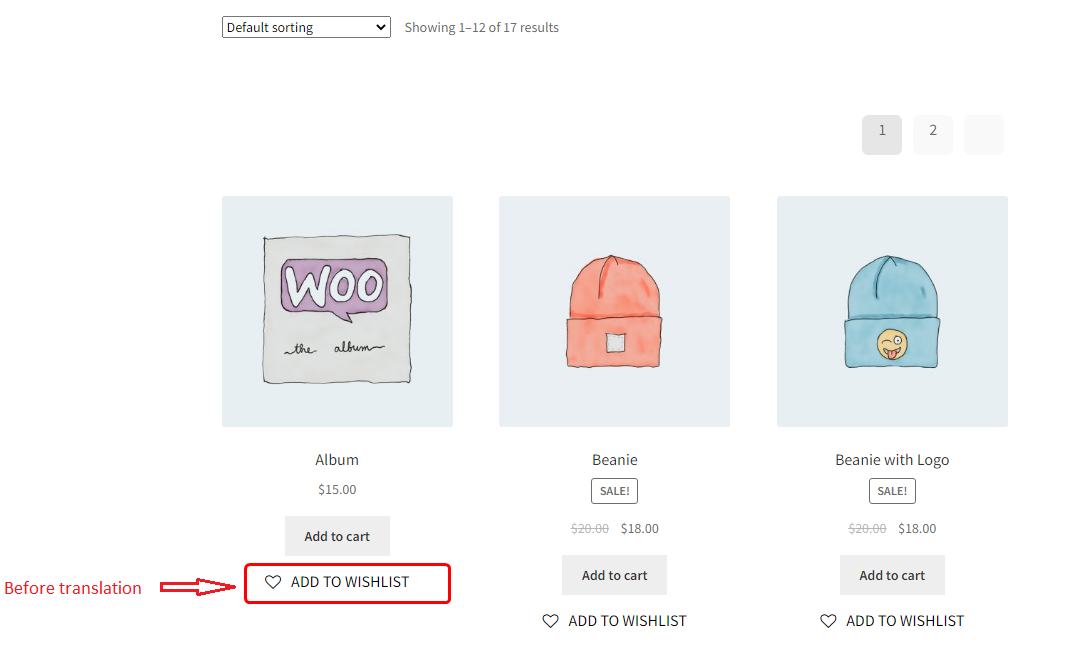
3. Ensure that wishlist pages are translated correctly.
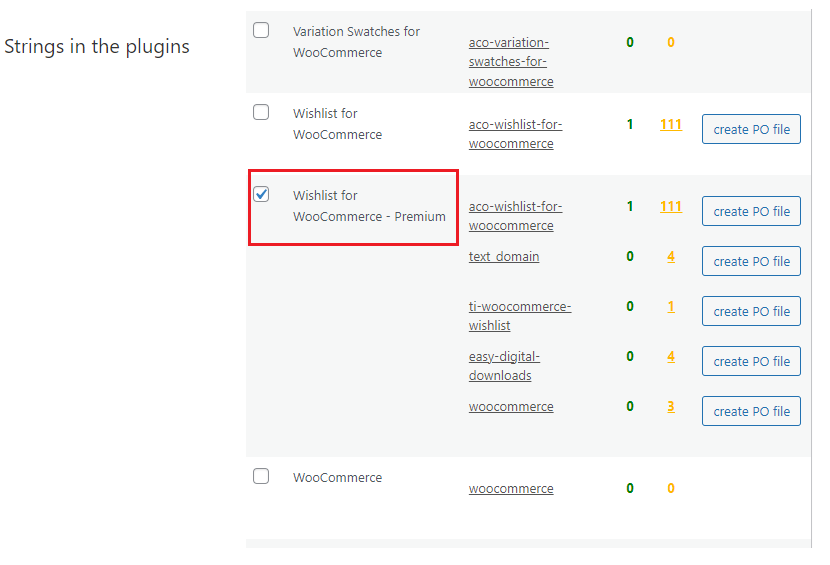
3. Then go to Dashboard-> WPML-> Theme and Plugin Localization. Select Wishlist for WooCommerce. And Scan it for strings.
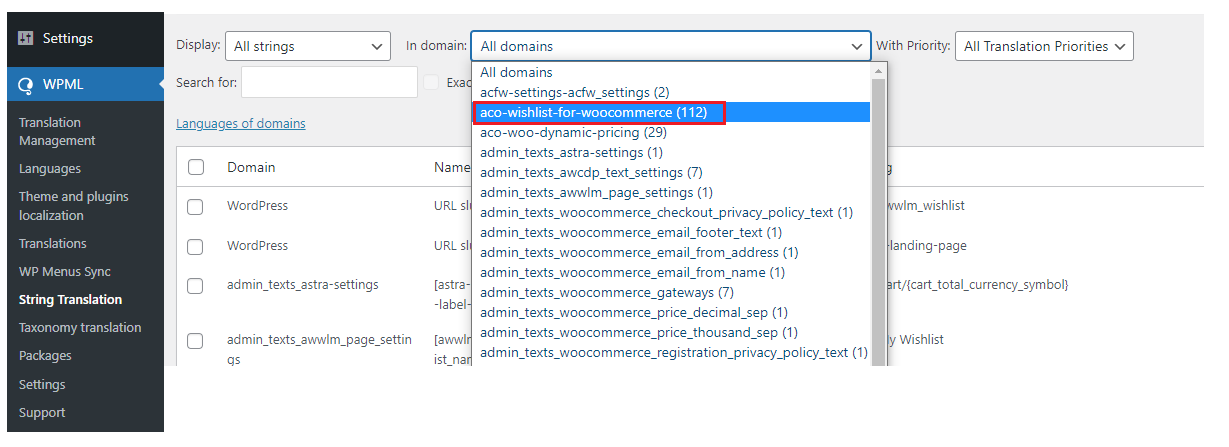
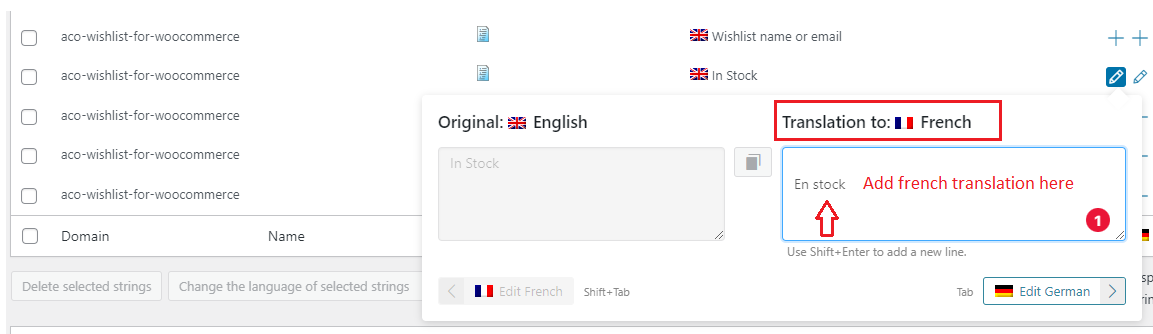
5. Then go to Dashboard-> WPML-> String Translation. Select the “aco-wishlist-for-woocommerce” text domain from the drop-down in the domain. Here you can able to see the strings from our wishlist plugin.
6. Select the text you want to translate and click on the + icon.
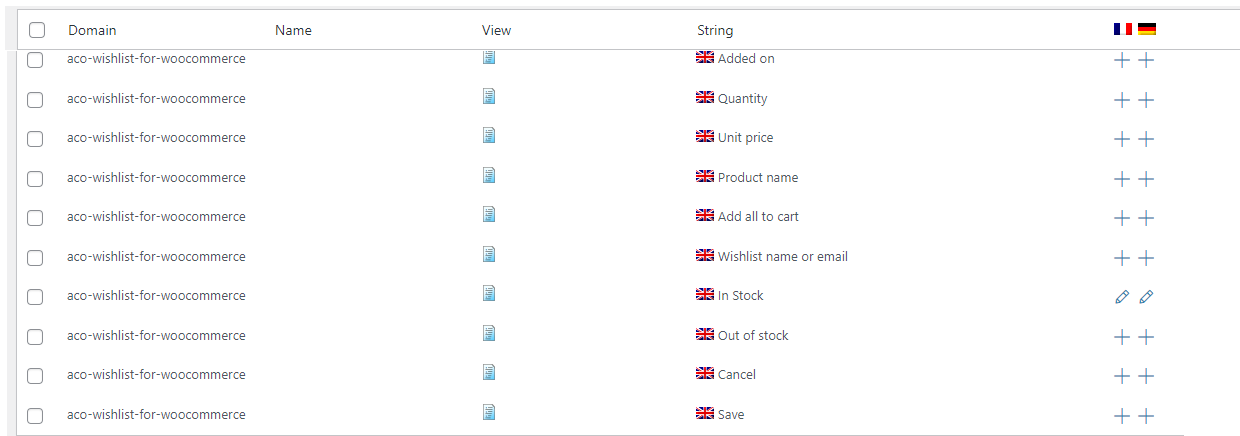
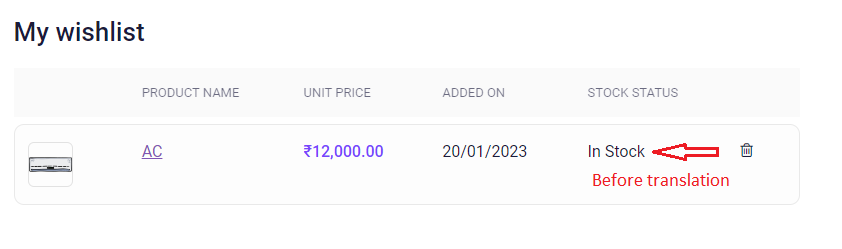
7. Then it will show a box to add the translation. Add the required translation and then press enter to save. For example, we need to translate the text “In Stock”. Then click on the + icon for the French translation of the text “ In Stock” add the required translation and press enter.
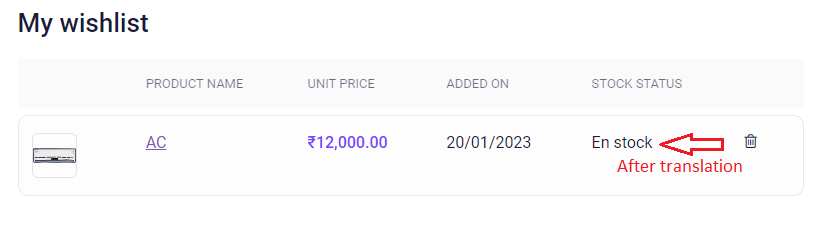
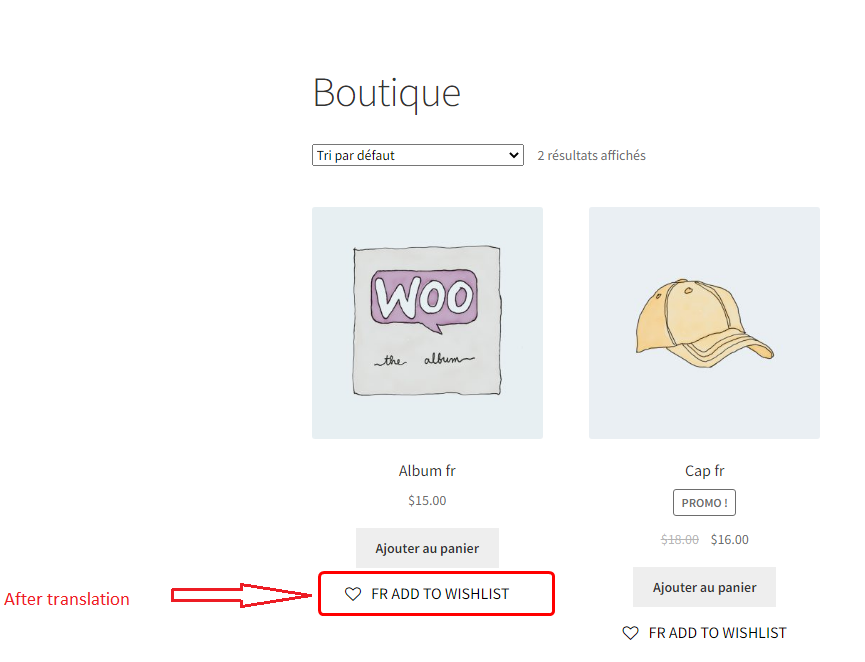
8. To check this, change your language on the frontend page by clicking the top language bar and selecting french to see the translation.

9. Then you can see the text is translated.
10. To achieve admin_texts translation, go to Dashboard-> WPML-> String Translation. Select the “admin_texts_awwlm_button_settings” from the text domain drop-down. Then select the admin strings to translate.
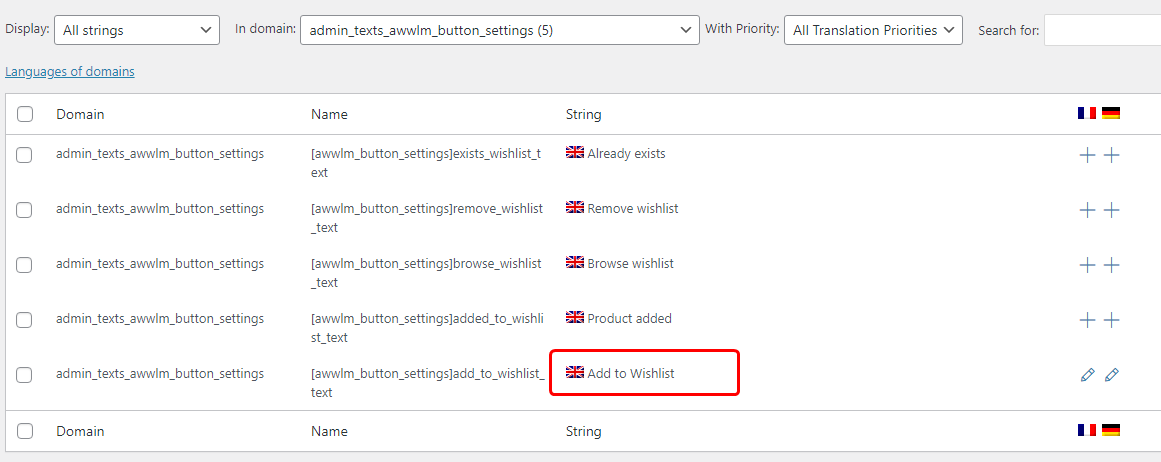
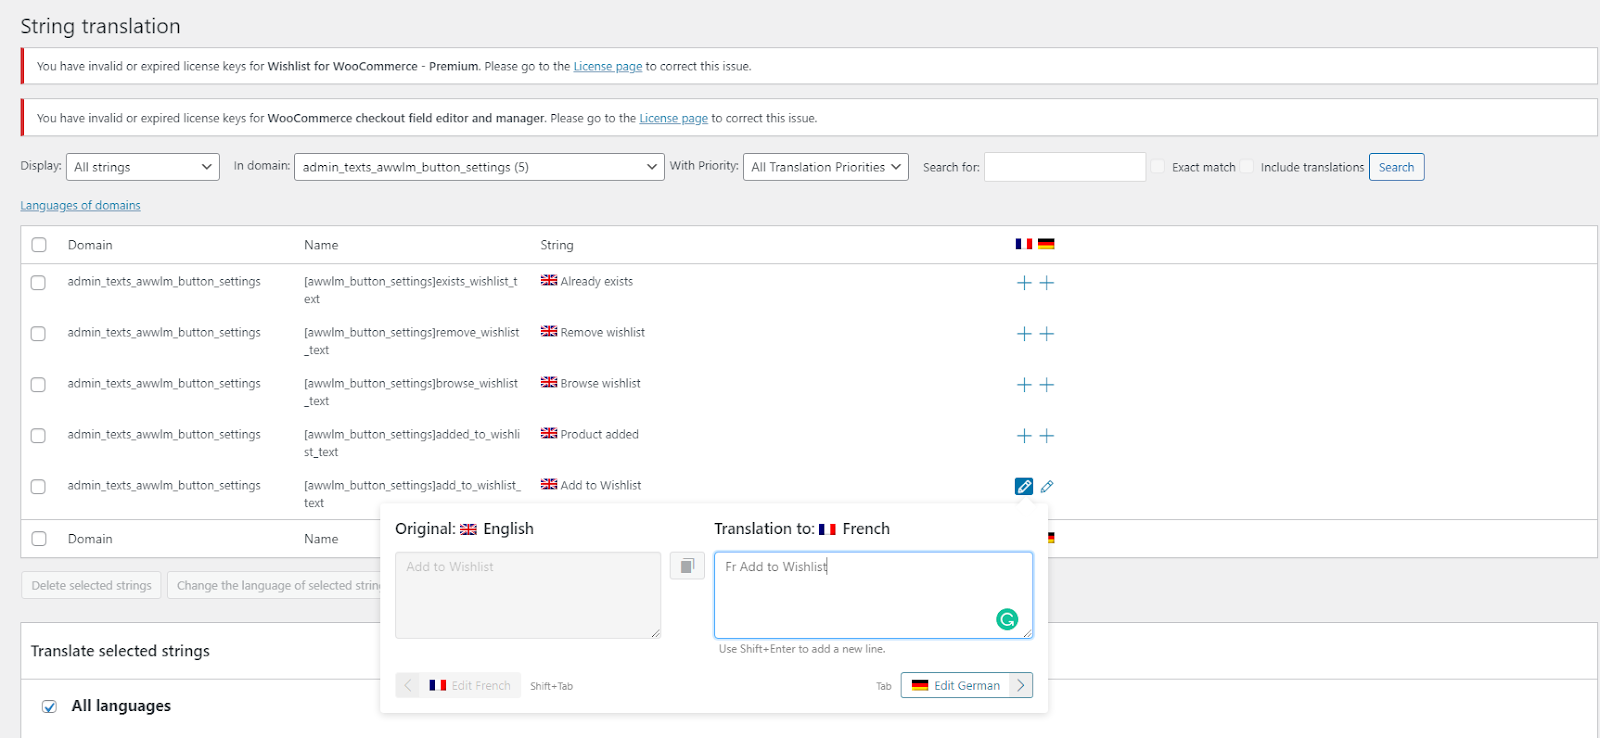
11. Then you can see the admin text is translated.
If you have questions about our plugin(s), are experiencing issues with any of our plugin


 Login
Login
 Cart
Cart BUY THIS PLUGIN