Login
Login
 Cart
Cart
Imagine giving out discounts after discounts, yet not being able to convert your visitors to customers? Well, I’m sure that this is a nightmare you don’t want to face.
But if you already did, there’s a good chance that you need to change something on your product page. And one of the best places to start the change is by adding custom product badges on your eCommerce site.
Have you ever noticed the “Sale badges” on the top corner of your products that you have put on sale using WooCommerce? Yes, that’s what we are talking about.
That boring old sale badge looks like it’s now a part of the store, so we won’t blame you if you don’t remember it.
But you know what? You don’t deserve those same old sale badges, Instead, you can deserve nice-looking custom product badges on your WooCommerce powered online shop.
You can use colorful badges that say “New”, “Featured”, “Extra 50%”, or anything that you want.
But how can we add those custom product badges to the WooCommerce store? Is there any easy way? Well, let’s get to know if there is!
What are the WooCommerce Product Badges?
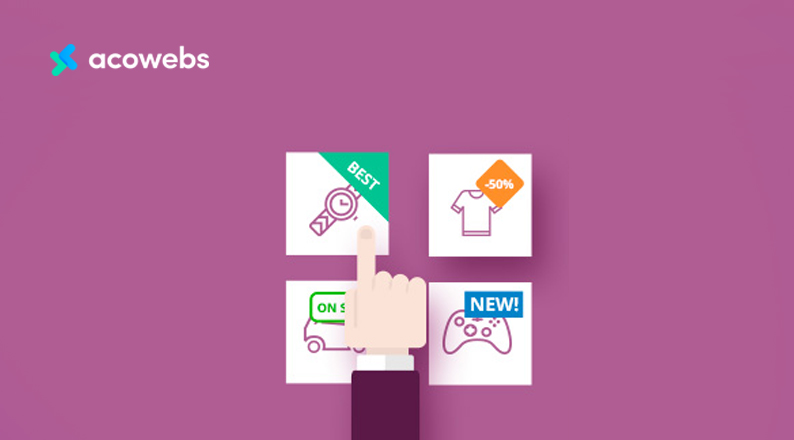
You must have seen the number of notifications over an application icon on your phone. Some of them indicated the number of messages (over messages icon), some show the number of missed calls (over the dialer icon).
Now imagine the same for the products on your WooCommerce store. Yes, there is a similar badges option for your products as well. However, in WooCommerce these badges only appear when you set any product on sale. Like the image below.
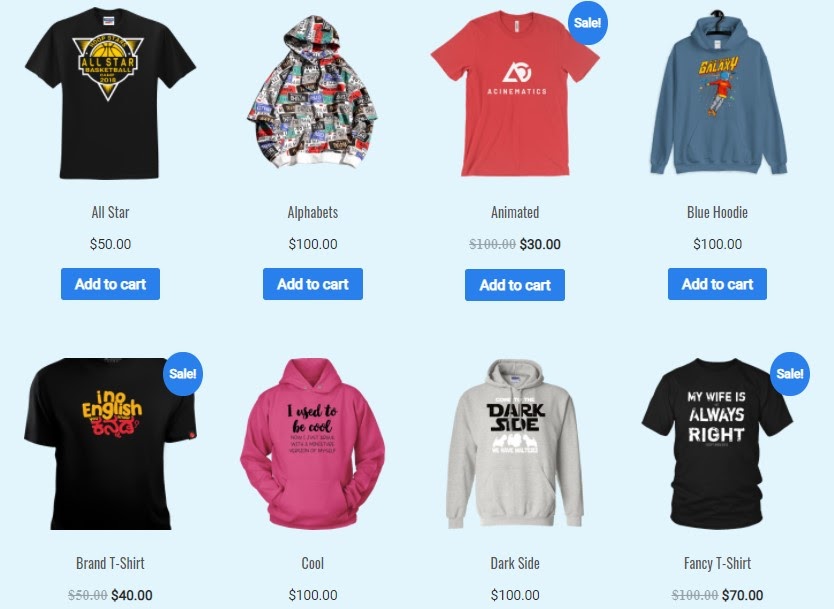
WooCommerce product badges are usually visible on the sale products. But if you have discounted a product using any custom methods, like using dynamic discount rules, there is no option to show any badges for that.
Well, at least not by using default settings.
Why do you Need Custom Product Badges for Your Shop?
Let’s say you have a product that is high in demand, and you want to add a custom badge that says, “High Demand”, to let people know. Or a product that is only available to you out of all your competitors, and a badge like “Featured Product” can increase its sale by many folds.
Or in the most common scenario, perhaps you added a custom discount using a plugin. But the WooCommerce sale badge will only show up in case you set discounts using the default method offered by WooCommerce.
So despite offering discounts to the customers you will not be able to let people know that you are offering discounts. Bummer, right?
Now if you have searched for a conventional option like me and found no results on how to add custom product badges using WooCommerce, then you are not alone.
Yes, there are no options to set custom product badges for the WooCommerce store in the default way.
But that does not lessen the need for a custom product badge, as they are heavily useful for eCommerce, and we have already talked about that above. So how do we implement them on our website?
ALSO READ: What Is Scarcity Marketing? How Is It Useful In eCommerce?
How to Display Custom Product Badges using a Plugin
We already informed you about the product badges, and why custom product badges are important for your website. But we still don’t know if there is any way to add custom product badges to our WooCommerce-powered eCommerce website.
Well, there are actually two major ways to add custom product badges to your website. One of them might seem a bit complex to you, but the other one will surely be easy to implement.
Using PHP Coding

One of the two ways of creating custom badges and implementing them on your website is by manual coding. If you know PHP, you can add custom badges by yourself.
However, we will not be going deep and show you how to write PHP codes for adding custom product badges, as most of our readers don’t know how to code at all.
It is the primary reason behind creating a website using WordPress, right? Also learning to code is quite a long process and it might take a lot of time before you know how to add different badges for your eCommerce store.
Using WooCommerce Product Labels
WooCommerce Product Labels is a premium plugin that lets you add custom product badges without going the extra mile of learning how to code.
Getting Started with WooCommerce Product Label
WooCommerce product label also has a free version named WooCommerce Product Labels free version, which is a WordPress plugin that can help you add custom product badges to your WooCommerce store with ease.
The plugin has a lot of ready-made badges for you to add to your website. However, that’s not all, as you can manually design and add custom product badges as well.
This is one of the leading WooCommerce plugins that offers both a free and a premium version.
The free version itself has a lot to offer to the table. You can find the following features on the free version of the plugin.
- You can create unlimited badges. (Yes, unlimited!)
- You can easily create or manage badges with our amazing UI.
- You’ll have the option to customize everything from badge color, font size, line height, width, opacity, position, and more.
- Will get a live preview that helps you with easy positioning and styling.
- Default or commonly used badge styles available to choose from.
- Option to set hide or show badges.
- Option to set badges to a set of products or categories.
- Option to set badges to all products ‘On Sale’.
- Option to set expiry date & time on badges.
- Option to hide the default WooCommerce ‘On Sale’ Badge.
Yes, all these features are available for free on the WooCommerce Product Labels. But that’s not all. For just $19/year, you can get premium features like –
- 100+ predefined badge styles to choose from. So you won’t have to find resources and add them manually.
- Live preview with the option to change the preview image.
- Set timers on products.
Amazed with what you can do with this plugin? Well, let’s try it out.
How to Install WooCommerce Product Labels
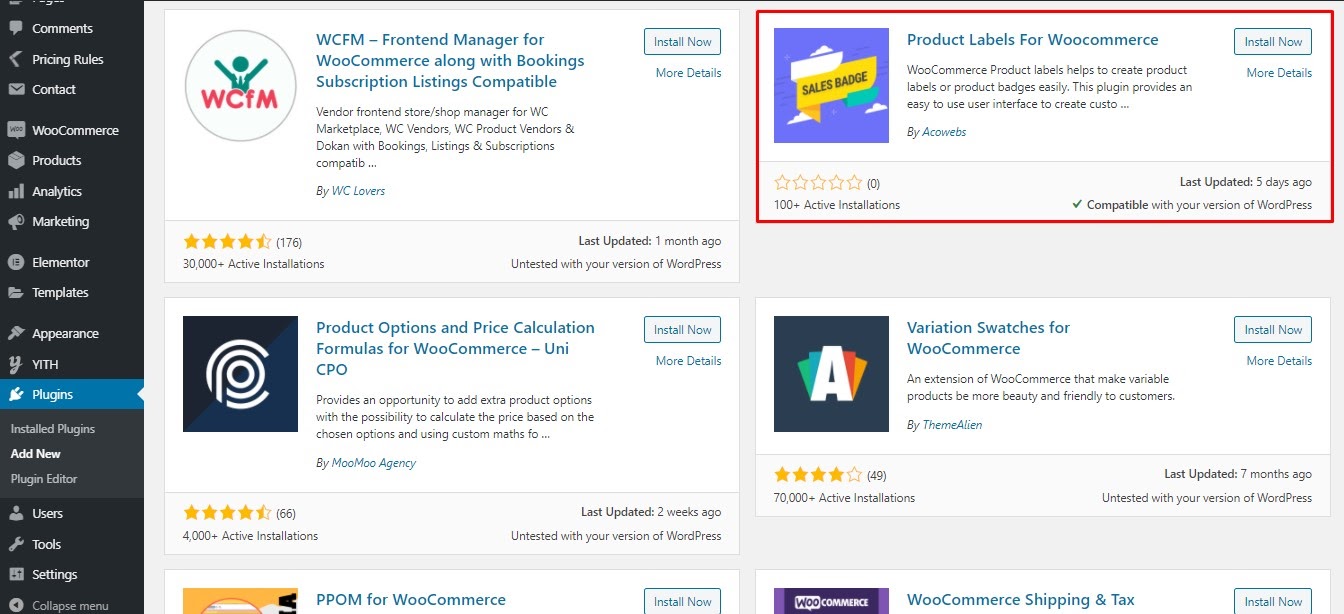
Installing WooCommerce Product Labels is just like any other plugin. From your WordPress Admin Dashboard, navigate to Plugins > Add Plugins > Search “Product Labels For Woocommerce”, and install the one from Acowebs.
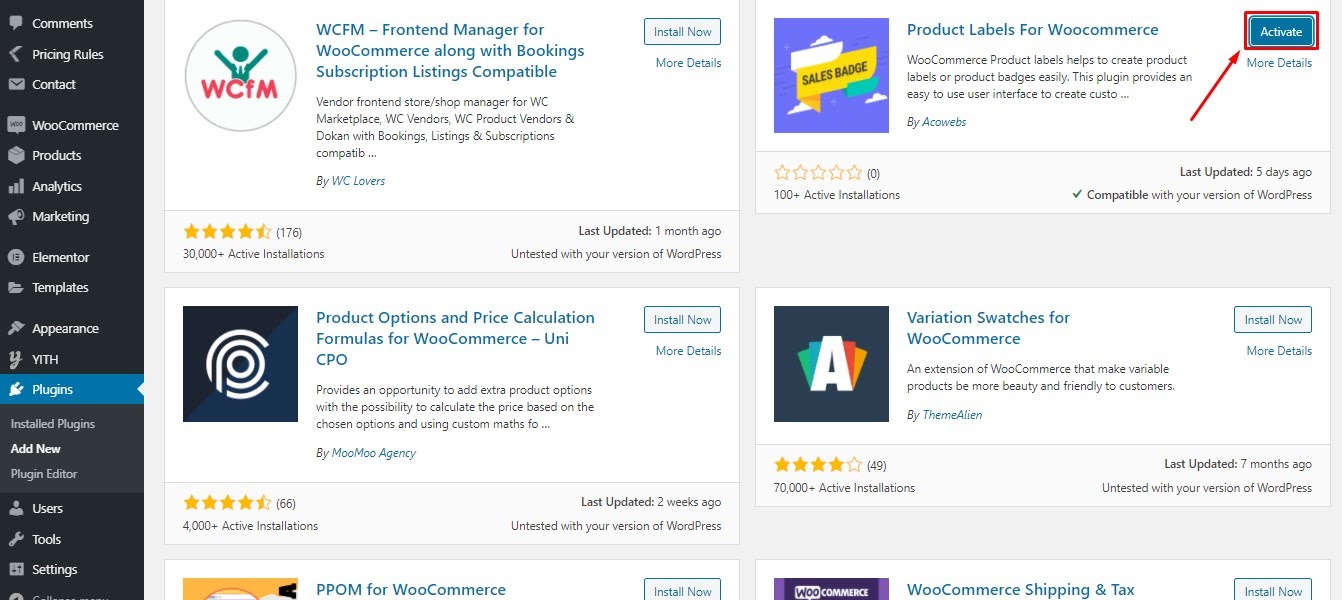
Once the installation is done, activate the plugin.
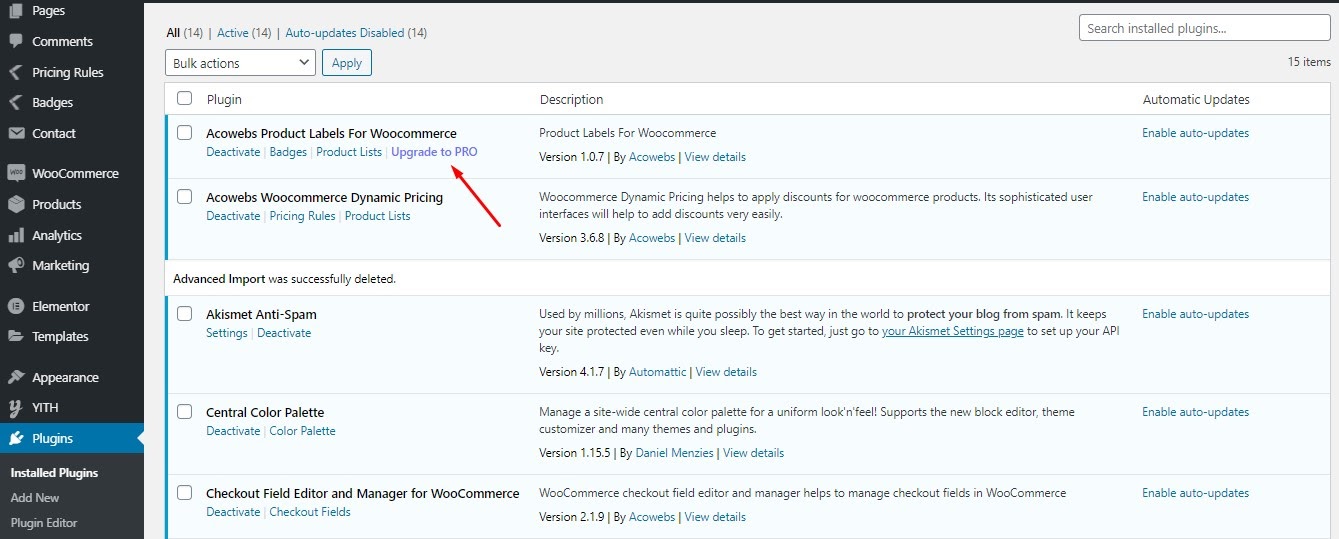
If you want to upgrade to the pro version, just go to Plugins from WP Admin Dashboard again, and click on “Upgrade to Pro”, just under the “Product Labels for WooCommerce”.
You can also get the premium version of “WooCommerce Custom Product Labels” from the official website.
Adding a New Badge
Adding a new badge to the WooCommerce Product Labels is actually super easy.
First login to your WP Admin Dashboard and from there select Badges. Once you click on the badges, you’ll find an “Add New Badge” button on the top right corner.
A new page with a nicely designed UI will appear. Keep in mind that all the changes that you make to this page can be previewed live from the right side of the page.
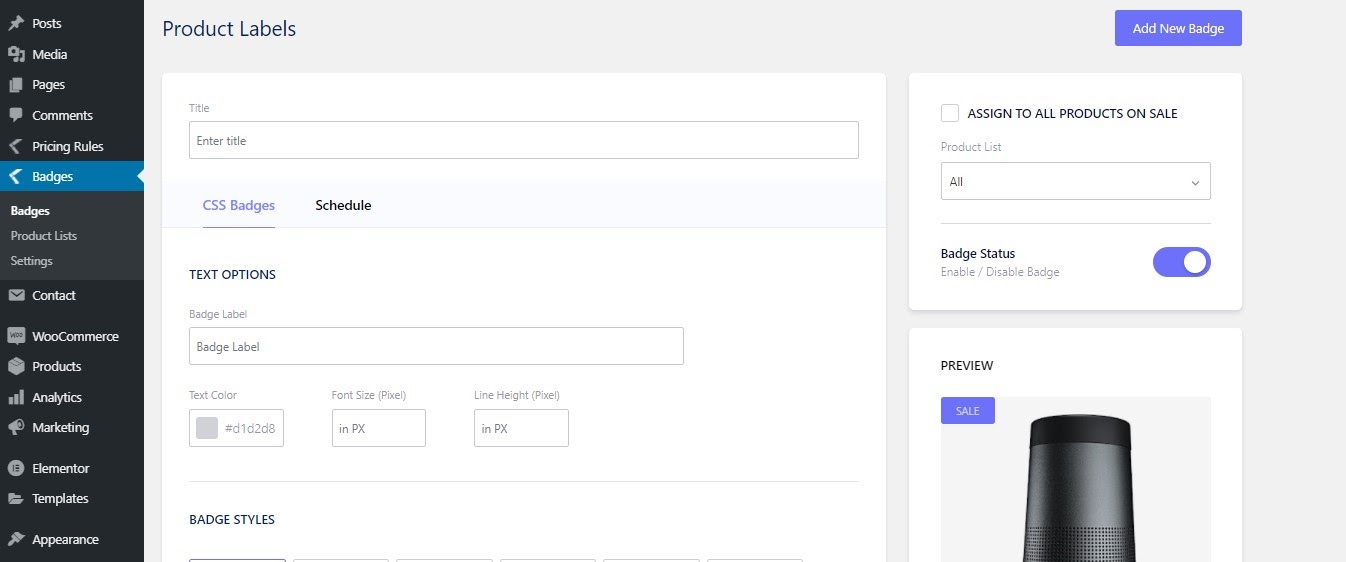
Now, on top of the page, you’ll be asked to enter the title for “Product Labels”. Once you add the title, you’ll find a plethora of options down below. So let’s just start from the top.
Under the naming option, you’ll find a section called “Text Options”. This section will basically determine what the text inside the badge will be and how it will look like.
So first, set the text for Badge Label, we named our one “Featured”.
Next, you can change the text color. We chose white for our text color as we want a deep color background along with it. You can change it to whichever color that you like.
You can also change the font size to modify the size of your text. Line height can be used for increasing the distance of the text from the top corner.
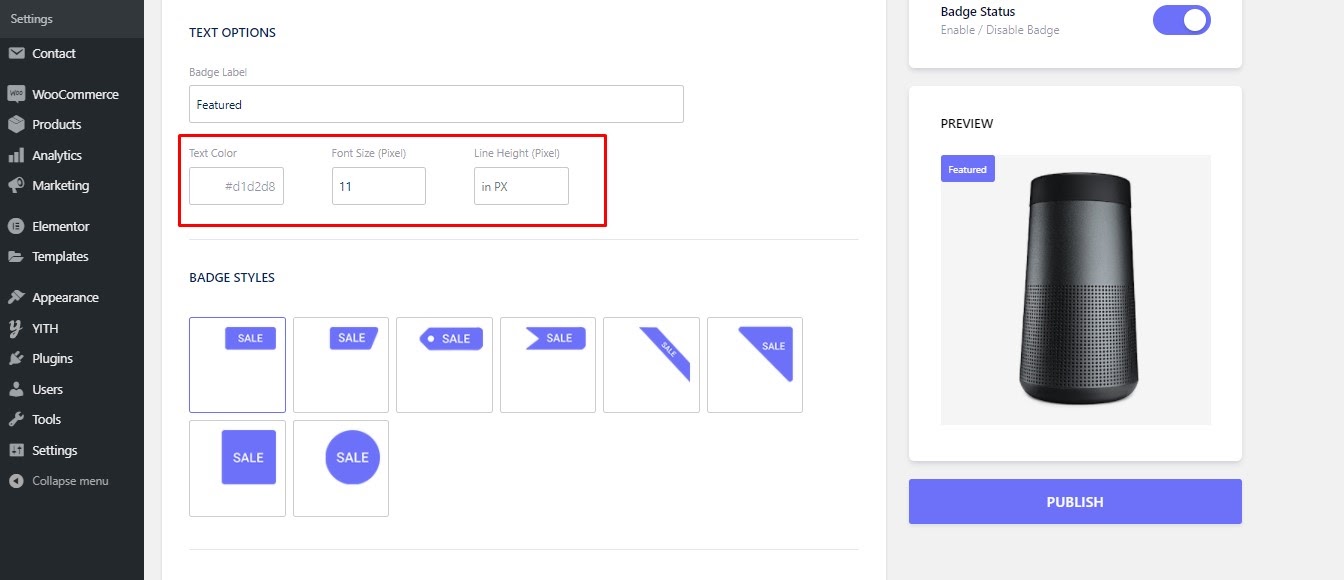
Moving on to the next section once the former one is over. Badge Style will let you choose the design of the product badge. There are 8 different classy designs for the product badge that can be found on the badge style option.
Choose one and keep an eye on the preview to see how exactly it looks.
Here’s how our one looks.
Once you are satisfied with the badge style, let’s move on to the Style Options. From here you can change the color of your badge, height, and width. If you think it looks good, carry on and modify the options under that.
You’ll find an Opacity option to control the opacity of the badge. Below that, a 360-degree rotation is also available, so that you can choose the right style for the badge.
You can also flip the badge both horizontally and vertically if you wish to do so.
In the end, you can set the location of the badge by yourself. You can either choose a position or pixel-based location.
For the first one, go under the “Badge Position” and select either top, bottom, left, or right alignment of the badge.
Now before you go on and hit that publish button, make sure you have selected exactly the products that you are trying to add badges to.
You can either select all products that are on sale, or you can make a list of your products that are up for sale with a custom discount or products that you want to equip with custom badges like “Featured”, “Best Seller”, “New”, etc.
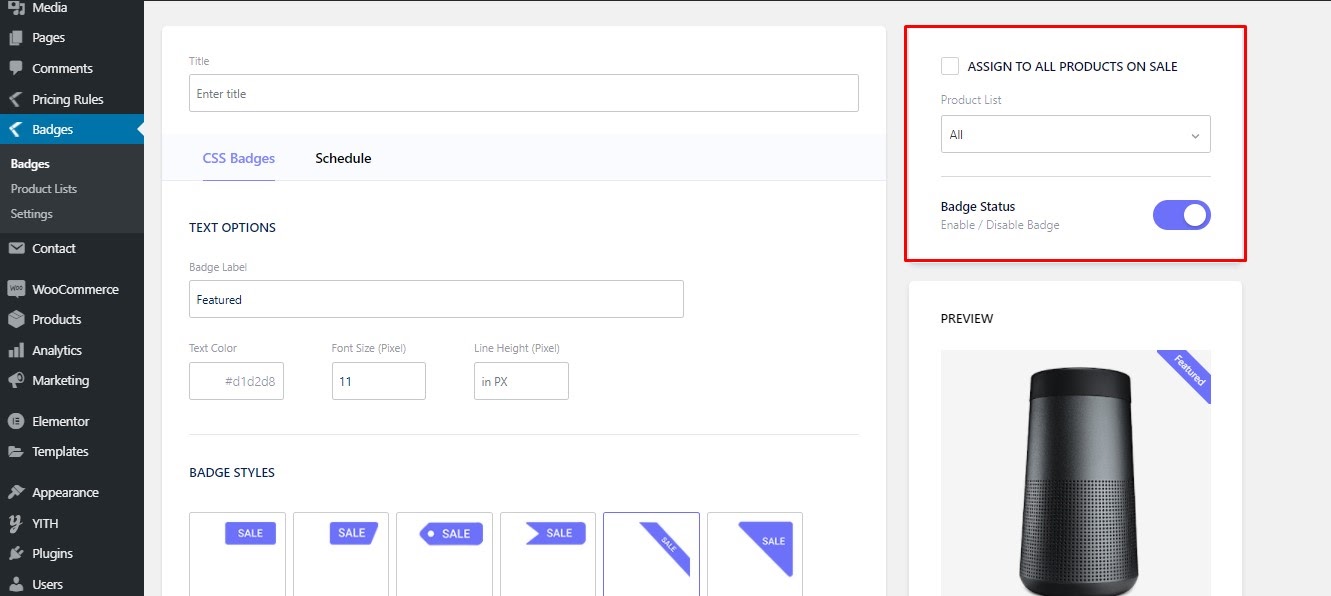
To make the list of the products, we will be using the “Product List” option. But before moving on to know how we can do that, hit the publish button from the bottom of the page and then go forward for the next task.
Editing Product List
Product list is used for categorizing the products for displaying badges. With WooCommerce product labels, you can add specific products, categories, or a mix of both to the product list. Let’s try it out!
To add a product list, navigate to WP Admin Dashboard > Badges > Product Lists. Now click on “Add Product List” on the top right corner. Once the product list creation page appears, you will be asked to enter the list name. Here enter the name that you want to.
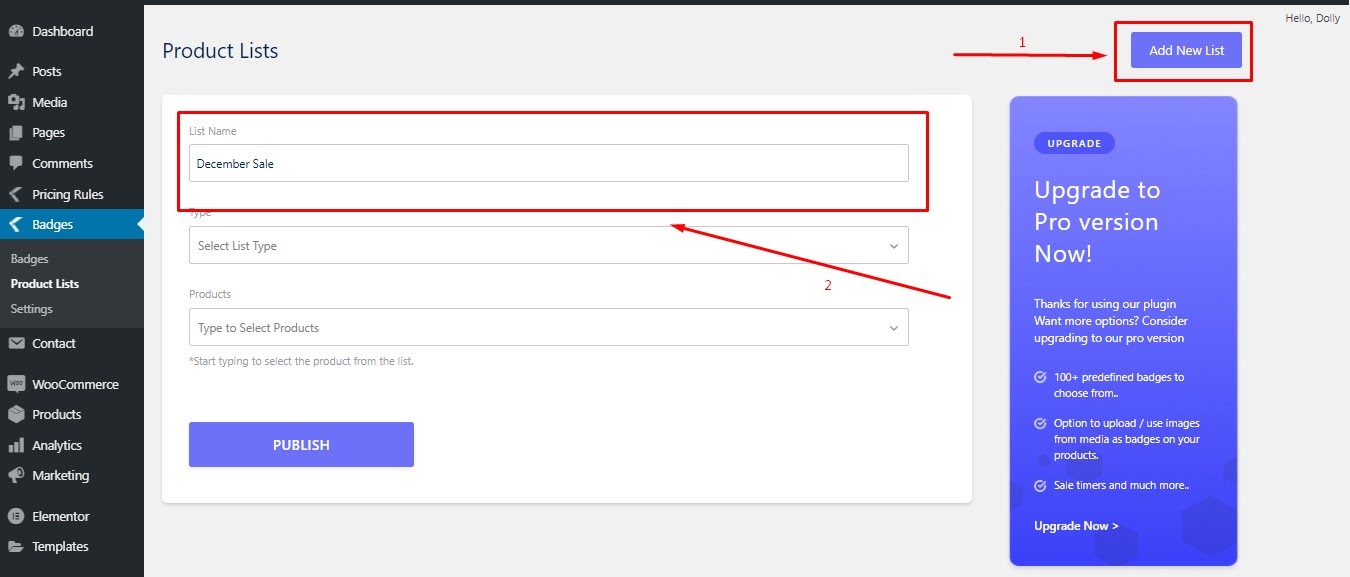
The next field is “List Type”. Now, this is the most important part. There are two different list types available for badges, one is Product Selections and another one is Dynamic Request. Both of them have different applications and below is how to use them.
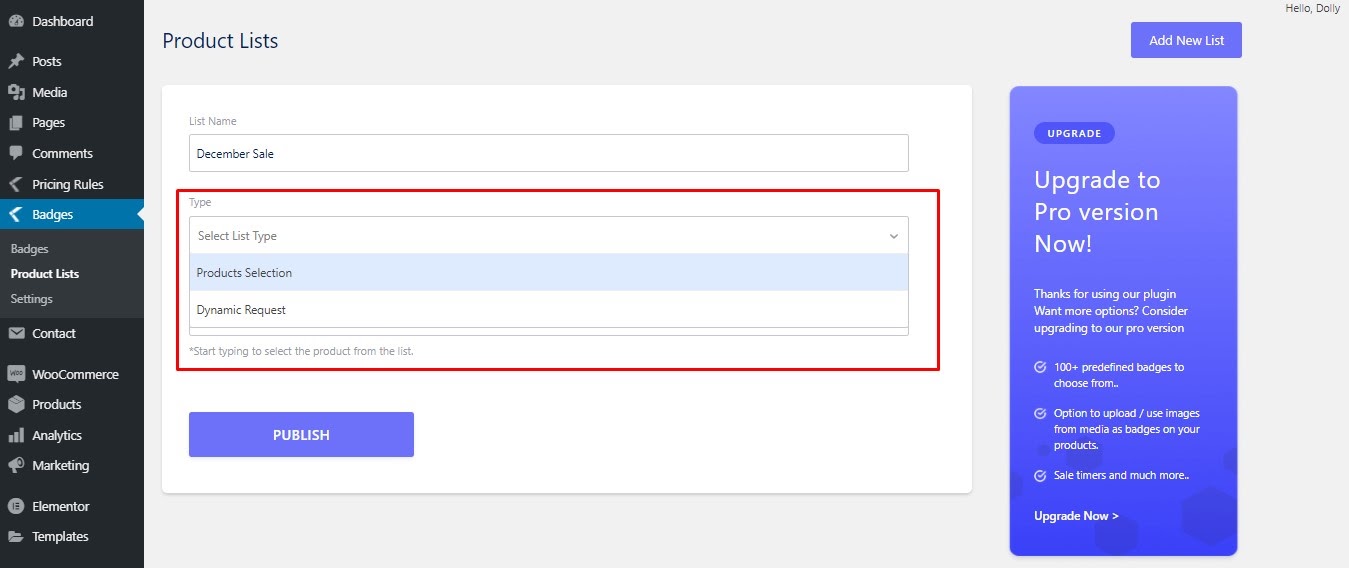
1. Using Product Selection: Using the product selection method, you can only select single products. It is useful for selecting a very small amount of products. Just select the Product Selection page and then on the next field, type your product names. Once you are done, click on publish and you will be good to go.

2. Using Dynamic Request: For Dynamic Request type, you’ll get more fields than a product selection. Under the type Dynamic Request, you will get a field called Taxonomy Combinations. Using this field you can choose one or more categories on the product list. You can also exclude some products from the product list that are part of those categories. Here is how you can apply it practically.
- Adding all the products of a Category into Product List:
To add all products of a category into a product list.
- Select AND on the field of Taxonomy Relation.
- Now click on Add Relations.
- Once you do that, a field will appear for you to Select Type. Here, select Categories, as we’re planning to add all the products of a category. (You can also select Tag to add all the products under a tag, in the same way).
- Now you’ll be asked to Select Relation, select IN, as we want products that are in our preferred category.
- You’ll now be asked to select the category, select the one you need.

Now select publish, and your product list will be created.
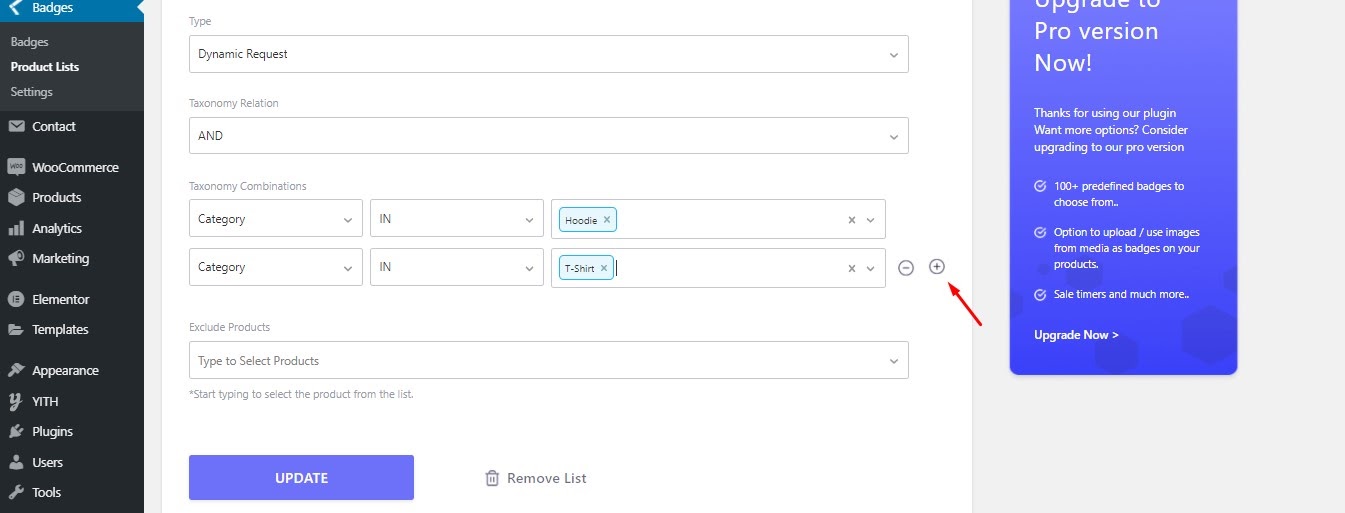
- Adding Multiple Category into Product List:
You can also add multiple categories to a single product list. You can do it in the same way as a single category product list. When you’re done with adding one category, just click on the plus (+) button below it and you’ll get options to add another category.
- Excluding Products from Product List:
When you are adding all the products of a category to a product list, there can be certain products in that category where you don’t have any sales going on. In that case, you can’t add the common sale badge to that product as well, can you?
Well, there is an option to exclude a certain product, or products from a list. Once you are done adding the category/categories, you’ll find an option named Exclude Product, right below it.
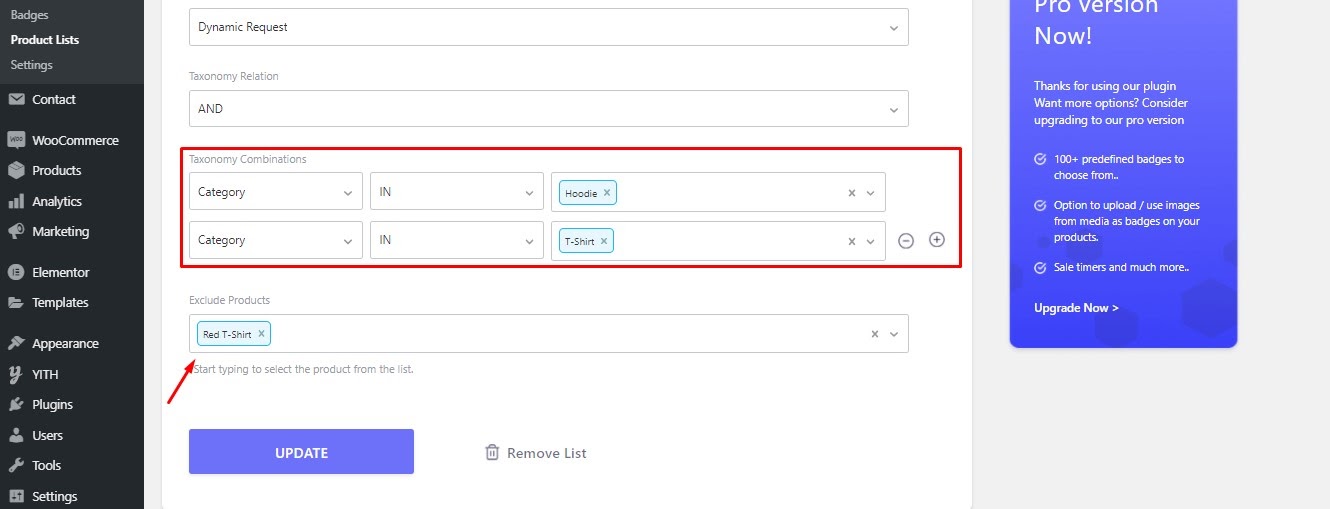
Here you can search with the product name to add the product that you don’t want to be on the product list.
WooCommerce Product Label Settings
WooCommerce Product Label comes with a setting that is pretty handy. You can find some really important features in the settings. Once you go to WooCommerce Product Label Settings from WP Admin Dashboard > Badges > Settings, you will find three options.
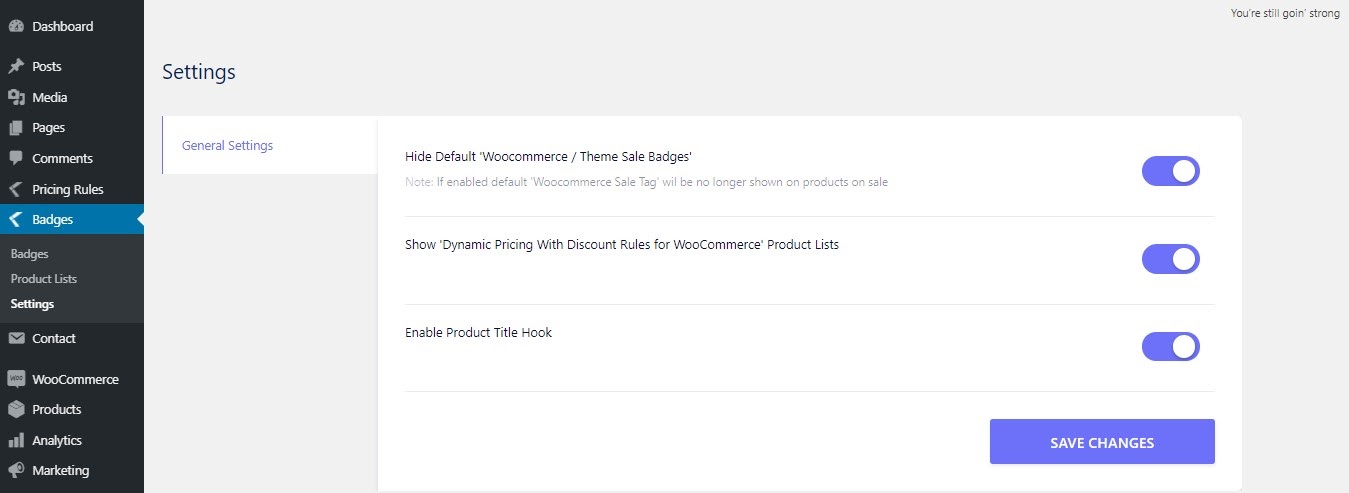
- The first one is “Hide Default ‘Woocommerce / Theme Sale Badges”, as you can imagine, this option is used to hide the sale badges that you see after putting up a product for sale using the default sale method offered by WooCommerce.
- The second option is “Show ‘Dynamic Pricing With Discount Rules for WooCommerce’ Product Lists”. If you use “WooCommerce Dynamic Pricing with Discount Rules for WooCommerce” by Acowebs, you can just use the existing product list from that plugin. You don’t have to do it differently for these two plugins. All you have to do is turn on this option and your product list will be automatically synced.
- You can also enable product title hook without any coding.
How Custom Product Badges Can Help You Improve Conversion
Product badges make it easy for customers to differentiate between products.
You can divert the attention of your visitors to the products that you want and by making them stand out from the rest using product badges. You can also prioritize products based on sales, stock, or demand.
Notifying customers which are the hot products, which are the products on sale, or even featured products using badges attract people more than those without any badges on top.
They are also super important when it comes to converting more visitors into customers. Studies show that product badges can increase conversion from visitors to customers by a whooping 55%!
The most popular product badges that are proven to be high-converting are “Sale”, “Best Seller”, “Top Rated”, “Featured”. But you can also try out other product badges and examine their impact on sales.
Product badges work so well, because they work as a psychological trigger, and people like things that they can differentiate. In the same way, badges like “best selling” give people an urge to buy the product as many others are doing the same.
While badges like “high demand” can create a sense of urgency to the brain.
Overall, if used with good color combinations and design, product badges can have the most crucial impact on your conversion rate.
WooCommerce Product Labels: The Best Plugin for Custom Product Badges?
There are quite a few plugins on the WordPress repository (both free and premium) that help create WooCommerce product badges. However, most of them lack in one area or another.
If you consider only the free version, WooCommerce Product Label edges over any other plugin of the same category by a big margin. It lets you create unlimited badges, customize them, and apply them all free of cost.
It’s UI is one of the most sophisticated that you have ever come across on WordPress plugins. So normally the ease of use is also better than any other plugins of the same type.
What’s more, you have some pre-designed badges as well, so you won’t start out with nothing.
However, the premium version will give you even more convenience, with more than a hundred predefined badge styles and some more lucrative features. Add to that the premium support that you will have, it is definitely a better choice compared to many others.
There’s not a thing about WooCommerce product badges that WooCommerce Product Label can’t do. The premium version of the WooCommerce product label starts from just $19. When are you getting the plugin?
Wrapping Up
Custom product badges are very useful for eCommerce stores, as they help increase the conversion rate. While custom-developed websites use badges often, it was not present on WooCommerce-powered WordPress websites.
WooCommerce product badges or the lack of them, has been a problem for dedicated eCommerce owners for a long time. WooCommerce Product Labels can help minimize almost all of those problems.
Following this article, you can easily create any type of custom product badges for your eCommerce website and as you can see from the badges that we created, they will look beautiful.
With everything being said, if you face any problem while creating custom product badges or if any part of this guide confuses you, don’t be shy to comment down below and we will be eager to help you out with the problem you are facing.
Acowebs are developers of Woocommerce dynamic pricing that will help you add bulk discounts to products on your stores. It also developed the plugin for adding various extra product fields which is called Woocommerce custom fields, that are lightweight and fast. You can easily update your store with these add-ons and enjoy a hassle-free experience, check out the best options for additional Woocommerce custom product addons.