Login
Login
 Cart
Cart
Nowadays, most eCommerce customers are looking for a faster & smoother ordering experience. You have to be fast enough to hold their attention.
When a customer makes a purchase decision but experiences a delay in the ordering process, there’s a good chance you will miss that sale.
There’s just too much competition in the eCommerce industry to have a breathing space, especially in the area of smooth user experience on your website.
As a website owner, you must want to make it easier for your customers to shop, right? We know you do, and you can. The question is how so?
Well, one of the ways to make the order process faster is by adding a WooCommerce quick order form on your website.
In this guide, you are going to get a complete idea about how we can create a WooCommerce Quick Order Form, and how to utilize them. Without further ado, Let’s get started.
What Is The Quick Order Form and Why Is It Important?
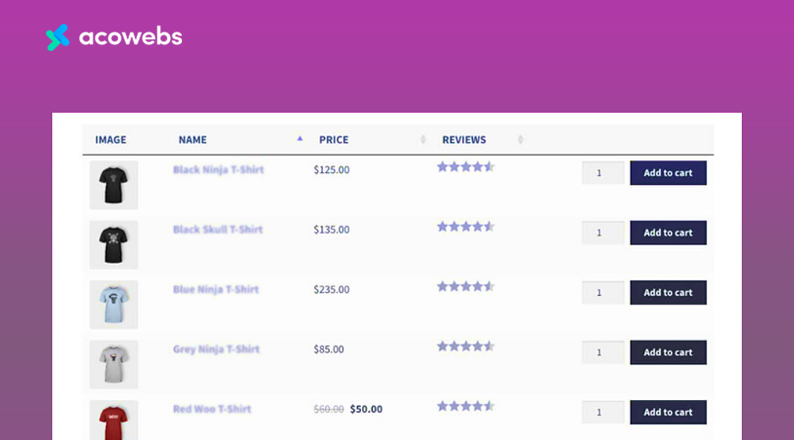
A quick order form is a list of various products on a single page, from where the customers can easily choose the products they need and order form.
It is much easier to find products from a WooCommerce quick order form than a regular product. That is because it is manually crafted and more organized.
Let’s have a look at some more of the key reasons you should have a quick order form on your website.
Saves Time
The most important aspect of a quick order form is that it saves your customers time.
Your customers don’t have to spend more time finding the product that you have on your website because they would get the products they need on one page and can order the products from right there very quickly.
As a result, they will save time and effort.
More Conversion
Since it’s easier to find and order products from the WooCommerce quick order form, you are also likely to get more conversion from a quick order form.
No Coding Required
With WooCommerce, building a quick order form does not require any coding knowledge. You can add product tables anywhere on your site without any coding experience.
With dedicated plugins for creating a quick order form, you can add a product table to any page and post, while also manually set the product features you want to display.
Now, to add a quick order form on your website, you either need to create it manually, or use a plugin, with the latter being the easier option.
In our tutorial, we used a plugin called “Product Table for WooCommerce”. Let’s have a look at the plugin before we start our tutorial.
ALSO READ: WooCommerce Setup Tutorial on Your WordPress Website
What Is the “Product Table For WooCommerce” Plugin?
Up until now, we have learned about the Quick Order form. Now let’s find out how we can add such forms to our website.
Creating a good quality quick order form for your WooCommerce shop requires a good quality plugin.
Without a good quality plugin, you can never create a well customizable and user-friendly order form.
The “Product Table for WooCommerce” plugin is another product from us to ease your eCommerce journey.
Product Table for WooCommerce is a new plugin from Acowebs that aims to make it easy for the site owners to add product tables for various use, including quick order forms, and help them to generate sales.
With the help of this plugin, you can display various products of your choice on a table that you can place on any page using custom shortcodes.
This plugin comes with multiple filters like Features, Class, Price, Rating, Availability, Sales, and Custom Field that allows the customers to find products very easily and order straight from the page.
Below are some of the key features of the plugin.
Product Table for WooCommerce – Features at Glance
- It supports lightbox for the product image
- Ability to add all to cart button support
- Support for WPML string translations
- Ability to add Custom text and HTML
- Support for Advanced Custom Fields
- It also supports AJAX and non-AJAX pages
- With the help of this plugin, you will be able to add an “add to cart” button.
- It also allows customers to quickly add multiple simple products to the cart
- It has a powerful table editor to customize the table, which makes it easy to adjust the element position by dragging the columns and filters of the table
- The plugin offers a Withgreat user experience for customers by showing product descriptions in the table as columns such as Title, Image, Attributes, Category, Tags, Quantity, Stock status, Dimensions, and Date
- There are action buttons with ajax add to cart, redirect to the product page, refresh cart, etc
- You can create product tables by adjusting the visibility of the columns based on the type of device. This will be visible on both tablet and mobile devices
- Ability to add load more features for table data
- Custom CSS writing options
These are some of the key features of this plugin. You will get many more useful customization options for your product table on this plugin.
How to Create a WooCommerce Quick Order Form Using The Product Table Plugin
If you have come this far, you will surely be wondering about the process of creating a WooCommerce Quick Order Form.
Now we’ll show you how you can create a Quick Order Form using the “Product Table For WooCommerce” plugin. Which will bring good aspects for you and your WooCommerce store.
Install and Activate the “Product Table For WooCommerce” plugin
The first thing you need to do is to install the “Product Table For WooCommerce” plugin. To get it, go to your WordPress dashboard and click Plugins > Add New to add a new plugin.
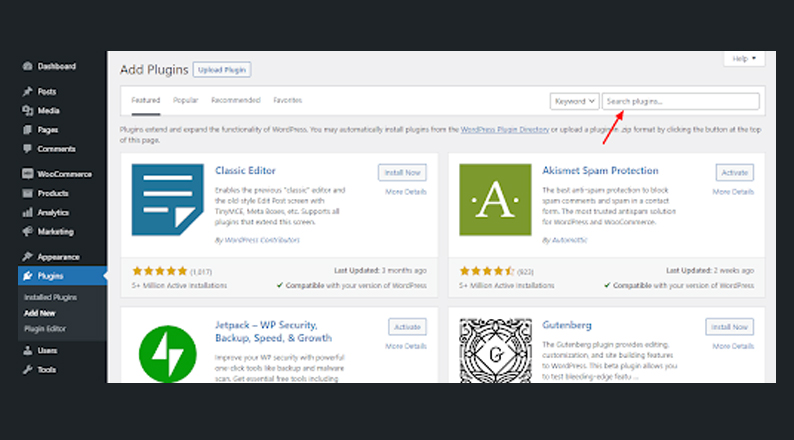
Click on the search bar on the top side and write “Product Table For WooCommerce by Acowebs”.
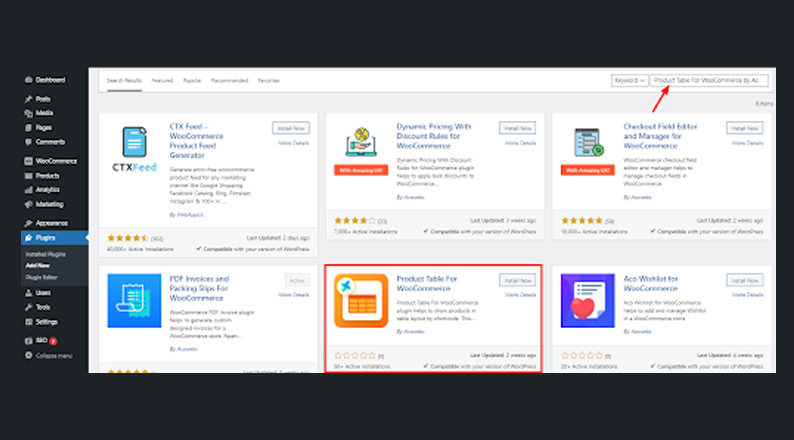
Once you search, you’ll see the plugin called “Product Table For WooCommerce”. Simply, click the “Install Now” button. Once the installation process is complete you will be asked to activate the plugin. Just click on the “Activate” option.
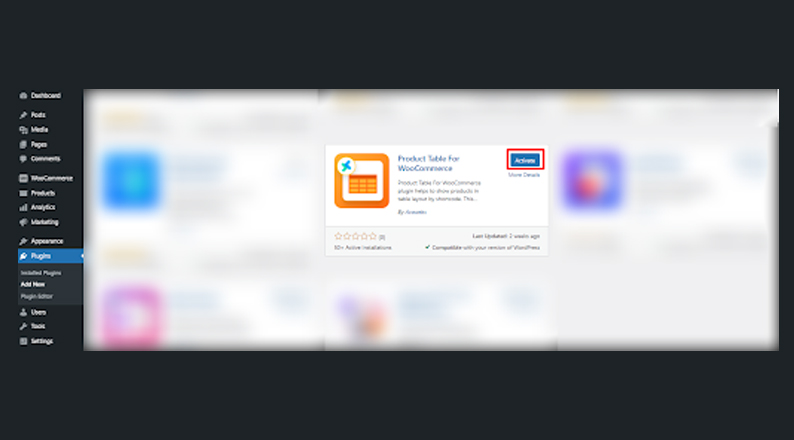
With that, you have successfully Installed and Activated the plugin.
ALSO READ: WooCommerce SEO Tips and Tricks to Boost Traffic and Sales
Create the Quick Order Form
We have already completed the installation process. Now we need to start creating a quick order form.
You will see an additional menu named WC Product Tables on the left sidebar of your WordPress backend. This menu allows you to create a quick order form.
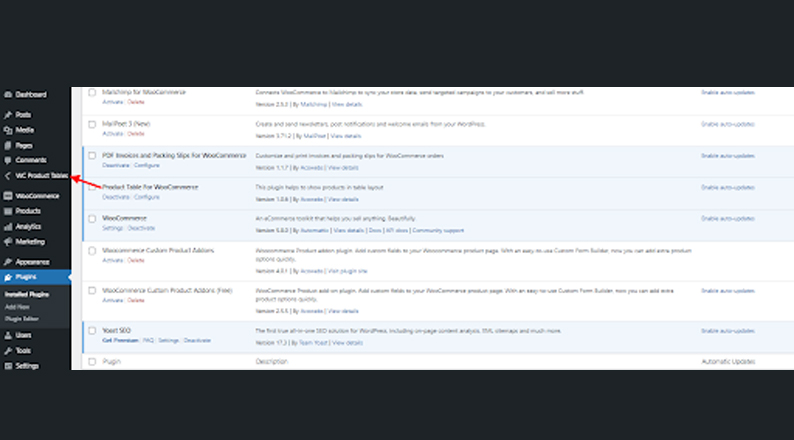
First, enter the “WC Product Tables” menu. Since you are new, a page called “Create the first table” will appear in front of you. From here, you can create as many product tables as you need.
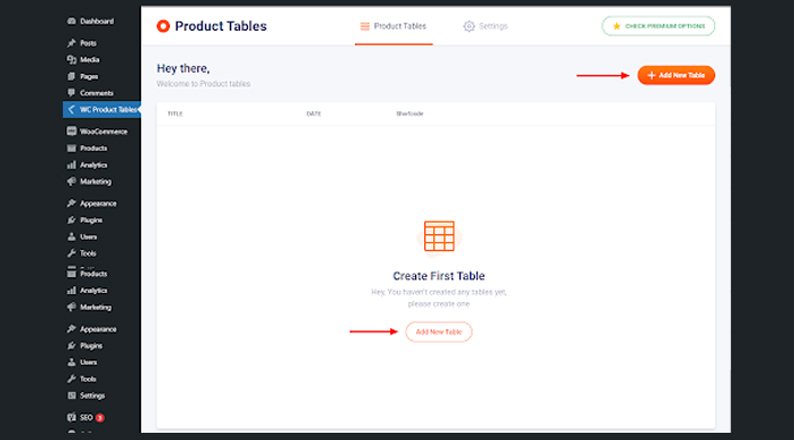
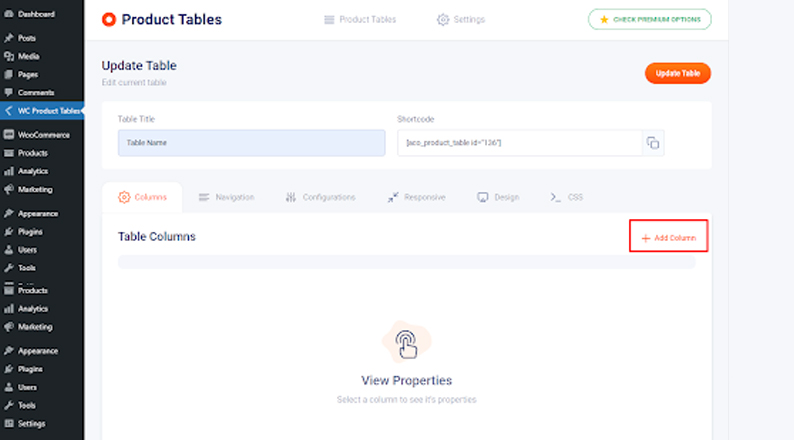
To create the table you click on the “Add New Table” option. This will take you to a page like the one shown below.
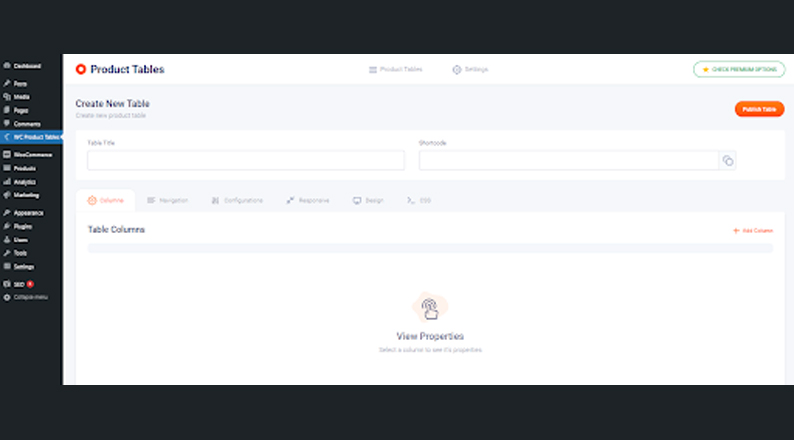
First, you have to name the table. For that, you will have to click on the “Table Title” option where you will name the table. For example, we have titled our table as “Table Name” here.
ALSO READ: Ultimate Guide to Advanced Table Rate Shipping for WooCommerce

After that, follow the below process to add some columns to the table.
Columns
It is not possible to make a table without columns. So let’s go ahead and create some columns for our table. To select a column you need to click on the “Add Column” button on the right.
There are a couple of different types of Columns that you can, depending on the data you want to show on the column, choose one.
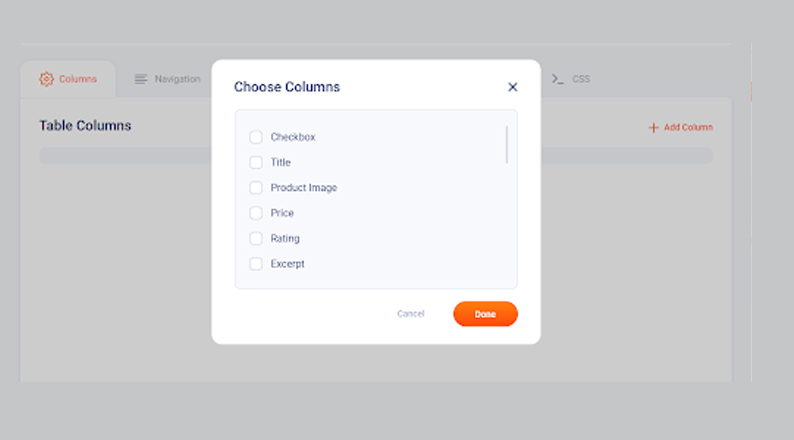
The column types are –
- Checkbox
- Title
- Product
- Image
- Price
- Rating
- Excerpt
- Content
- Cart Form
- Attribute
- Category
- Tags
- Button
- Dimensions
- Weight
- Quantity
- Stock
- SKU
- Date
- Custom Field
- SL No
- Text
- HTML
- Aco Quick View
Each column has its own functionality. After adding columns, you can click on them if you want to make further changes. For example, we have taken four columns from these.
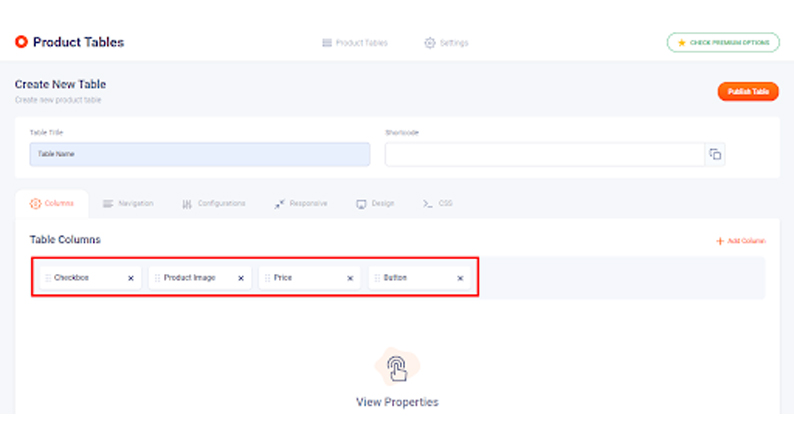
You can take as much as you want according to your needs.
Navigation
This is the navigation panel of your table. Navigation options will mainly let you tweak the sorting and filtering, stuff that helps the users find the desired product more easily.
The navigation options consist of two panels called the “Left Sidebar” and “Header Row” panels. These are the places you can add the sort/filter and other navigational features.
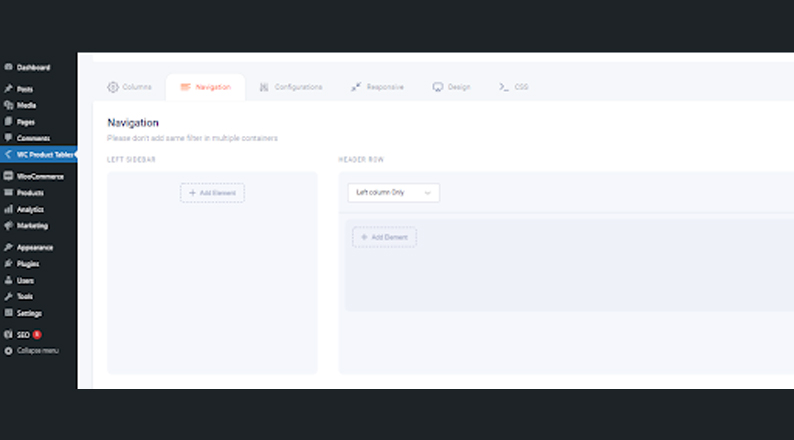
Left Sidebar: In the left sidebar you will see a button called “Add Elements” where you will see the following options.
- Sort By
- Result Count
- Results Per Page
- Category Filter
- Price Filter
- Search
- Clear Filters
- HTML
For example, we added a Category & Price Filter to the left sidebar. You can add others as you need.
Header Row: Here you have to fix the column of the header row. Clicking there will show you the following options:
- Left column Only
- Left 70%, Right 30%
- Left 50%, Right 50%
- Left 30%, Right 70%
- Right column Only
By clicking on these you can take the column as you like. We took the Left 70%, Right 30% option here.
Since we are doing two columns to the right and left, we can add elements to both columns. For example, we added Result Count in the first column and Search elements on the other. To better understand, you can see our gif file below.

ALSO READ: A Comprehensive Guide on Adding Discounts in WooCommerce
Configuration
Here you will see a condition page with some necessary options. From here you can configure all the other products listed in the table. You can see the configuration options in the image below.

Table Width (PX): This option allows you to increase or decrease the width of the table in pixels.
Products Type: Here you will find four product types named External, Grouped, Simple, Variable. You can select anyone you want.
Products Visibility: You will see Exclude-From-Search, Exclude-From-Catalog, Featured, Rated-1 to 5 options. These allow you to determine the visibility of the products.
Products By Categories: You can select the categories of your products such as Accessories, Affiliate Products, Clothes, Headsets, Music, T-Shirts, etc.
Products By Tags: This option allows you to add products tags.
Products By ID & Products By SKU: These two options will allow you to add comma-separated product IDs and SKUs.
Exclude Products By Category, and Tags: If you want, you can exclude the tags and categories that you have previously included.
Exclude Products By ID: You can add the product IDs you want to exclude here.
Order: Here you will find two options called Ascending (Default) and Descending. You can select them according to your needs
Order By: With the options given here, you can display the products list in different ways.
Minimum Price & Maximum Price: You can set the minimum and maximum prices of the products.
Show Only In-Stock Products & On-Sale Products: There are two options that you can enable to show only in-stock products or on-sale products. And you can keep them disabled if you want.
Products Per Page: From here you can select how many products will be on each page of your table.
Search Target Fields: You can search for products by Title, Content, and Excerpt by going to the search options of your product table. Which will make it easier for you to find your desired products.
Pagination & Ajax Pagination: If you want you can enable or disable this option for pagination and ajax pagination.
Add All To Cart Button: This option allows your customers to select and order the products they need together. You can also disable it if you want. However, this button does not support variable, external, and group products.
Add All To Cart Button Label: You can change the name of Add All To Cart Button from here. For example, you can give “Buy All Now, Select to Cart, Click to Buy All, etc.
Table Custom Class Name: In this space, you can name the custom class of your table.
Show Table Head: In this space, you can name the custom class of your table.
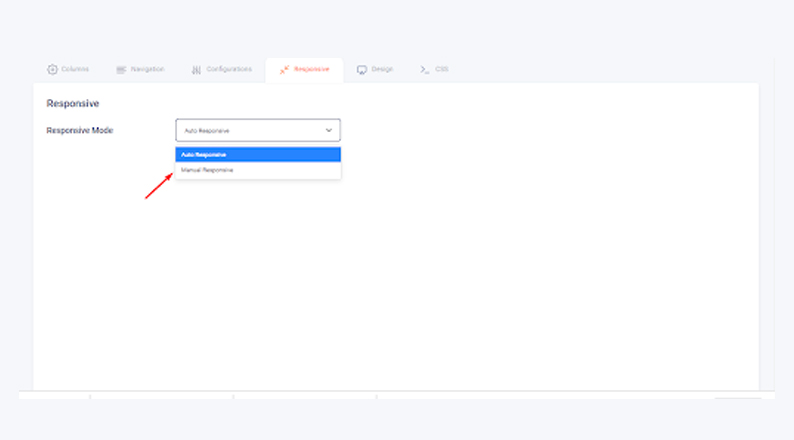
Responsive
Making things responsive is necessary for this era of mobile devices. With the dedicated responsive feature in the WooCommerce Product Table, you can easily make your table responsive.
There are two options, you can either select Auto Responsive or Manual Responsive. If the auto responsive does not work out in your theme, you should try the manual responsive option.
With the manual responsive option, you can select columns to hide on small screen devices like mobile, which will help to fit in the content on a smaller screen size.
You will find a row of two columns named Tablet Column and Mobile Column, once you select the manual responsive option.

You can mark the options to keep showing them on mobile devices or unmark them to hide them on mobile.
Design
From the design option, you can manage the styling of the Table Header, Table Body, Button, and Pagination.
Table Header & Table Body: Here you can design the table header and table body’s Background Color, Border Color, Text Color, Border Top Width, Border Right Width, Border Bottom Width, Border Left Width, Border Style, Text Align, and Padding.

Button: From the button design option, you can design Background Color, Border Color, Text Color, Border Width, Border Style, Border Radius, Font Size, Text Align, Padding, Hover Background Color, Hover Border Color, and Hover Text Color of the table buttons.

Pagination: This is the last option on the design page. The options that you can customize in the pagination settings are Background Color, Border Color, Text Color, Border Width, Border Style, Border Radius, Font Size, Text Align, Padding, Active, Background Color, Active Border Color, Active Text Color, Hover Background Color, Hover Border Color, and Hover Text Color.

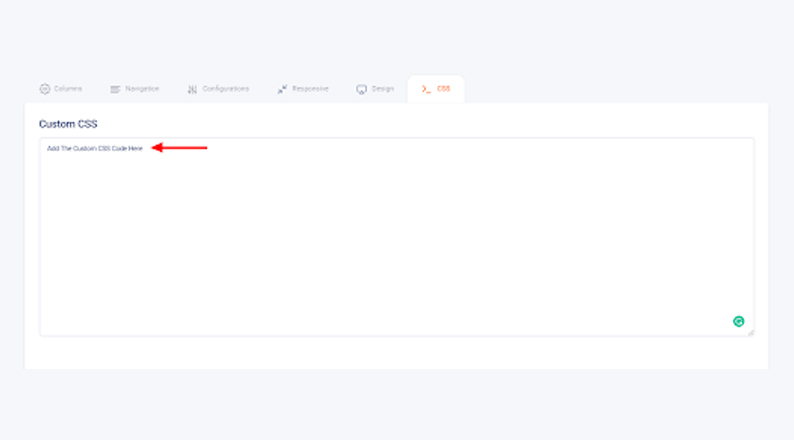
CSS
If you want to add any custom CSS to your product table, you can do so from here.
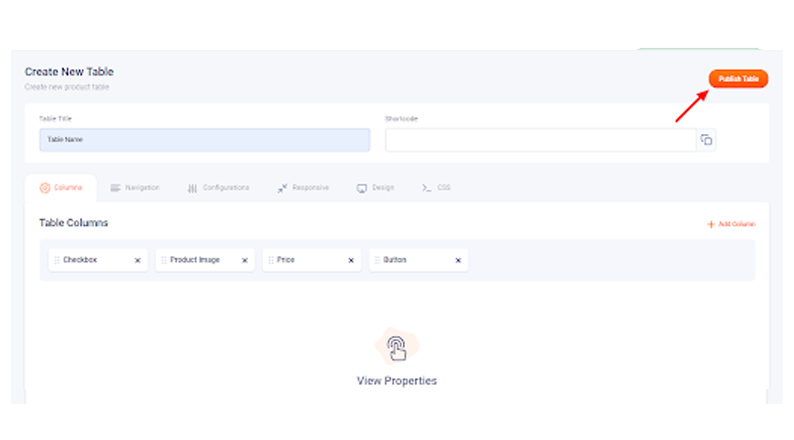
We hope you’ve followed the tutorial thus far. If you did, it’s time to click the “Publish Table” button in the upper right button, as we’ve come to the end of our first table creation.
Now we will show you how to add this table that we designed as a quick order form, on our desired page.
ALSO READ: WooCommerce SEO Tips and Tricks to Boost Traffic and Sales
Display Table Using The Shortcode
In order to display the quick order form, follow the below method.
When you click the “Publish Table” button, you will see a shortcode generated besides the Table Title option.
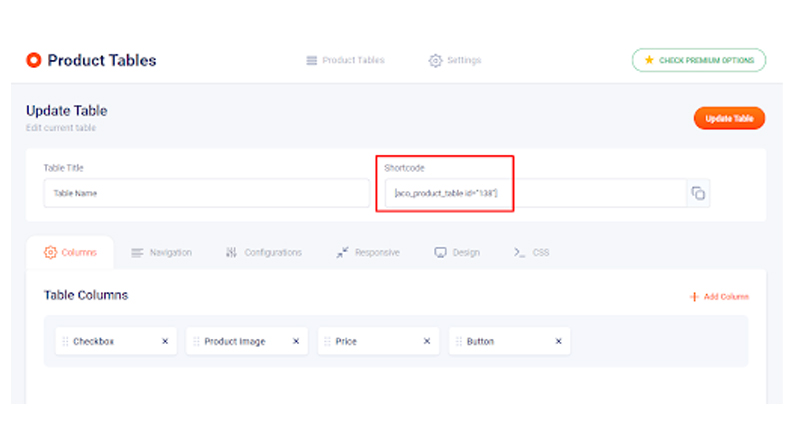
You need to use this shortcode to display the table.
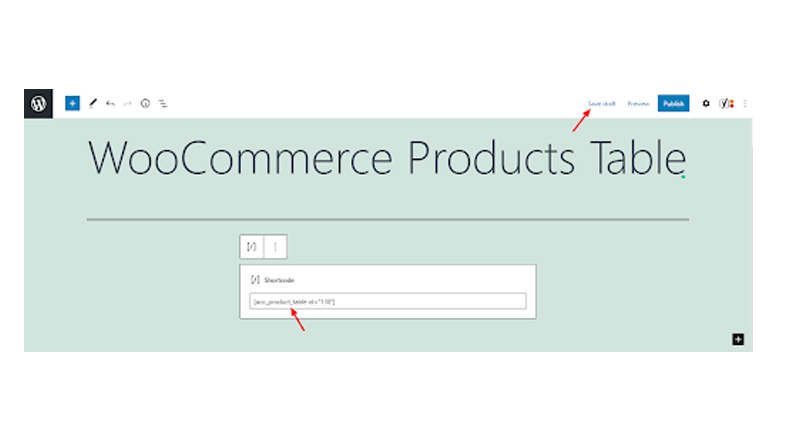
Now create a new page or access the editor of an existing page to add the shortcode. The Shortcode feature comes as a block in WordPress, so you have to click on the (+) button to add a block, and search for “Shortcode”.
Now paste the shortcode that you’ve copied after creating the product table.
After adding the shortcode, click the Save Draft button.
Now click on the preview option to view the table one last time before publishing the page. Below is how our quick order form turned out.
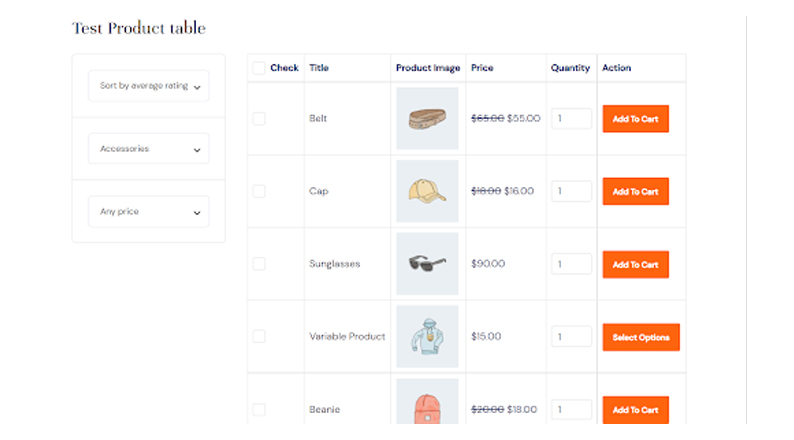
If you are satisfied with the output, go ahead and publish the page. And now it’s time to convert more!
Conclusion
It is very important for giving your customers the best user experience. Through the quick product order form, you can make it easy for the customer to choose and purchase products.
WooCommerce quick order forms are ideal for quick ordering as customers can simply click on the “Add to Cart” button by ticking the product of their choice, right from the page.
In this tutorial, we showed you the way to create a quick order form and hopefully, you have already created or are ready to create one for your shop by now.
If you have any questions or confusion regarding the process, don’t forget to comment down below, as we are eager to help you out.
Acowebs are developers of Woocommerce bulk discounts that will help you add bulk discounts to products on your stores. It also has developed various other plugins like the popular plugin for managing the checkout form fields in WooCommerce, called Woocommerce Checkout Manager, which is highly feature-oriented yet lightweight and fast. There is also a free version of this plugin available in the WordPress directory named WooCommerce Checkout Field Editor.