Login
Login
 Cart
Cart
WooCommerce really is the best free e-commerce solution for WordPress. It is also one of the top open source e-commerce platforms available Outside, the plugin has various phenomenal statistics, but only when you go deeper into the options of WooCommerce and the back-end, is genius really revealed.
WooCoomerce Installation
Install the WooCommerce plugin will be the primary step.
The following are the steps include the installation process of the WooCcommerce. The merit about this plugin is that you can able to download it for free of cost.
Step 1:
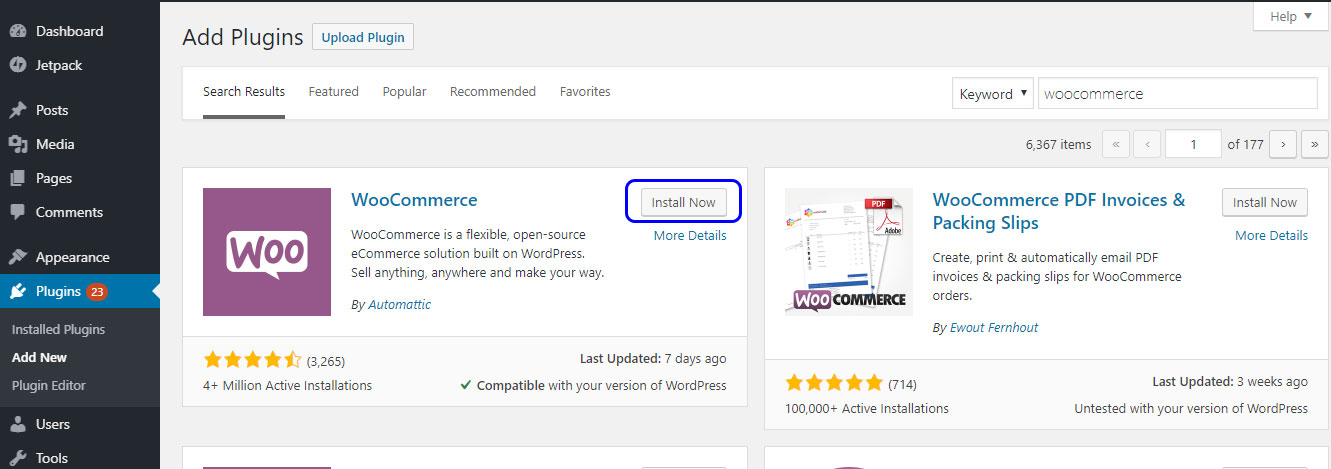
To install it from your control panel, go to WordPress Administration> Add-ons> Add new, search for “woocommerce” and click “Install now”. 3+ is the current version of WooCommerce which is in the latest.
Step 2:
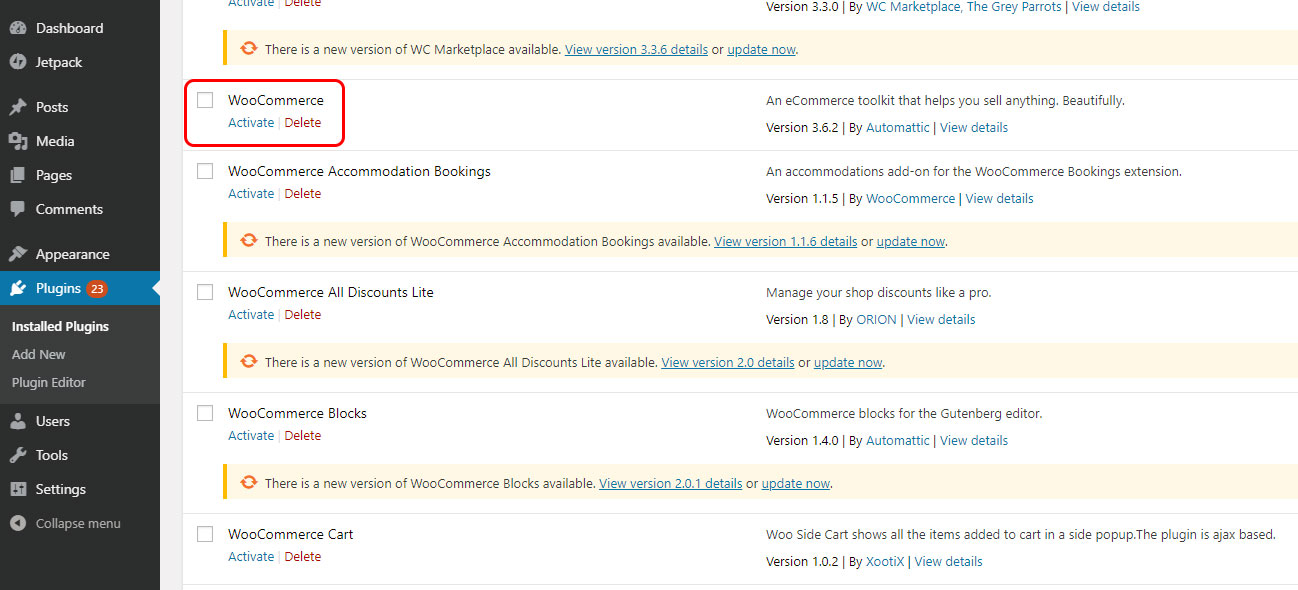
Click on “Activate” in order to get the activation.
Step 3:
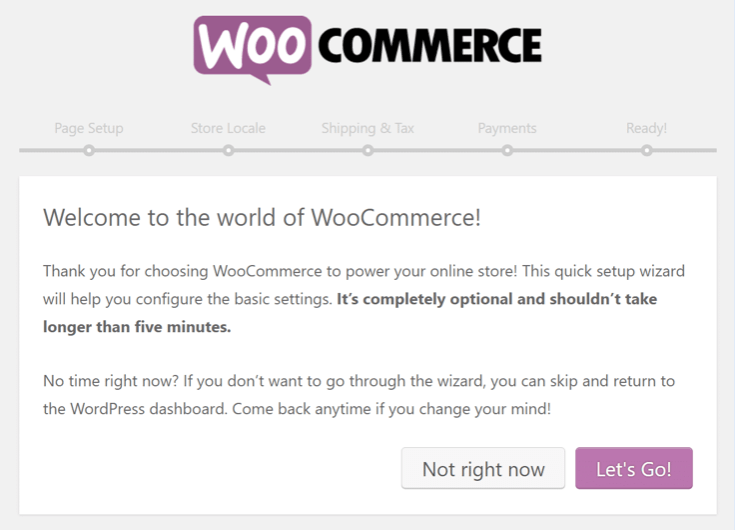
Then it will meet with a tutorial for configuring WooCommerce. You can omit this, but in our tutorial, we will click on “Let’s go” to the further procedure.
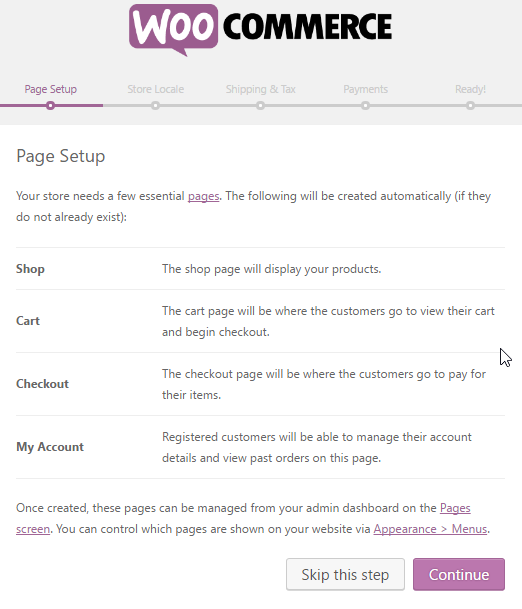
Stage 4:
WooCommerce notifies you that it will create some pages automatically that are necessary for the configuration on the page setup screen to complete. And that includes a store, cart, payment and the pages of my account. Click “Continue” to create these for your needs.
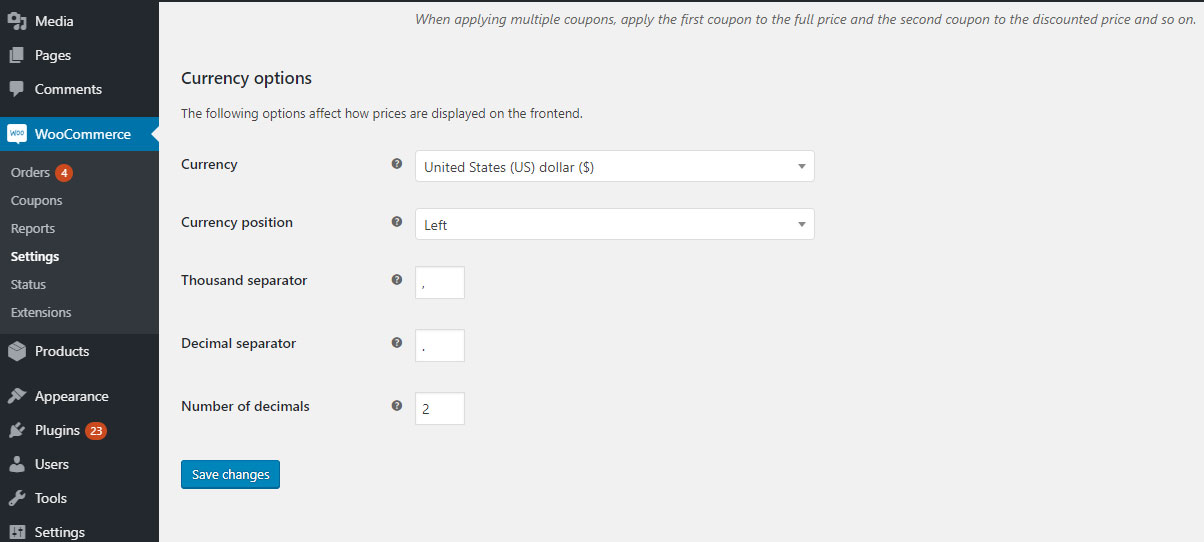
Step 5:
In the configuration screen of the store’s regional settings, WooCommerce allows you to choose the country and state in which it is based as fast, the currency and the units that will be needed for your products. Then click on “Continue” to move into the next steps.
Step 6:
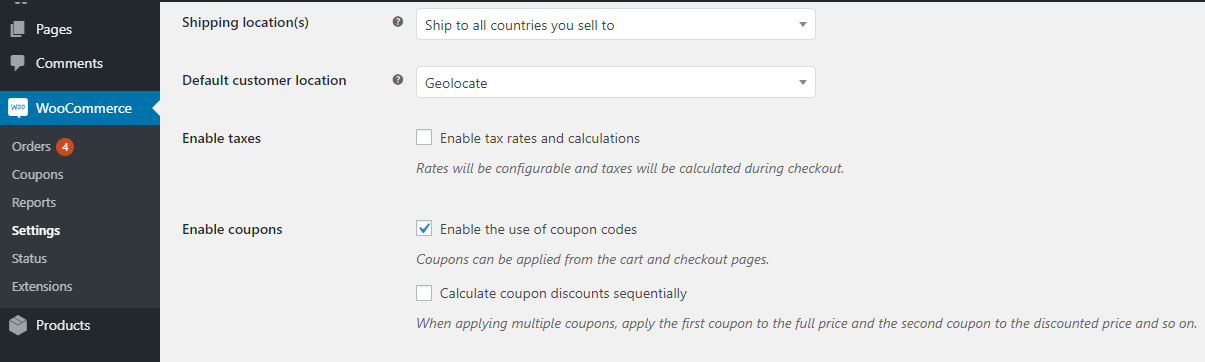
In the shipping and tax configuration screen, it is possible for you to choose whether you want to send goods which are physical to customers. Remember, WooCommerce can also be used to sell products which are digital and downloads. And then it is possible to enable the sales tax if necessary.
Then click on “Continue”.
Step 7:
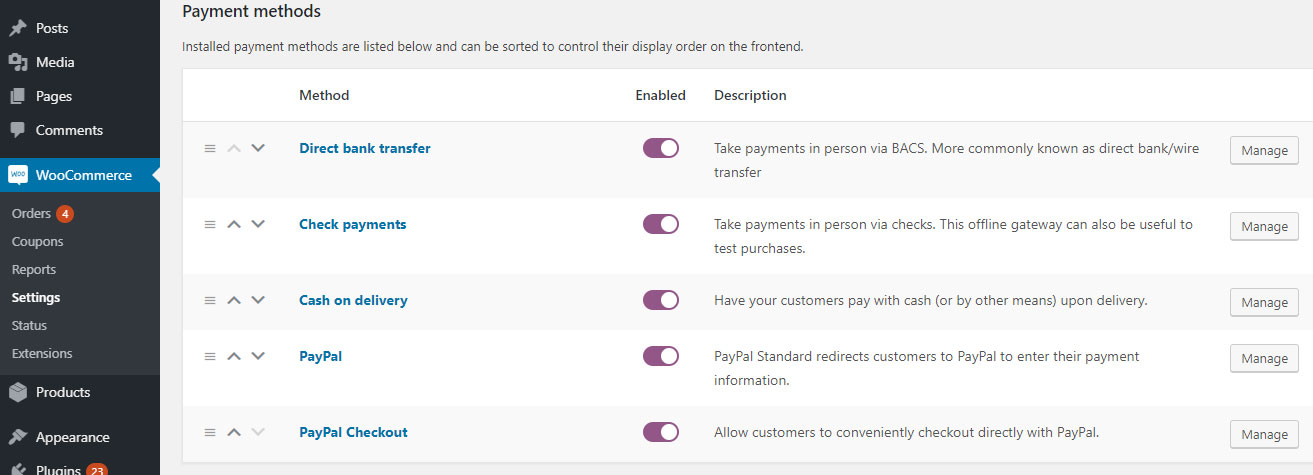
It is also possible to choose which third-party payment processor you want to integrate from the payment screen,
Then click on “Continue”. Next steps can gradually set up a plan to set easy to make your WooCommerce site.
Finally! Your WooCommerce store is ready. You can click on the link given at the bottom to go back to your WordPress panel. Now you can easily start creating your own products. Check out rest parts of the WooCommerce tutorial below.
Also Read: Set Up WordPress Website
Addition and Management of New Products
The first and foremost modification that you will need to notice is the addition of two new tabs to the side menu of your control panel that is called as WooCommerce (your general configuration area) and Products (your product configuration area).
In order to start setting up your virtual store, All you have to do is, go to
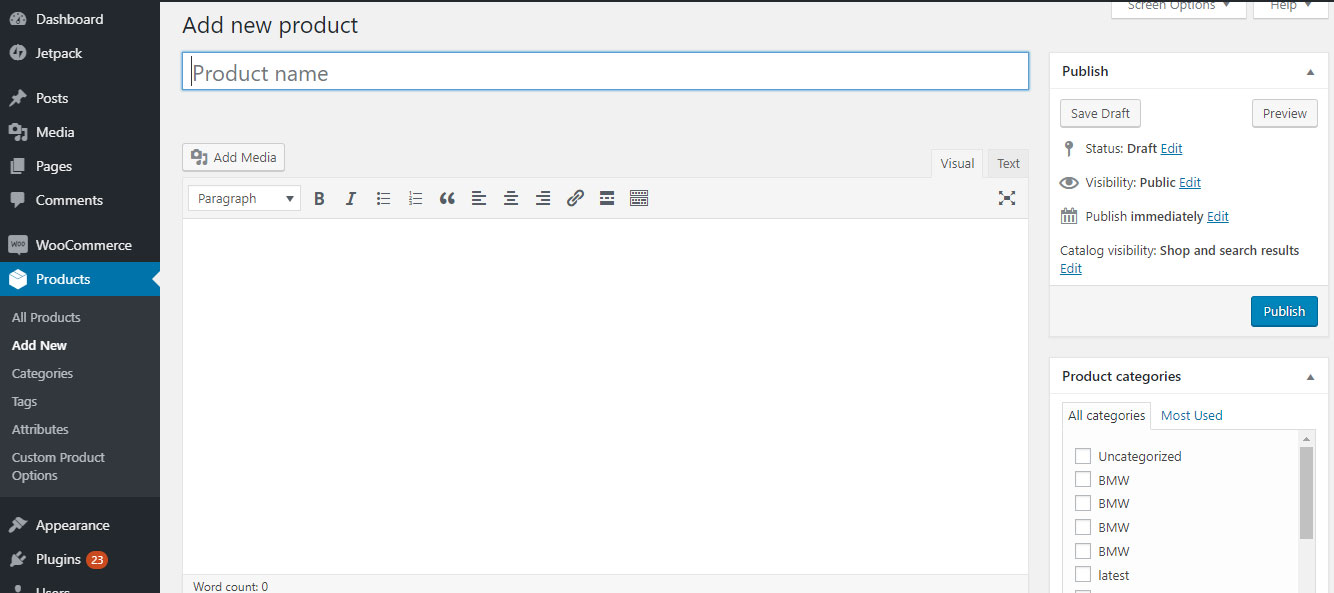
WordPress Administration> Products> Add product to add your first product.
Create the best title and a brief description of that product. As the appearance of a title and a description in a live preview as shown below.
Also Read: WordPress Automation Tools
Product Data
WordPress Administration> Products> Add New
You can able to select whether your product is virtual or not (the first option deletes the Shipping Data tab) and it is the downloadable type (digitalIn the product data screen widget,). It is possible for you to enter the regular price and the sale price (sales may be limited in time) in the General tab.
It is a must that you have to upload the file you want to buy If you are selling digital products. Then, customize the download limit (leave it blank to mark it as unlimited), the expiration of the download (leave it blank to keep it permanently available) and the file type (standard/application/ music). Based on the file that you select affects the marking of schema.org for the product.
Then, in the Inventory tab, it is also possible you to customize the options to manage your stock by entering the quantity of the product, the state of the stock (in stock / out of stock), and if you want to allow the pending orders. As an extra bonus, you can mark the product as sold individually, which means that you can only buy one in a single product in an order. This is where you will enter the number for identification that is needed which is called as SKU. And on the Linked Products tab, it is possible to add additional sales, cross sales, and product grouping. Attributes that allow you to enter specific attributes needed for the product (for example, reliable, never break down, etc.) that will be displayed in a tab of Additional information in the front version of the product page. At last, thing to add, you can able to enter the personalized purchase notes, and give a menu order to the product and enable/disable revisions in the Advanced tab.
Also Read: Speed Up WordPress
Short Description of the Product
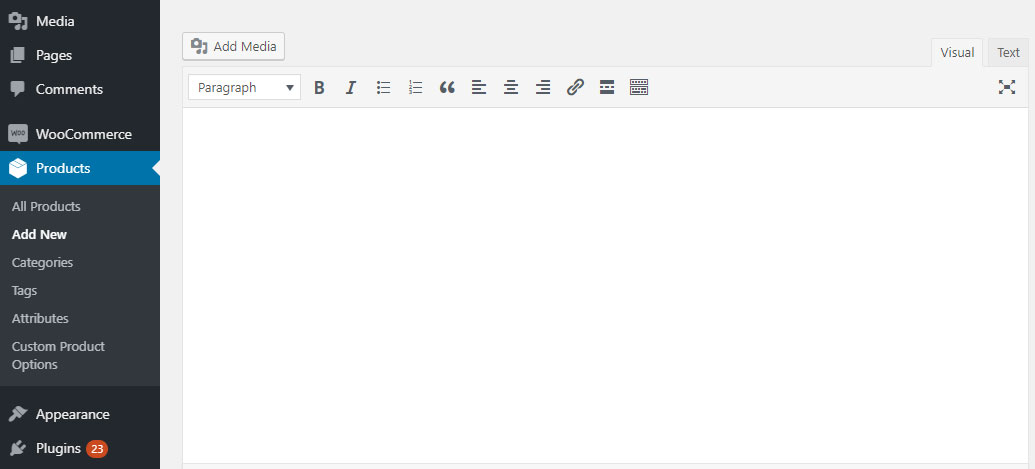
WordPress Administration> Products> Add New
With the help of a brief product description screen widget, you can create a brief heading for the image which will be displayed below part of the product title.
The front end on Preview side
As you dealing with such things, do not ever forget to add tags and you should place them in a category and include an image/gallery of the product.
Managing Products
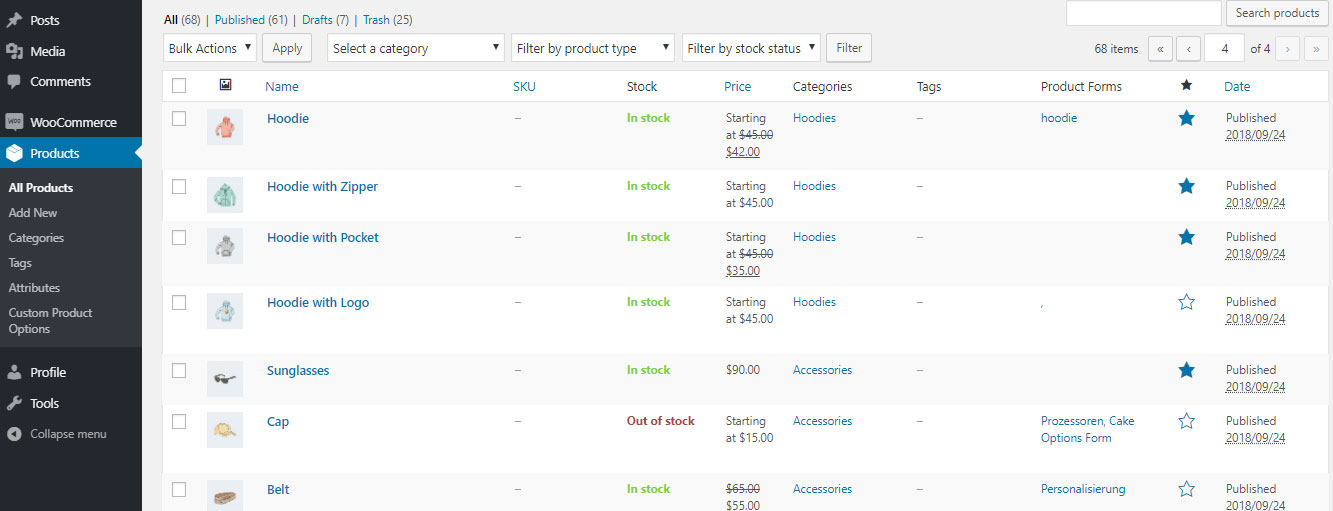
WordPress Administration> Products> [multiple tabs]
From going to WordPress Administration> Products pages, you can able to see your products, categories, labels, shipping classes, attributes, and the calendar. These pages will look like the standard WordPress Administration page> Publications> Categories, except for the product view as they are shown in the below screenshot.
Also Read: Customize WooCommerce Product Page
Managing WooCommerce
It is possible for you to get explore on several things about your digital store: Orders, Coupons, and reports on the WooCommerce tab are visible. You can also able to customize the settings and also able to add new extensions.
Orders
For making orders go to
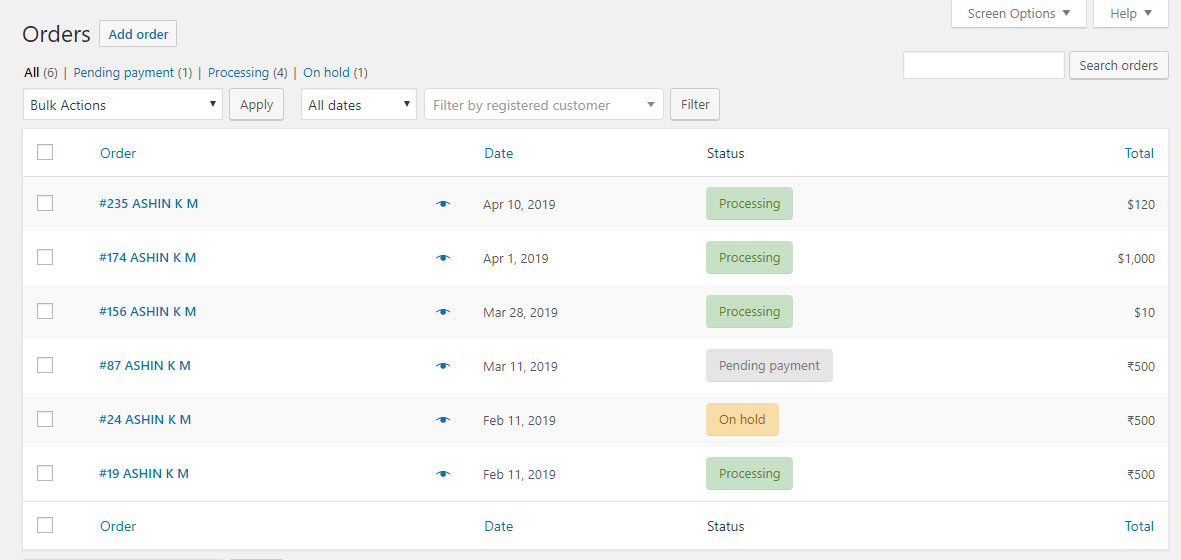
WP Admin> WooCommerce> Orders
This page displays a list of your current purchases and the orders that are made. If you sell products which are the digital type, there is not much to do here other than seeing who all bought the products and what are those products they bought. But if you sell physical goods, this is the point where you can organize and select which products you need to send and which are the orders that are being processed or that are still pending.
Coupons
To set coupons for your product
WordPress Administrator> WooCommerce> Coupons > Add new
In order to set coupons to your electronic store, WooCommerce has the most powerful options. The coupon data screen widget provides permission to you to customize the coupon discount and restrictions, On the screen of coupon editing.
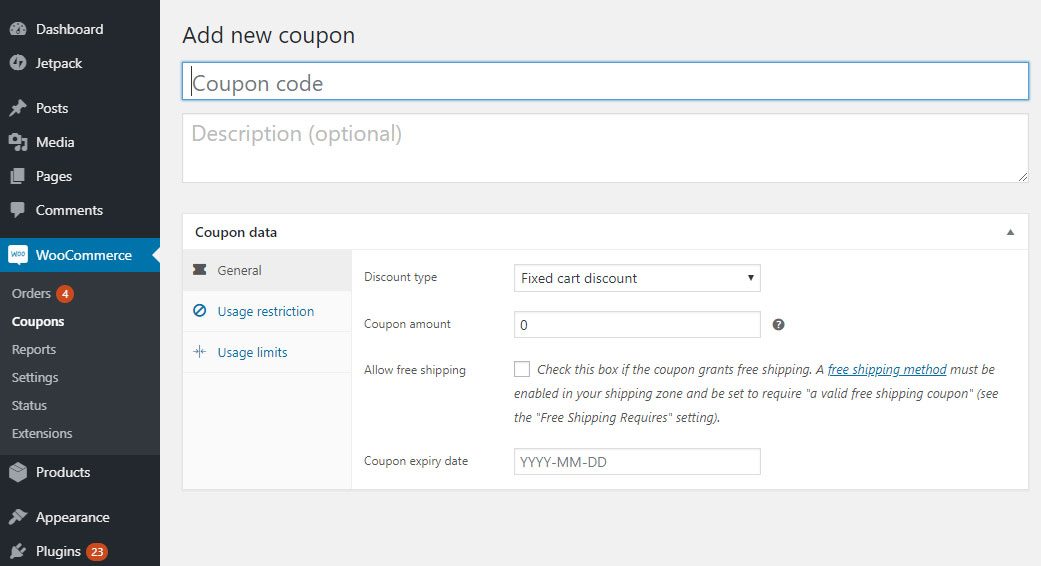
The General tab allows you to edit the information regarding the coupon: the type of coupons like a discount of the cart, percentage discount of the cart, product discount and percentage of the product, its value, free shipping options, taxes on the coupon and its date of expiration.
In Restrictions of use, you can able to establish a minimum expense that the client must make to validate the coupon. To restrict the use so that it is not been used along with other coupons, check the box only for individual use. If the coupon does not apply to items that are for the sales, there is also an option for such cases. This is also where you select the products and categories of the product to which the coupon applies. Finally, you can even prohibit certain email addresses from using coupons.
The tab that will limit the uses and establishes the limit as peruse of coupon or per the customer.
Also Read: eCommerce Marketing Strategies
The coupon management screen is shown below.

Reports
To set a Report, go to
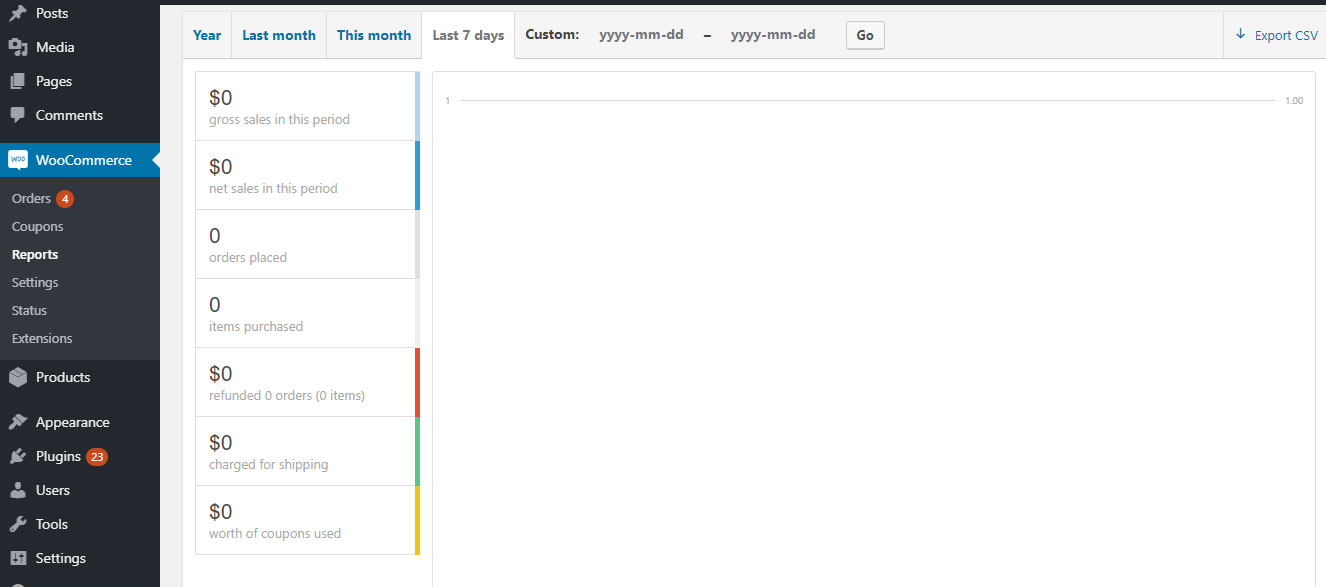
WordPress Administrator> WooCommerce> Reports
WooCommerce also offers powerfully integrated tracking. It is visible in the charts and graphs of your sales, orders and shipping costs in five different time periods. Each chart can be limited based on the sales of a particular product, product category or coupon. In the Clients tab, you can see your customer acquisition during the same five periods of time. At last, you can also see your stock becoming low. In that out of stock and most of the products in stock in the Stocks tab. All data can be able to set in CVS sheets.
Settings
To Configure
WP Admin> WooCommerce> Configuration
Here the WooCommerce becomes really impressive in the Settings screen, you can able to customize almost every aspect of the virtual store of yours. All from your thousands separator to the payment process and mailing options can be adapted as per your satisfaction.
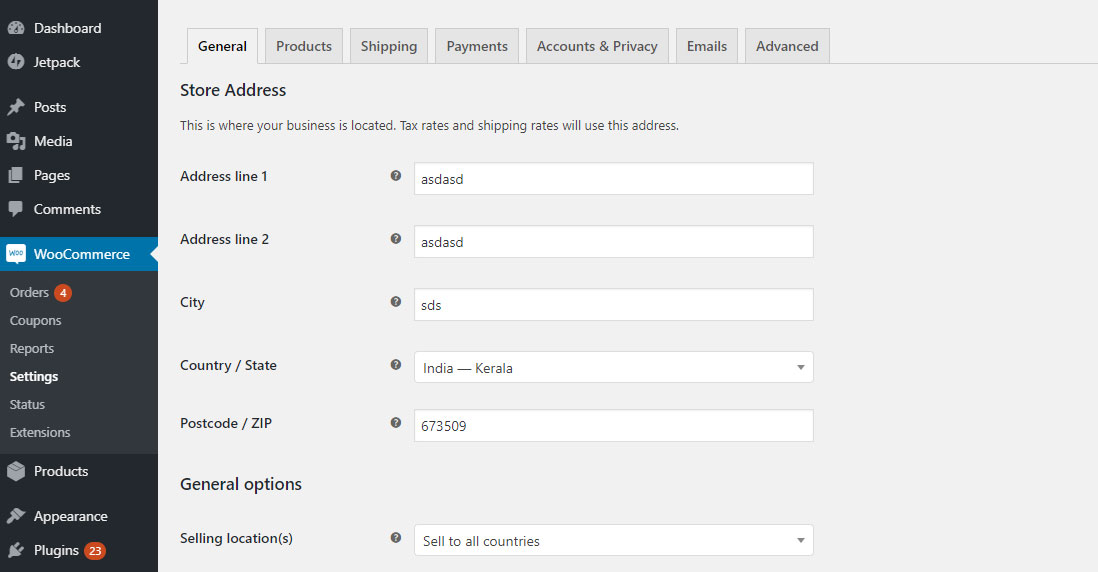
The General tab is the tab that deals with your basic information, including your currency, base and sales locations, and also the viewing options.
Also Read: WordPress Rich Snippets
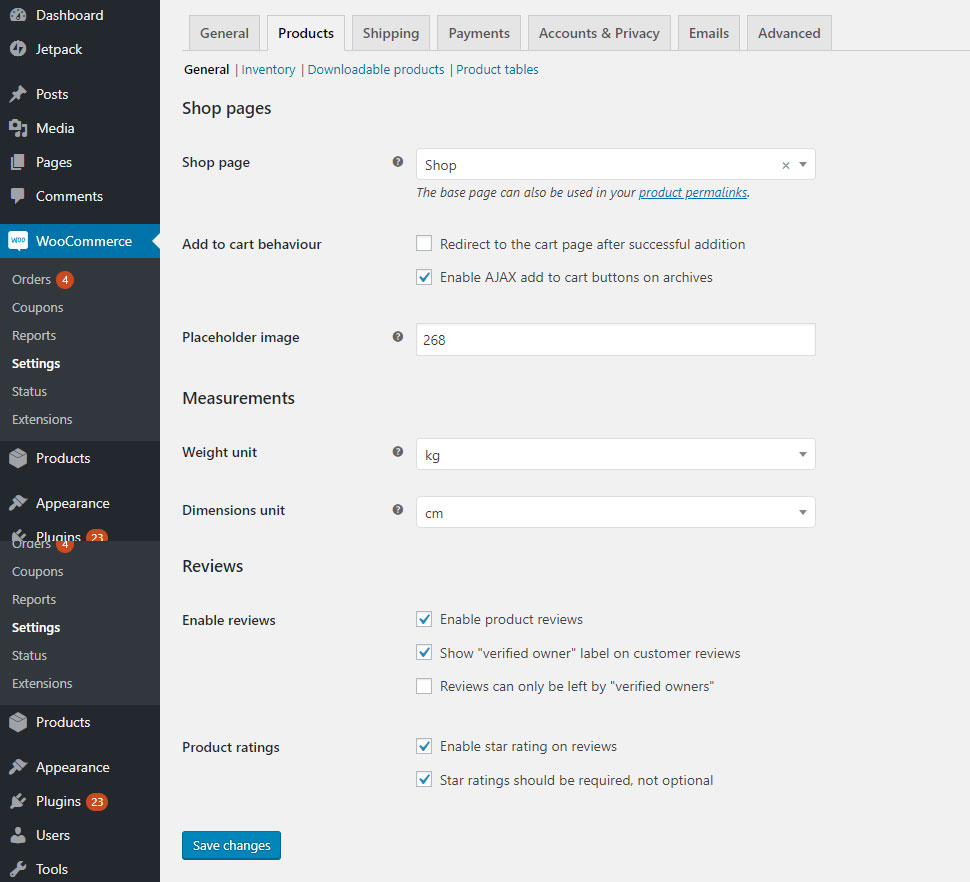
Product data that includes the customs classification, default screens, measurement systems, product thumbnail dimensions, download methods, and even buttons to add to the Ajax / non-Ajax cart are customized in the Products tab.
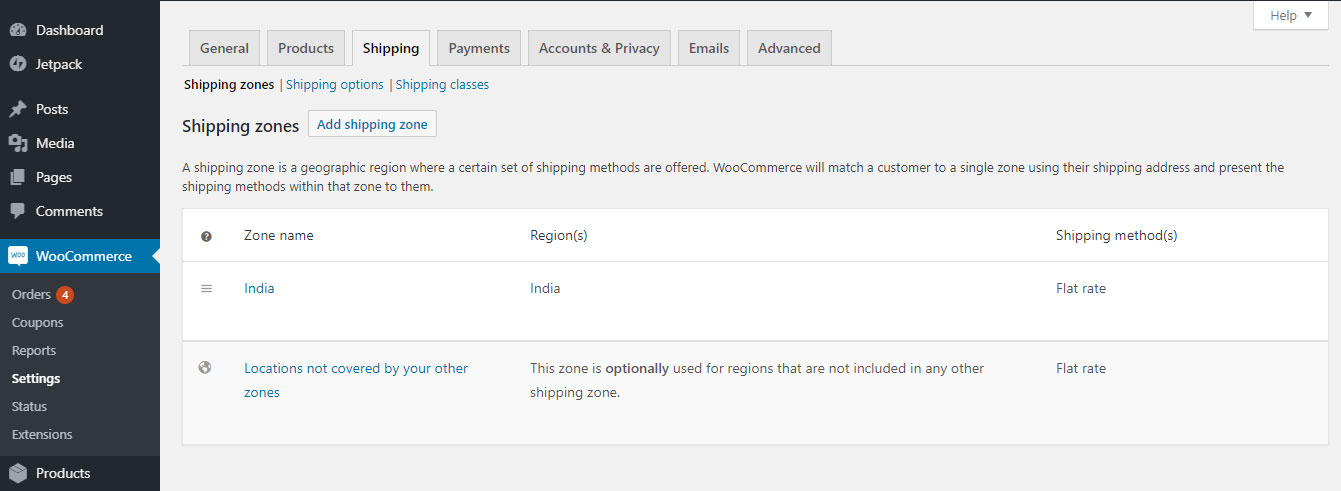
Shipment
It is an important responsibility for their shipping methods and pricing models. You can also use enable/disable shipping throughout the store and it is possible to edit various viewing options. To restrict the availability of your store to specific countries only is a factor to add in this area, which makes sales image higher.
Checkout
Here it allows you to customize the payment process. All you have to do is by making yourself choose between five payment gateways, edit the pages, add a T & C page and change the appendices of URL.
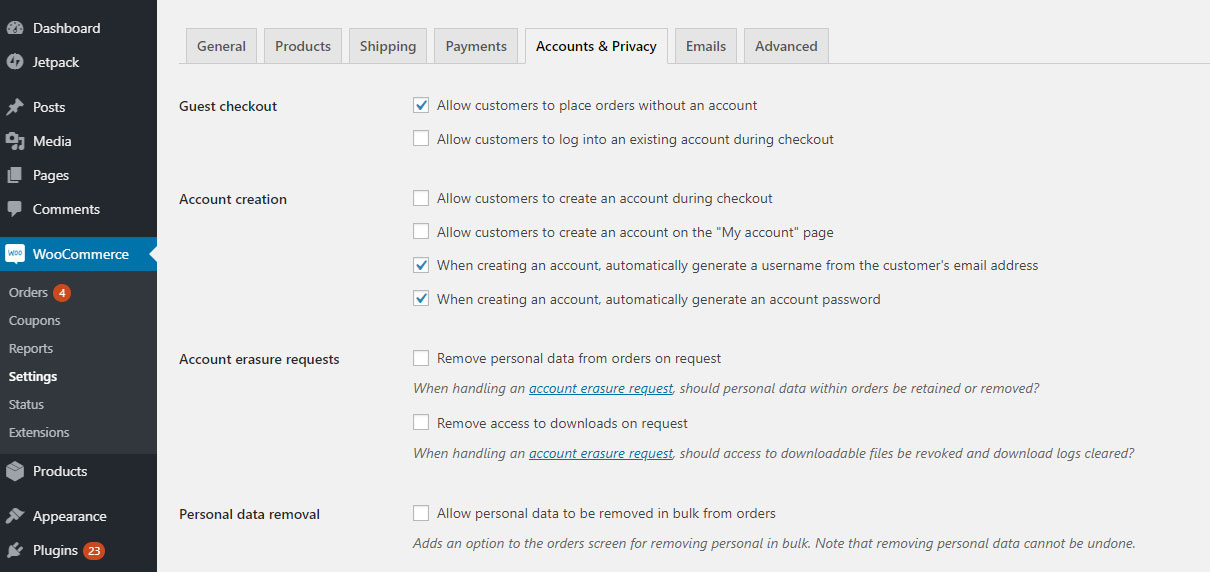
The account will make edits in all the display and registration options of the user account.
Also Read: Speed up WooCommerce
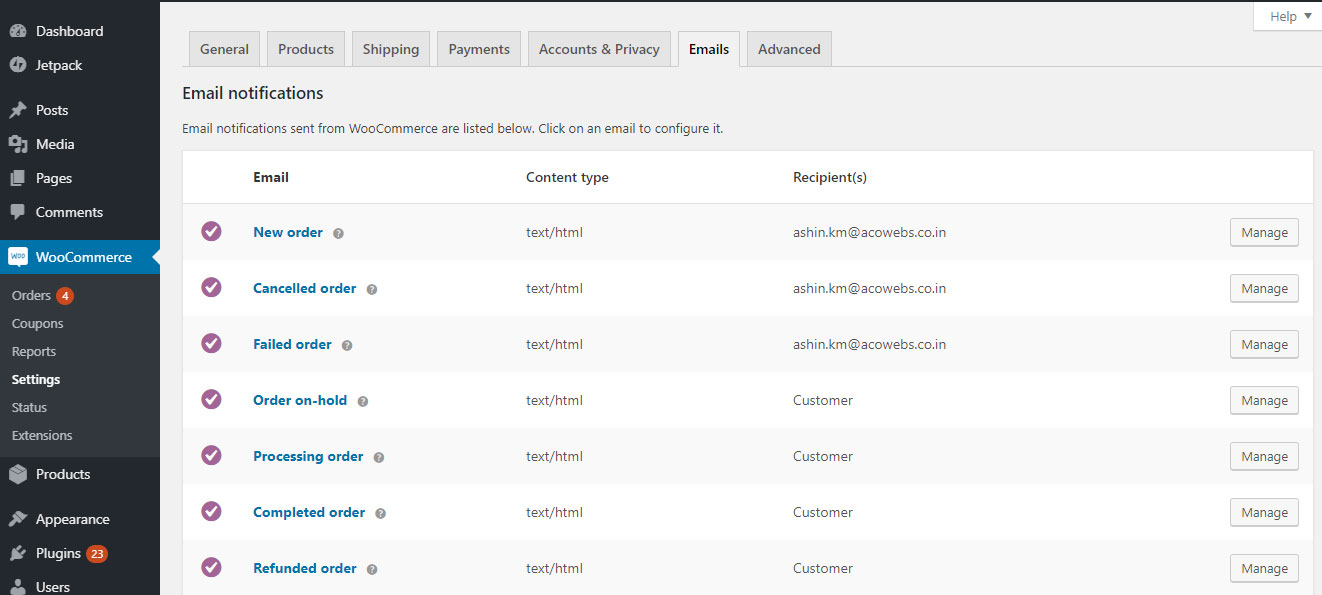
In the E-mails tab, it is possible for you to customize everything related to customer service. By specifying, you can adapt all the sender options for the email generated by WooCommerce, directly in the background color of the email.
And finally, in the API tab, it will provide the enabling of the REST API, the keys/applications and the webhooks.
Also Read: WooCommerce SEO Tips
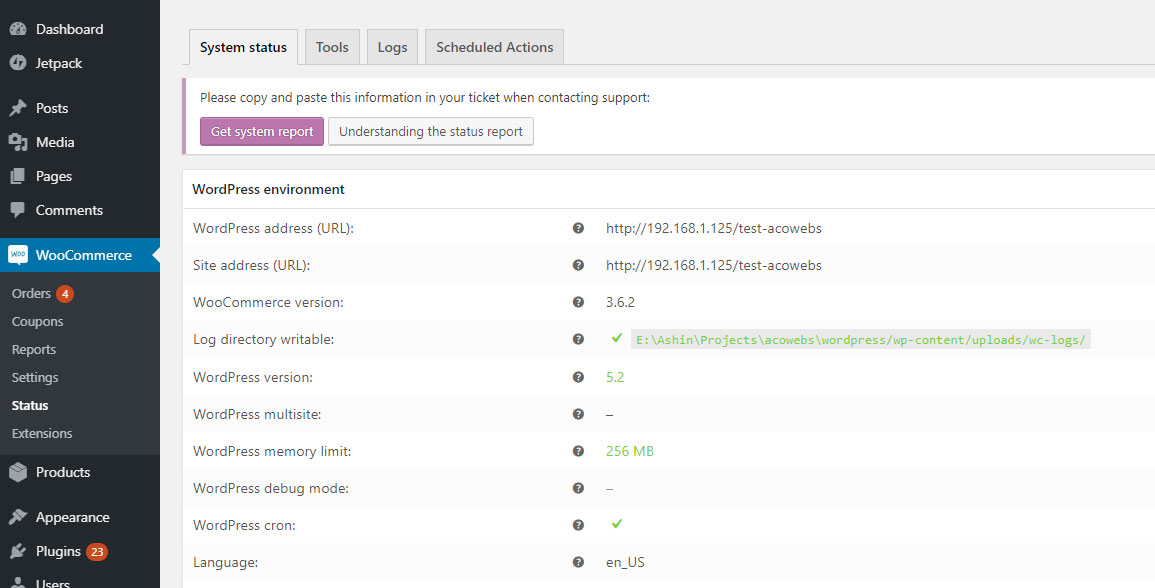
State of the System
WordPress Administrator> WooCommerce> System status
All your information in back-end will be like your WooCommerce / PHP / MySQL / etc. Version, size limits, registration.
You can able to delete the caches of your website for multiple variables. Install new options and reset the settings to the default, in the Tools tab on the same page.
Addons
If you need to add addons
WordPress Administrator> WooCommerce> Addons
The Community that supports is one of the attributes that make your WordPress being more popular CMS on the planet. Thousands of topics and tens of thousands of add-ons!
It is almost 100% of them are contributed by users. It is similar in the case of small scale products too. The Plug-in developers will allow you to buy native and third-party WooCommerce extensions that are in your extension store. Basically, hundreds of various addons and themes and specific style options of WooCommerce are available in the stores.
At Acowebs, we have developed woocommerce extra product options that will help you personalize your stores. It supports the additional option with feature-rich add-ons which is WooCommerce Product Addons, that are lightweight and fast. You can easily update your store with these add-ons and enjoy a hassle-free experience, check out the best options for additional woocommerce products.