Login
Login
 Cart
Cart
One of the biggest challenges for an eCommerce store is getting recurring customers. Most of the eCommerce stores struggle to get their customers back on their site, some without even purchasing anything from their website.
So normally, they seek a way to retain the customers and keep them coming. But by just looking at the costly solutions like outrageous discount coupons, they forget a very simple way to retain the customer, a wishlist.
Wishlist is not directly linked to sales, so a lot of eCommerce shop owners do not take the initiative to implement this feature.
But if you’re like us and believe in the impact of the wishlists, then you are in the right place.
In this article, we will get to know how you can use one of our plugins WooCommerce Wishlist by Acowebs helps to enable wishlists on WooCommerce-powered WordPress sites.
Are you excited about the guide? Let’s get started!
Why is Wishlist Important for an eCommerce site
A wishlist is a collection of products that a customer saves on their account to check or buy later. They are mainly used when a customer likes a product but wants to explore more about it in the future or wants to purchase it later.
E-commerce shop owners also use this feature to let customers add “out of stock products” on their wishlist and send a notification when the product is back in stock again.
All in all, a wishlist allows an eCommerce shop to get the customer back on the site to check further about the product they like.
And if you’re an eCommerce owner, you already know how important it is for an eCommerce to retain customers. But just to let you know how important customer retention is, here’s a little stat.
According to SEMRush, for an eCommerce, the probability of selling to an existing customer is between 60% and 70%, while the probability of selling to a new customer is only between 5% to 20%.
Convinced enough to add the wishlist feature on your website? Well, if your eCommerce site is powered by WordPress, we have just the solution for you.
The solution is named WooCommerce Wishlist plugin. Want to know more about it? Here you go!
WooCommerce Wishlist by Acowebs, at a glance
Aco Wishlist is a highly useful plugin from Acowebs to help you run your eCommerce shop smoothly. It is an affordable plugin that allows you to enable a wishlist on your online store and help you get recurring visitors.
But what makes this plugin stand out among some other similar products on the market, is the sheer number of features.
Another thing that will put a smile on your face is the pricing, which is as affordable as it gets. In fact the Wishlist plugin from WooCommerce itself cost as much as $79 when Acowebs’ Wishlist costs way lower.
To know the true depth of this plugin, you need to know about the features that it offers. Let’s take a look at the features of the WooCommerce Wishlist plugin by Acowebs and know what it can do.
Free Features
- You can select a page for Wishlist.
- You can control or allow the use of Wishlist for unauthenticated users.
- You will have the ability to set the “Add to wishlist” button position for the product page and listing page.
- There is also a shortcode option available, to place the “Add to wishlist” button anywhere on the page.
- You will be able to customize the “Add to wishlist” button style.
- You can choose what you want to display after a product is added to Wishlist (You can set it to show Add, Remove or Visit Wishlist button).
- Ability to upload your own custom “Add to wishlist” button icon, or you can choose the predefined icon that comes with the plugin.
- Customizable Wishlist table columns.
- Option to remove the product from Wishlist automatically, once the customer adds the product to the cart.
- Option to redirect the customer to the cart page after adding products to the cart.
- Allowing users to share the wishlist on social media (Facebook, Twitter, Pinterest, WhatsApp, email).
- You can also use custom CSS styles to decorate the wishlist.
- Multiple variations of the product are also supported by Acowebs Wishlist plugin.
- Fully translatable.
Premium Features
- Premium version of Aco Wishlist has all features on the free version
- The premium version also has a multi wishlist option.
- You can set the privacy settings for wishlists on pro.
- Dedicated widget for you to place a wishlist.
- Ability to show popular products based on the wishlist.
- Option to search within the wishlist.
- Ability to customize the page layout option of the wishlist.
- Ability to move the products between wishlists.
- Option to look out for a cost estimation from the wishlist.
Now that was a lot of features on a plugin that helps you enable Wishlist on a WooCommerce site, wasn’t it?
Well, that’s the kind of thing that makes Acowebs Wishlist special, it’s the abundance of cool features packed into an affordable plugin.
With the features being discussed, you might be wondering how you can enable a wishlist on your WooCommerce site using this plugin. Well, that’s what we are planning to show you in the next section.
How to Enable Wishlist on Your WooCommerce Site
Enabling a wishlist on a WooCommerce website is very easy if you have the right tool. Today we will do that using one of our plugins, the WooCommerce Wishlist pro plugin by Acowebs.
However, to make the plugin work and enable Wishlist on your website there are some prerequisites.
So, let’s take a look at the prerequisites that you need to have before we move on to show how you can use it to enable a wishlist on your website.
The Prerequisites:
While Aco Wishlist is a standalone tool, you can not use it on any website. In order to work with the wishlist, you need to have –
- A ready WordPress site.
- WooCommerce Plugin installed on your website (Free).
Now, if you already have a WordPress site and are using WooCommerce to build your eCommerce site, you can just follow us on how to install and use it.
Step 1: Installing the Plugin

Aco Wishlist is a lightweight plugin that will take no time to install. The install process is also not unknown, as you can just install it from your WordPress dashboard, just like any other.
There is no need to go to your FTP and install it. Sounds easy enough?
Now, we will show you how to install both the free and premium versions of the Aco Wishlist. So let’s get started with the process of installing the free plugin first.
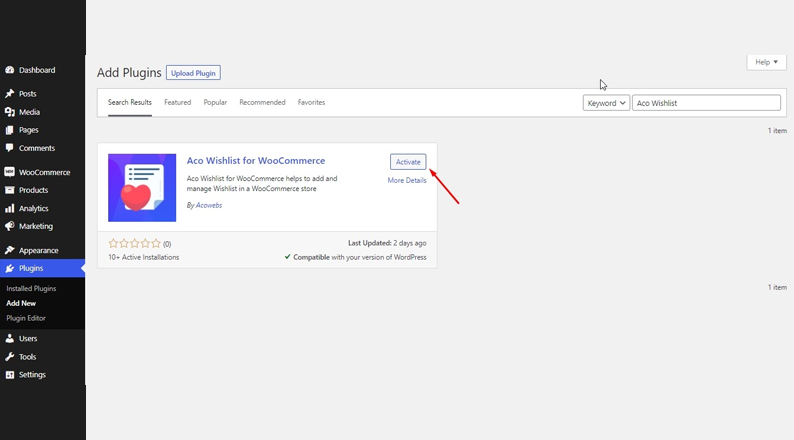
- Login to your WordPress Admin Dashboard.
- Navigate to Plugins > Add New.
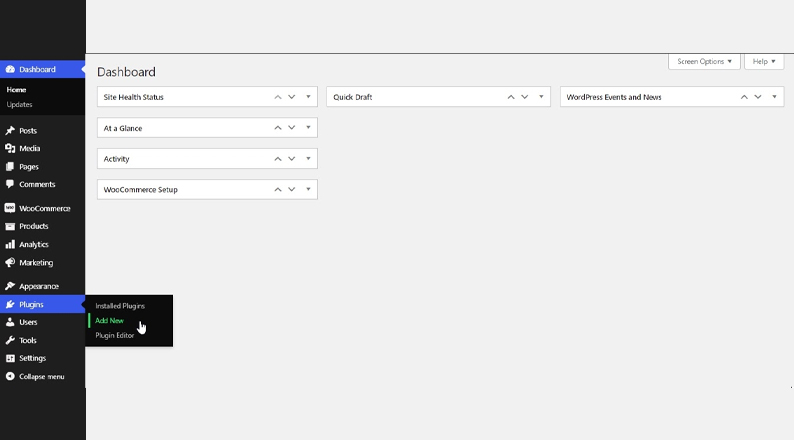
- Search for Aco Wishlist
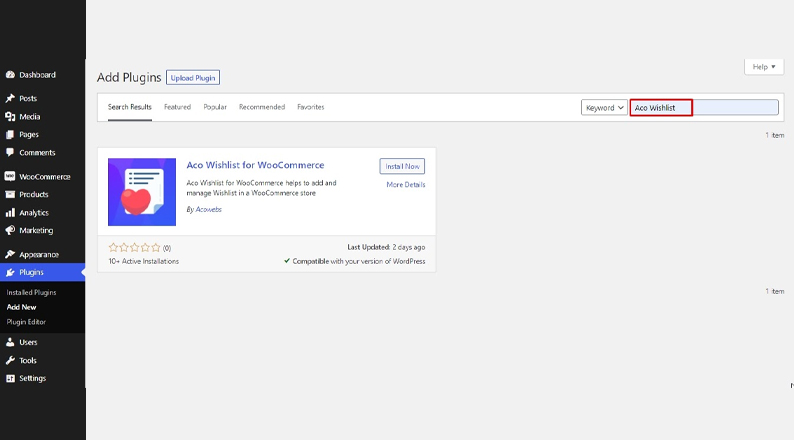
- Install the plugin, and then activate it. And now you’re ready to use it on your website.
As you have seen from the feature list above, the premium version of the Aco Wishlist offers some advanced features that you might feel the need for.
If you are willing to purchase and install the premium version of the plugin, follow the below method.
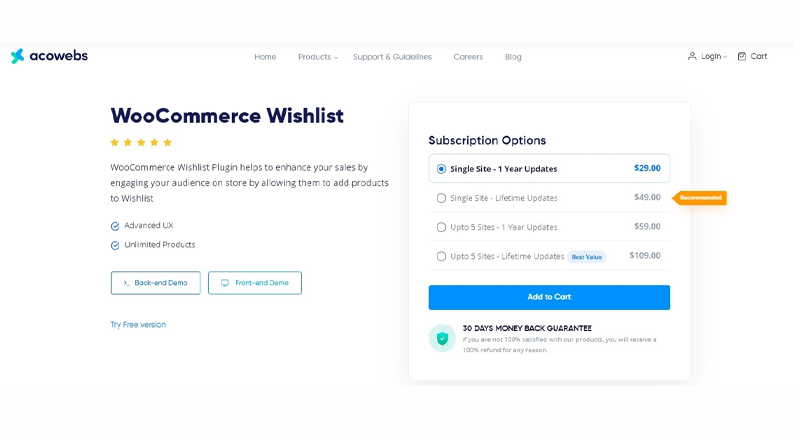
- Visit the WooCommerce Wishlists page on the Acowebs website.
- Choose which pricing plan suits you, and click on Add to Cart. (Up to 5 sites with lifetime updates provides the best value for money)
- Place your order with the payment method that you prefer.
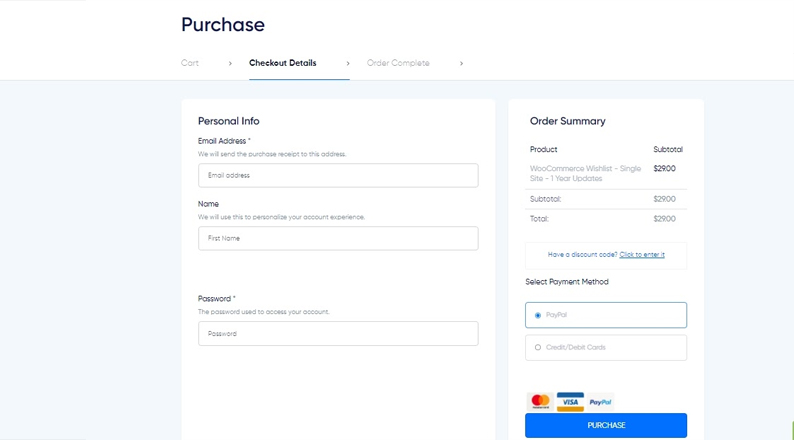
- Once you purchase, you will get the instruction to download the zip file of the plugin, on the next page. Download the plugin file.
- Now login to your WordPress admin dashboard.
- Go to Plugins > Add New.

- Click on Upload Plugin.
- Find & select the plugin file from your computer/device and upload it.
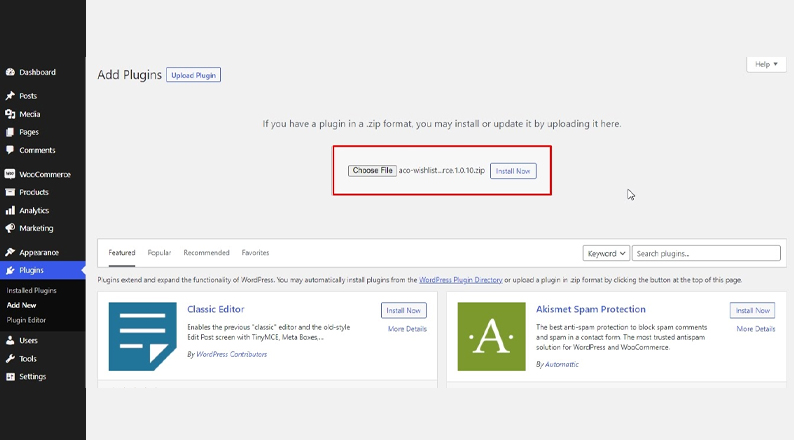
- Now activate the plugin from Plugins > Installed Plugins. Now you are ready to use the premium version of the plugin on your website.
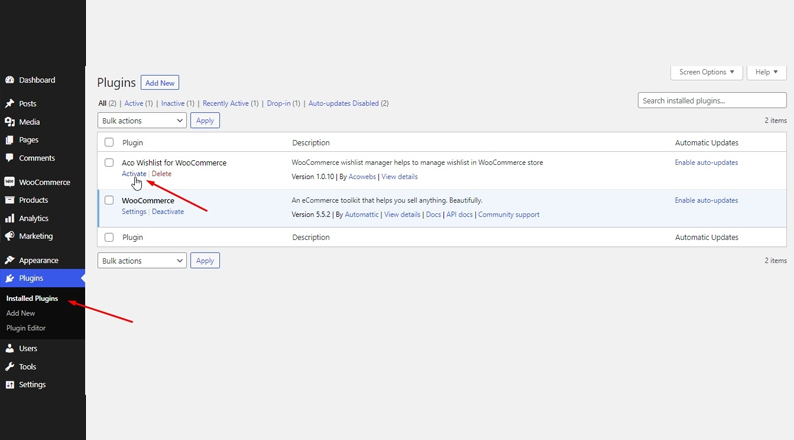
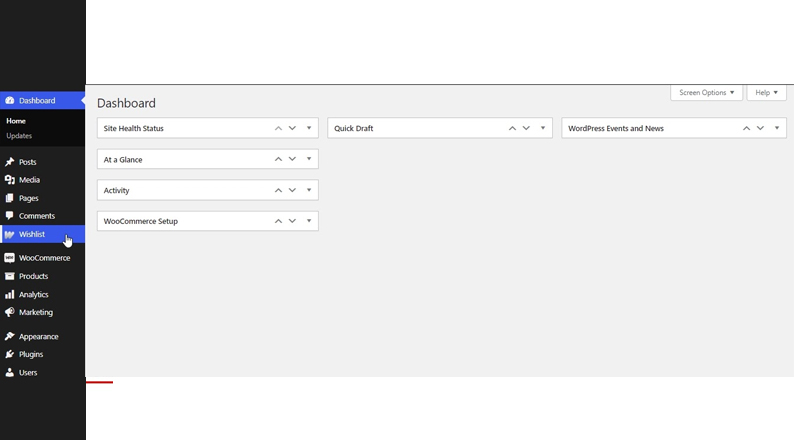
Now that you’re done installing the plugin. After installing the Aco Wishlist for WooCommerce, you will find the Wishlist option straightway on your WordPress Admin Dashboard Sidebar.
To access it just navigate to WordPress Admin Dashboard > Wishlist
There are 3 different settings tabs on the wishlist option. We will go through all of them to show how you can customize the wishlist for your website. Let’s start with the general settings.
Step 2: Configuring the General Settings
The general settings hold some of the crucial options. Below are things you can do from the general settings.
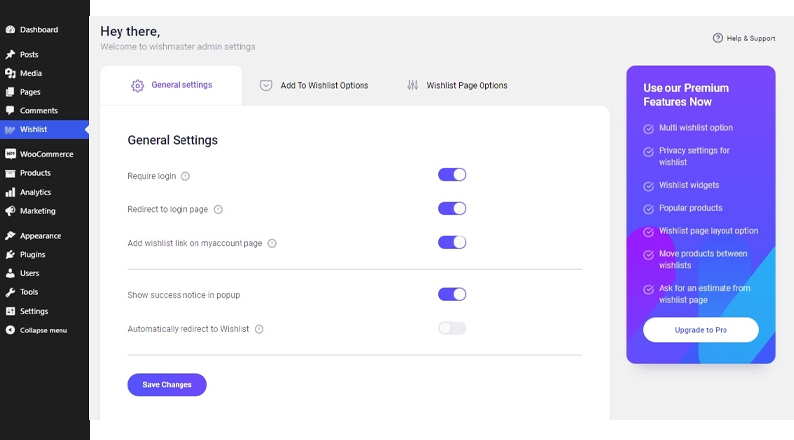
- You can make the wishlist available only for the visitors that are logged in, or other users as well. For that, you need to tweak the Require Login option. If you set the wishlist for only logged-in users, another option will appear. This option will let you determine if you want to redirect the logged out visitors to the login page if they add any product to their wishlist or just leave them on the page they are in.
- While wishlist requires a standalone page to show the collection of products, you can add the link to the wishlist page on ‘My Account’ page of the customer. For that, there’s a dedicated option named Add wishlist link on my account page.
- You can also enable or disable a notice for successful wishlist addition of a product by the customer from the general settings.
- There is also an option to redirect the customer to the wishlist collection page once they add a product to their wishlist.
If you’re done, just click on Save Changes and move on to the next settings tab, which is Add to Wishlist Options.
Step 3: Configuring the Add to Wishlist Options
Add to Wishlist Options page consists of a whole lot of settings regarding the Wishlist Button Style, Position, Color, Text Style, Custom CSS, etc. Let’s have a look at the key settings of this tab.
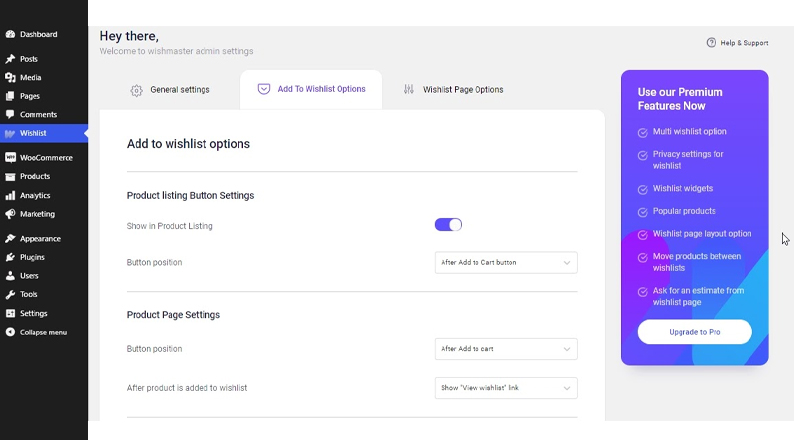
- The Product Listing Button Settings allows you to display the Add to Wishlist button on the Product Listing page or not. If you opt for adding the button on the product listing page, you can determine where you want to show the button i.e. button position.
- The operation of Product Page Settings is quite similar to what Product Listing Button Settings do. Add to Wishlist button is automatically added to all product pages. With this settings, you can set the button’s position and what the button will show once you once the product is added to the wishlist.
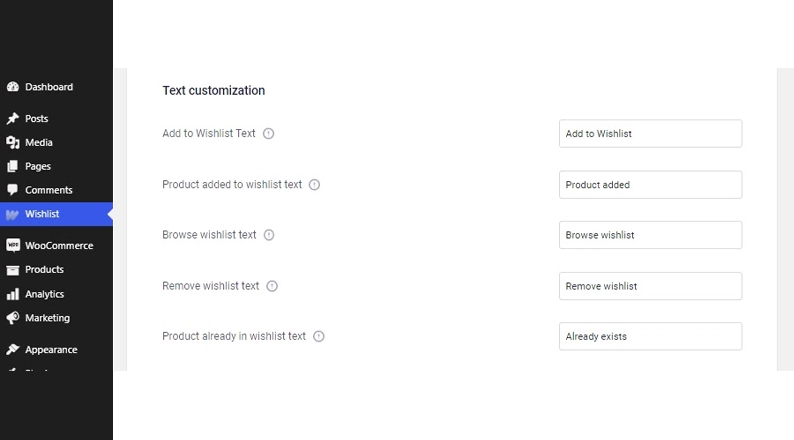
- From the Text Customization option, you can customize the texts. Following texts are up for customization, “Add to Wishlist Text”, “Product added to wishlist text”, “Browse wishlist text”, “Remove wishlist text”, “Product already in wishlist text”.
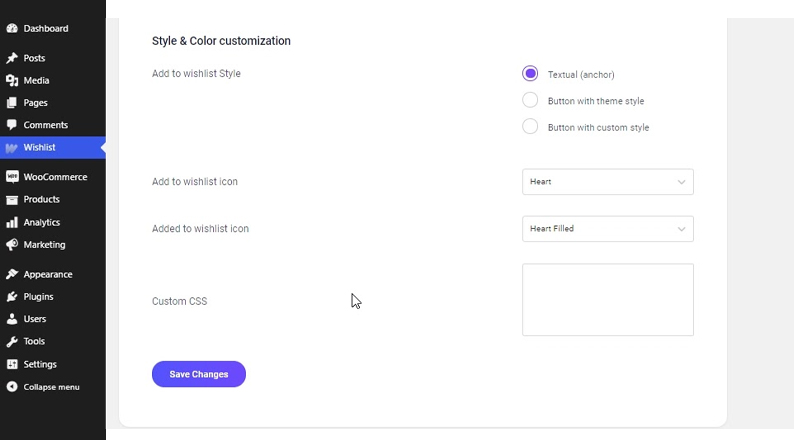
- The Style & Color customization option will let you customize the button style. You can choose between a text-based button (anchor), a button with your theme style, or a button with custom CSS. Apart from that, you can also change the “Add to wishlist icon” and “Added to wishlist icon”. You can either choose between the two provided icons or upload one of your own.
After making the changes, don’t forget to click on Save Changes if you don’t want to lose the changes made.
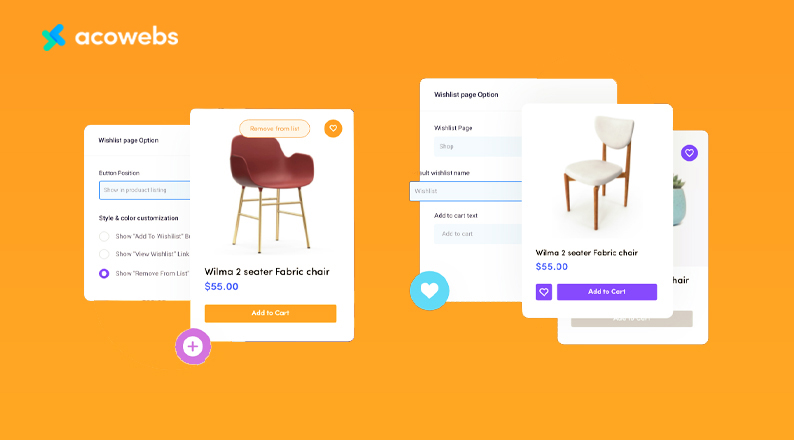
Step 4: Configuring the Wishlist Page Option
As you already know, you will need to create a separate page to display the items on the wishlist. From this page, you will get to select the wishlist page and customize how the products will be displayed. The key settings of this page include –
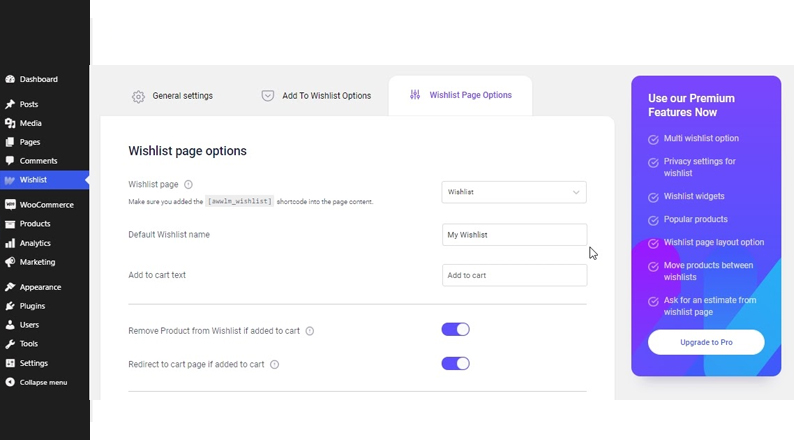
- Apart from selecting the wishlist page, you can also set the default name for the wishlist. You will also be able to customize the Add to Cart text on the wishlist page.
- You will be able to enable or disable the removal of the product from the wishlist if the customer adds it to the cart. You can opt to redirect the customer to the cart page if any product from the wishlist page is added to the cart.
- You can choose to show the following data on the wishlist page – Product price, Stock status, Date of addition, Add to Cart button and Remove from the wishlist.
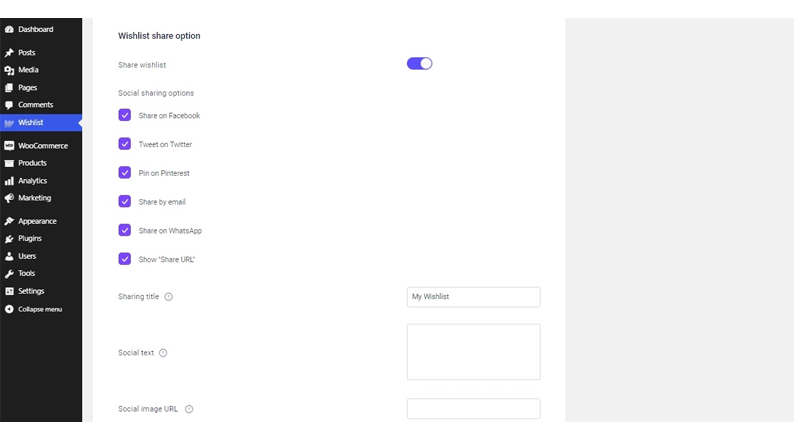
- Finally, you can also enable the option for the customer to share their wishlist. If you choose to enable this setting, some more options will appear. This includes Social Sharing Options, Sharing titles, Social Text and Social Image URL customization.
There are a lot more features and settings in this plugin that you would love to use. But for that, you have to get the premium edition. As for a starter site, the free version will serve you nicely.
Step 5: Seeing the Wishlist in Action
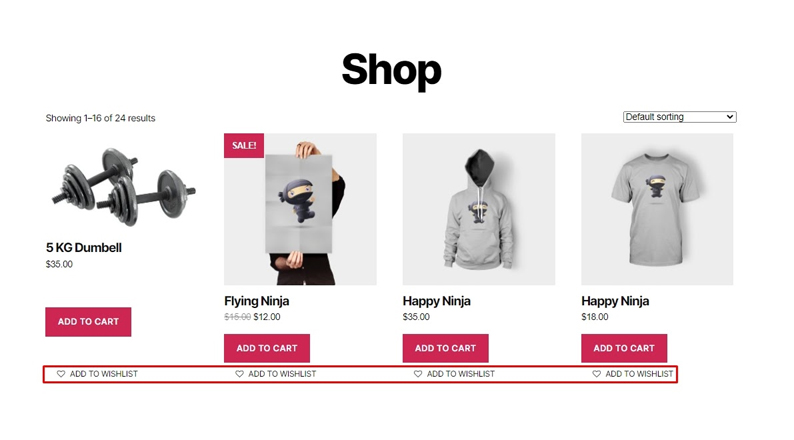
We made it! We added a wishlist to our eCommerce website. Now is the time to check it out. For starters, here’s how the Add to Wishlist button looks on the product listing page.
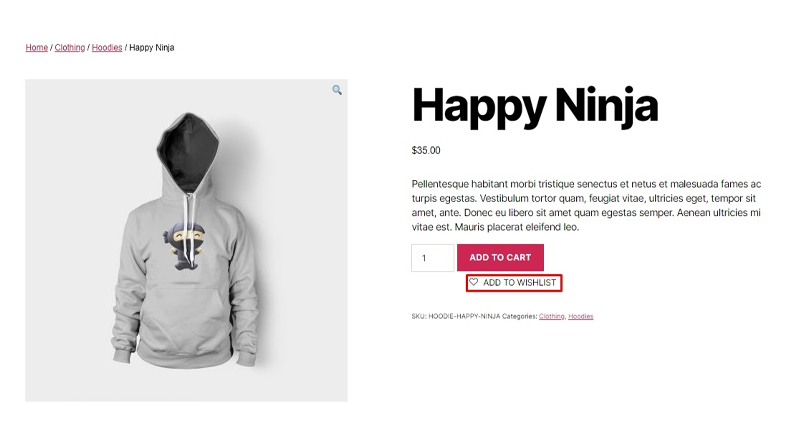
Below you can see the Add to Wishlist button on the product page. Suits nicely, right?
Now let’s get this product to our wishlist by clicking the button. And it showed us a notice, just like we have set. It also changed the button from Add to Wishlist to Browse Wishlist.
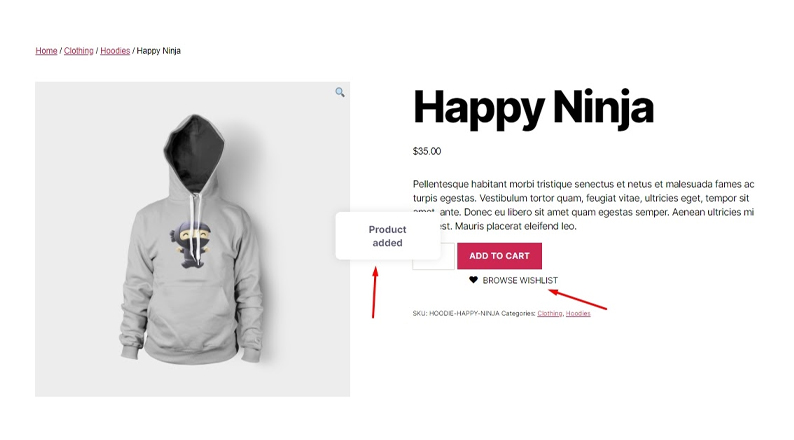
So, let’s browse our wishlist, shall we?
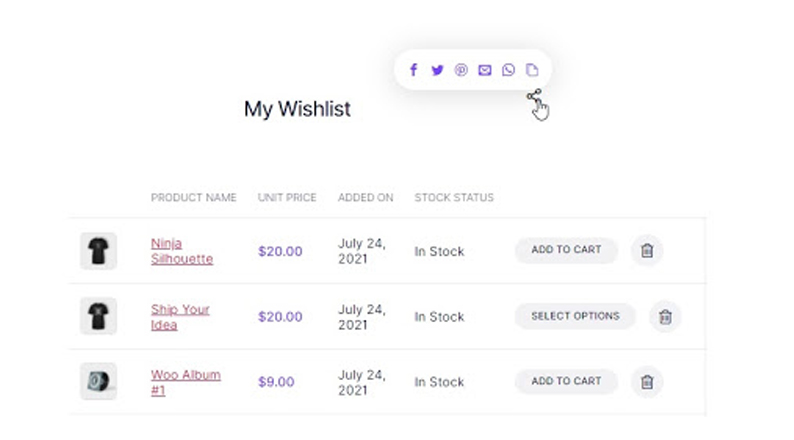
As you can see in the below image, the dedicated wishlist page shows the collection of products that we decided to add to the wishlist. Apart from the Product Name, we can also see the Unit Price, Wishlist Addition Date, and Stock Status of the products.
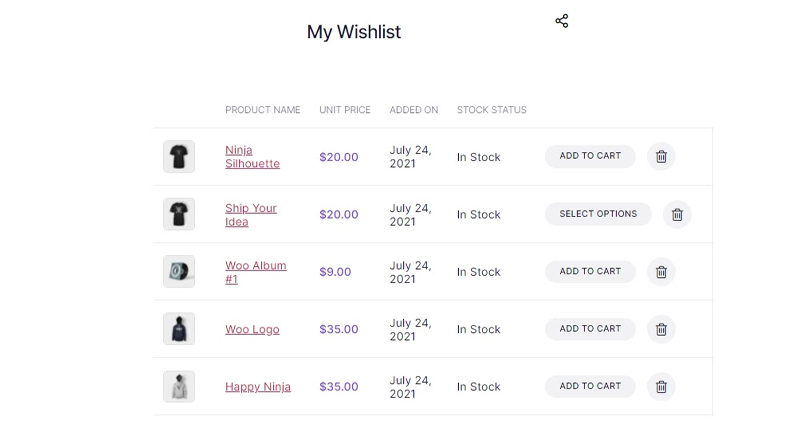
If we look at the below image, we can also see a social sharing button, which looks quite good, doesn’t it?
So there we go. We successfully enabled and tried our wishlist option on our eCommerce site. Easy Peasy!
Acowebs Wishlist Pricing Plan
Acowebs Wishlist is a nifty little plugin that you will admire once you use it. The plugin is very useful and makes it easy to add a wishlist with just a couple of clicks.
It also comes with a lot of advanced features to customize the wishlist. However, despite offering a lot of advanced features, the plugin is rather affordable.
There are currently 4 pricing packages available for this plugin. With the base plan starting from just $29, you can guess how affordable it is. Here are the packages in detail.
| Sl. | No. of Sites | Updates | Price |
| Plan 1 | Single Site | 1 Year Updates | $29.00 |
| Plan 2 | Single Site | Lifetime Updates | $49.00 |
| Plan 3 | Up to 5 Sites | 1 Year Updates | $59.00 |
| Plan 4 | Up to 5 Sites | Lifetime Updates | $109.00 |
While the price for the starter plan is $29, you can get the best value for money if you buy plan 4. That’s because, with this plan, you will get support for multiple sites and get lifetime updates as well.
Button > Get Acowebs Wishlist for Your eCommerce Shop Now!
Add a Wishlist to your WooCommerce store today
Wishlists are super important for an eCommerce website. Today, with so much competition all around, the wishlist has become even more relevant, useful and necessary to retain customers.
If you have a custom-developed website, you will have to code your way to build a wishlist feature.
However, if you use WordPress to create and run your eCommerce shop, there’s no need to do that, as you have quite a few plugins to enable the wishlist feature.
Especially if you use WooCommerce on your WordPress website, it becomes quite easy to add this awesome feature.
If you’re seeking a plugin for enabling a wishlist on a WordPress site, WooCommerce Wishlist free plugin is a great plugin from Acowebs that helps you do this job quite easily, that too without any additional cost.
We have shown the way of installing this plugin on a website and how to use it. Hope you followed the article and were able to enable a wishlist on your website. If not, don’t forget to let us know if you need any help.
Acowebs are developers of Woocommerce dynamic pricing that will help you add bulk discounts to products on your stores. It also developed the plugin for adding various extra product fields which is called Woocommerce custom fields, that are lightweight and fast. You can easily update your store with these add-ons and enjoy a hassle-free experience, check out the best options for additional Woocommerce custom product addons.