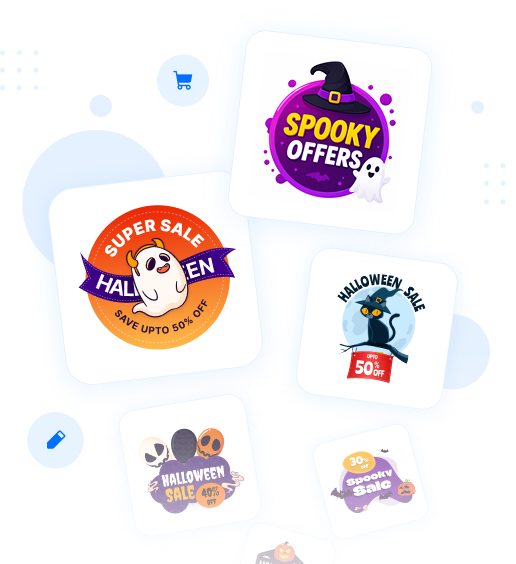
The Customizable Badge feature in Labeler allows you to create product badges with your own text and customize their appearance. You can choose a badge design and customize the text, font, size, color, position, and other styling options.
From your Shopify Admin, go to Apps → Labeler. Under the Create section, click Badges to open the badge settings.
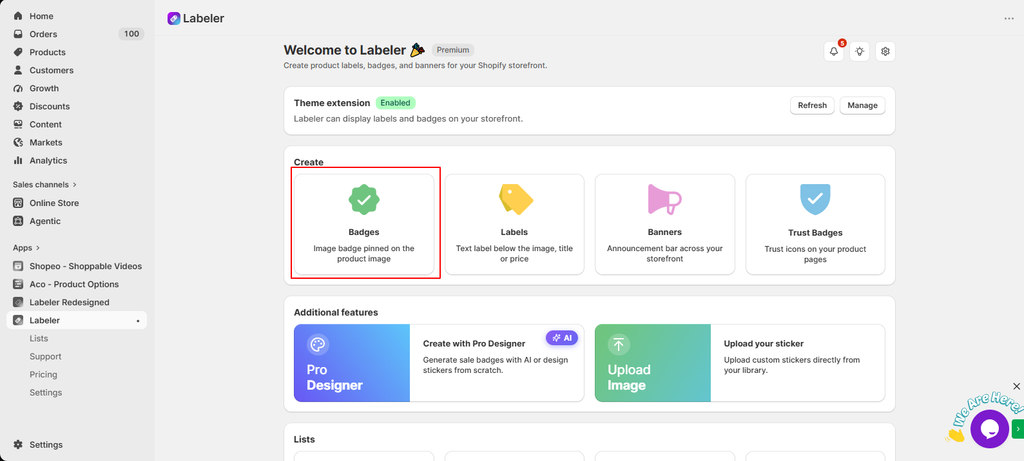
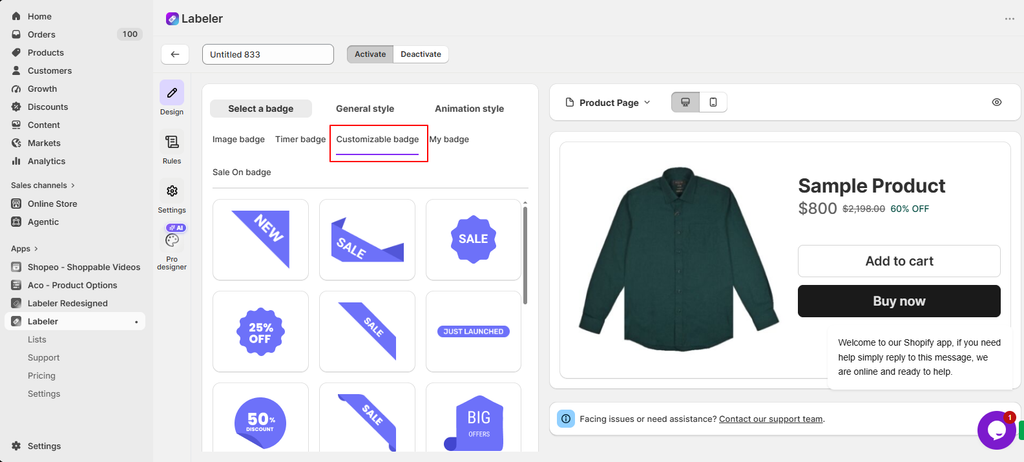
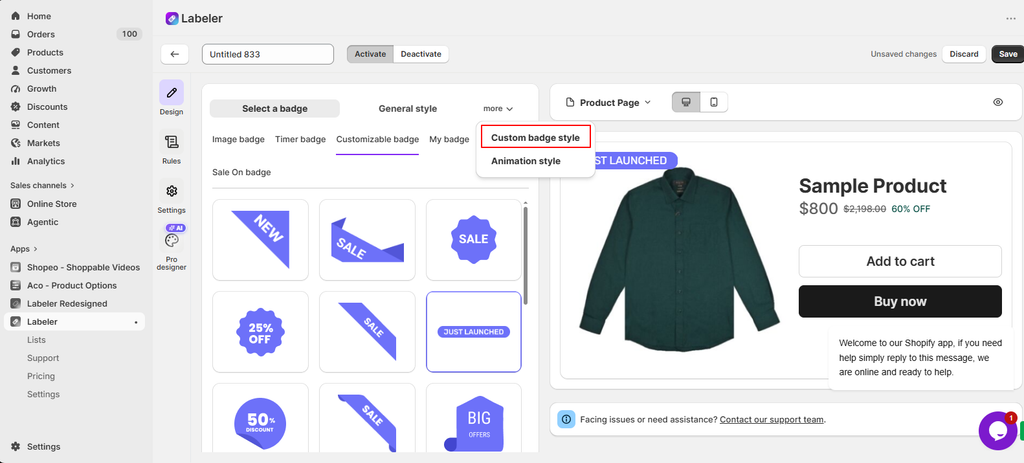
In the badge settings, go to the Design section and click Select a badge. Then select the Customizable badge tab to view the available customizable badge designs.
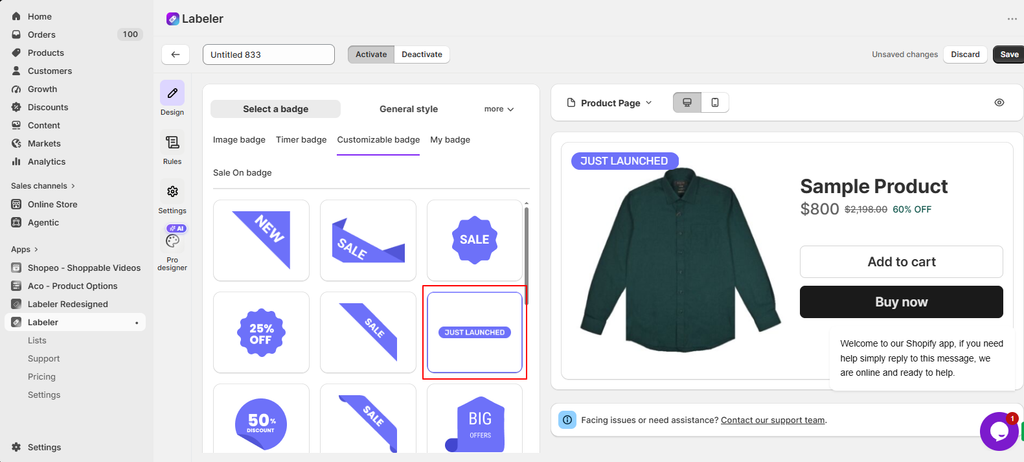
Select the badge design you want to use from the available options. For example, you can select the Just Launched badge.
After selecting the badge, click More and select Custom badge style. This will open the customization options for the selected badge.
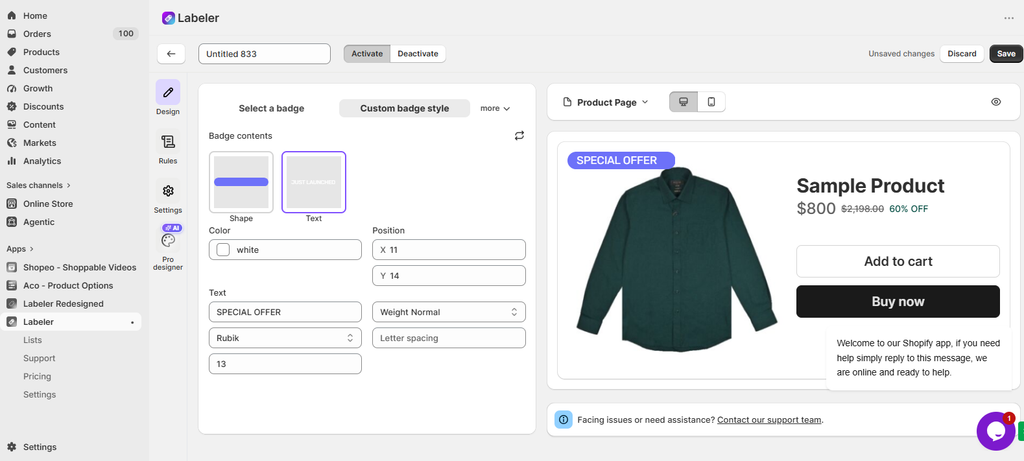
Under Badge contents, select Text. You can enter your desired text in the Text field. For example, you can change “JUST LAUNCHED” to “SPECIAL OFFER” or any other text you want to display.
You can also customize the text using the available options, including font, font size, font weight, letter spacing, text color, and position.
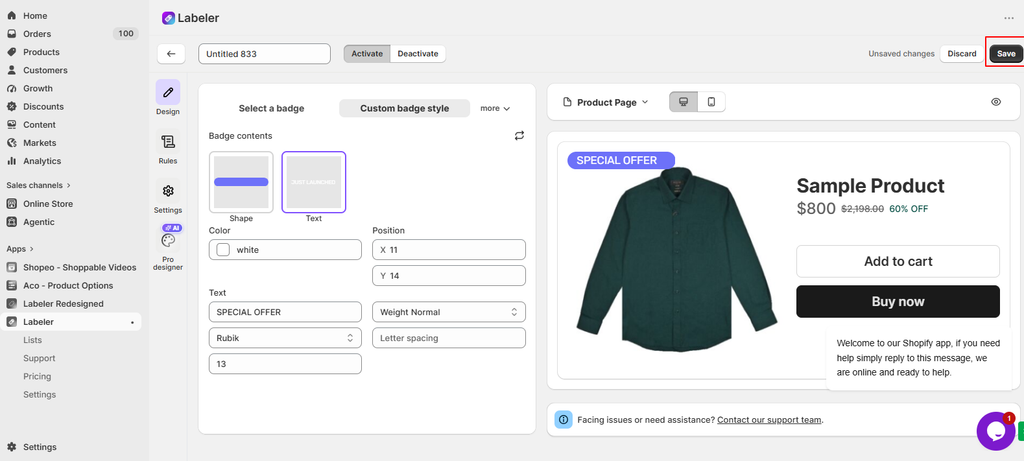
Once you have finished customizing the badge, click Save in the top-right corner to save your changes.
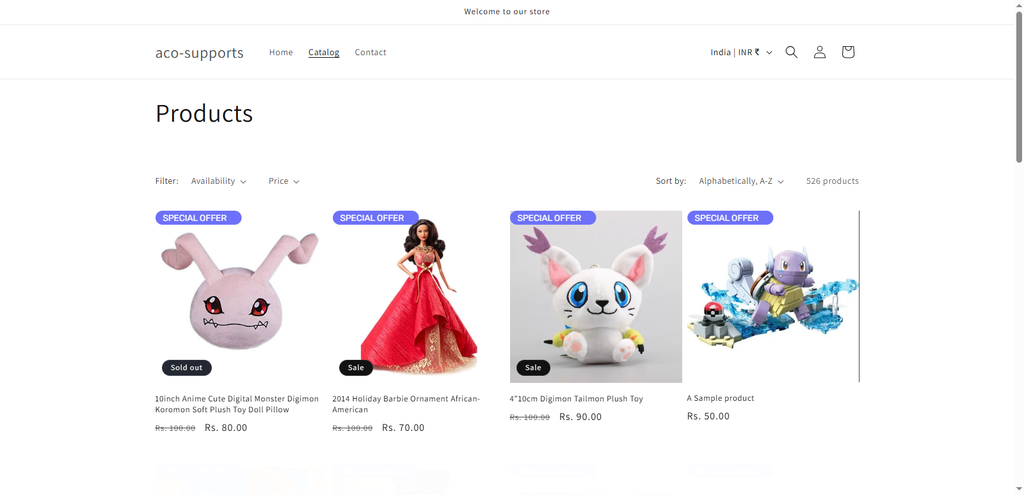
Your customizable badge is now ready to be used on your products according to the configured badge rules.
If you have questions about our plugin(s), are experiencing issues with any of our plugin











 Login
Login
 Cart
Cart BUY THIS PLUGIN