
The Hide badge from feature in Labeler allows you to control where a badge or label should not appear on your Shopify storefront. You can specify the CSS class or ID of a particular section, and the badge/label will be hidden from that section while remaining visible in other areas.
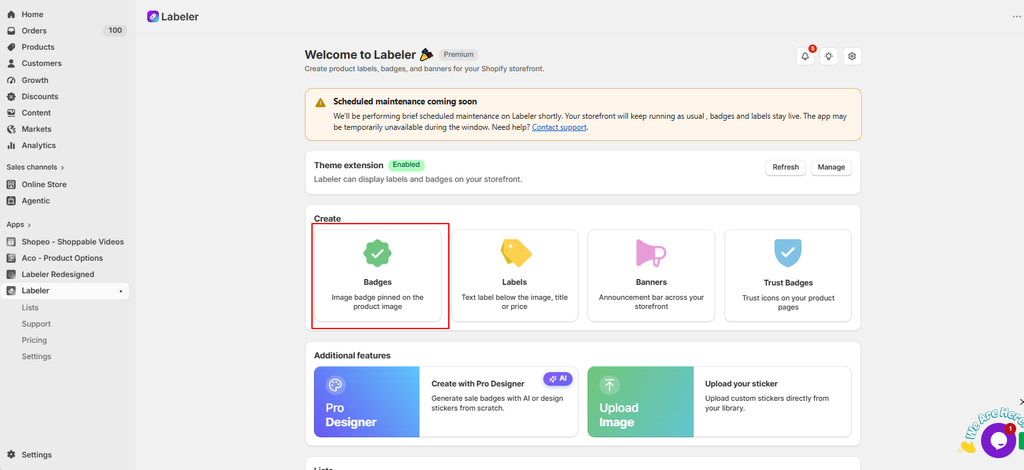
From your Shopify Admin, go to Apps → Labeler and open the badge or label you want to configure.
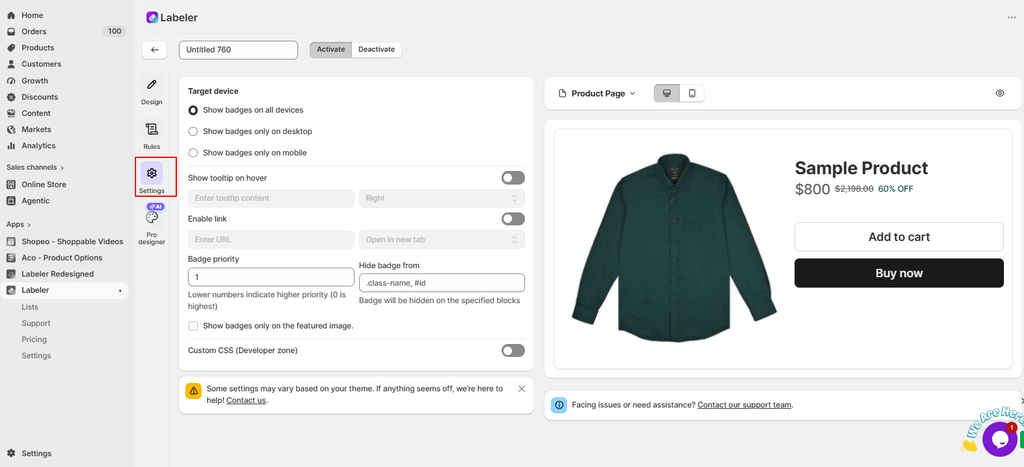
Then Navigate to the Settings section.
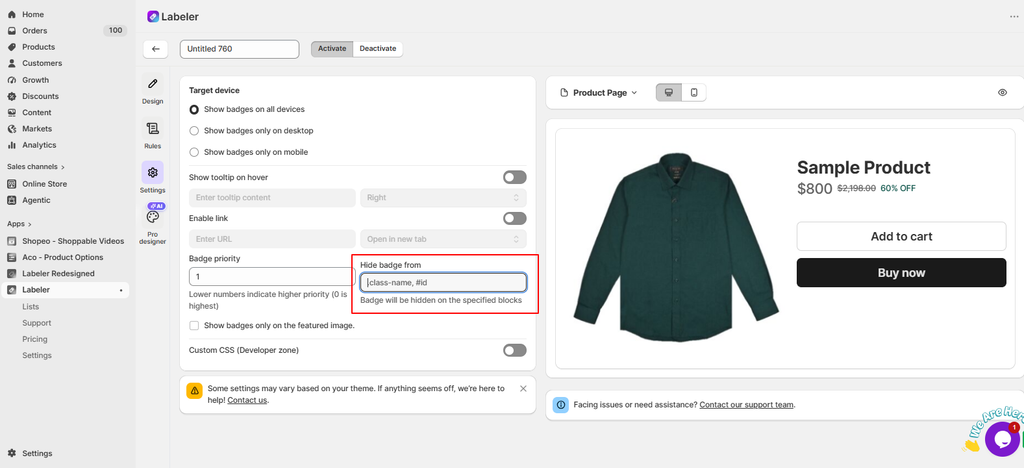
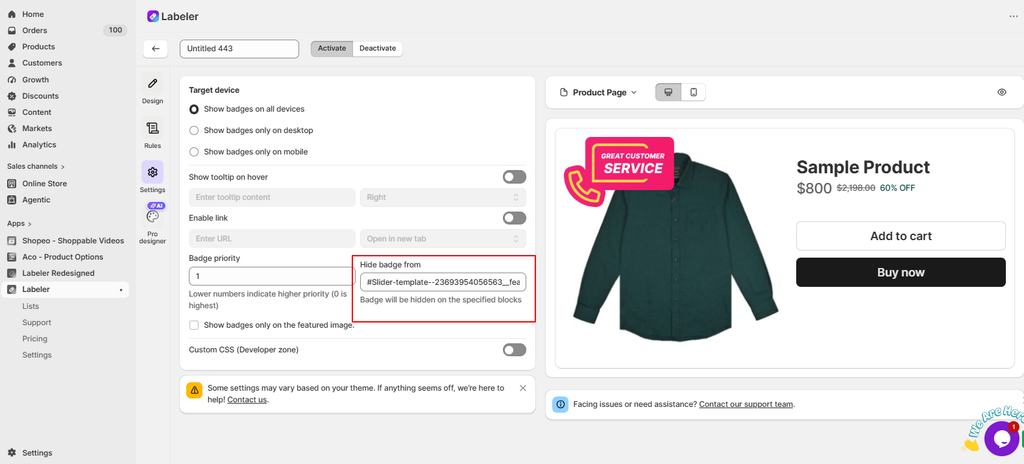
In the Settings section, find the Hide badge from field.
This option allows you to specify the storefront sections where the badge should be hidden.
Open your Shopify storefront and identify the section where you don’t want the badge or label to appear.
Right-click on that section and select Inspect to open your browser’s developer tools.
Find the HTML element representing the section and look for its CSS class or ID.
For example:
<div id=”featured-collection”> You can use: #featured-collection
Or, if the section contains a class:
<div class=”featured-collection”> You can use: .featured-collection
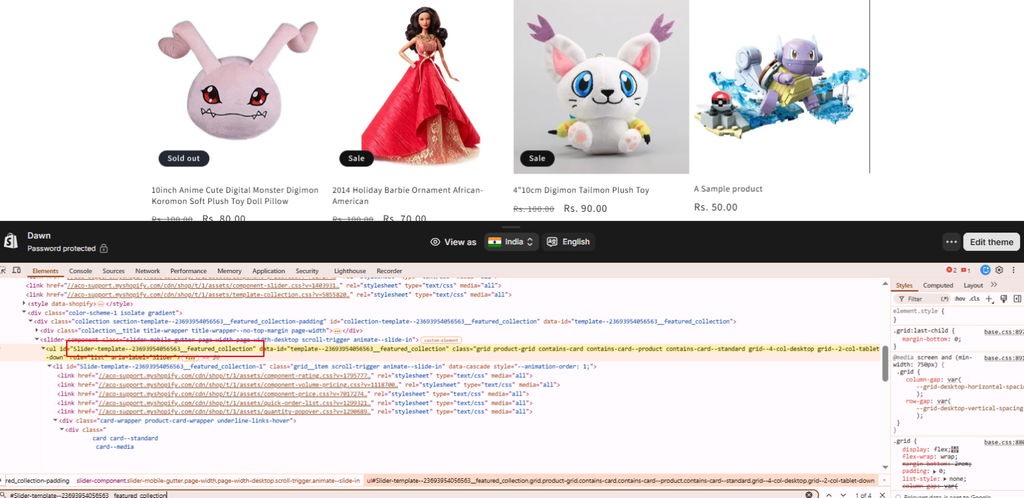
Copy the CSS class or ID and paste it into the Hide badge from field.
If you need to hide the badge from multiple sections, you can specify multiple selectors separated by commas.
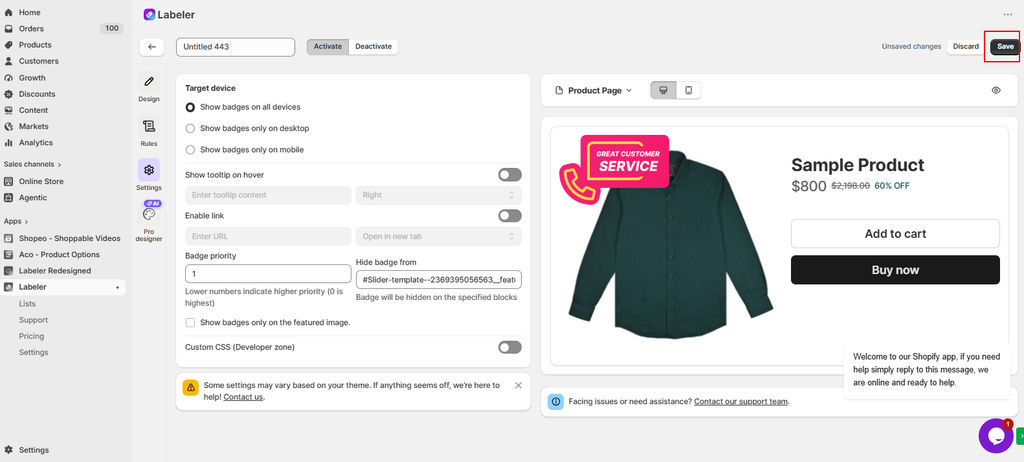
Once you have entered the required CSS class or ID, click Save in the top-right corner.
The badge or label will then be hidden from the specified storefront section while continuing to appear in other applicable sections.
Note: The CSS class or ID can vary depending on the Shopify theme. If you’re unsure which selector to use, use your browser’s Inspect tool to identify the correct section selector.
If you have questions about our plugin(s), are experiencing issues with any of our plugin















 Login
Login
 Cart
Cart BUY THIS PLUGIN