
The Schedule feature in Labeler allows you to control when a badge or label should be displayed on your store. You can set a specific date range, time period, time zone, and days of the week for displaying the badge or label.
From your Shopify Admin, go to Apps → Labeler and open the badge or label you want to schedule. Then go to the Rules section.
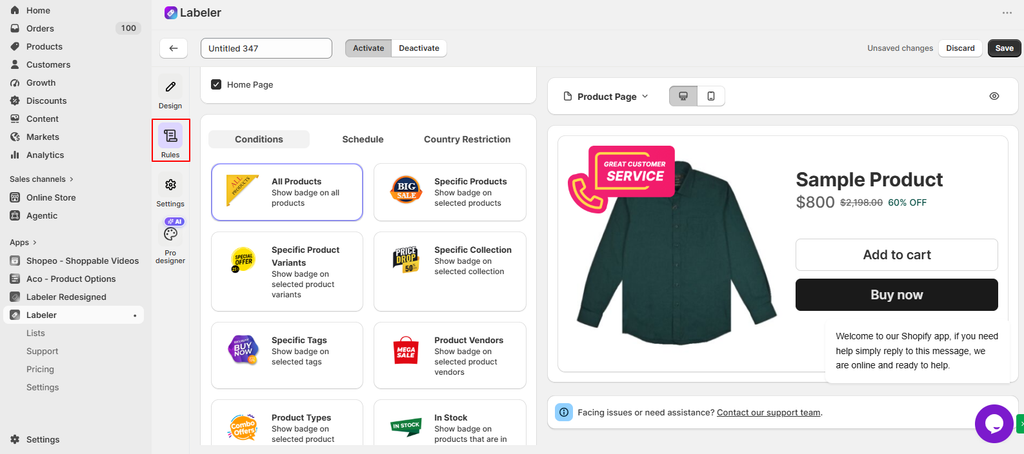
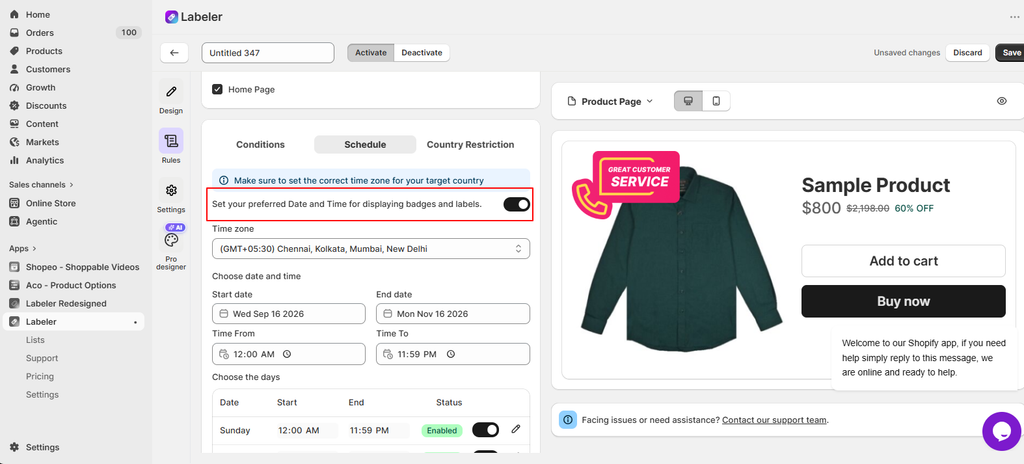
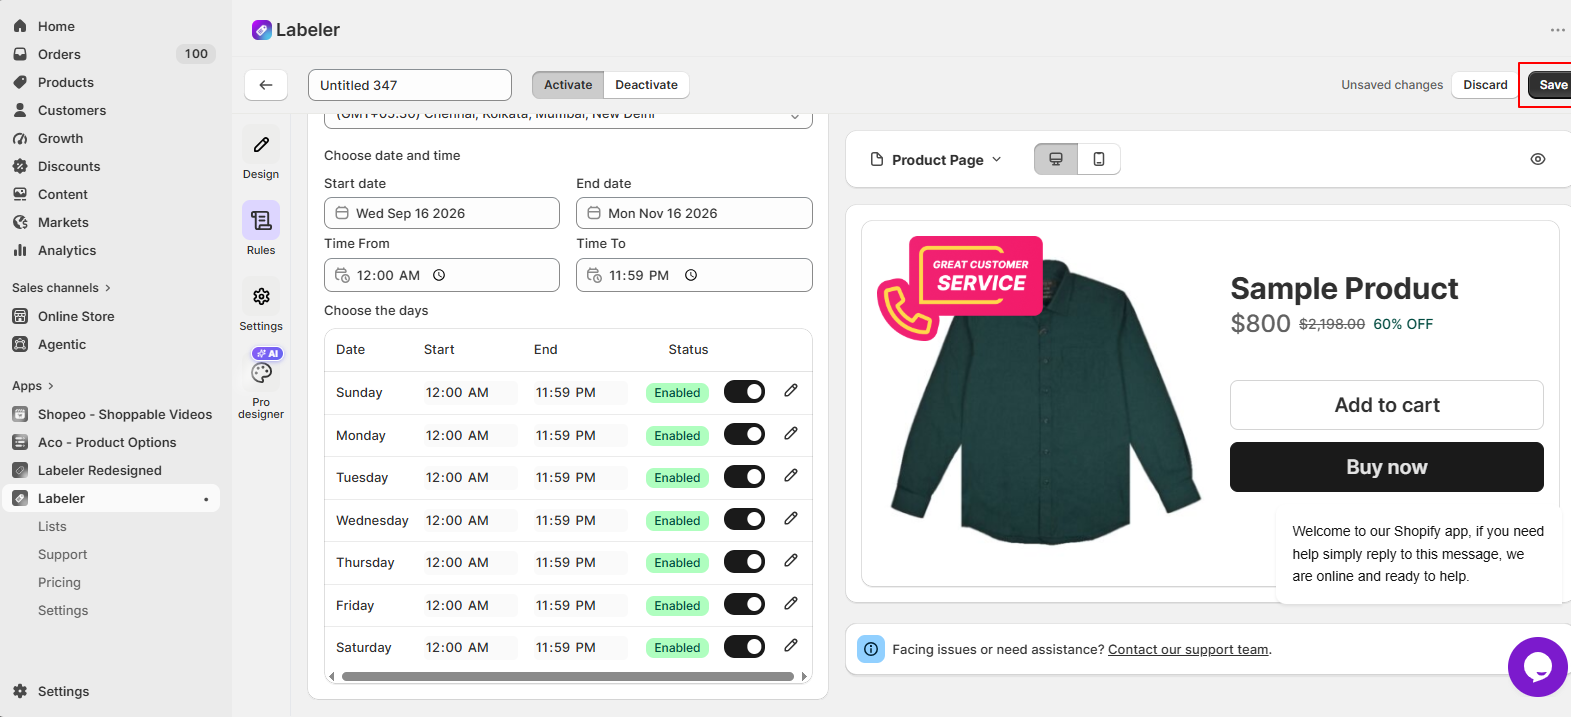
In the Rules section, select the Schedule tab. You will find the option Set your preferred Date and Time for displaying badges and labels.
Enable the toggle to activate the scheduling options.
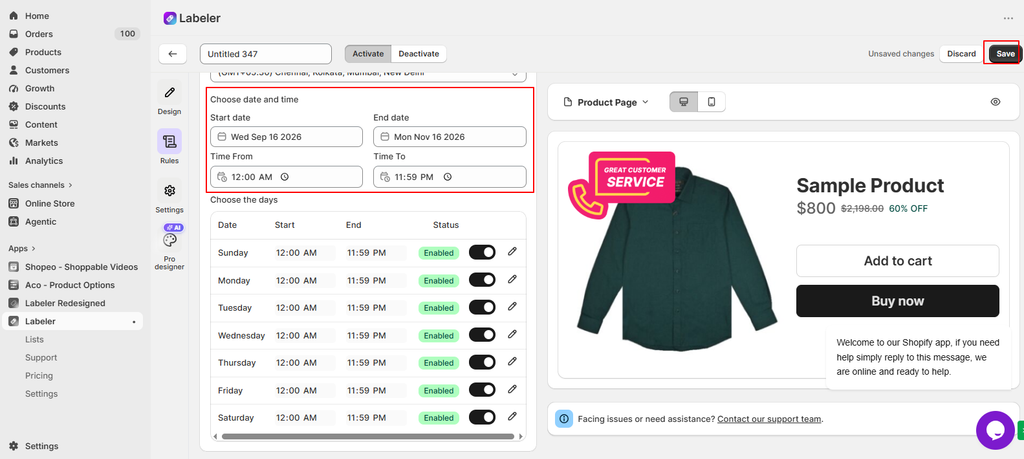
After enabling the schedule, select the appropriate Time zone for your target audience. Then choose the Start date, End date, Time From, and Time To for when the badge or label should be displayed.
For example, you can schedule a badge to appear from September 16, 2026, at 12:00 AM until November 16, 2026, at 11:59 PM.
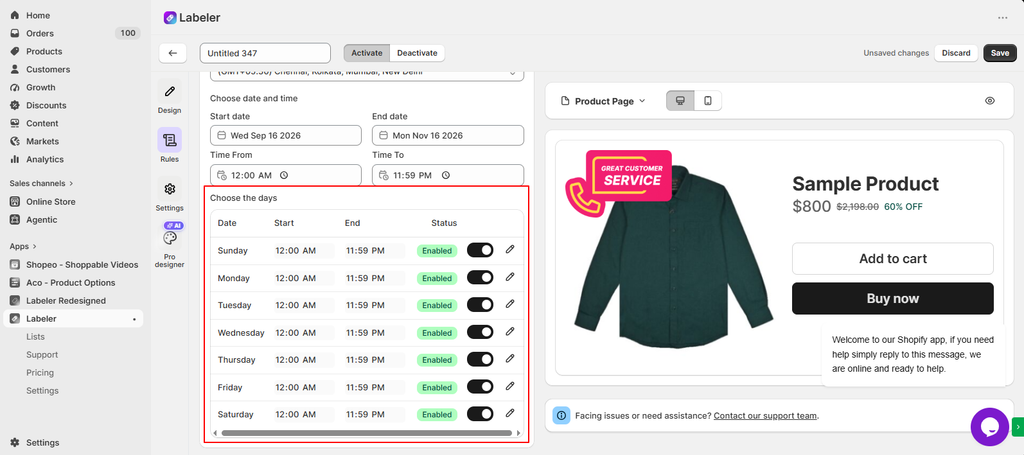
Under Choose the days, you can configure the start and end time for individual days of the week. Use the toggle next to each day to enable or disable the badge for that particular day.
You can also click the edit icon next to a day to modify its specific start and end time.
Once you have configured the required schedule, click Save in the top-right corner. The badge or label will then be displayed according to the selected date, time, and day settings.
If you have questions about our plugin(s), are experiencing issues with any of our plugin


















 Login
Login
 Cart
Cart BUY THIS PLUGIN