Login
Login
 Cart
Cart
It’s 2020, and more and more brick-and-mortar businesses are joining online platforms to increase their sales.
The T-shirt industry is a relatively inexpensive and easy – set up business that’s always thriving and comes with colossal selling opportunities.
Interestingly, you can personalize the T-shirts according to the upcoming events or make a statement or create your brand awareness.
The beauty lies in the fact that people tend to buy personalized t-shirts more than any casual shirts because they are emotionally connected with the statement.
That’s why creating an online T-shirt store can be your next one-stop-shop to reap online commercial benefits.
This tutorial will discuss how easily you can create and personalize the WooCommerce custom t-shirt store.
Why Should you Offer Personalized Products to your Customers?
Offering personalized products to your customers is a pivotal solution to retain your customers for longer by providing unique products to your clients. Customers can get what they are looking for right away without using any follow-up email requests.
When you offer customized t-shirts, you can allow personalized engraving or premium fabrics, unique designs, or colors of their choice in a snap.
Adding a product addon plugin can help you offer customized options; you can add options using dropdown menus, allow text area, custom color option, custom price inputs, or even sample images.
In this tutorial, we have used WooCommerce Custom Product Addons by Acowebs. Using this plugin offers multiple add on field options like text fields, dropdown menu, upload a file option, and many others.
How to Create a Personalized Custom T-shirt Store – The Definitive Guide
States show that the customized T-shirt industry is flourishing rapidly, and it is expected that the global customized T-shirt industry will cross over $10 Bn by 2025.
Therefore, if you want to provide top-notch quality services to your customers, you must configure the right tool on your WooCommerce store.
There are many factors involved in creating customized or personalized products, and once you have taken the domain name and hosting, the next step is to take the eCommerce store platform.
You can choose multiple options, depending upon your budget and the features you wanted to include in your T-shirt store. You can go with Magento, Shopify, or WooCommerce.
But in this article, we will have the only WooCommerce because of its diverse options and customizable ability.
What Basic Types of Personalization does WooCommerce Offer?
You might be discerning, why should I go for a WooCommerce product add-on when WooCommerce is offering some basic features for free?
No doubt, WooCommerce comes with some readymade solutions to personalize your products, known as variations. You can define attributes of your products like size, color, and set prices of different inventory levels.
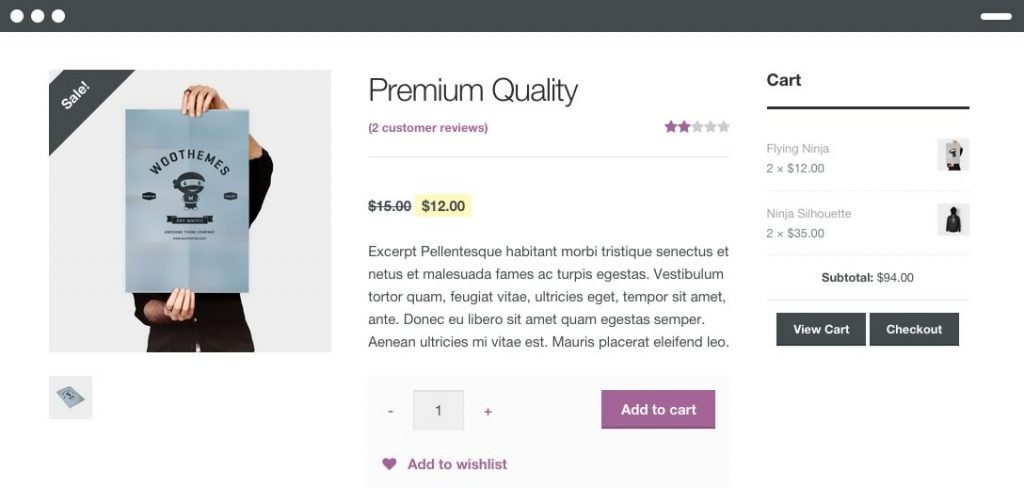
Here is how a typical WooCommerce product page will look like without using an Add-on plugin.
However, suppose you want to add extra fields such as different pricing options, upload a file option, or text boxes to add their personalized product’s details. In that case, the WooCommerce custom product addons plugin can serve you best.
Product Addons for WooCommerce, also known as WooCommerce Custom Fields plugin, is an excellent addition to your WooCommerce store to provide a next-level shopping experience to your customers.
It comes with the liberty of adding more than 20+ custom fields to your product form. You can also add multiple prices depending upon the customer’s selection.
Also, in the premium version, you can take advantage of conditional logic, which lets you hide or show certain fields upon the users’ specific selection options. You can add dropdown menus, text field options, color group selectors, or email fields.
Here are some of the field options available for your product form.
1. Text field
2. Number field
3. Radio field
4. Checkbox field
5. Select field
6. Text area field
7. Date field
8. Color field
9. Hidden field
10.Password field
11.Email field
12. Paragraph tag
13. Header tag
Now, let’s jump over to our next section to show you how you can configure this plugin and customize your t-shirt store.
WooCommerce Custom Product Addons Plugin Installation

You can install the free version from the WordPress repository.
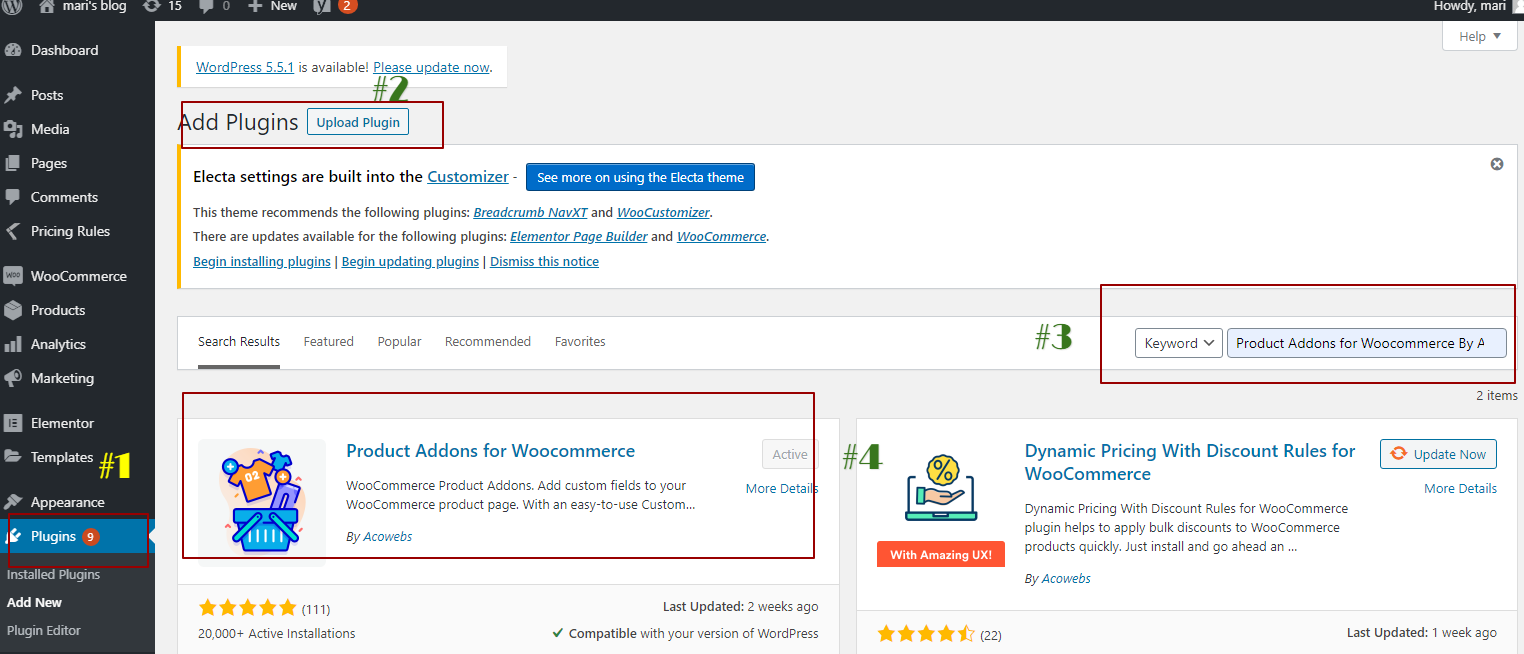
- Log in to your Admin area
- Go to Plugins > Add New plugin
- Search in the search bar for WooCommerce product Addons by Acowebs
- Click on install and then Activate.
Customize a T-shirt eCommerce Store with WooCommerce Product Addons
Once you are done with the Product addon installation, the next step is to create your product category and your product pages to add the T-shirt form.
Step1: Create your Product and Category
The first step is to create a product or create a category to apply a custom product form. We have created a category with the name of Clothing > T-shirts.
To create a new product, you can follow these footsteps.
- Go to Admin area
- Now click Products
- Select All products
- Now Add New Product
Now add your product’s title and also select its category from the right-side corner.
You can also set your product’s image and add multiple products from the product gallery option.
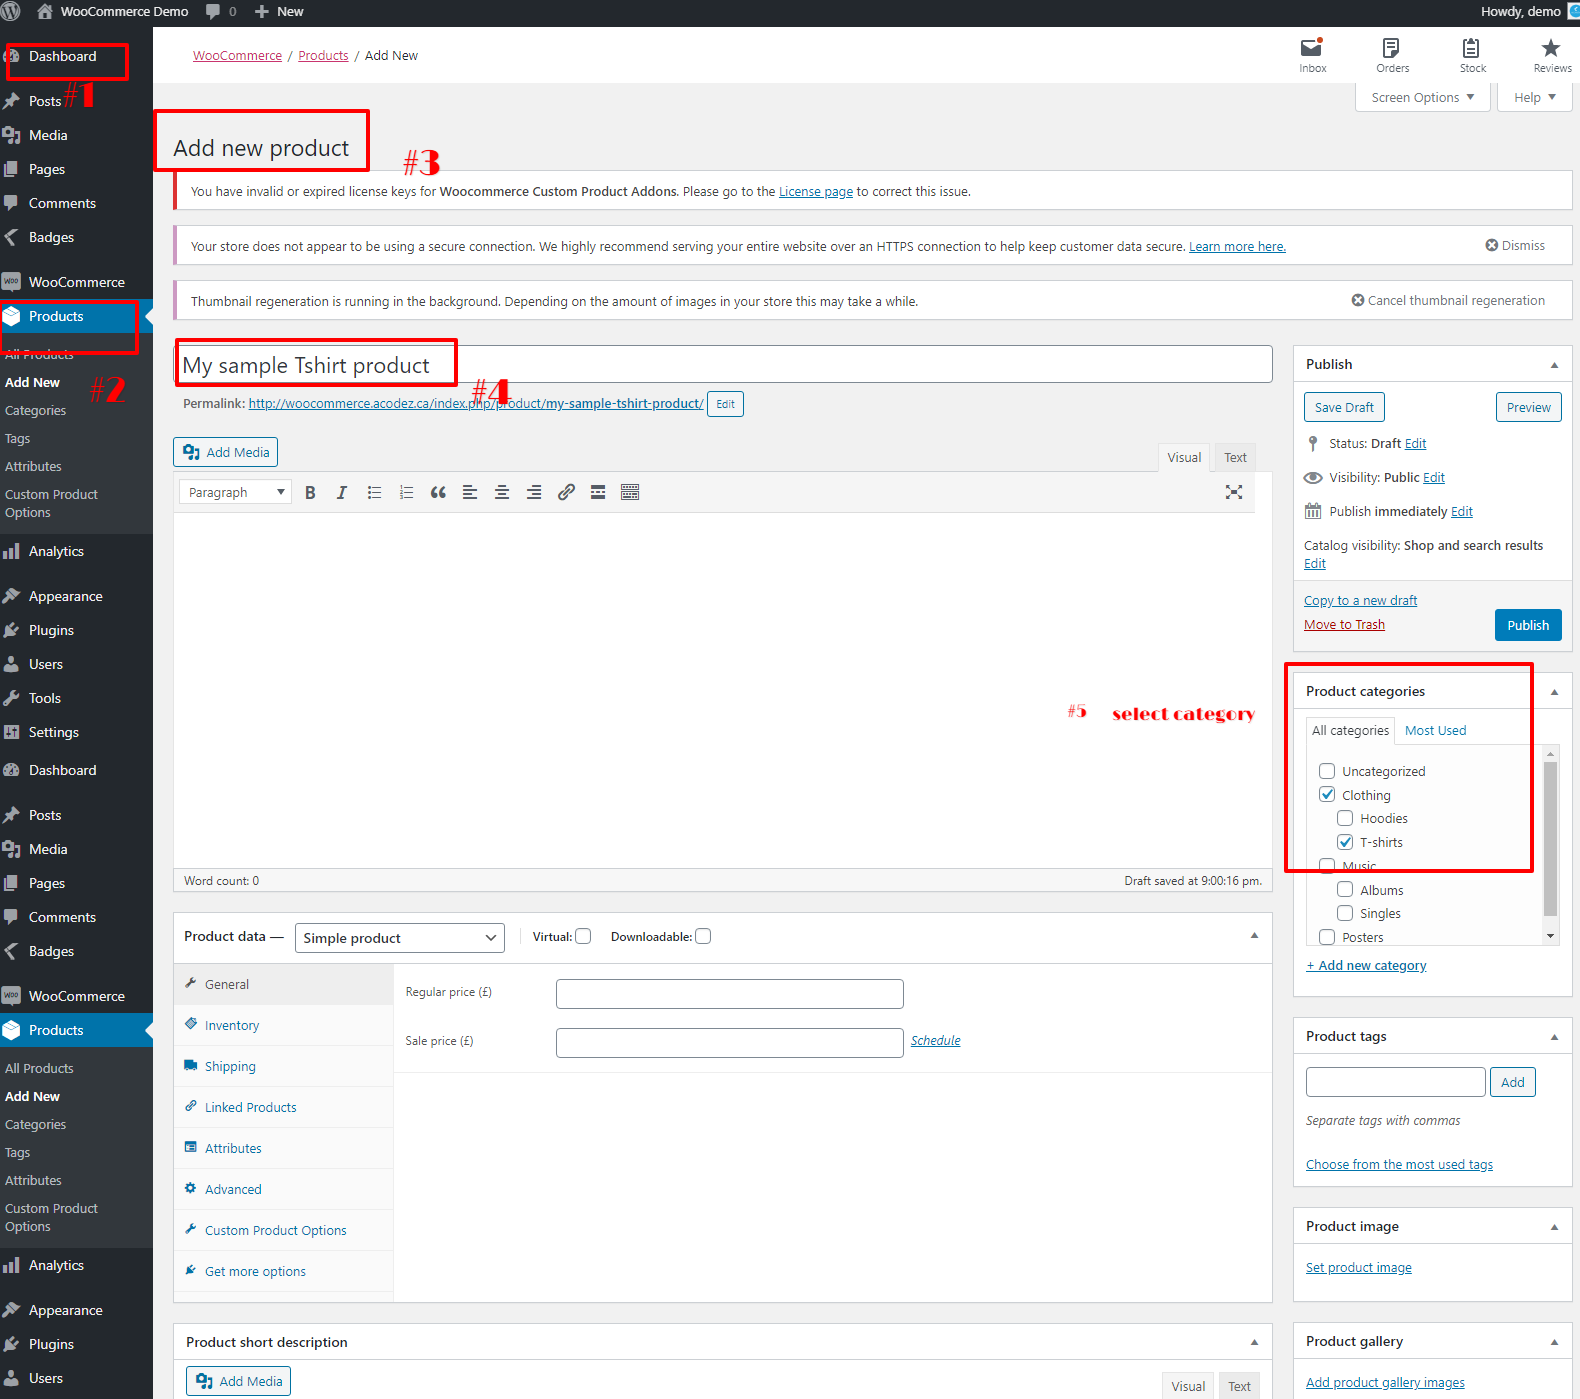
Now hit publish, and you are done with your product addition.
Step 2: Create a T-shirt Product Form
A basic T-shirt product page will look like this image. You can see the T-shirt name, color, and size fields.
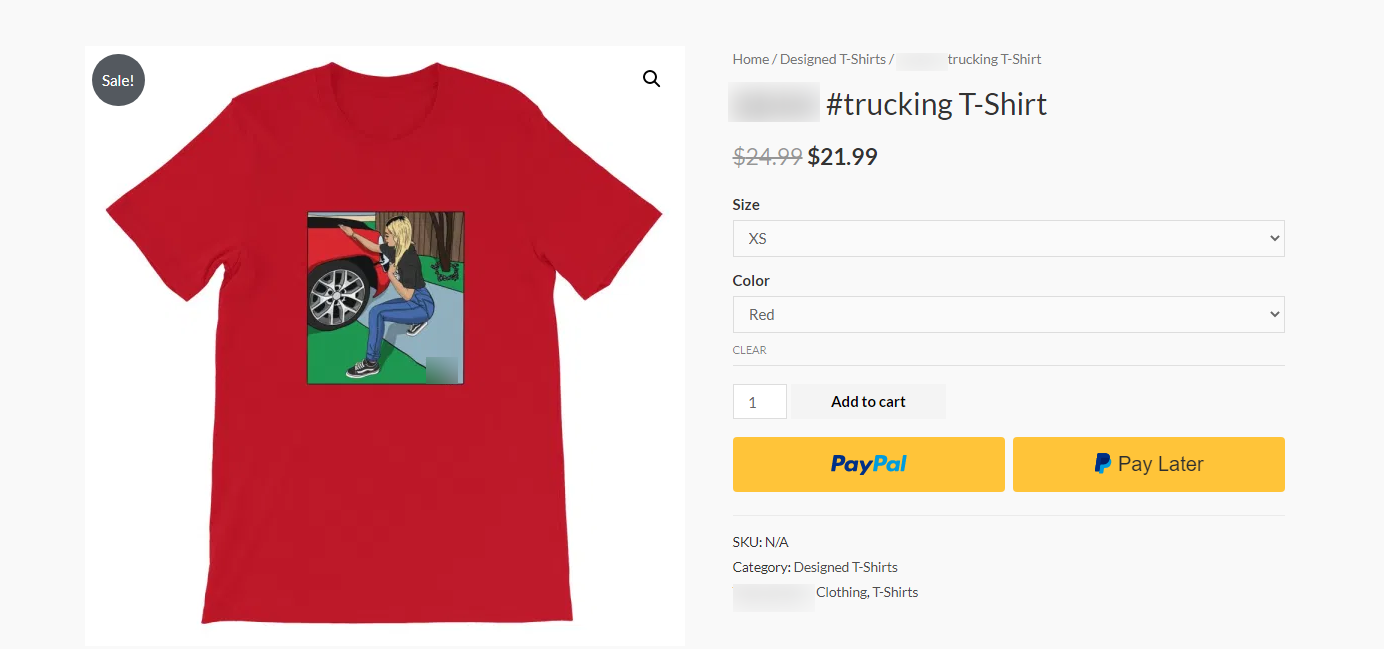
You have another option of adding custom options where the customers could add their custom logo or fabric of their choice; you’ll need to add custom fields with these options.
Let’s explore how you can add custom fields in your product form.
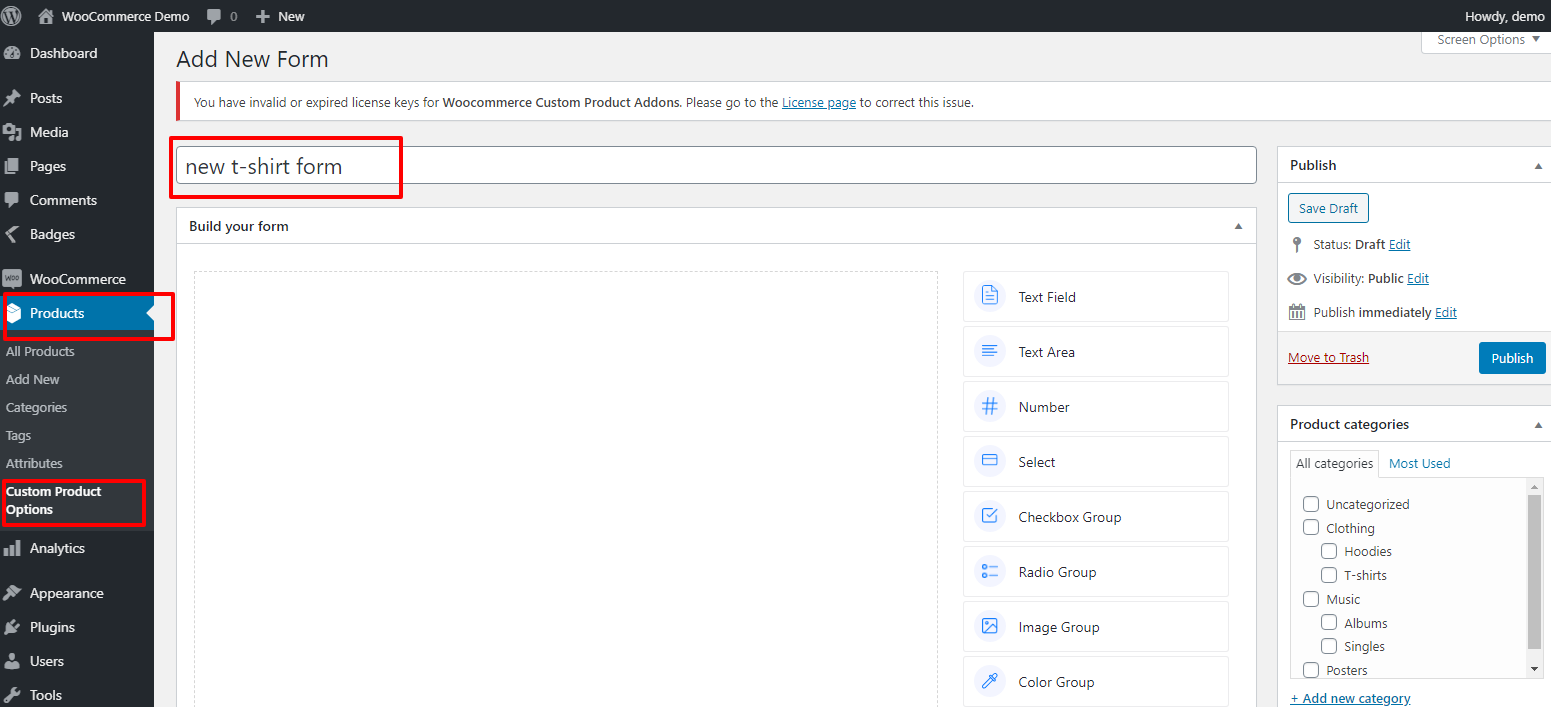
To add a product form, go to custom product options in your dashboard area.
- Go to Products
- Now click on the custom product options
- Select Add new form and create your form title.
Now start adding fields.
Adding customized fields is extremely easy with WCPA. You’ll drag’n drop each field from the right-side panel. Each domain has its setting panel right above the field; once you click on the “pencil icon,” you will enter the field’s editing area.

First of all, we will add a size field in the form; drag’n drop the “select” field from the right-hand side field menu and click on the edit icon.
Edit Label as “size” and also write select your size in the placeholder input field.
Then start adding multiple variations of your sizes, also. You can use as many variations as needed; I have added four size options. Also, you can set prices for each size individually.
You can also enable the “required field” option if you want to keep this field mandatory.
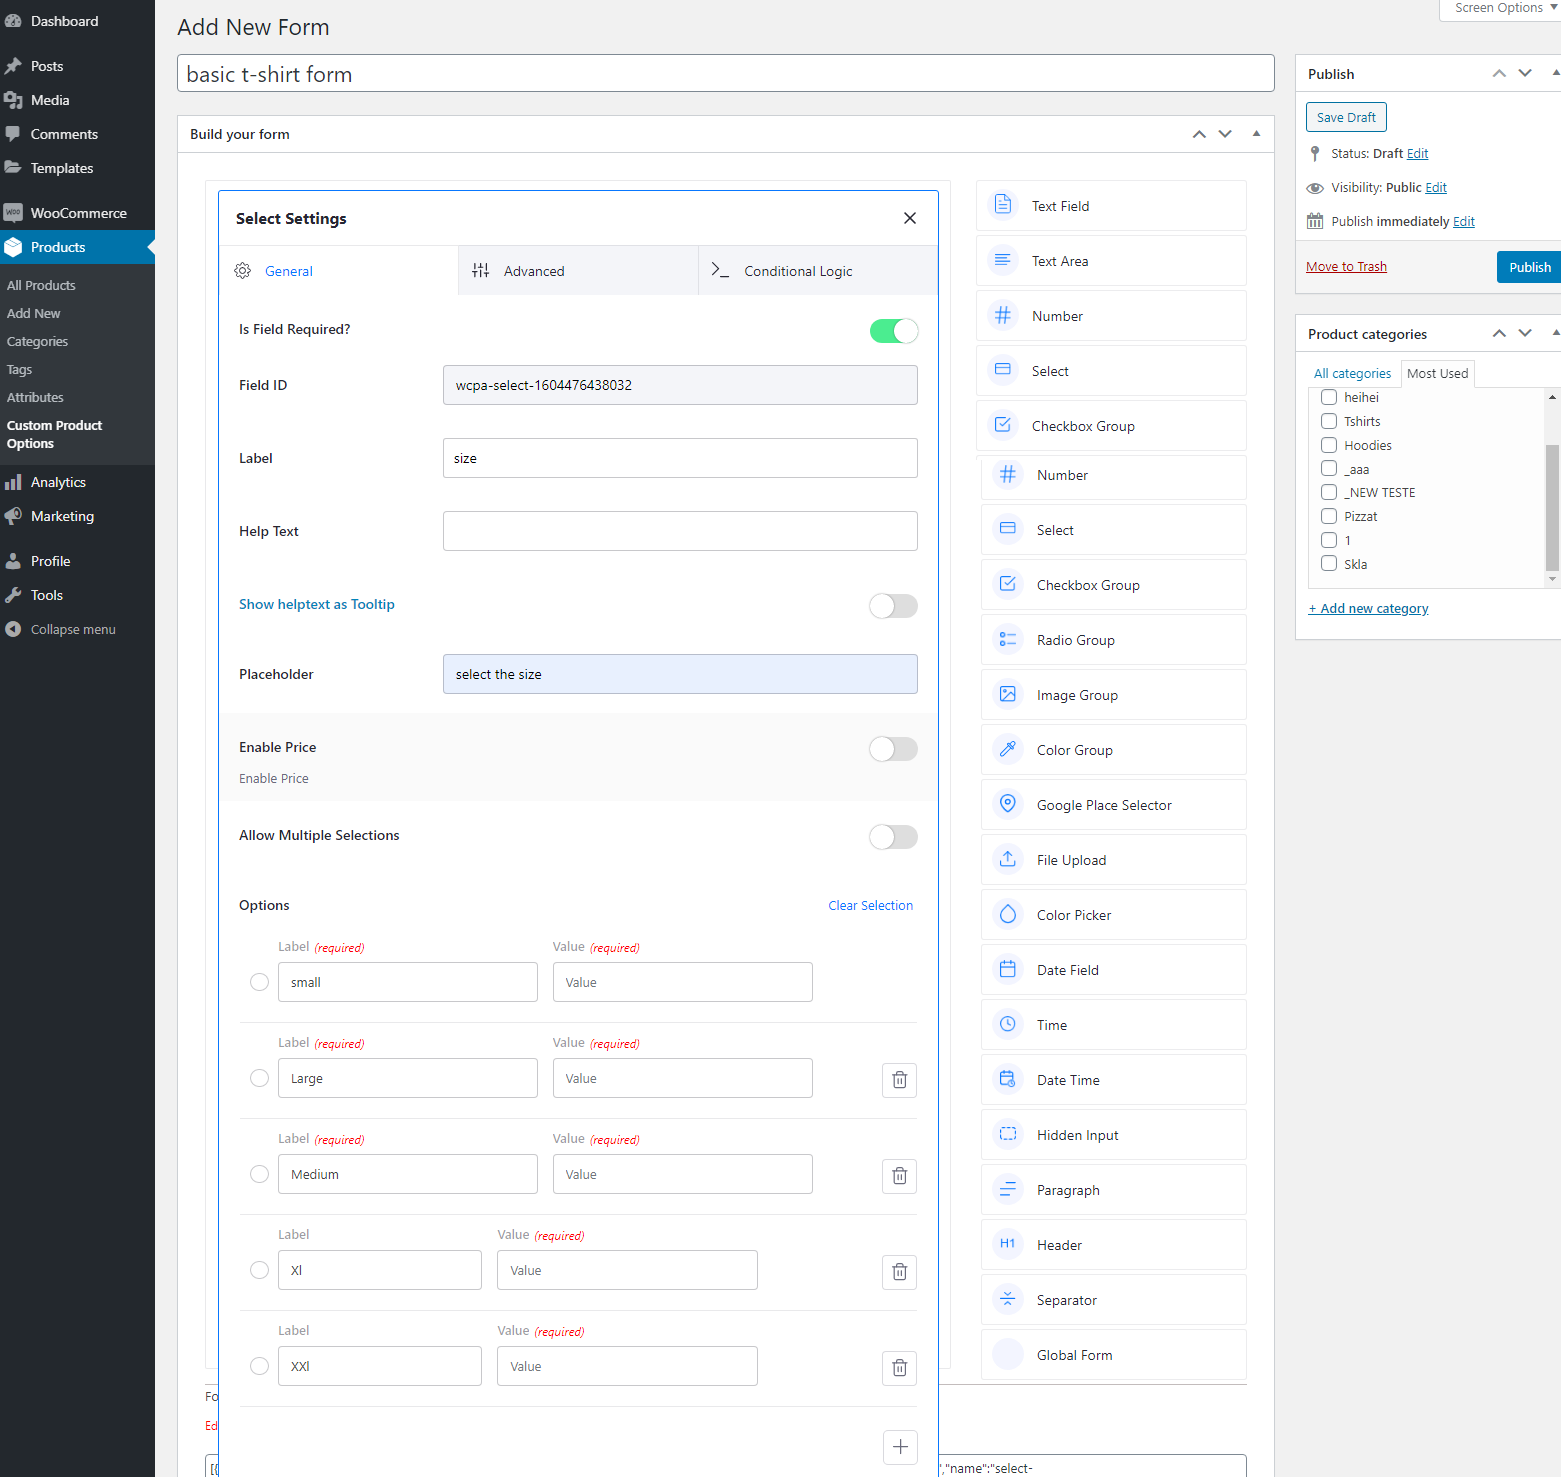
You can also display each option’s images to make it more appealing, as a picture speaks a thousand words, so try this intimating option to attract the user’s attention.
This time, we will add image options so the users could visualize the original product.
Drag’n drop the Image Group field in the form and click on the edit icon.
You’ll find an interesting image displaying the Zoom image on the hover option, which will let your image zoom in when a user hovers over the image. He’ll be able to visualize the closer look of your product.
This fantastic feature will save your disk space as you need not install any separate plugin to add a Zoom image on the hover option.
Similarly, you can select the popup image option, which will display the full product image by clicking the zoom icon.
Another interesting option is to customize the product image size by defining your required image size in pixel or skip this option to keep the default image size settings.

If you offer customized designs or embed your logo options, you can take advantage of radio fields and File upload fields.
We have used the radio field to let customers decide if they want to go with the plain t-shirt or customize it with their design or logo. They can upload the chosen file from their directory, and you can charge according to their design or logo sample.
You can also add conditional logic, which is a great way to keep your product form short and concise. It helps you display only those fields that are mandatory and if customers like to see some more options, only the hidden fields will appear.
We have added a radio group of “plain” and “customize” fields. If customers checkmark the “Plain” box, the next field of “choose your logo” won’t appear, and you’ll achieve a look of short and concise form without getting your customers distracted.
The “choose your logo” field will only appear if the customer decides on customizing his t-shirt.
Let’s find out how you can add conditional logic like a breeze.
First off, you have created a radio group of “plain” and “customized” fields.
Next, you will add the File Upload field in your form. Now, click on the setting icon, and you will see three settings tabs; General, Advanced and conditional logic.
If you like to add conditional logic to this section, enter the conditional logic setting area.
Now add the condition by selecting the relevant field from the checkbox and set its relation as customized. So, it will only appear when the customer will click on the “customize” checkbox.

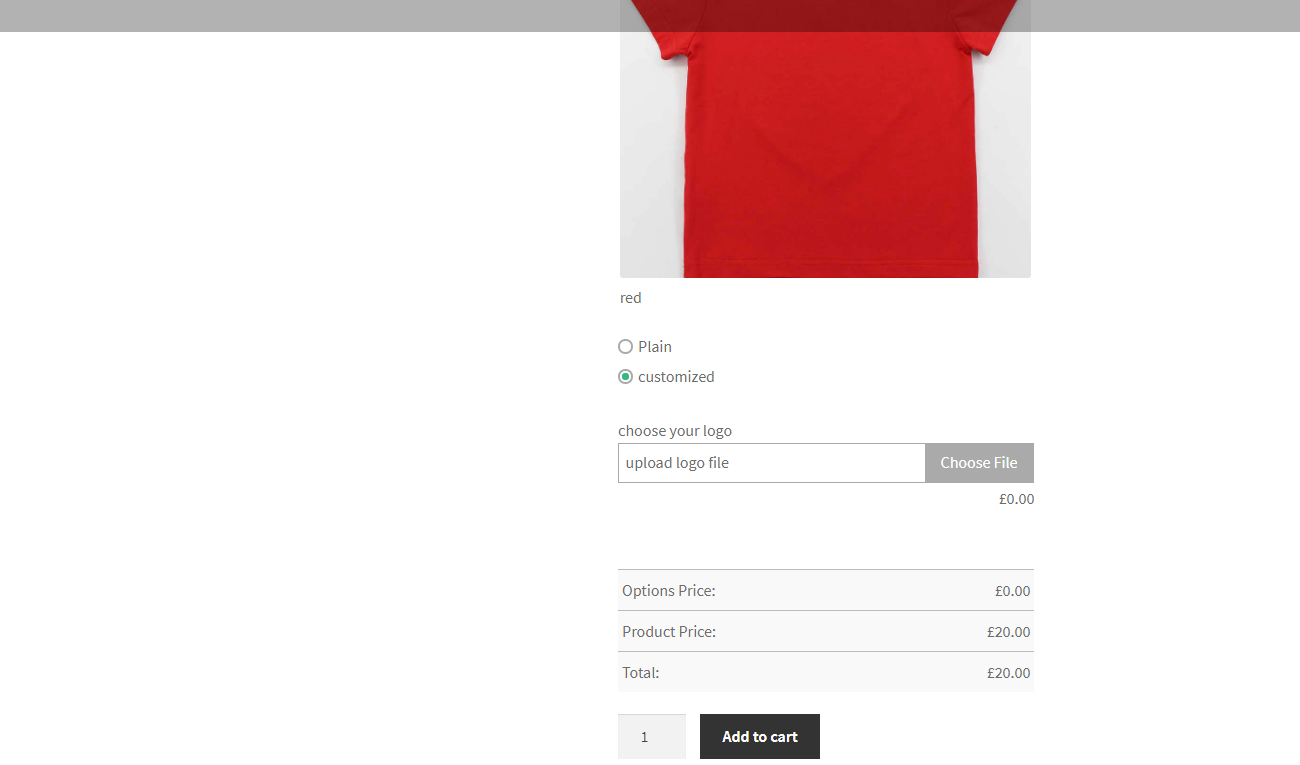
if the customer selects the plain option, then your form will look like this, while the other field with conditional logic is hidden.

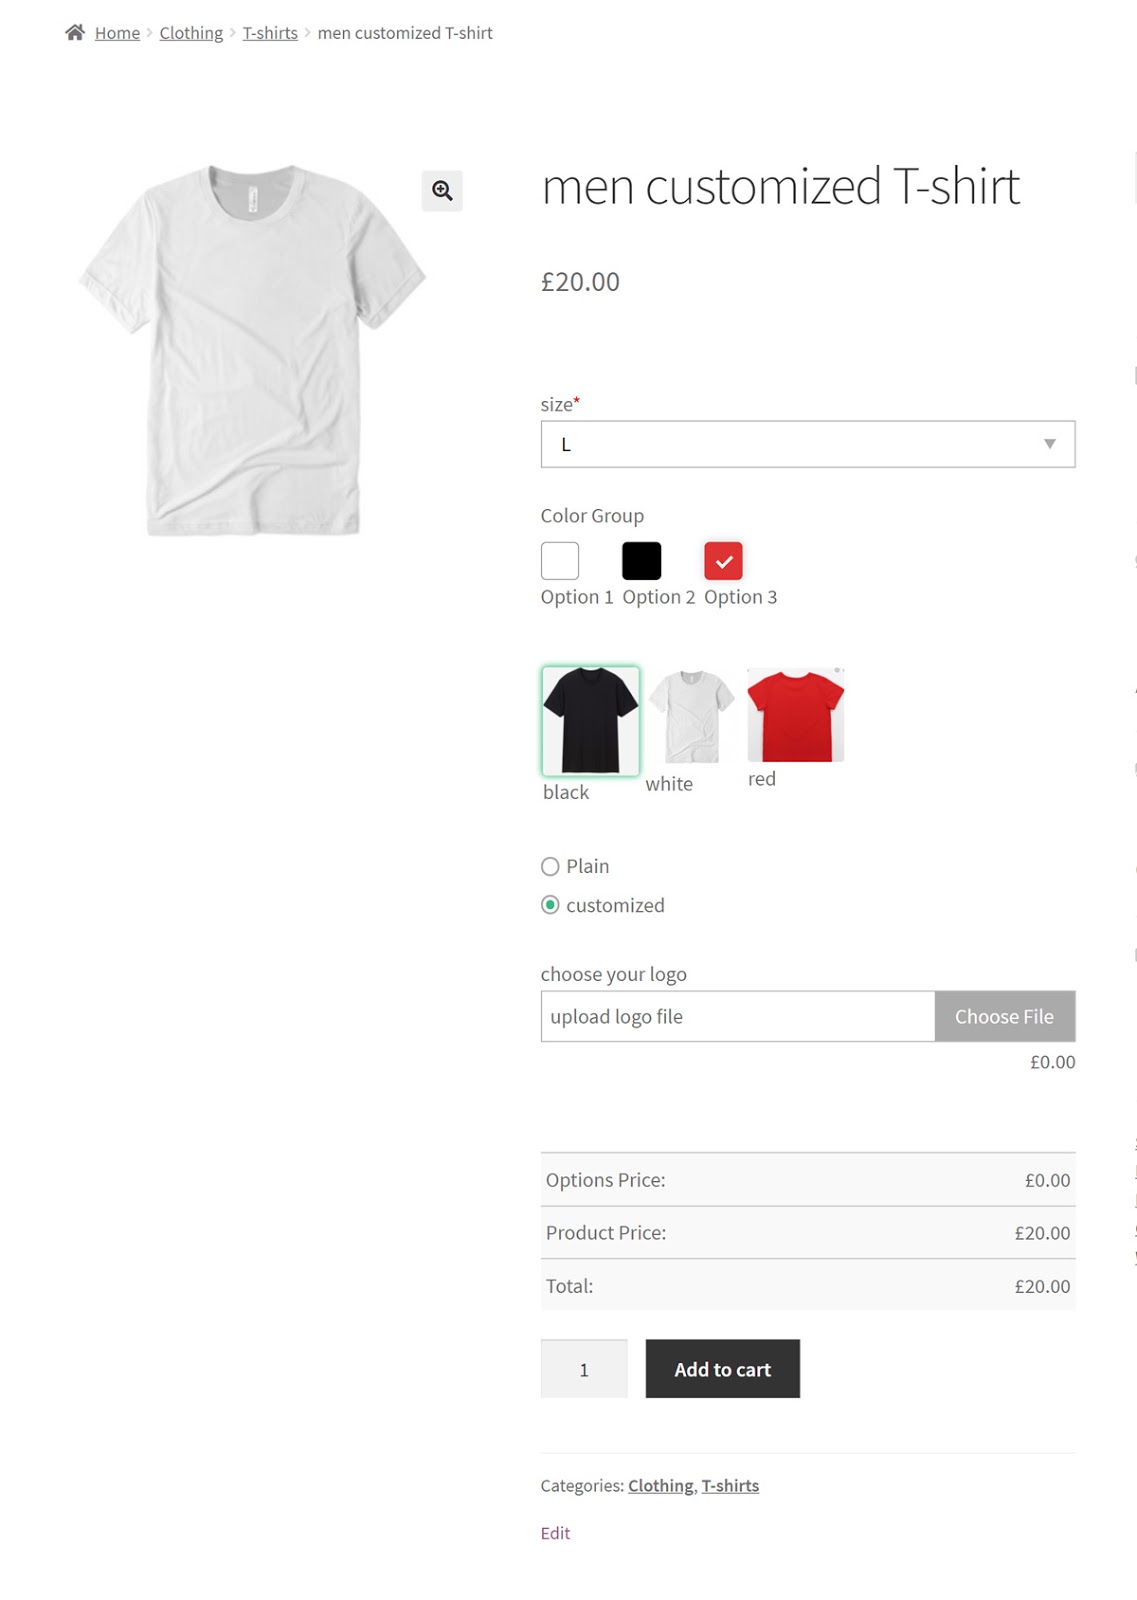
And if they like to customize their t-shirts with any of their design or logo, they will checkmark the customize option, and the hidden field with “upload your file” will appear as follows;
Once you are done with the final form setting, then hit publish. Here is how our final T-shirt form will appear.
Final Thoughts
Here ends our tutorial and if you like to see how it works, then watch our demo tutorial here.
You can now offer an incredible shopping experience for your customers with customized designs and logos of their choice, which will increase your loyal customers’ base.
WCPA by Acowebs offers tailor-made custom solutions to the clients, which makes shopping fun for the customers. If you like to try the demo version, then do visit the WCPA website where you can see how this plugin is going to serve you best.
Acowebs are developers of Woocommerce bulk discounts that will help you add bulk discounts to products on your stores. It also has developed various other plugins like the popular plugin for managing the checkout form fields in WooCommerce, called Woocommerce Checkout Manager, which is highly feature-oriented yet lightweight and fast. There is also a free version of this plugin available in the WordPress directory named WooCommerce Checkout Field Editor.