Login
Login
 Cart
Cart
Suppose you are a customer. When you place an order in any shop, you are normally given an invoice. Similarly, when you order at an online shop, you will be given a custom-designed invoice in the same way.
On the invoice, you’ll get all the details of the order such as company name, logo, address, customer’s name, address, order date, product details, etc.
Let’s turn the table, and suppose that you are now the shop owner (which we think you are, as you’re reading this article). When your customers make an order, you need to send an invoice whenever they make an order, don’t you?
One question may come to your mind. How? Given that you might have a lot of orders and it is tough to manually customize the invoice each and every time for that particular order, it’s a valid question. Now, don’t worry.
In this article, we will show you how you can automatically create and customize WooCommerce invoices for your customer by using the “WooCommerce PDF invoices & packing slips‘ plugin.
One point to keep in mind, this article is written specially for eCommerce owners who use the best ever combo of WordPress and WooCommerce to build their site.
Now let’s get started, shall we?
Why Is Invoices Important For an eCommerce Shop
You have already got a preliminary idea about invoices. Speaking about its importance, it is a reflection of the transaction between you and your buyer.
Your customers can get proof of their purchase and you can keep track of your orders.
This is a must-have, especially for eCommerce as there is no physical proof of purchase. If you don’t bring it up in front of them then you are not helping the case for your buyers. This is especially important if you’re a small business that offers buy now, pay later options. In such cases, you might want to include an invoice letter as part of the purchase.
There are many reasons to include a PDF invoice for each order in your store. Below are a few points about why you should opt for sending invoices with each order from your eCommerce shop.
- Creating a WooCommerce PDF invoice is straightforward. You can easily create invoices for your shop with PDF Invoices and Packing Slips For WooCommerce plugin.
- Customers trust the professional shop owners. The PDF invoice paints a picture of your professionalism to customers.
- In today’s eCommerce industry with smart customers, you must offer invoices to build trust with your customers and keep up with the competition.
- When other shop owners give invoices to customers but you don’t. Naturally, your customers can ask you for an invoice as proof of their purchase. As this is something that can be done automatically using a plugin, you should not take the burden of manually creating it every single time.
- Brands play an important role in creating a strong and personal connection with customers so that you can easily earn high profits. Importantly, offering WooCommerce PDF invoices helps you to create a significant brand value for your eCommers shop.
ALSO READ: WooCommerce Setup Tutorial on Your WordPress Website
What Is WooCommerce PDF Invoices and Packing Slips
If you run your WordPress store with WooCommerce, you need to customize and power it up with various plugins.
There are a lot of WooCommerce plugins in the WordPress plugins directory. Even if you just want to automate your invoice creation process, there are multiple choices.
However, one plugin that can stand out from the rest is WooCommerce PDF Invoices plugin. It is a user-friendly WordPress plugin made by Acowebs.
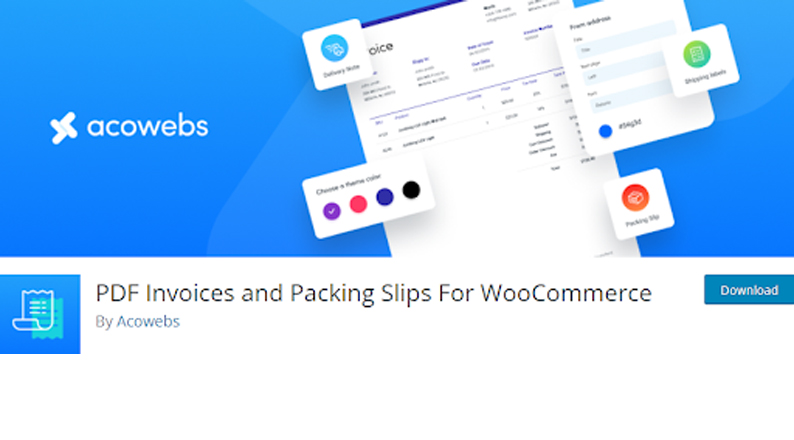
It helps to create custom designed invoices and necessary PDF documents for a WooCommerce store.
The plugin is simple to use, has a nice looking GUI and is packed with all necessary features. Users will love its standard invoice template which looks great.
Also, the PDF Invoices and Packing Slips For WooCommerce plugin can help you to create Packing Slips, Shipping Labels, Delivery Notes, and Dispatch Labels. Just look the below:
How to Generate PDF Invoices For Orders In WooCommerce
There are 3 steps. Following these, you will be able to generate a PDF invoice for orders in WooCommerce with ease.
Step 1: Install the WooCommerce Invoice Plugin
The first step is to install this plugin. Now, you can download it from the WordPress plugin directory, and upload it. But there’s an even easier way. If your WordPress site is all ready, you can just install the plugin directly from your WordPress dashboard.
To do that, navigate to the WordPress dashboard and click Plugins > Add New for adding a new plugin.

Now click on the search bar of the top side and write “PDF Invoices by Acowebs”.
A few seconds later, you will see the plugin named PDF Invoices and Packing Slips For WooCommerce made by Acowebs. Click the “Install Now” button.

It will take a few minutes to install. Once installed, activate your plugin by clicking the “Activate” option.
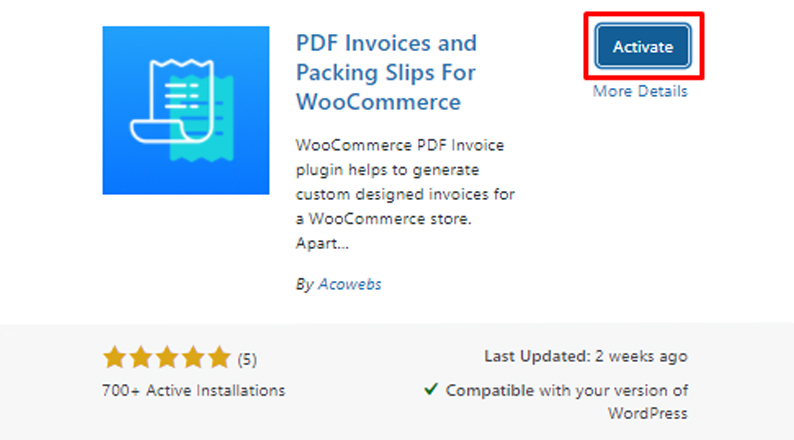
Welcome, you have successfully installed and activated the plugin, if you completely follow our install guide.
ALSO READ: WooCommerce SEO Tips and Tricks to Boost Traffic and Sales
Step 2: Setting Up the Basic Invoice Informations
After completing the installation process, we will now set up the plugin.
First, you will see an additional menu under “WoCommerce” in your dashboard named “PDF Invoice”. This allows you to configure and customize your documents.
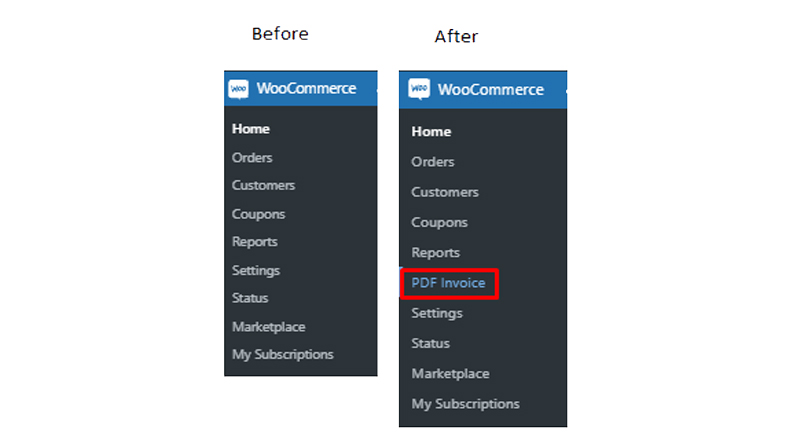
Simply go to “WooCommerce > PDF Invoice”. Here you will see two settings, one is “General Settings” and the other is “Document Settings”.

General Settings: From here you can manage common settings for the document. You will find a page where you will be asked to provide information about your company.
Here you must provide all the accurate information of your company which will be seen by the customers in your invoice.
Firstly, you have to give your company name. Then set the company logo by clicking the Upload option.
Footer: If you want to give any information in the footer of your invoice, this option is for you.
Address (Sender details): Here you will be asked to fill in the Department/Sender, Address line 1, Address line 2, City, Country/State, Postal code, Contact number, Email, VAT/GST Registration Number.
For example, below we are showing you how to fill out the form.
Other settings: In this setting, you can enable RTL support. This is a good thing for your Arabian customers. By enabling this option you can impress them which will play a positive role in improving your business.
When you have completed all of them, click on the “Update Settings” button below. We hope you have successfully completed the work of General Settings.
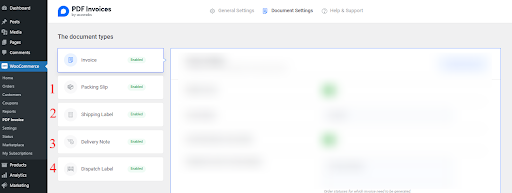
Document Settings: Here you can see not only the invoice but also each document type such as Packing Slip, Shipping Label, Delivery Note, and Dispatch Label. You can change their setting as well as enable or disable.
As you will learn about invoices in this guide, let’s configure invoice settings from the options below.

Enable Invoice
The first step in invoice settings is to enable the invoice. You did everything well but forgot to enable it, as a result, it will remain hidden from the eyes of your customers. So, don’t forget to enable it.
Invoice Name
Simply, you need to give the name that will show as the invoice name to your customers. For example, we named it “Invoice 01”. You can name it as you like.
Use Order Date as Invoice Date
You can enable this option if you want to use the order date as the invoice date. Otherwise, you can keep it disabled.
Generate Invoice for Order Status
In this setting, you will see some order status to select. You will understand the condition of the order by looking at these statuses. They are respectively:
Pending Payment, Processing, On Hold, Completed, Cancelled, Refunded, Failed, and Draft. By clicking the “Choose Order Status” option you can select one, two or all the statuses according to your needs.
Invoice Number Format
Here are four types of number formats you can use: [number], [number][suffix], [prefix][number], [prefix][number][suffix]. We gave the first one. You can use others if you want.
Invoice Length
You can specify the total length of the invoice number here for the convenience of your customers.
Attach Invoice PDF In Email
Enabling this option will send an automated email to your customers after every order containing the invoice in PDF format.
Enable Print Invoice Option For Customers
Your customers may want to print your invoice. This is an option that will enable the print invoice option so you can allow customers to print their invoices.
Custom Logo for Invoice
This is a common option for every invoice alike. This is used to add a custom logo to the invoice. This option is also available in the General Settings. You can avoid this if you have completed the task from the General Settings.
Custom CSS
If you want to make your invoices more colorful and more customized, you have the option to write custom code in CSS that will help you to further customize the invoice to your liking.
When the document settings are done, click “Update Settings” below to save everything. Now you can go to the top and check the customized WooCommerce invoice documents by clicking on the “Customized Layout” option.

You will see an invoice template here. Click on the “Choose this template” option. Now you are at Invoice Customizer. You can customize it as you wish. In the free version you can configure some options for the invoice.

Colour Theme:
This option allows you to customize the colour themes. Above you will see the first five colors but by clicking on the “Plus” icon you will see many more colors. With them you can customize the theme of the invoice to your liking.

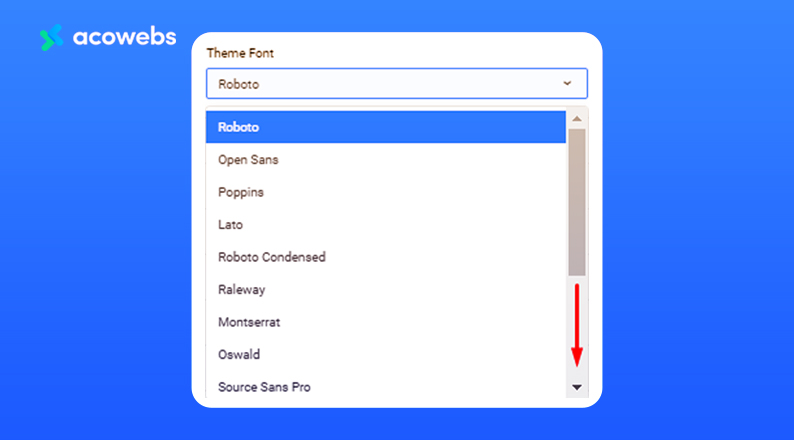
Theme Font
Here you can give the theme font of your choice which will impress your customers. There are many fonts you will see. Among them the notables are: Roboto, Open Sans, Poppins, Lato, Raleway etc.
After that, you can see so many options. Expand each section for further customization. You can toggle them to add or remove items from the invoice. Below is a list of them and their work:
COMPANY LOGO
First, select the company logo or name as you want that will show in your invoice. You can change the width & height of your logo and write extra details that will show under your company logo or company name.
Also, change the extra details of font family, font size, weight, style, and font color if you want.
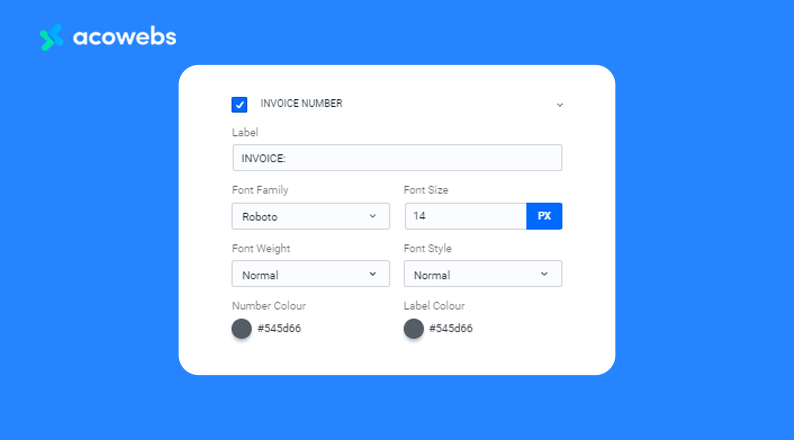
INVOICE NUMBER
You can change the label, number & lebel colour. You can even change the font family, font size, weight, and style.
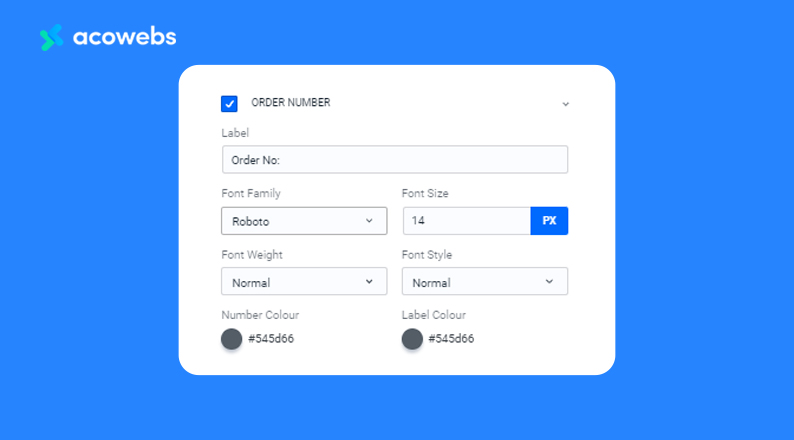
ORDER NUMBER
This option allows you to change invoice order label & lebel colour, font family, font size, font weight, font style, and number colour.
INVOICE DATE & ORDER DATE
Want to edit invoice date & order date? Simply go to this option and you can change lebel, format, font family, font size, font weight, font style, date and label colour.

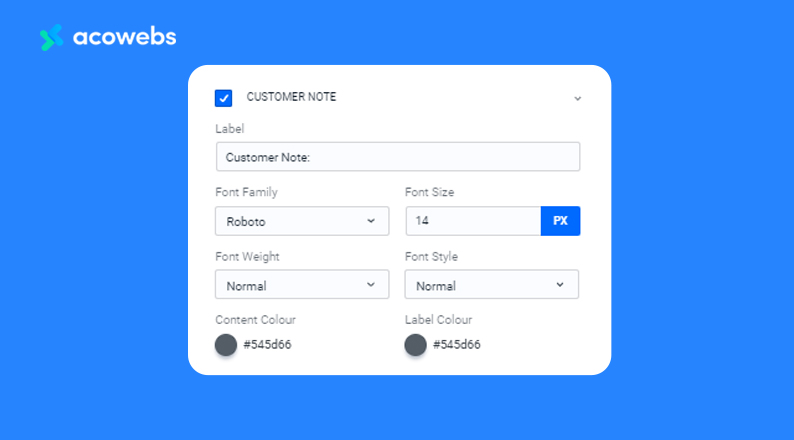
CUSTOMER NOTE
It allows you to change customer note’s lebel, font family, font size, font weight, font style, content colour, and lebel colour.
FROM ADDRESS
You can change the address title, font family, font size, font weight, font style, font colour & text align. You can even add or remove elements visibility and styles.

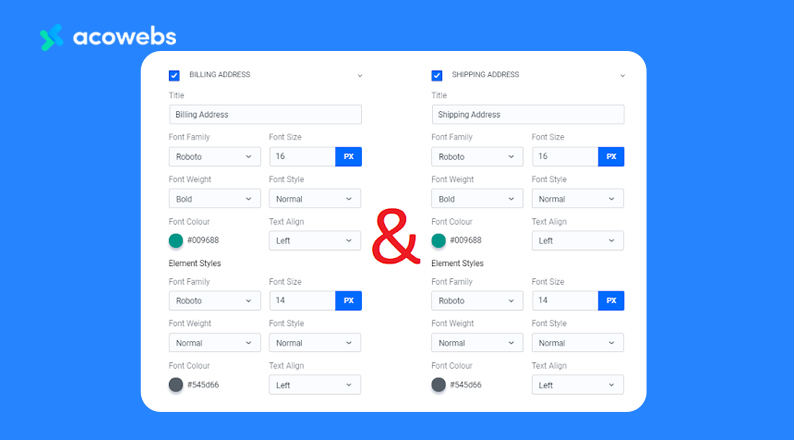
BILLING ADDRESS & SHIPPING ADDRESS
There is a lot of work to be done here. You can change the title, font family, font size, font weight, font style, font colour, and text align. In the same way you can also element the styles under the Billing and Shipping Address.
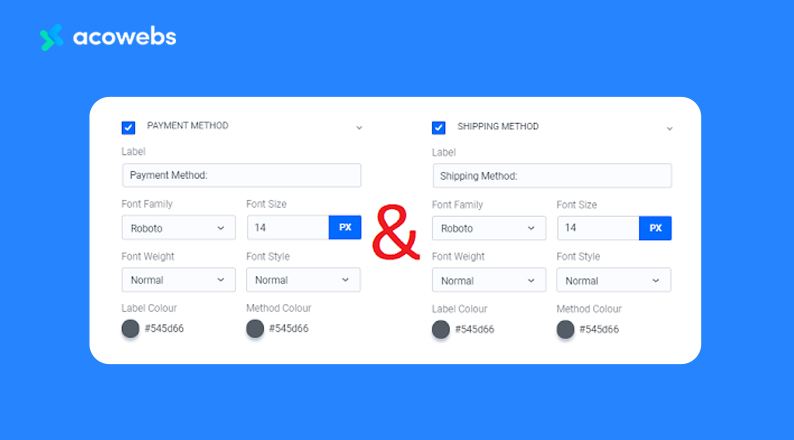
PAYMENT METHOD & SHIPPING METHOD
You can change their label, font family, font size, font weight, font style, lebel colour, and method colour by this option.
PRODUCT TABLE
Check out the product table section here. You can decide which of our columns will be visible.
You can also change the table head label, here you can change the labeled text size, text color, table header background, table body style. You can also change the table border color.

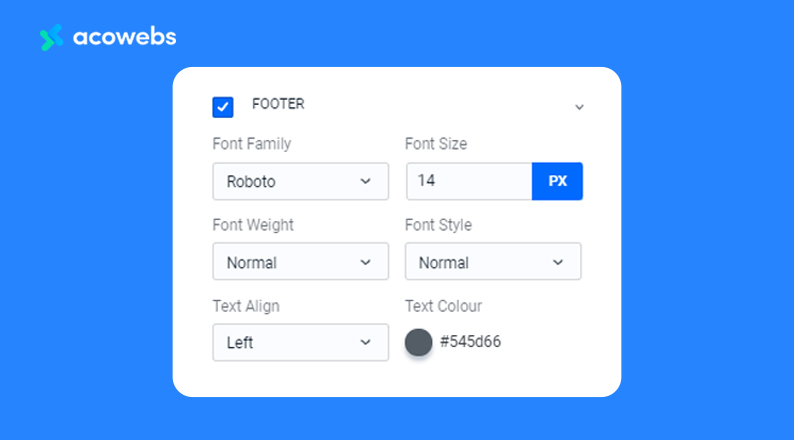
FOOTER
The last option is footer. You can edit the footer’s font family, font size, font weight, font style, text align, and text color of your invoice.
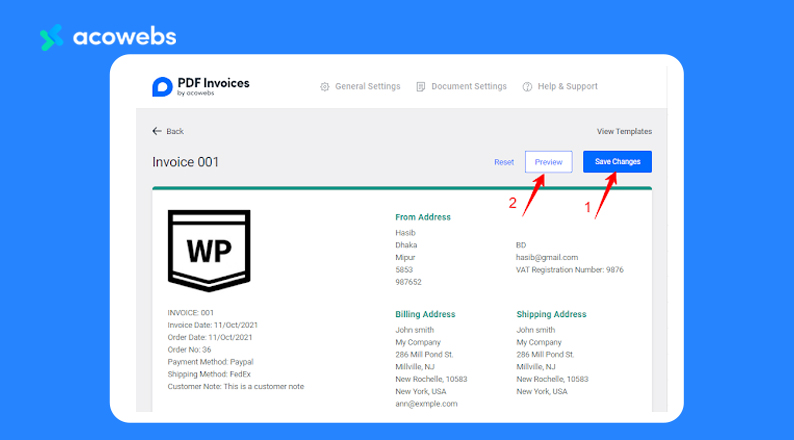
Once the customization is done you need to click the “Save Changes” button to save all the customizations done. You can see a quick preview from here.
Finally, we have successfully customized our automated invoice using the “WooCommerce PDF Invoices and Packing Slips” plugin. That was a very easy process, don’t you think so?
Now let’s take a look at how to automate the process of sending this invoice with each order.
ALSO READ: Ultimate Guide to Advanced Table Rate Shipping for WooCommerce
Step 3: Generate Auto Invoice with Each Order Email
Once your invoice is ready, go to your order page.

For example, we have an order and we’ll show you how to turn on automatic invoice sending with each order email.
Access the order that you want to edit.

Here are three tasks that you need to do.
The first thing is to change the order status. To do this click the “Status” and select the order current status. There you will see more options called Pending Payment, Processing, Completed, Cancelled, Refunded, and Failed.
Your second task is very important. You can select the order action from here. We have selected the first “Email invoice /order details to the customer” to send the invoice of each order by email. You can choose the others as you wish.
The third is to click on the “Generate Invoice” option and generate it. Now you can preview the invoice. After completing all the tasks don’t forget to click the Update button. You can also download the invoice from that page itself.
Conclusion
Every business owner wants to make their business bigger. And the most important component behind the growth of a business is your customers.
They decide whether you will succeed or fail. And if you want to keep them in your favor, you must build a relationship of trust with them.
Adding invoices to your product is important for your online shop because it creates your client’s trust. As a result, it can also impact your recurring sales.
Apart from that, a lot of times shop owners have to face many problems keeping up with the accounting books.
If you also face such problems, the invoice can be a great way around. It serves as a payment document for your customers and helps you track your sales and financial management.
A nice customized WooCommerce invoice highlights your business smartness to customers. Which can contribute to the improvement of your business.
If you want to customize WooCommerce invoices and make it premium-looking one, you will either have to design them and create them every time or use a plugin on your website.
We have already guided you about a great WordPress plugin with a gorgeous interface that is called “PDF Invoices and Packing Slips For WooCommerce”. This plugin from Acowebs helps you create an invoice very easily.
From this article, we hope you got a complete idea about WooCommerce PDF invoices and packing slips. And now you can easily create an invoice for your online shop.
If you have any questions or suggestions about the article, feel free to comment in the comment box below.
Woocommerce discount rules that will help you add bulk discounts to products on your stores. It also developed the plugin for adding various extra product fields which is called Woocommerce product addons, that are lightweight and fast. You can easily update your store with these add-ons and enjoy a hassle-free experience, check out the best options for additional Woocommerce product addons.