Login
Login
 Cart
Cart
Have you ever noticed that images pop up when you do a Google search for a product? That is how vital optimized images are when it comes to search results.
Many business owners think that SEO only applies to the website content, page tags, title tags, and headers. While these are vital elements, image optimization helps search engines to rank your images when a product query is placed.
Optimizing your images allows search engines to crawl and index them to rank them when a relevant query pops up.
As search engines strive to give users the most relevant results, they’ve designed algorithms to help them rank websites accordingly.
As such, it is best to always be prepared for any algorithm that classifies images. The better you can understand how search engine robots can find your e-commerce store, the better for your bottom line.
10 Tips on Optimizing Your Web & Product Images
The internet has afforded the world a lot of conveniences. One of those conveniences is shopping. Consequently, eCommerce has grown tremendously.
43% of Google’s organic searches are for eCommerce sites. As an eCommerce business, product photos play a big part in inviting website visitors and converting them to paying customers.
Photos are so important that 75% of all online shoppers will purchase based on product photos. As such, businesses need to consider product photography and optimization an integral part of their success.
Tip 1: Get the right image size for your eCommerce platform
Yes, eCommerce platforms recommend specific sizes for optimal functionality. Getting the correct dimensions and file sizes will make the image look its best on the platform.
- Shopify recommends up to 20MB file size, with the ideal image being 4472 by 4472, 2056 by 2056 pixels, and a minimum zoom size of 800 by 800 pixels.
- WooCommerce platform recommends 2056 pixels with a file size of up to 64MB. The lowest possible size should be one that can work with WordPress.
- BigCommerce recommends a minimum zoom size of 1000 pixels and 2056*2056 pixels. The platform doesn’t declare the maximum upload size, though it suggests JPEG as the best file type.
- Magento is a platform that allows a lot of customization. As such, it doesn’t offer much when it comes to image guidelines. However, it does recommend 2056 pixels and an image framework that fills 85% of the area.
- Wix doesn’t have any recommendations when it comes to images. It does, however, recommend 1200 pixels. There is no defined maximum or minimum file size.
As an online business, your products are the only option your customers have to feel what you are selling. Therefore, it is vital to get the angles and sizes right. Strive to give the customer a full view of what they’ll get.
ALSO READ: How To Increase E-commerce Sales Using Social Media Marketing
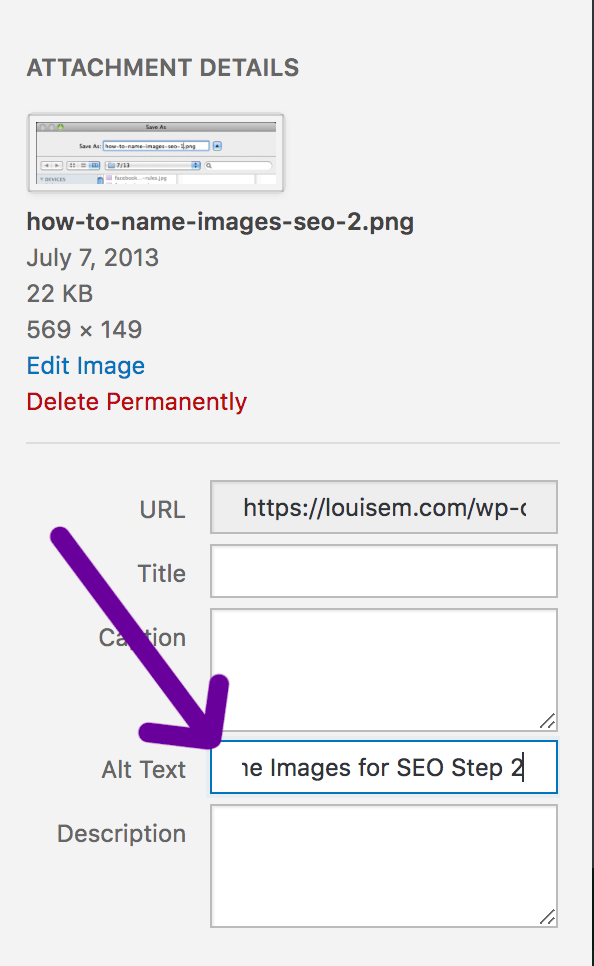
Tip 2: Give proper descriptions for saved images
Every camera assigns a default name to each image shot. Some of these names may be a series of numbers that wouldn’t make sense for search engine optimization.
Therefore, once you pick out the images to use, change the file name to the most accurately descriptive option you have. Search engines crawl file names when picking up results to rank on SERPs.
Therefore, your image file name should contain a relevant keyword or phrase that the customers are likely to use when looking for that product.
For example, if you are selling baking tins, it is best to use a phrase that describes the size, shape, and material. For instance, you could save it as “round-aluminum-cake-tin-4inches.jpg”.
That way, when a search query for a round, 4-inch cake pan is placed, the search engine will bring up your product image.
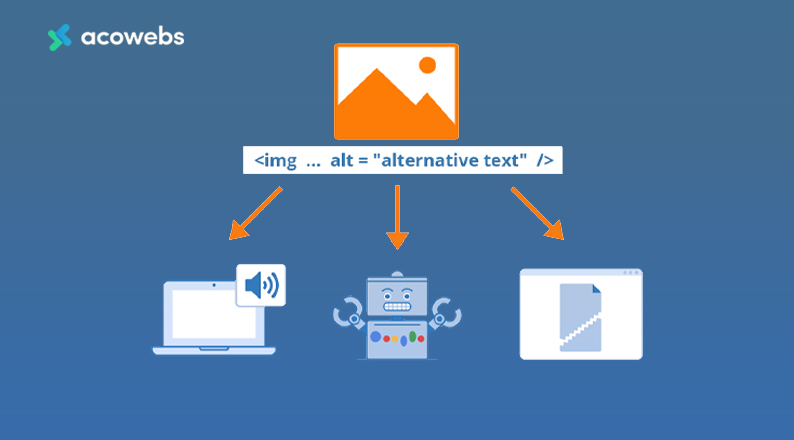
Tip 3: Get your “alt” attributes right
Alt attributes are incredibly vital when it comes to image SEO. The alt tags are like image file names that allow search engines to access the images when the browser cannot render them.
Image alt tags should comprehensively describe the product in the image. This means that it should have a product name, size, color, serial number, etc.
Focus on describing the product on the image and forget about keywords. Be direct, concise, and straightforward.
For example, you can have an alt tag that says “<img src=”Blue-eyed husky puppy playing with snow”/> instead of <img src=”puppy”/>. The former better describes what is going on in the photo.
ALSO READ: eCommerce Trust Signals to Build Customer Confidence
Tip 4: Use the correct image format
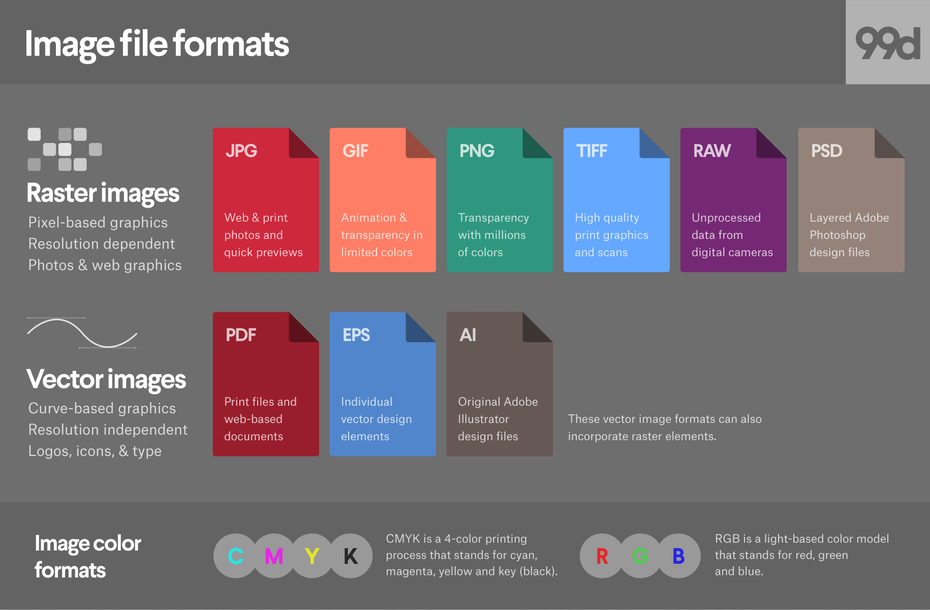
Each eCommerce platform has its preferred image file type. However, the most common and broadly accepted types are PNG, GIF, and JPEG.
JPEG is the most broadly accepted file type as it still retains decent quality even when the file size is small.
GIF images are usually considered low quality, which makes them perfect for icons. PNG is best used where the images are more colorful and detailed.
If you are using large images on your website, it is best to stick to JPEG. If you are making thumbnails and other small photos, you can use PNG or GIF.
Tip 5: Optimize the image file size
If you are working towards online visibility, you need your site and images to load fast. As such, you need to keep the file size within the optimal recommended parameters.
Full-size images might look good to you but have a bulky code that slows down your site.
The good news is this: you can reduce the amount of data with a huge image file without affecting the visual quality.
You can consider image compression or resizing tools. Be careful not to compress the image too much as it can distort the quality.
- Lossy compression reduces the image size as well as the image quality
- Lossless compression reduces image size while retaining the quality
If you are dealing with large files, it is best to use lossless compression.
Tip 6: Create appealing thumbnails
Thumbnails give shoppers a glimpse of what the product looks like. The thumbnail, therefore, has to be enticing enough to make the shopper click on the product to get more information.
While thumbnails are vital and can be small in size, they need to be optimized. This is because unoptimized thumbnails can be bulky and therefore add up the loading time of your site.
For best SEO results, thumbnails should follow the same optimization rules as all other images on your online shop. Remember that the thumbnail alt tags should not be the same as those of the larger image on the landing page.
This is to avoid confusing search engines. Although it is the same image, the thumbnail and landing page images should have different but relevant descriptions.
ALSO READ: How to Create a Customer Journey Map
Tip 7: Create and submit an image sitemap
A sitemap is simply that: a map of your eCommerce website or online shop. It is a document that shows search engines all the site pages, everything on those pages, and where they link to.
When submitted to a search engine like Google, it is easier for your site to be scanned more intelligently.
If you are starting, you may not have too many pages or products yet. As such, you may not need to create a site map.
However, as you grow to a large online shop, you will need a sitemap to help search engines to crawl the website.
Tip 8: Use a white background when taking product images

Fun fact: the most successful product photos have a transparent background.
Some platforms, such as Amazon, require vendors to use a white background in the pictures. While white is easy to work with, it is plain.
This means that it enhances the product’s appearance. It is stunning with colorful products.
For best results, use a curved white background to make it easier to render by volume. You can always choose to remove the white background.
This enables you to work with an image that has a transparent background.
ALSO READ: Top 8 Social Media Strategies That Every E-commerce Store Needs To Implement
Tip 9: Avoid content delivery networks
If your eCommerce website is bandwidth-heavy, you will need a CDNs. CDNs will help increase browsing speeds.
However, all images that are hosted by CDNs will not be on your website. This is not the best news when you are trying to optimize images for search results. When working with a light eCommerce site, avoid CDNs.
Tip 10: Time to test the eCommerce images

Once you have done all you should do, test out your work. A/B testing is the best option as it is a proven successful conversion method.
A/B test involves setting up two identical pages. Once set up, measure the reactions of site visitors on each page.
In most cases, people will choose one between the two. Switch up the test a little by using different images on identical pages. Which images will people prefer? Go with the choice that the audience feels most impressed by.
Conclusion
Search engine optimization is a marketing strategy whose small acts quickly snowball into significant results.
Therefore, while some of these tips seem like they do not require much work, they play vital roles in image SEO.
If you are hoping to boost your rank on search engines, perhaps it is time that you looked into image optimization.
Image optimization could be the difference between your eCommerce drowning in a sea of similar businesses and standing out to make profits.
It, therefore, makes sense that you take time to learn how to best use the hacks shared in this article to maximize the profit-making possibilities that lurk in their implementation.
Deploying these tips for your e-Commerce will give you a competitive advantage and will almost certainly lead to improved conversions.
It might also surprise you to see a notable boost in your rankings on search engine results pages (SERPs).
Acowebs are developers of Woocommerce bulk discounts that will help you add bulk discounts to products on your stores. It also has developed various other plugins like the popular plugin for managing the checkout form fields in WooCommerce, called Woocommerce Checkout Manager, which is highly feature-oriented yet lightweight and fast. There is also a free version of this plugin available in the WordPress directory named WooCommerce Checkout Field Editor.