- Woocommerce
- Shopify Apps
- WordPress
For instructions regarding Installation and Activation, please visit: Installation & Activation
Product forms are the basic building block of our WooCommerce custom product addons plugin. Let’s get started with “How to build a Custom Product Form”
Move to Product Addons >> Forms >> Add New Form
(the new sub-menu appeared with effect from the activation of WCPA).

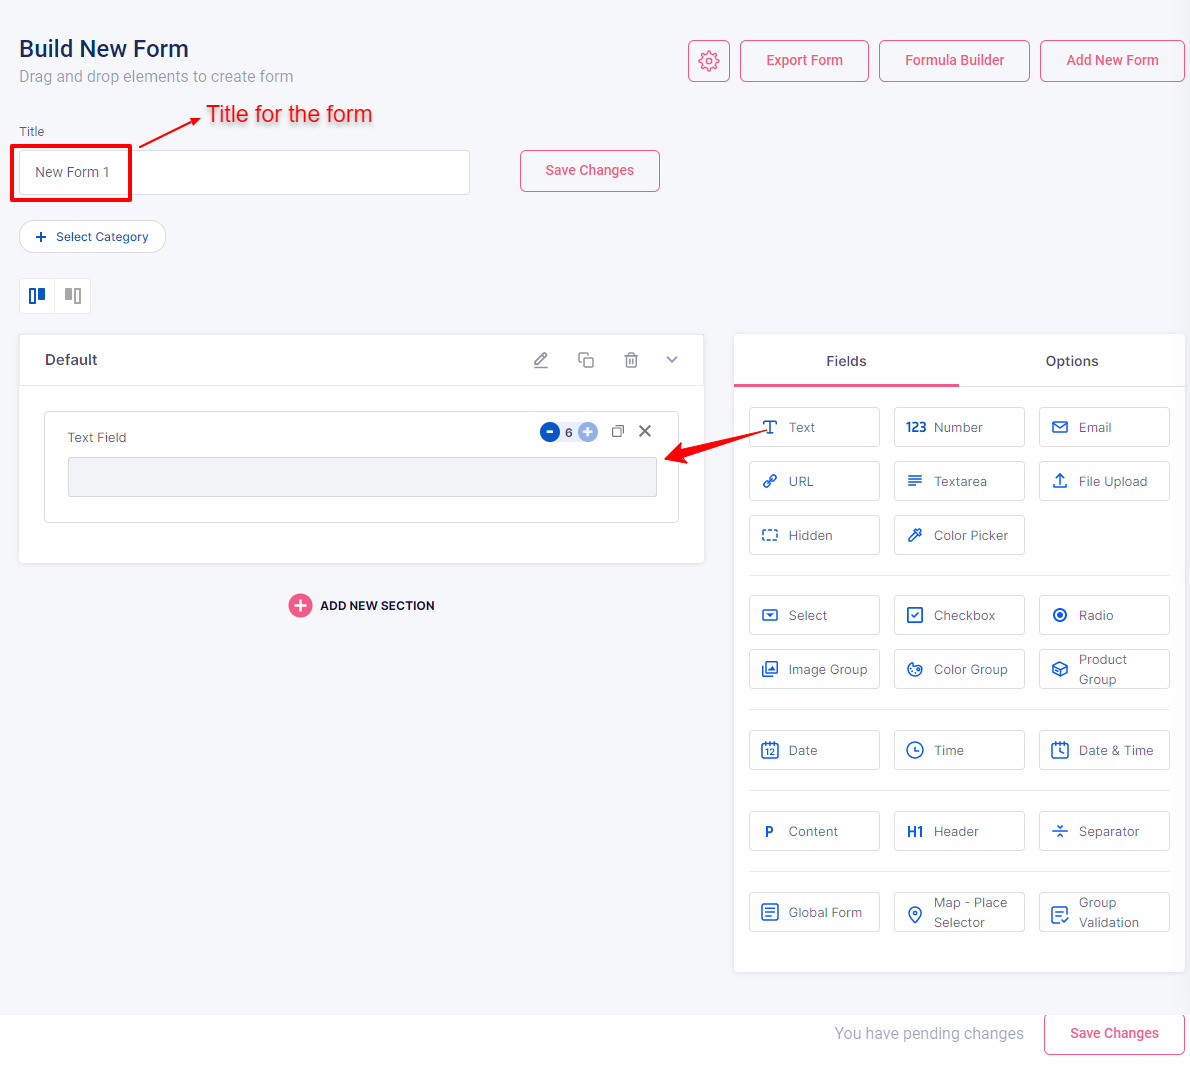
Click on the button Add New Form, which will result in a new tab that will help to customize your form.

Enter a title for the form in the title column. Now start building your form by Drag & Drop from the right side fields.
To add a New Section to the form, Click on the button Add New Section, which will create a new popup where you can configure the section settings
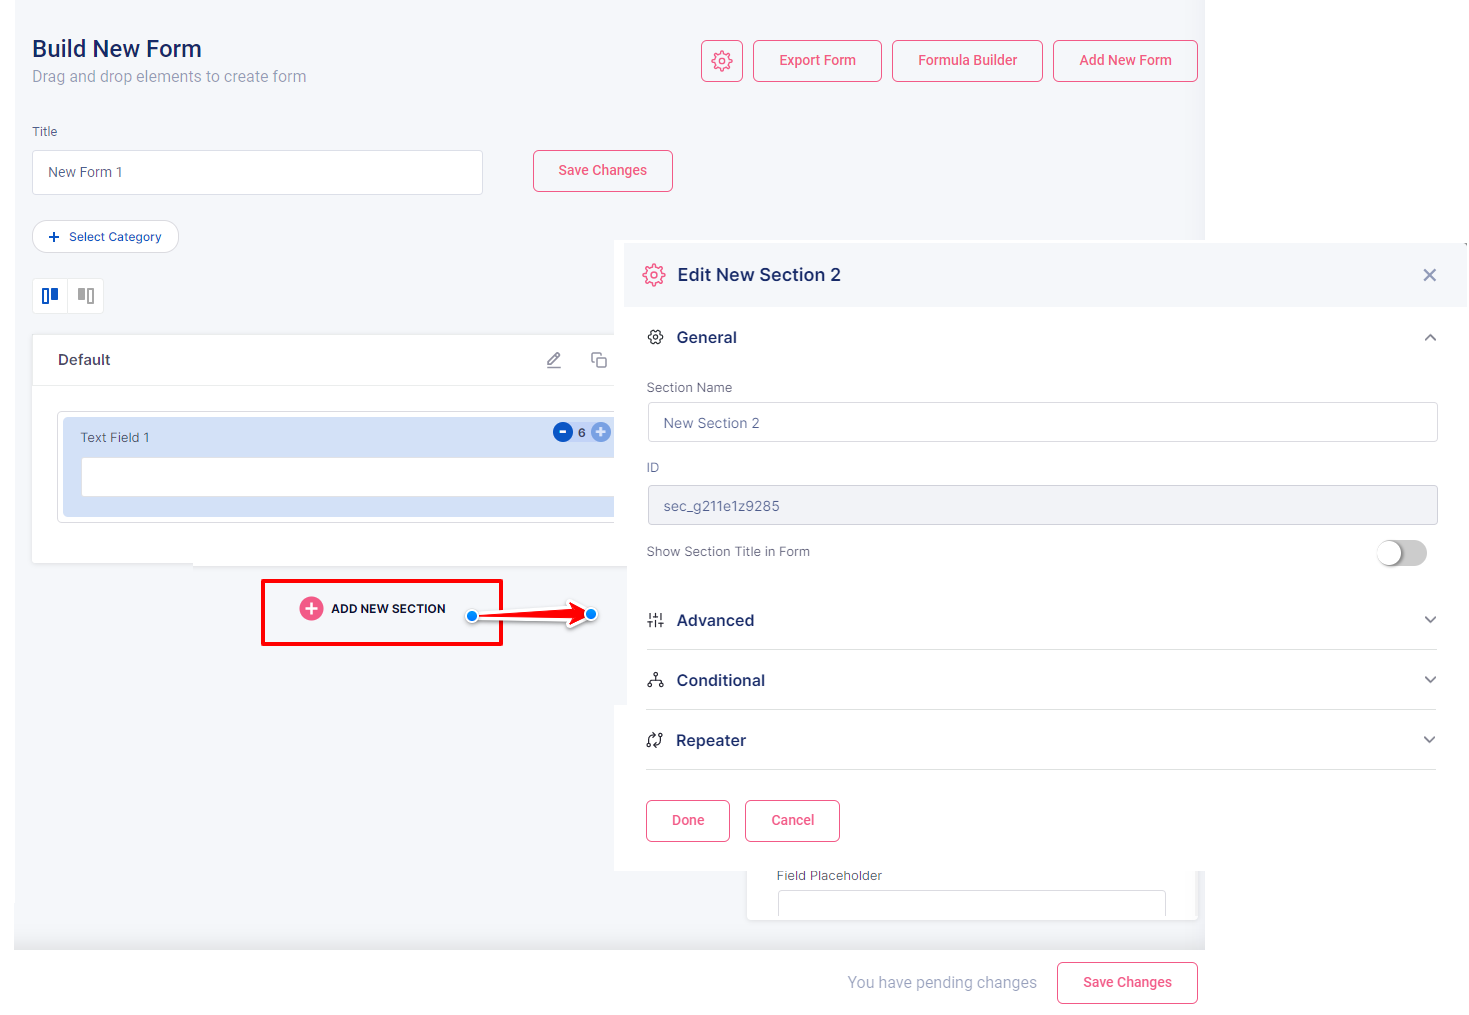
Enter a Section Name for the new section created and click on the Done button, which will result in the creation of a new section. You can create any number of sections to a form by following the same procedure.
Every section will be provided with four options on its top right side.

1. Edit: It includes General, Advanced, Conditional, and Repeater options to customize each section.
2. Copy: Duplicate the section with all the settings.
3. Remove section: It is used to remove the created section.
4. Drop-Down Arrow: Used to minimize and maximize the section
Once a section is created, start building your fields by Drag & Drop from the right side of the tab.

Every field will be provided three options on its top right side.
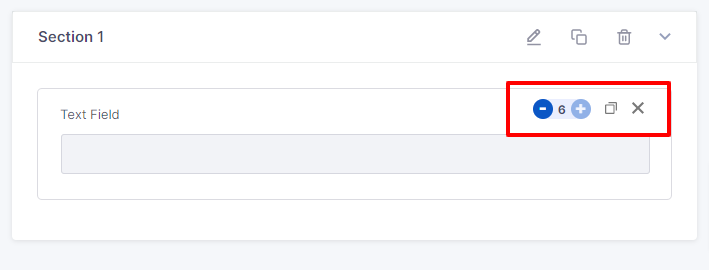
1. Column Adjustment: You can adjust the column space occupied by the field using the + and – buttons (Limit: 0-6).
2. Copy: Duplicates the field with all the settings.
3. Remove Element: It is used to remove the field element.
Go to Products >> {select product name} >> Product Addon >> Select Form, select the form you want, and click on Save Changes.

Navigate to Form settings >> Products List. Where you would be able to see the created product by searching by typing at least 1 letter. Click on the product name and then clicking the save button will result in assigning the form to that product.

The third way is category-wise assigning. You can do it from the Product Addon edit page itself. You just need to assign the form to the desired product category from the Form settings >> Product Categories. It will assign the form for every product in the selected category.

If you don’t need to show the category-wise assigned form for a particular product in the same category, then you have the option to exclude/override globally assigned forms.

The form settings tab can be found in the top right corner of the form edit screen.
Every change made in the form setting will only affect the particular form that you are currently editing and will not be affected globally

It provides seven settings tabs,
1. Product Categories
Used to assign forms to all products of that categories

2. Products List
Used to assign the form to an individual product.

3. Display Settings

Use Global settings: Uncheck to use local settings (settings you make in this section will be considered local. It will be applicable only for the particular form you are editing ). If this option is checked the settings will be applied from the global settings of the WCPA Plugin.
Show price against each fields: this option shows the price against each of the fields to which pricing has been enabled
Hide options price: used to hide the options price. It is applicable only to fields having an options price
Show Price Summary for each sections: Used to show the price for the newly created sections
Price Summary Section: It shows/hides the Total price, Product price, Options price, Fee(only if a fee has been set) and Discount by ticking or un-ticking the respective checkboxes.
4. Pricing Settings

Product Price + Addon Price: Will display the total price as the sum of the product price and addon price – This will be the default option.
Take whichever is maximum of addon price and product price: will only select one price either Option price or Base price which is higher.
Exclude Product Price if Addon price is greater than zero: will only select the options price if there exist options price.
Remove Product Price even if addon price is zero– It can cause the price of the product to zero in case no options are selected
Set this form price as Fee – will set all the field prices as fees and fees will be counted once irrespective of the quantity. (Fee will be counted once irrespective of the quantity)
Process price set as Fee as WooCommerce Fee or Custom:
We can configure it in two ways, as Woo Fee and Custom

Woo Fee: Where it uses the default WooCommerce Fee system, which will be added once per order and will be added after calculating the shipping price. In most cases, this must be working fine.
Custom: In the custom method, We achieved fee functionality, without depending WooCommerce Fees. In the custom cases, it will be calculated before calculating the shipping price.
Exclude this form price from applying discounts: Discounts won’t affect the form prices once you enable this setting.
5. Contents/Strings
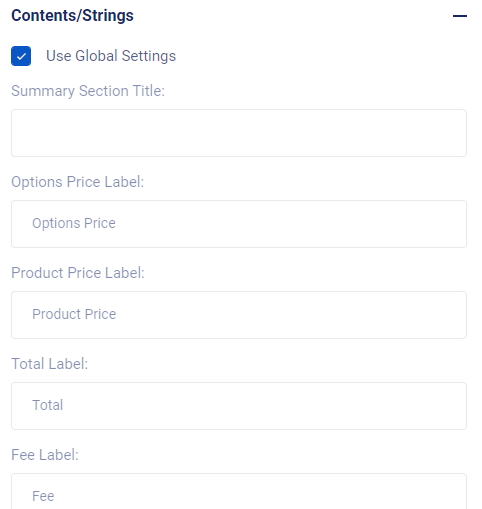
You can change the label names for the Summary section title Options Price, Product price, Total, and Fee, but is applicable only for the respective form only(local scope).
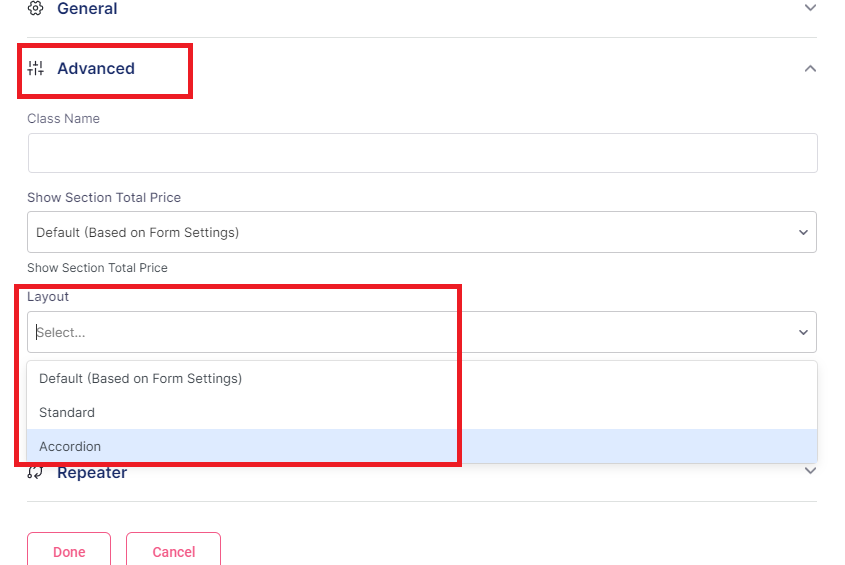
6. Layout Options
Form Layout Options: you can switch the layout between standard and accordion on the form front end.

Once accordion is selected from the form settings, then this will be taken as default for all the sections created
If you need to set the form as standard and only a particular section as accordion, then you have to choose the same from the Advanced setting of the new section
7. Other settings

Allow direct purchase from archive/listing pages without selecting options: You can purchase products directly from the archive page or listing pages by ticking them. But please ensure you have not added any mandatory fields, or else it will throw validation errors.
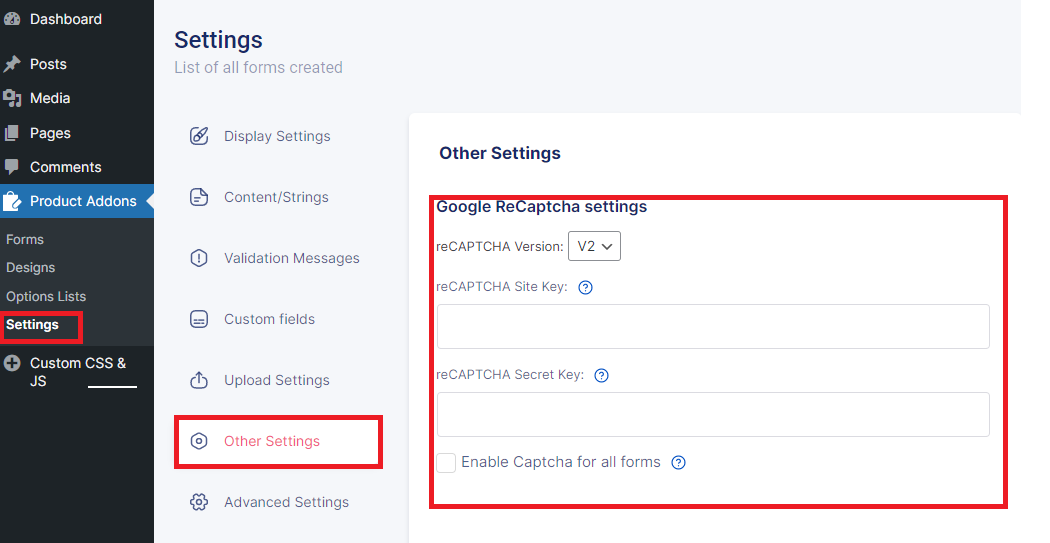
Enable reCAPTCHA for this forms: If you have already configured reCAPTCHA you can use it in the form by ticking it. What is reCAPTCHA?
Note that the configured reCAPTCHA will be only applied to the particular form if enabled in the Form Settings
For configured reCAPTCHA globally, navigate to Product Addon >> Settings >> Other Settings >> Google ReCaptcha settings.
Bind field with quantity: If you want to bind a field with the default quantity of WooCommerce, You can use the custom formula for binding to quantity by using {field.element_id_of_the_field.value}. Note that the element_id_of_the_field will be unique for each field.
If you have questions about our plugin(s), are experiencing issues with any of our plugin


 Login
Login
 Cart
Cart BUY THIS PLUGIN