- Woocommerce
- Shopify Apps
- WordPress
This document help you to configure Amazon S3 and link it with the product addon file upload settings. For this, you need to follow 4 steps.
To create an IAM User you will need to first log in to your pre-existing AWS account from here.
If you do not have an AWS account you can simply register a new one from here
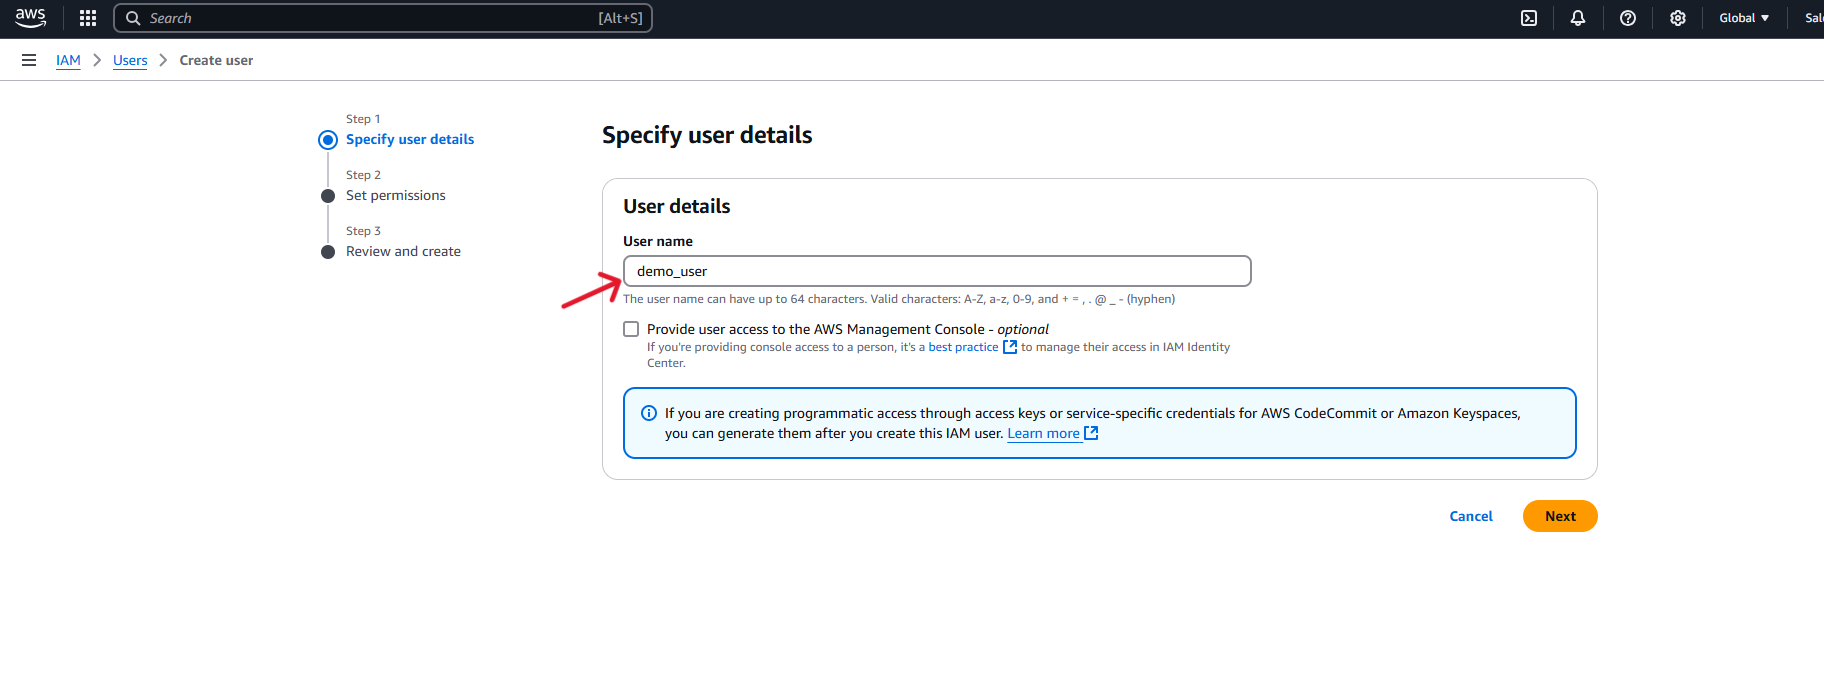
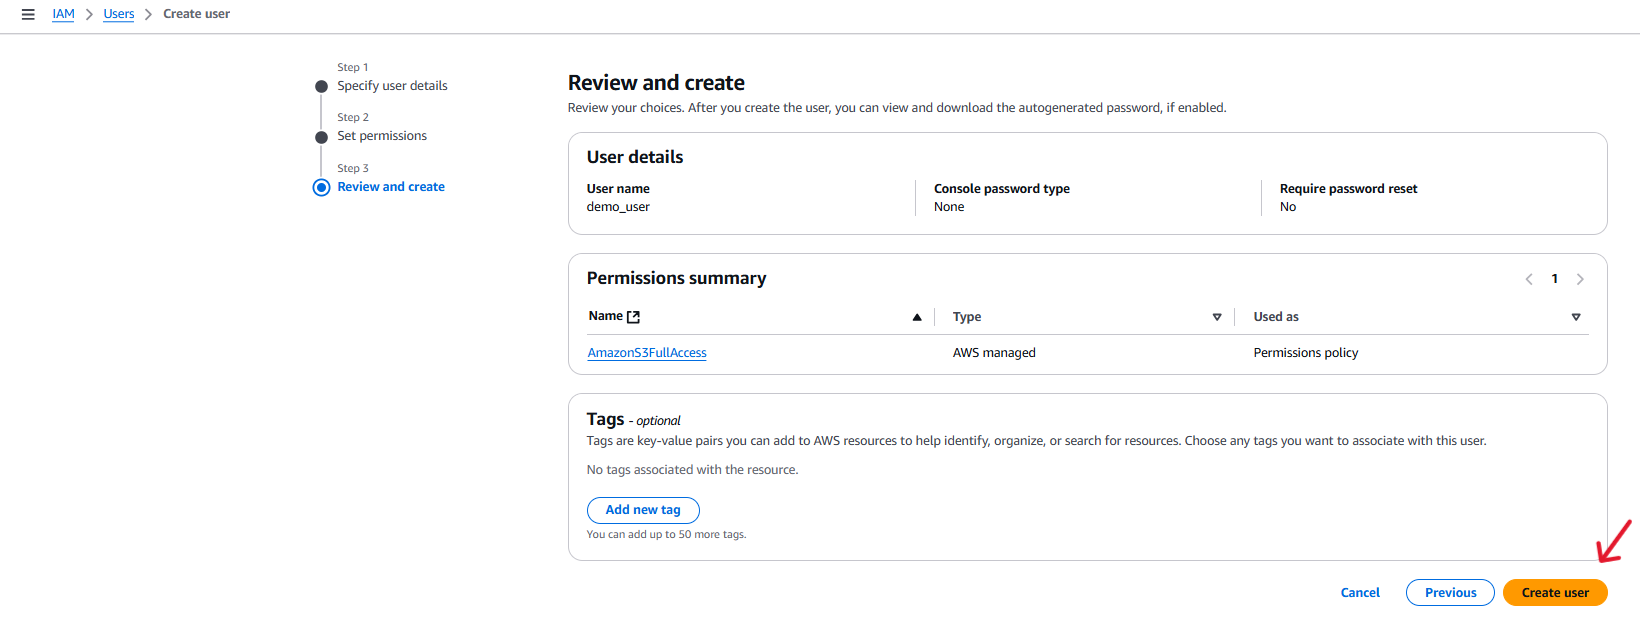
After logging in to your AWS account you will need to set up a new IAM user.
Below are the steps

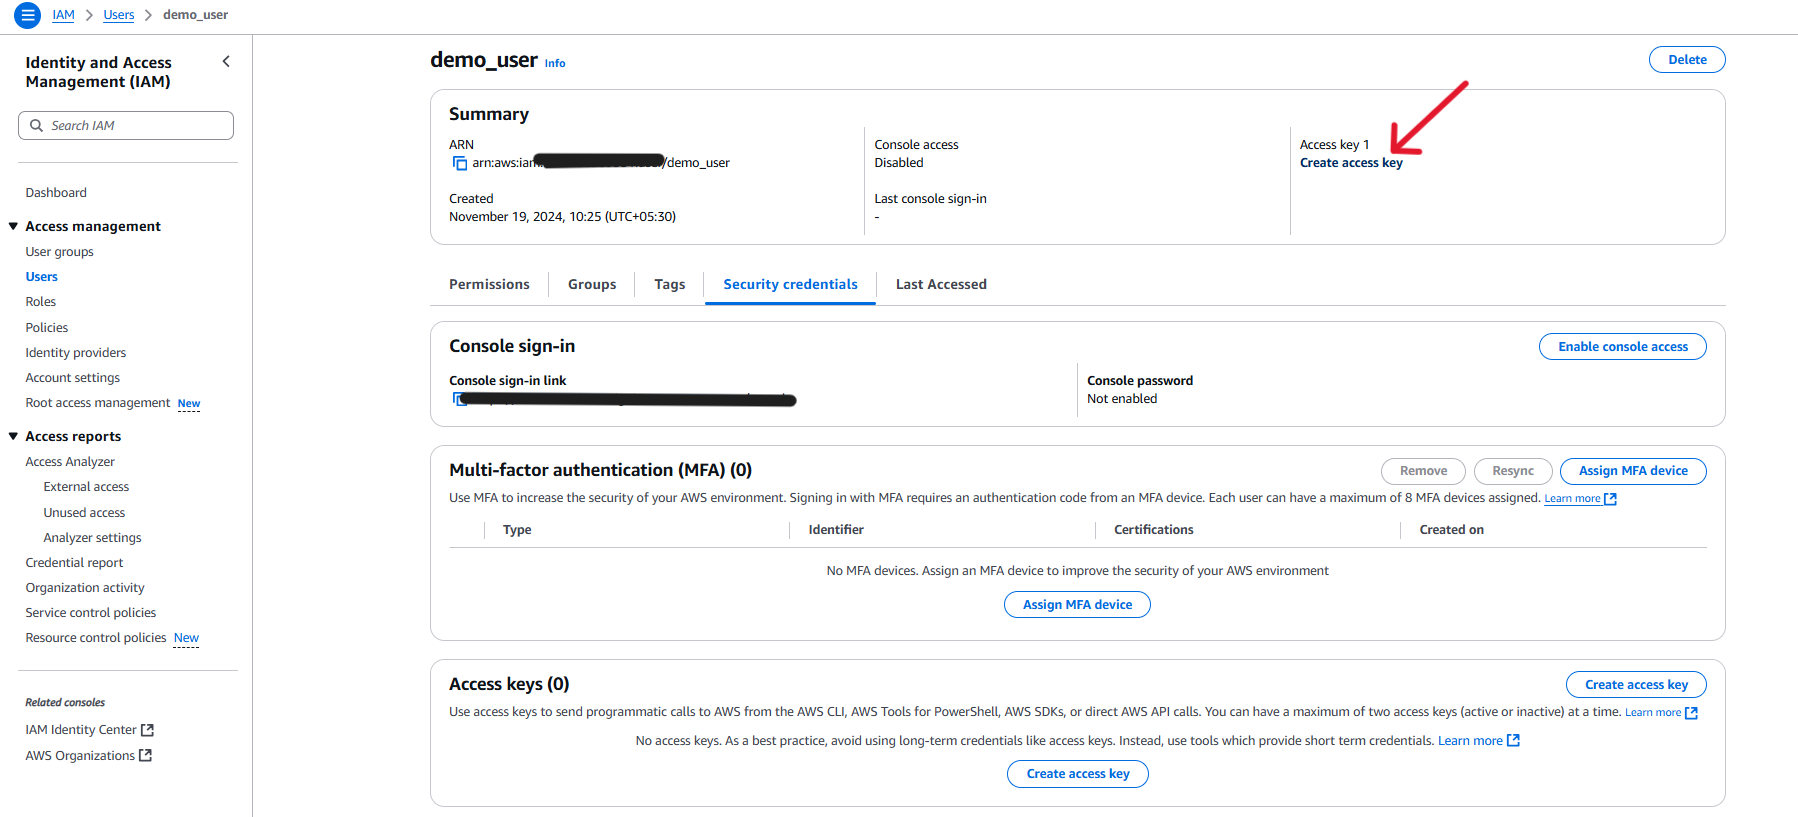
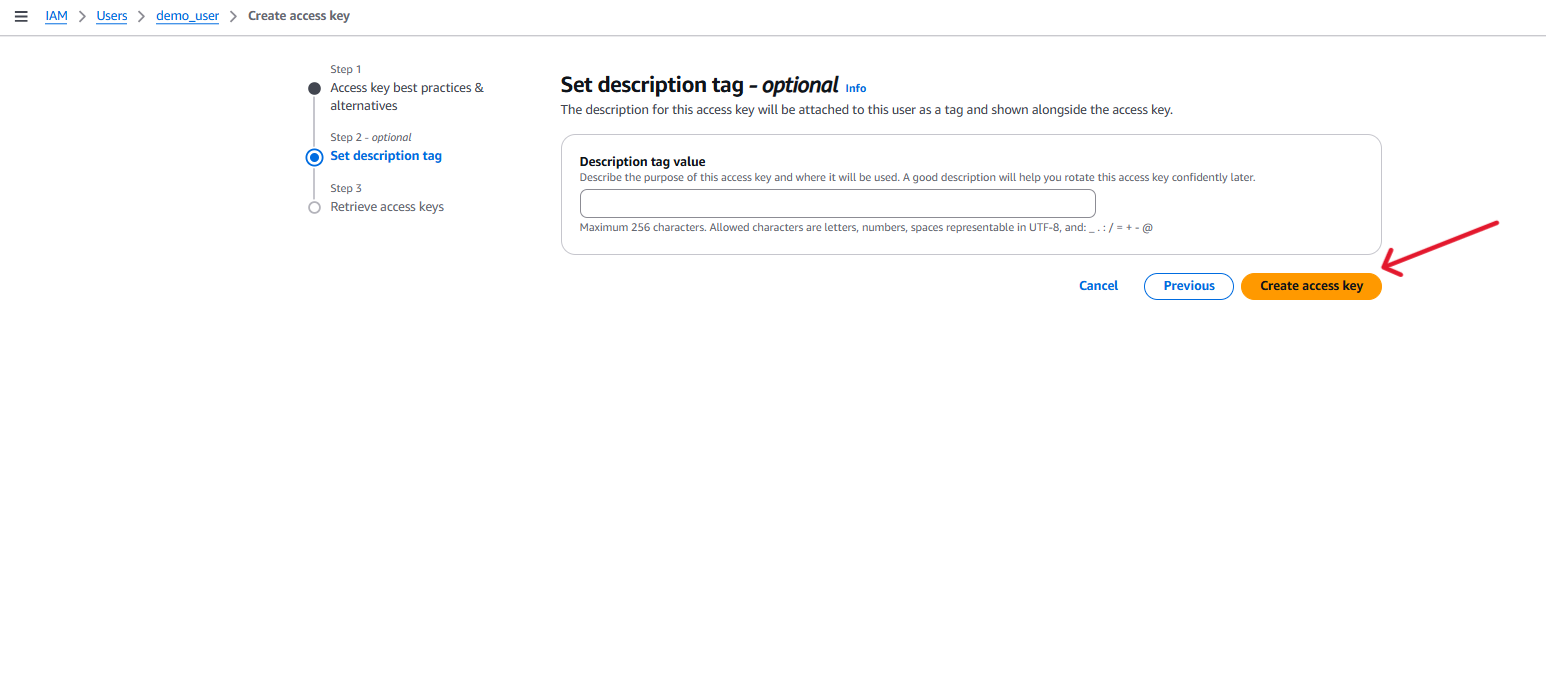
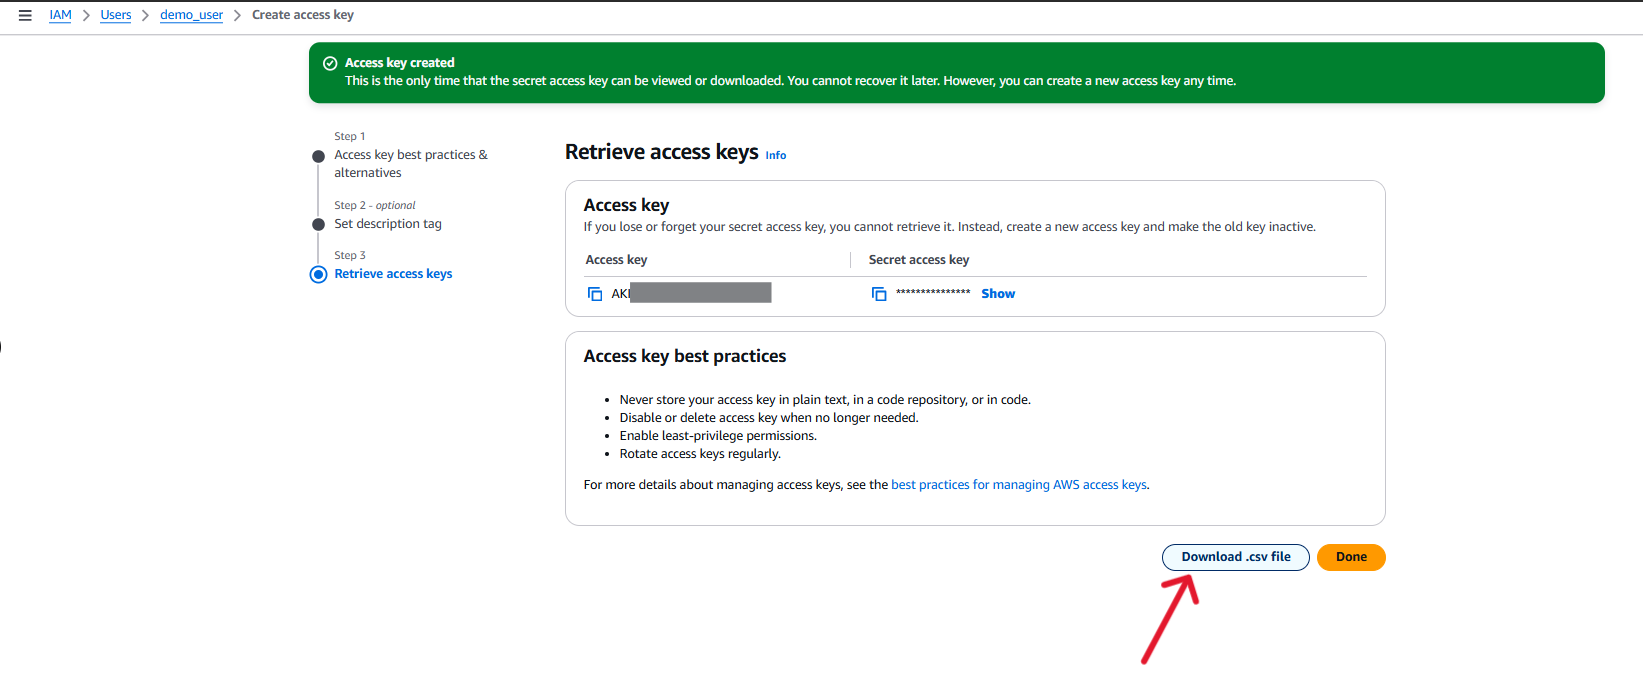
Here you can download the credentials file or note the Access Key ID and Secret Access Key. These will not be displayed again.
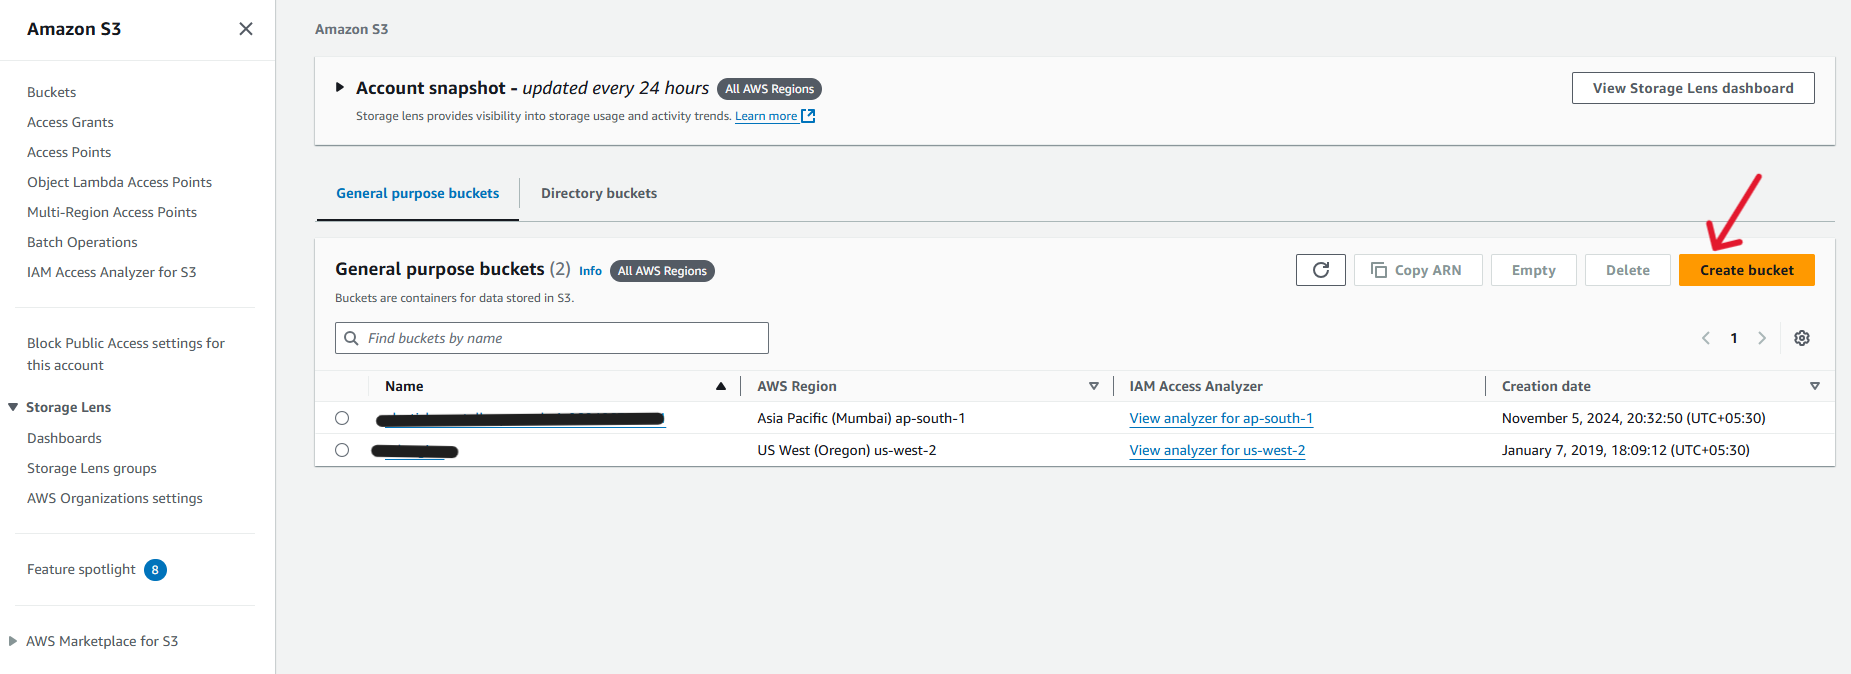
You need to set up an Amazon S3 Bucket to store the media.
For this, you will need to maneuver your way to the Amazon S3 page in the AWS console and click the Create Bucket button.
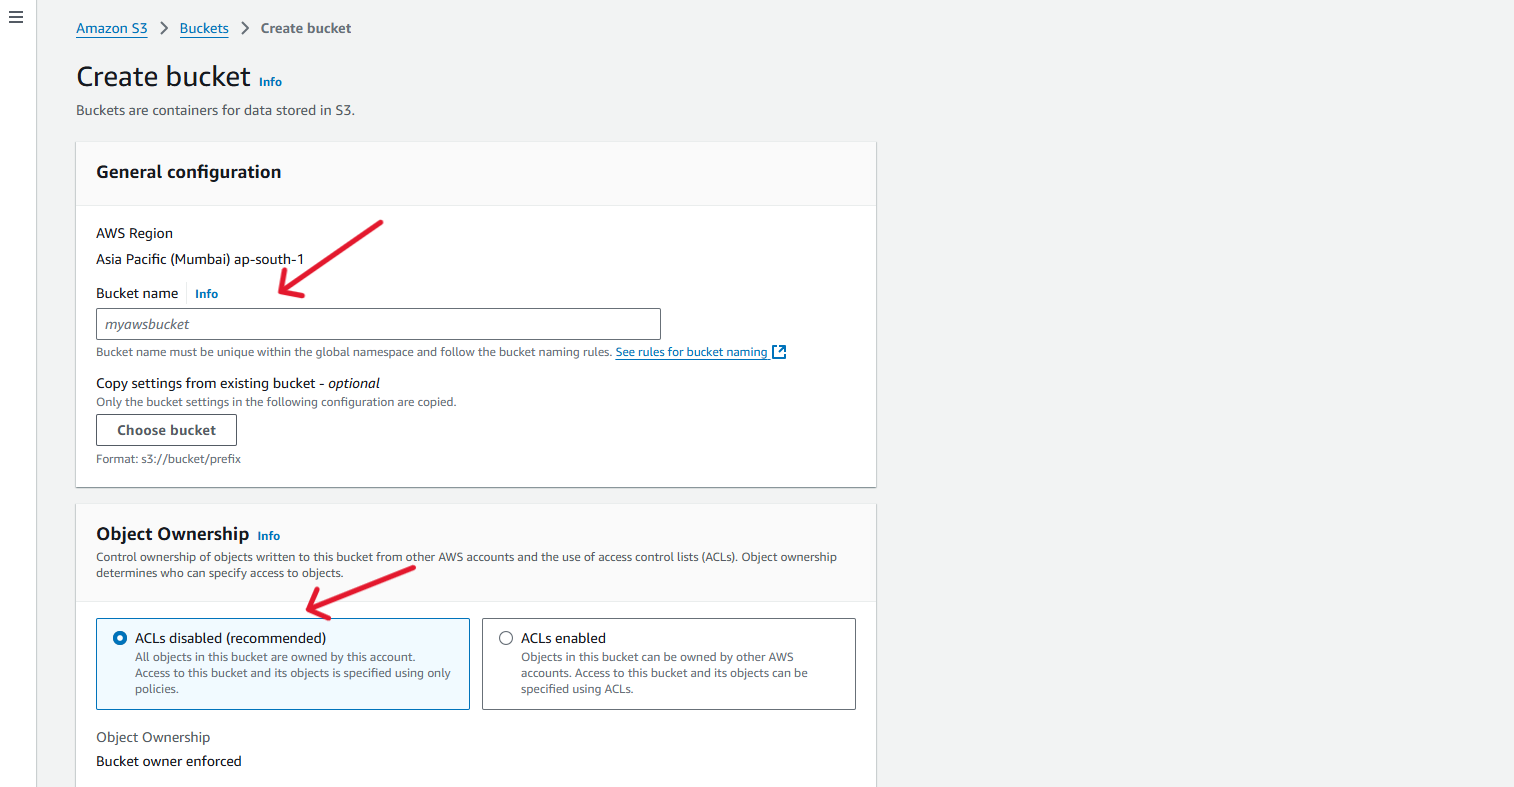
You can enter your bucket name in the field Bucket Name, And can choose the object ownership type,
You can choose ACLs disabled when all objects in this bucket are owned by this account. Access to this bucket and its objects is specified using only policies.
Otherwise, you can choose ACLs enabled when Objects in this bucket can be owned by other AWS accounts. Access to this bucket and its objects can be specified using ACLs.
In the next step, you can set the public access settings,
Uncheck all the checkboxes and enable public access to the bucket.
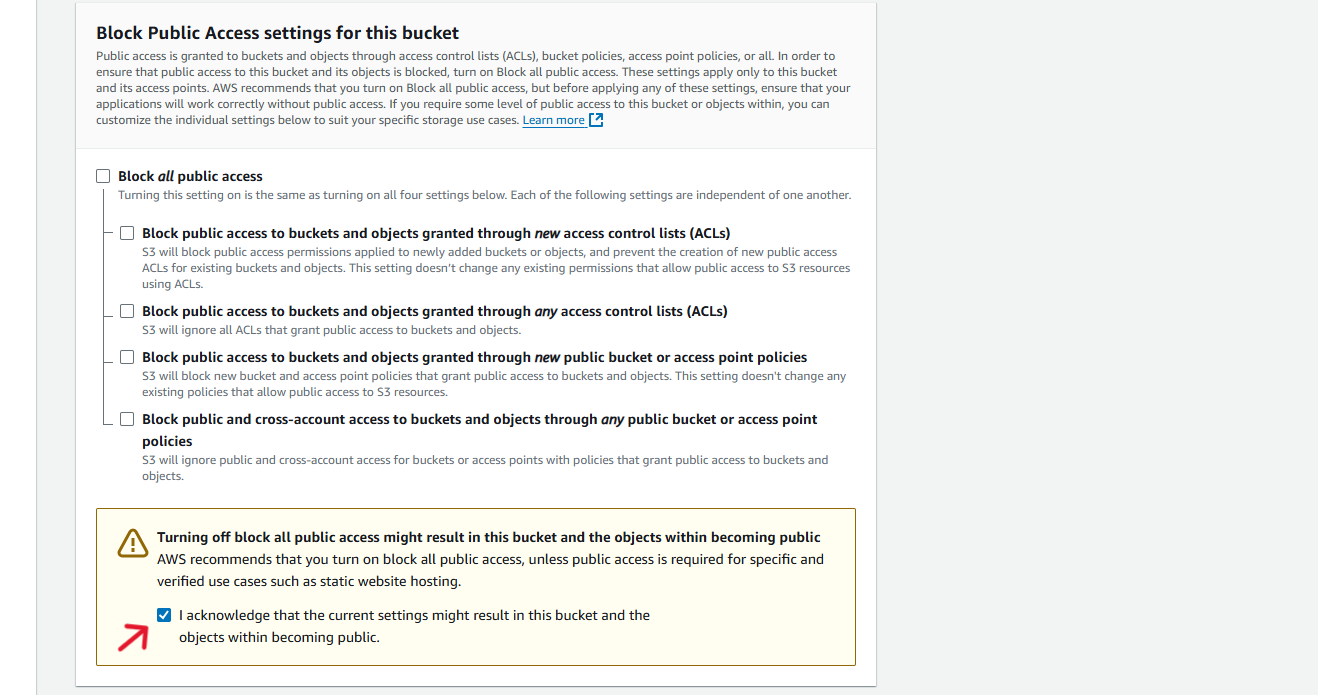
Rest of the settings you can keep the default settings, And click on to Create Bucket Button.
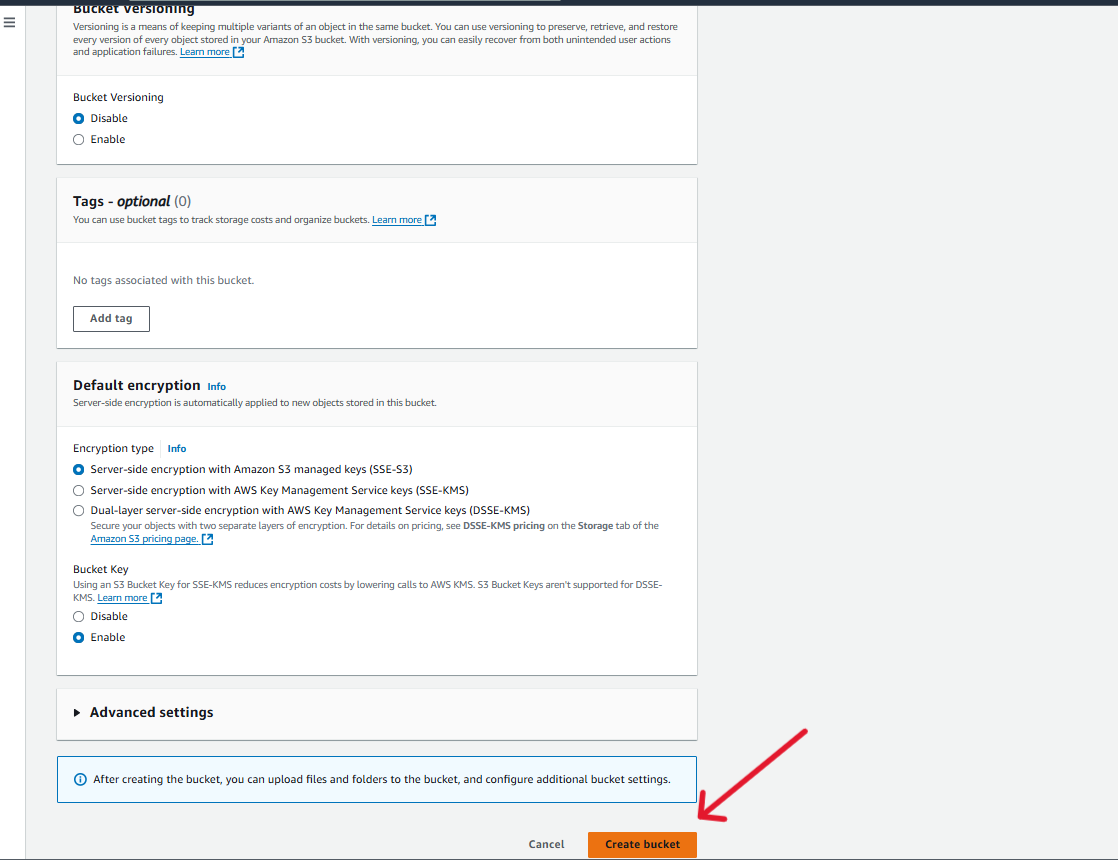
Then, Your bucket will be created in the specified region.
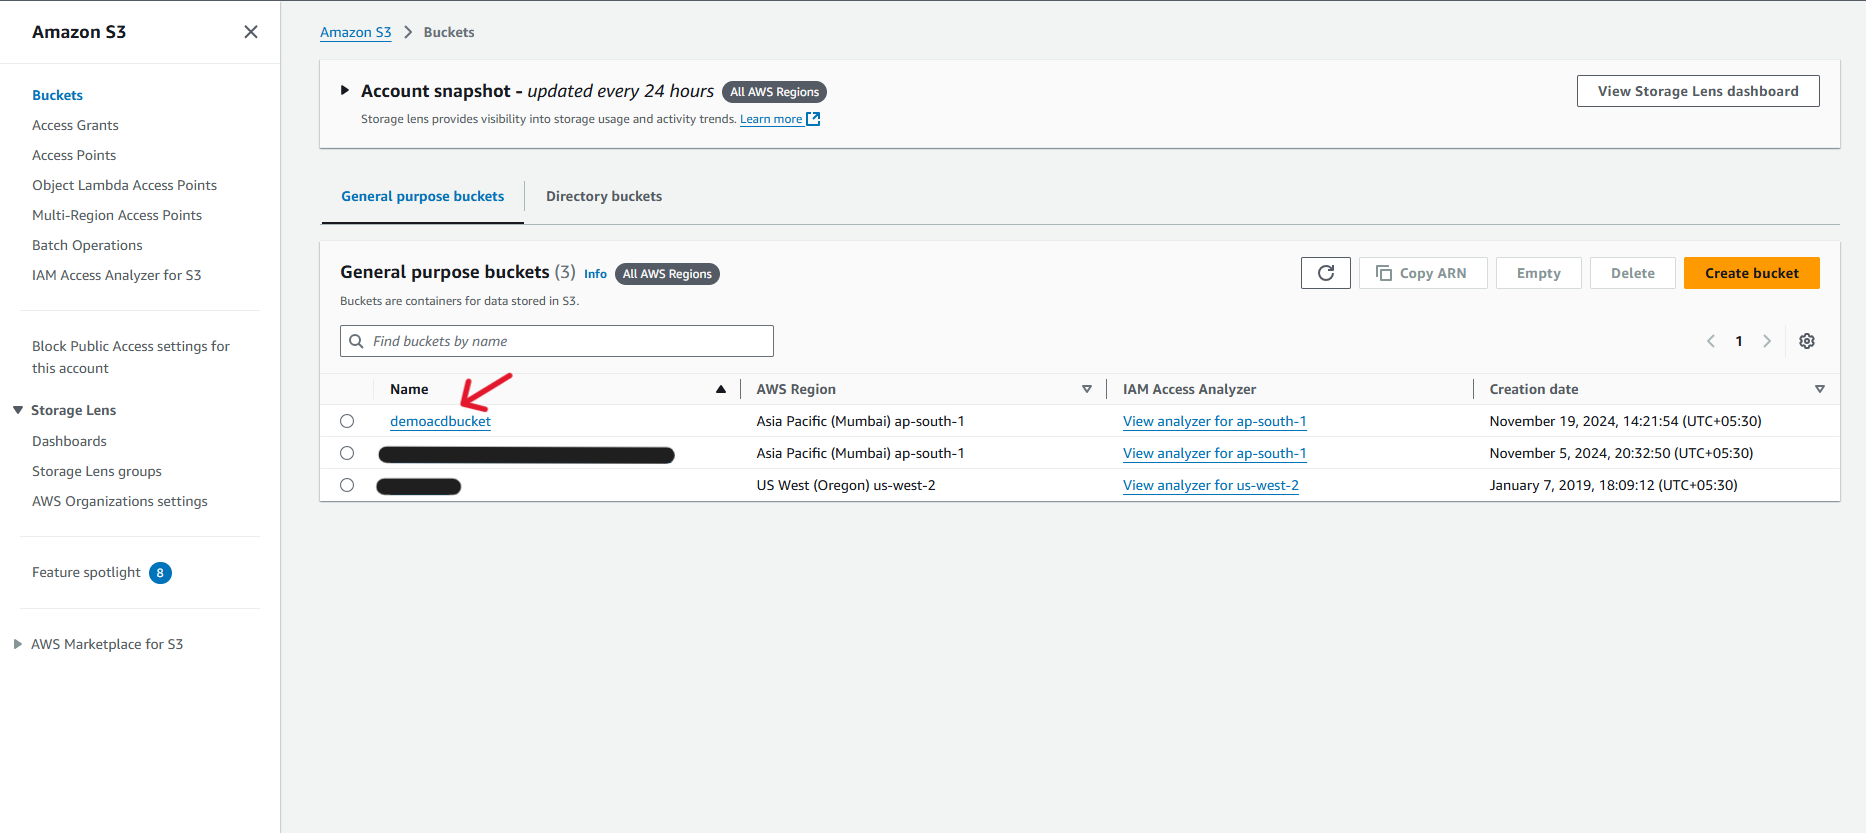
If you got any permission issues you can mention the bucket policies by adding a policy in JSON format.
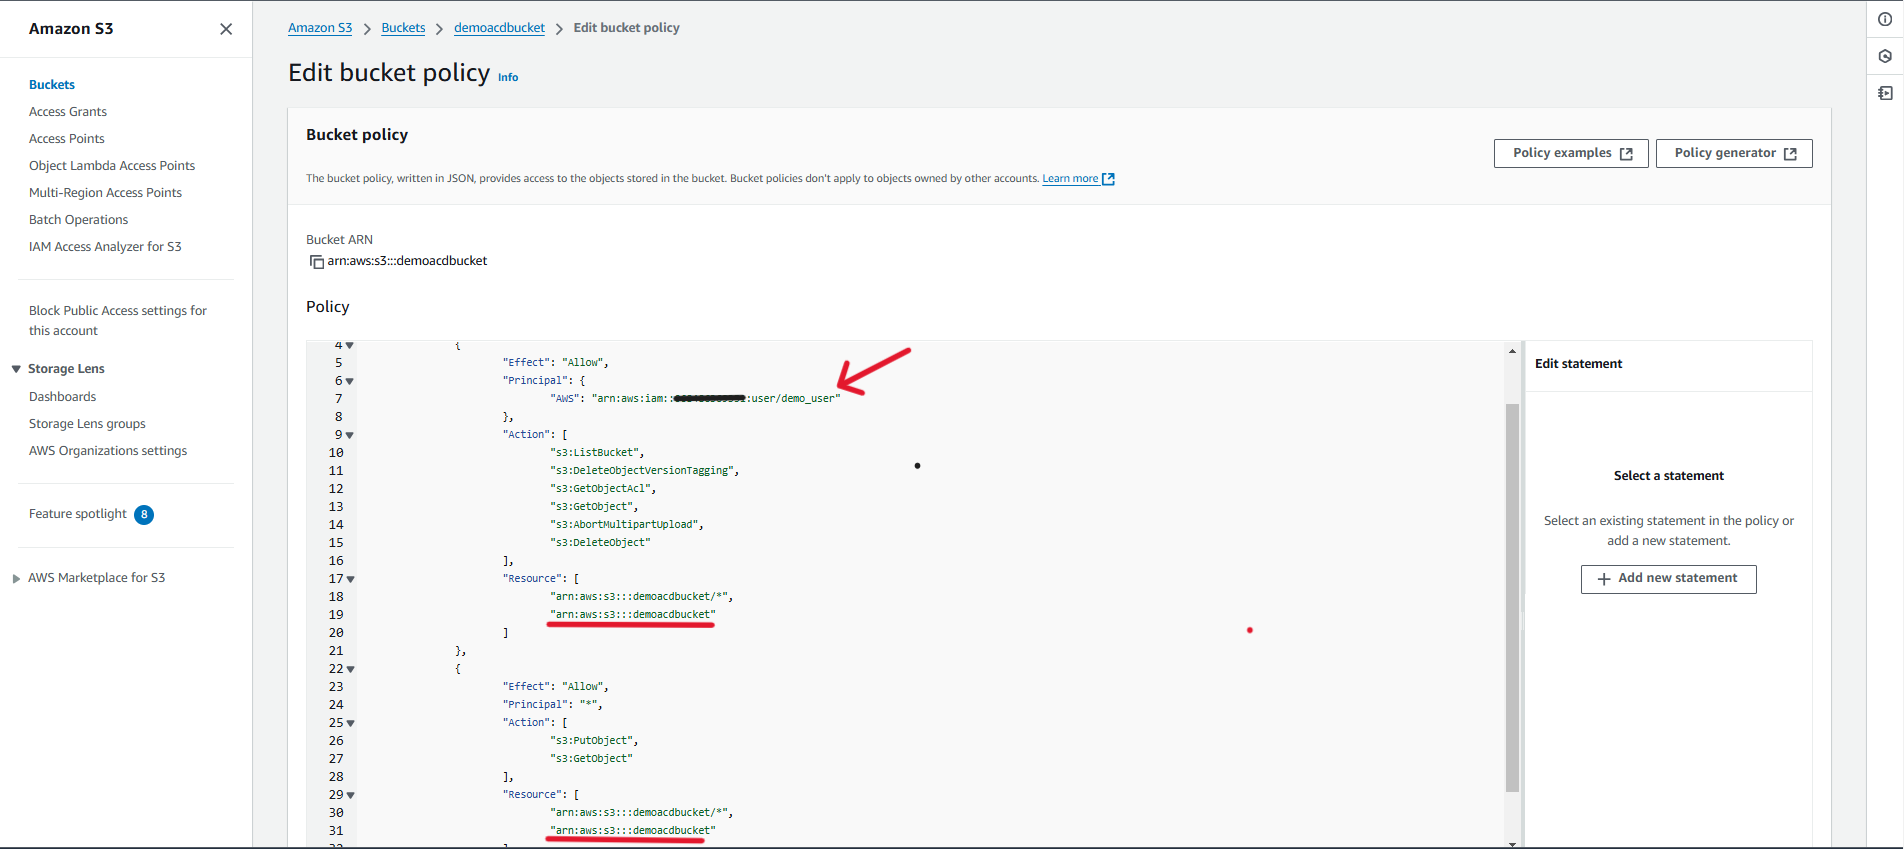
You can use the below policy for the same.
{
	"Version": "2012-10-17",
	"Statement": [
		{
			"Effect": "Allow",
			"Principal": {
				"AWS": "arn:aws:iam::6580xxxx007:user/demo" // replace this AIM usr arn
			},
			"Action": [
				"s3:ListBucket",
				"s3:DeleteObjectVersionTagging",
				"s3:GetObjectAcl",
				"s3:GetObject",
				"s3:AbortMultipartUpload",
				"s3:DeleteObject"
			],
			"Resource": [
				"arn:aws:s3:::<BUCKET_NAME>/*",
				"arn:aws:s3:::<BUCKET_NAME>"
			]
		},
		{
			"Effect": "Allow",
			"Principal": "*",
			"Action": [
				"s3:PutObject",
				"s3:GetObject"
			],
			"Resource": [
				"arn:aws:s3:::<BUCKET_NAME>/*",
				"arn:aws:s3:::<BUCKET_NAME>"
			]
		}
	]
}
Replace <BUCKET_NAME> with your bucket name.
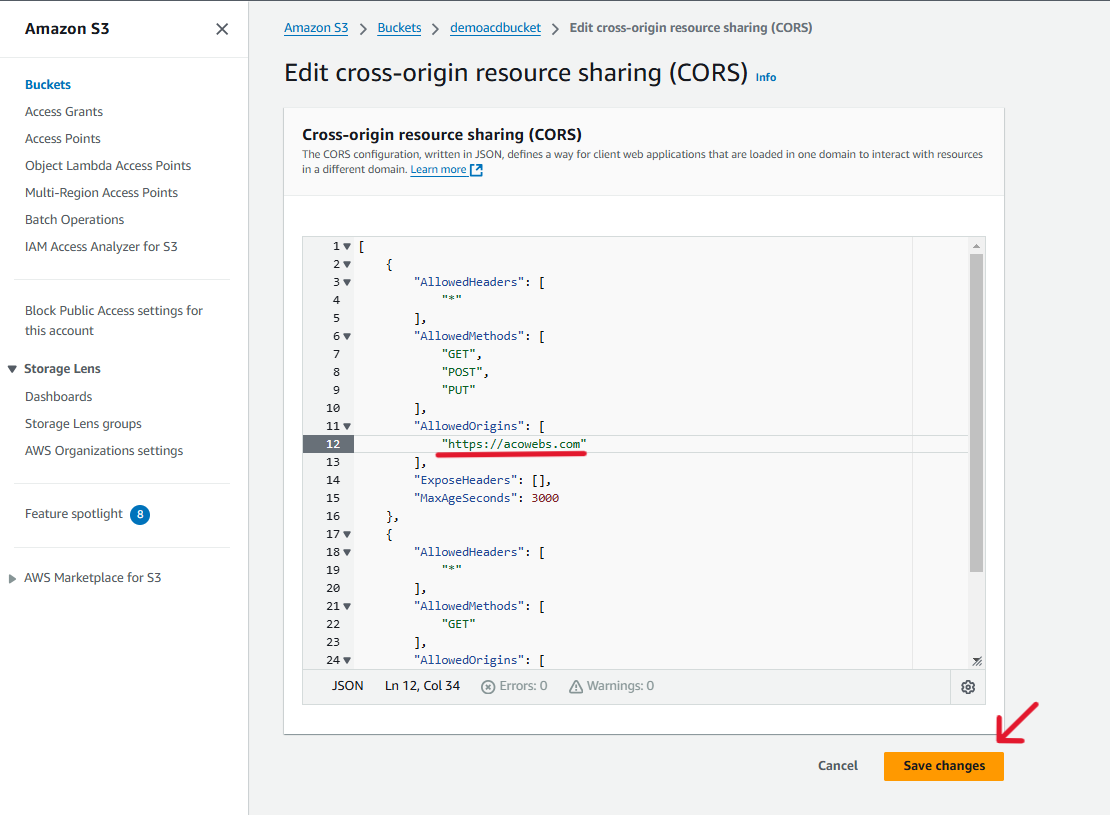
Also, You need to modify the CORS policy.
Scroll down to bottom from permissions tab, and see the CORS policy section.
[
    {
        "AllowedHeaders": [
            "*"
        ],
        "AllowedMethods": [
            "GET",
            "POST",
            "PUT"
        ],
        "AllowedOrigins": [
            "<SITE_URL>" // change it with your site url, eg https://acowebs.com , also you can use “*” if you wont need to restrict
        ],

        "ExposeHeaders": [

//Add the following 3 values if you want to support multipart uploads for files larger than 100 MB.

            "ETag",
            "Content-Type",
            "Content-Length"
        ],


        "MaxAgeSeconds": 3000
    },
    {
        "AllowedHeaders": [
            "*"
        ],
        "AllowedMethods": [
            "GET"
        ],
        "AllowedOrigins": [
            "*"
        ],
        "ExposeHeaders": [],
        "MaxAgeSeconds": 3000
    }
]
Replace <SITE_URL>with your site url, eg. https://acowebs.com , also you can use “*” if you wont need to restrict per any site.
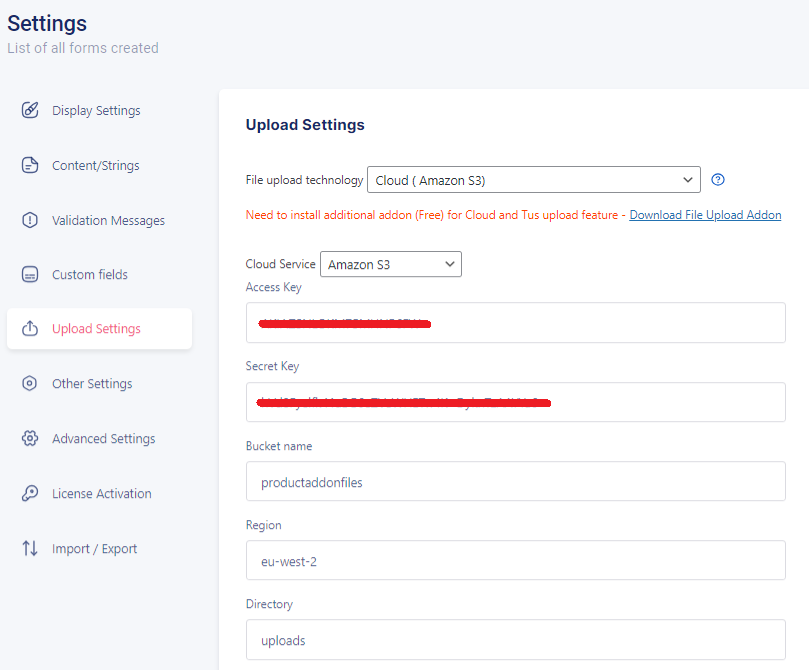
Now you will have the access key, secret key, bucket name, region and directory inside your amazon s3 account. You can add these data inside the custom product addon file upload settings and configure s3 as below.
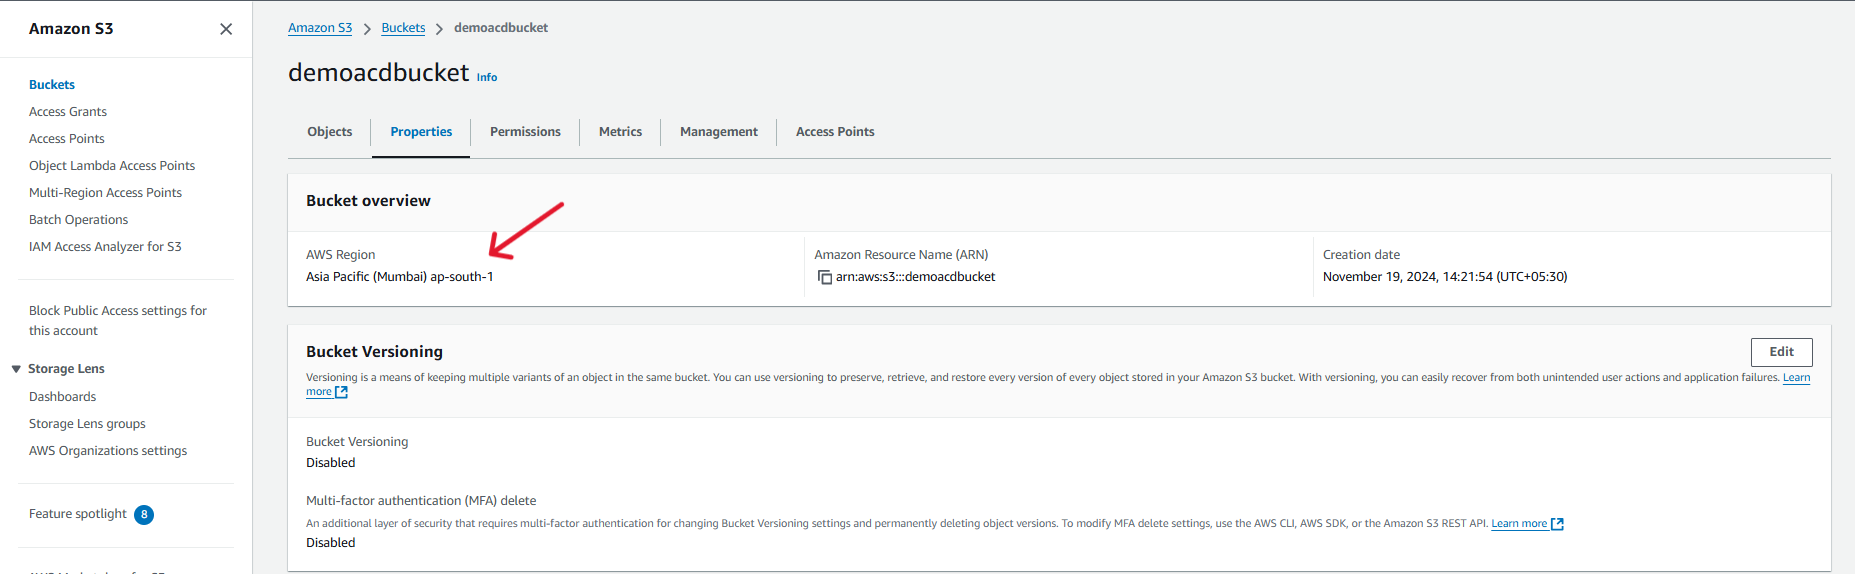
Here, Region will be available on your s3 account as below. You can add it here.
If you have questions about our plugin(s), are experiencing issues with any of our plugin


 Login
Login
 Cart
Cart BUY THIS PLUGIN