
A boutique store is planning an End-of-Season Clearance Sale that will run from 1st August to 15th August. The merchant wants a Sale badge to automatically appear on selected products when the campaign begins and disappear automatically once the sale ends. This eliminates the need to manually enable and disable badges at the start and end of the promotion.
Managing seasonal sales manually can be time-consuming, especially when the merchant is busy preparing discounts, marketing campaigns, and inventory updates.
Someone has to remember to activate the Sale badge exactly when the campaign starts and remove it immediately after the promotion ends. If the badge is enabled too early or remains visible after the sale has finished, customers may receive misleading information, leading to confusion and a poor shopping experience.
The merchant wants a simple way to schedule the badge once and let it run automatically throughout the campaign.
Acowebs Shopify Labeler app allows merchants to schedule badges by defining a start date and an end date.
The merchant creates the Sale badge once, configures the campaign schedule, and publishes it. Labeler automatically displays the badge on the selected products from 1st August and removes it automatically after 15th August without any manual intervention.
This allows the merchant to prepare the entire campaign in advance while ensuring the Sale badge appears and disappears at the correct time.
Open the Labeler app and click Create New Badge.
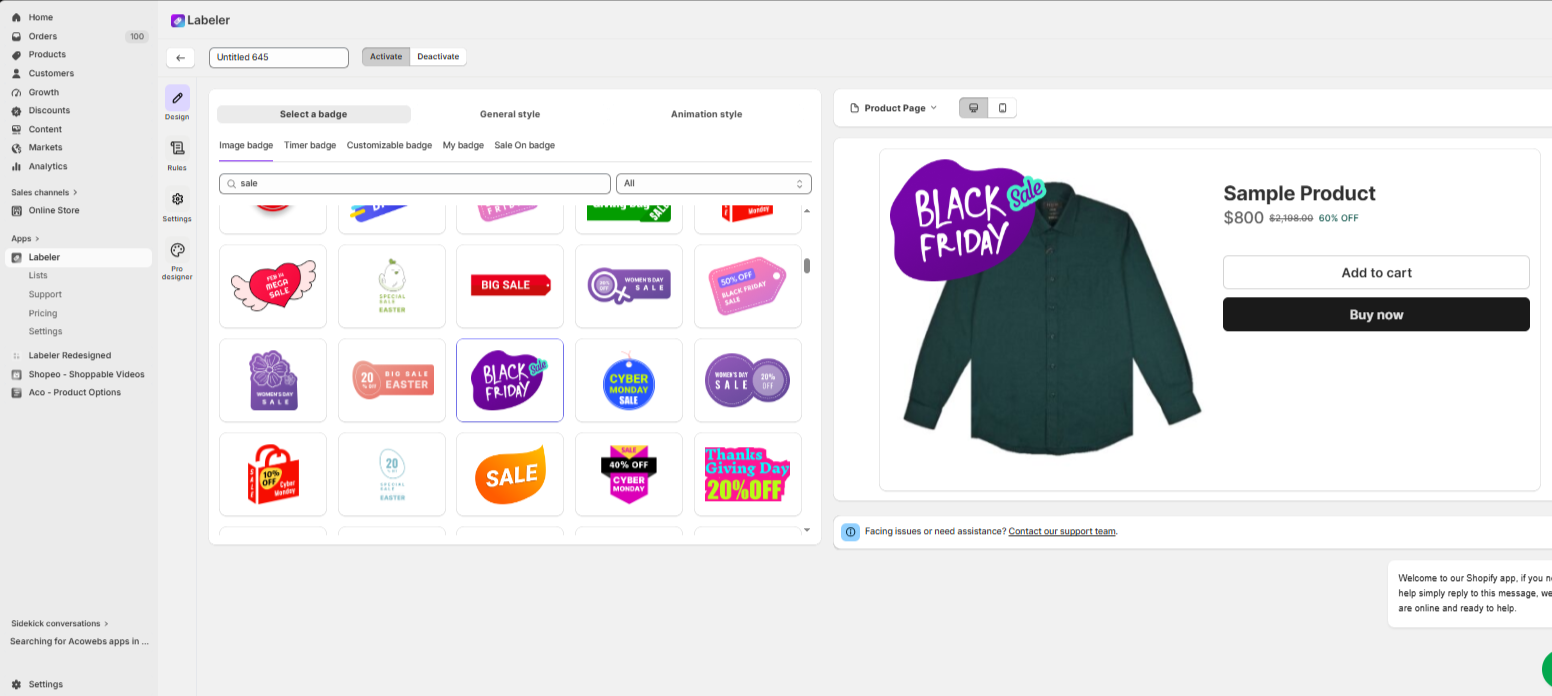
Go to the Design tab and select an appropriate Sale badge from the Image Badge category.
You can also customise the badge by adjusting its position, size, margin, opacity, and rotation from the General Style settings to match your storefront design.
Screenshot: Sale badge selected in the Design tab.
Open the Rules tab.
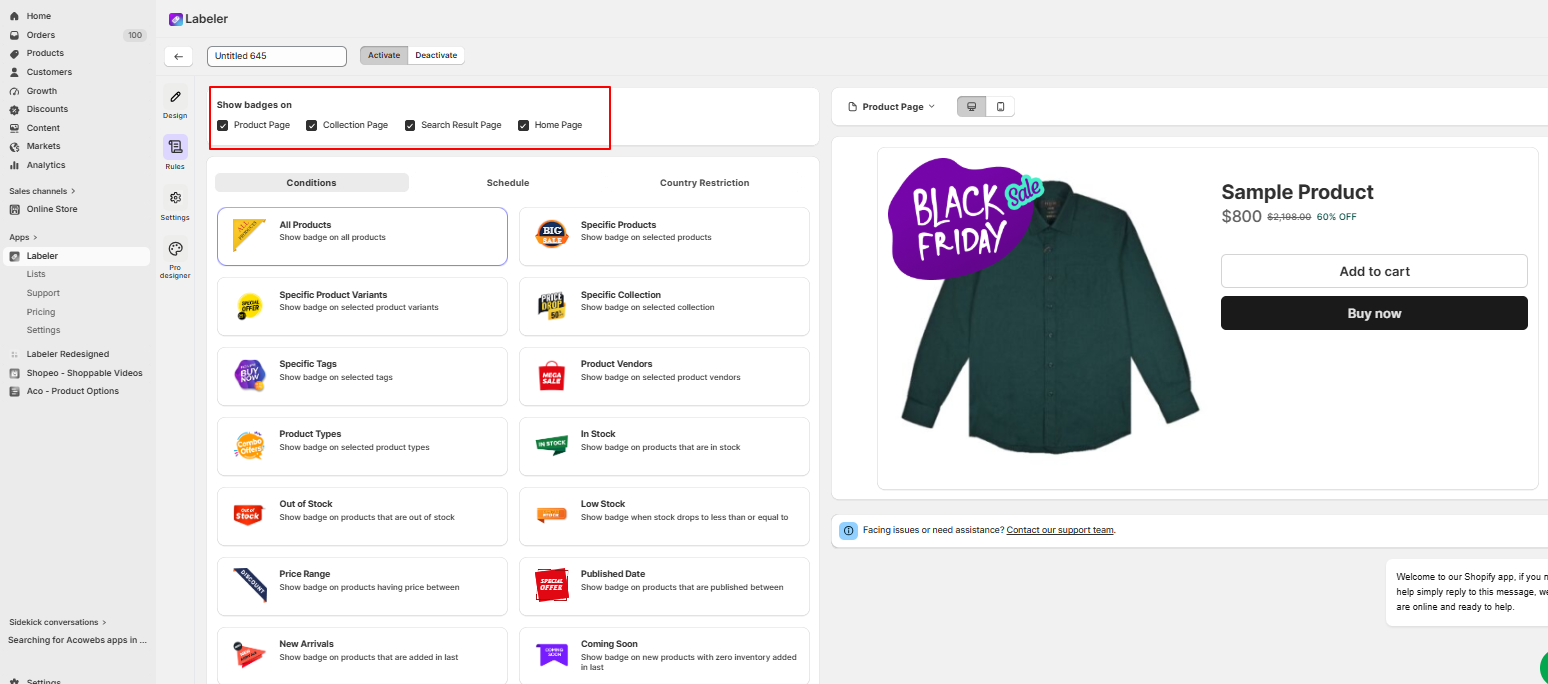
Under Show Badges On, choose the pages where the Sale badge should be displayed. In this example, enable:
This ensures customers see the Sale badge consistently across the storefront.
Screenshot: Show Badges On configuration.
Open the Schedule tab
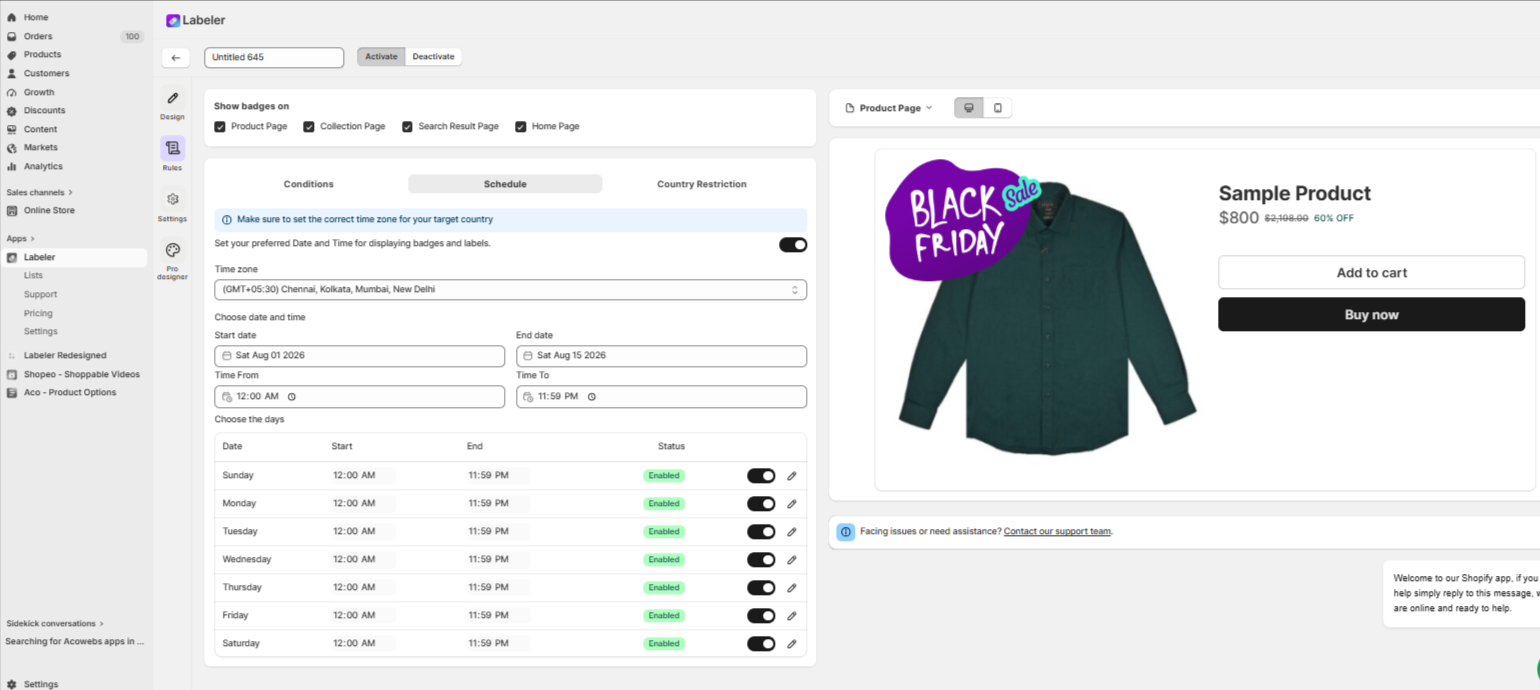
Enable the “Set your preferred Date and Time for displaying badges and labels” option. Then select the appropriate time zone, set the Start Date to 1st August, and set the End Date to 15th August.
This tells Labeler to automatically display the Sale badge only during the scheduled clearance campaign. As a result, shoppers will see the badge from 1st August until 15th August, after which Labeler will automatically remove it, eliminating the need for the merchant to manually enable or disable badges.
Screenshot: Schedule configured with start and end dates.
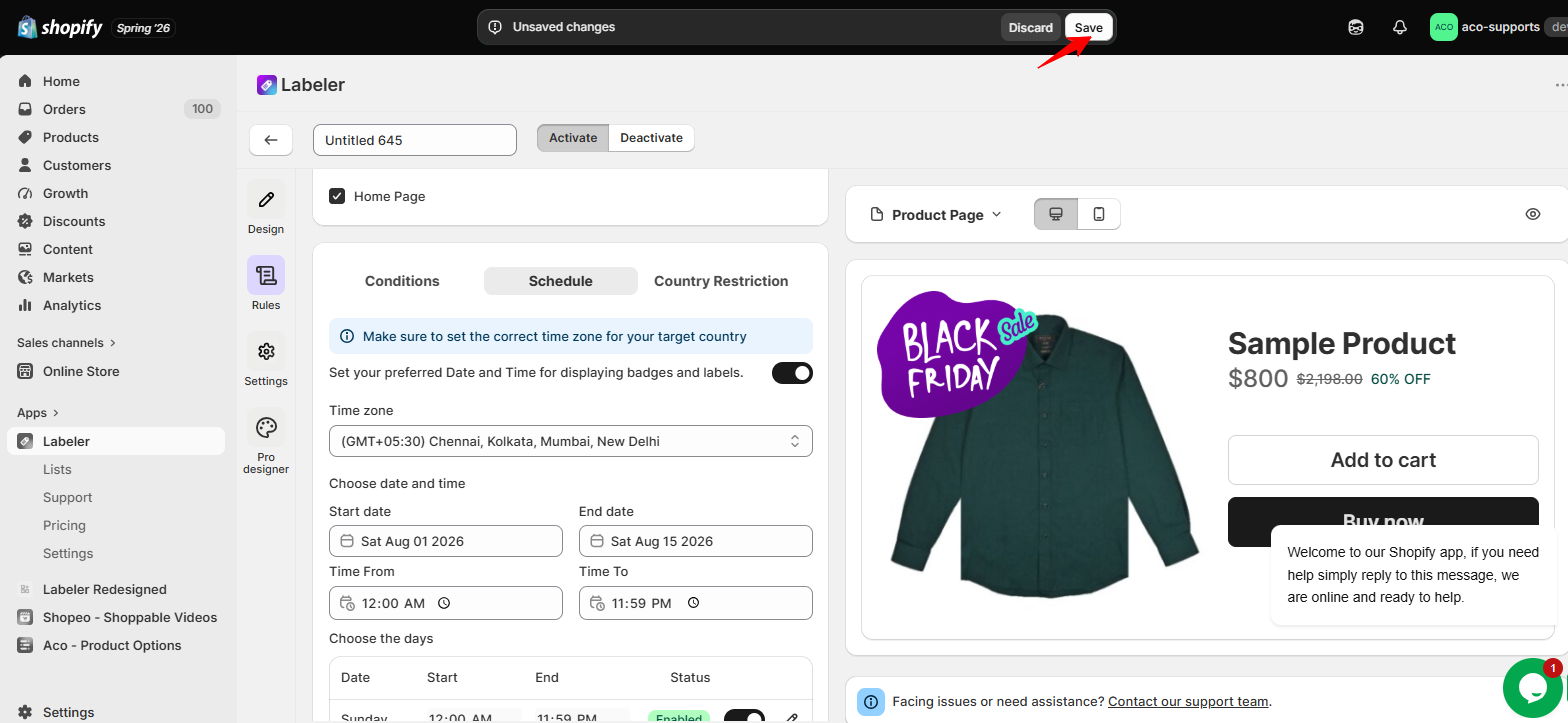
Click Save to apply the changes and activate the badge.
From this point onwards, the merchant can prepare the entire clearance campaign in advance. Labeler automatically activates the Sale badge on 1st August and removes it after 15th August, ensuring the promotion runs exactly as planned without any manual intervention.
Screenshot: Badge activated successfully.
Once the configuration is complete, the merchant no longer needs to manually enable or disable Sale badges for the clearance campaign.
The Sale badge automatically appears on 1st August, remains visible throughout the promotion, and is removed automatically after 15th August.
This helps the merchant run seasonal campaigns more efficiently, reduces manual work, prevents outdated promotional badges from remaining on products, and provides customers with an accurate and professional shopping experience.
If you have questions about our plugin(s), are experiencing issues with any of our plugin


















 Login
Login
 Cart
Cart BUY THIS PLUGIN