
A skincare brand regularly receives questions from customers about whether its products are cruelty-free, whether payments are secure, and whether the store provides a safe checkout experience. Although this information is available elsewhere on the store, customers often look for visible trust signals before deciding to make a purchase.
To reassure shoppers at the right moment, the merchant wants to display professional Trust Badges directly on the product page, highlighting secure payments, trusted payment methods, and important product assurances.
Customers who are unsure about product authenticity or payment security often hesitate before completing a purchase.
Without visible trust signals, shoppers may leave the product page to search for additional information or abandon their purchase altogether. This also increases customer support enquiries, as merchants repeatedly answer questions about secure payments and product authenticity.
The merchant needs a simple way to display professional trust badges that immediately build customer confidence while shopping.
Acowebs Shopify Labeler app includes a dedicated Trust Badges feature that allows merchants to display professional trust icons on product pages.
The merchant simply creates a Trust Badge, selects the relevant trust icons, customises its appearance, and publishes it.
Once configured, Labeler automatically displays the selected Trust Badges on the configured product pages. Customers immediately recognise trusted payment methods, secure checkout, and product assurances while browsing, helping build confidence before they reach the checkout page
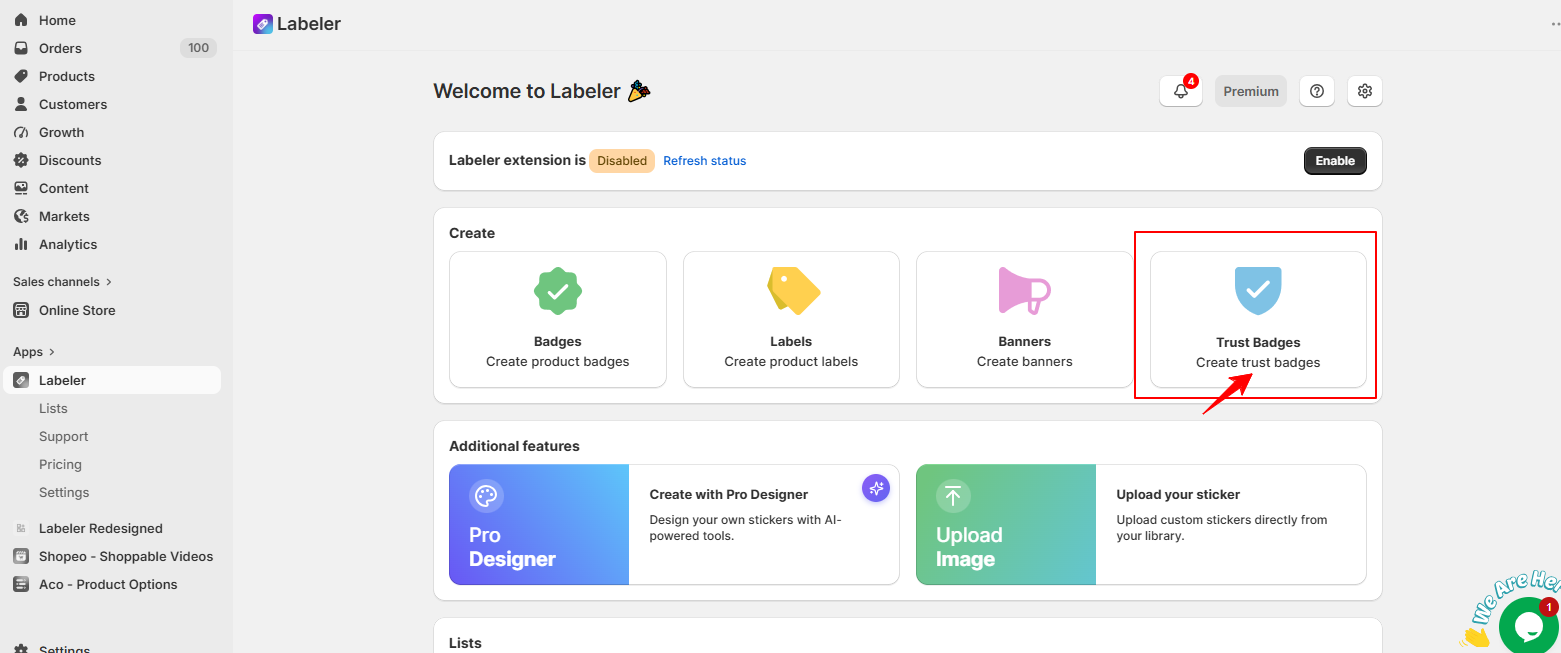
Open the Labeler app and click Create Trust Badges.
This opens the Trust Badge editor, where you can select a badge that highlights important trust signals for your customers. Instead of manually adding payment icons or security badges to every product page, you can manage them from one central location.
Screenshot: Trust Badges option on the Labeler dashboard.
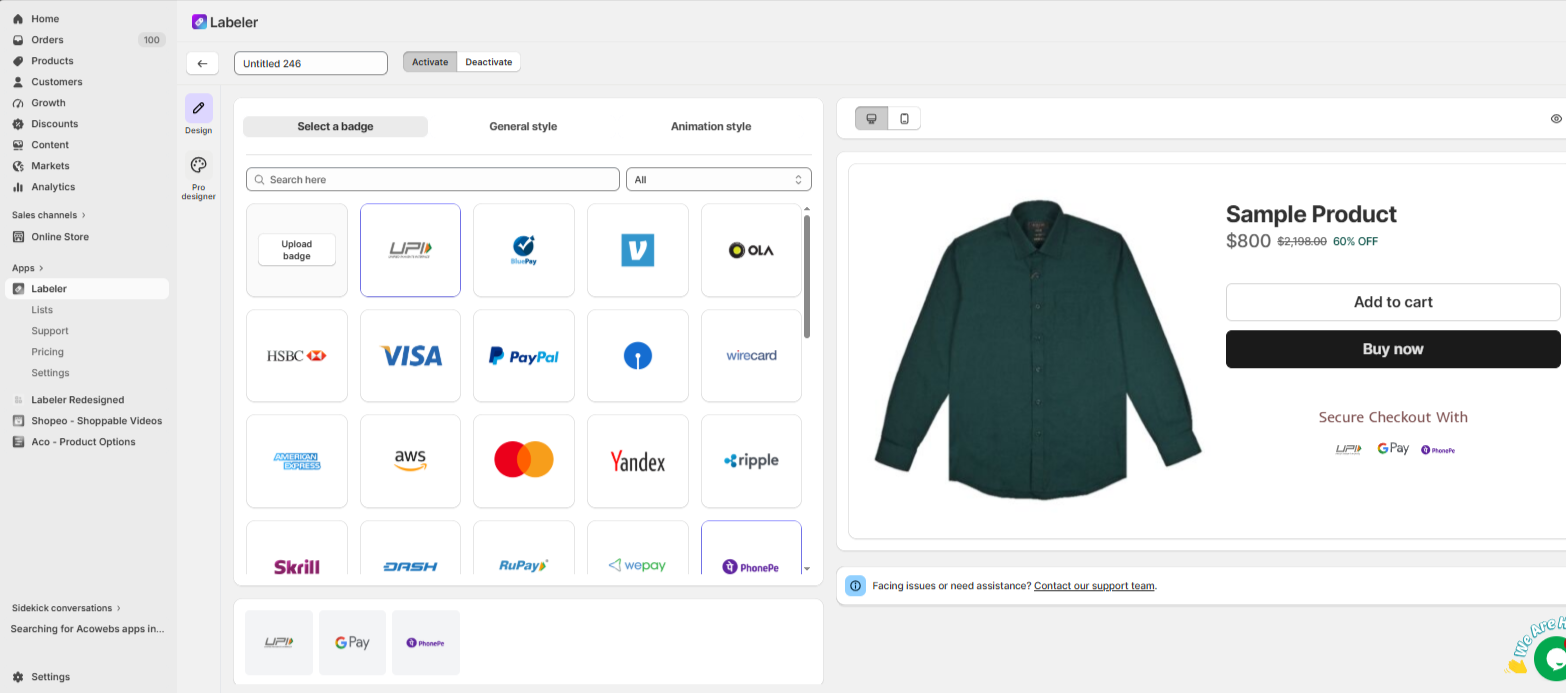
Next, open the Select a Badge tab and choose the trust icons you want to display.
This tells Labeler exactly which trust icons should appear on your product pages. As a result, customers can instantly recognise trusted payment methods and security assurances while viewing your products
Screenshot: Trust icons selected.
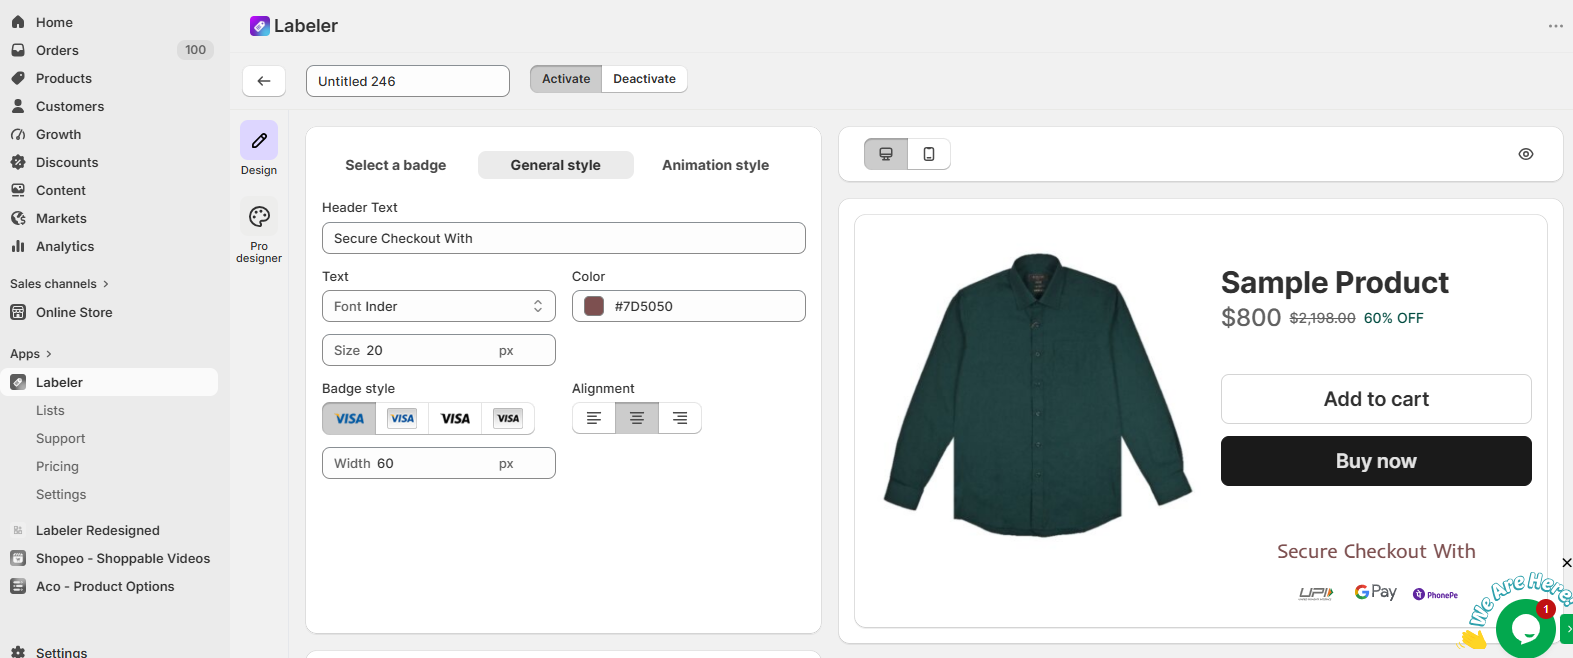
Open the General Style tab.
Here you can customise the header text, font, text colour, badge size, alignment, and icon width to match your store’s branding.
Screenshot: Trust Badge General Style settings.
Click Save to apply the changes and publish the badge.
From this point onwards, every customer visiting the product page immediately sees the selected trust badges. Instead of wondering whether payments are secure or whether the brand is trustworthy, shoppers can instantly see these trust signals while considering their purchase
Screenshot: Trust Badge activated successfully.
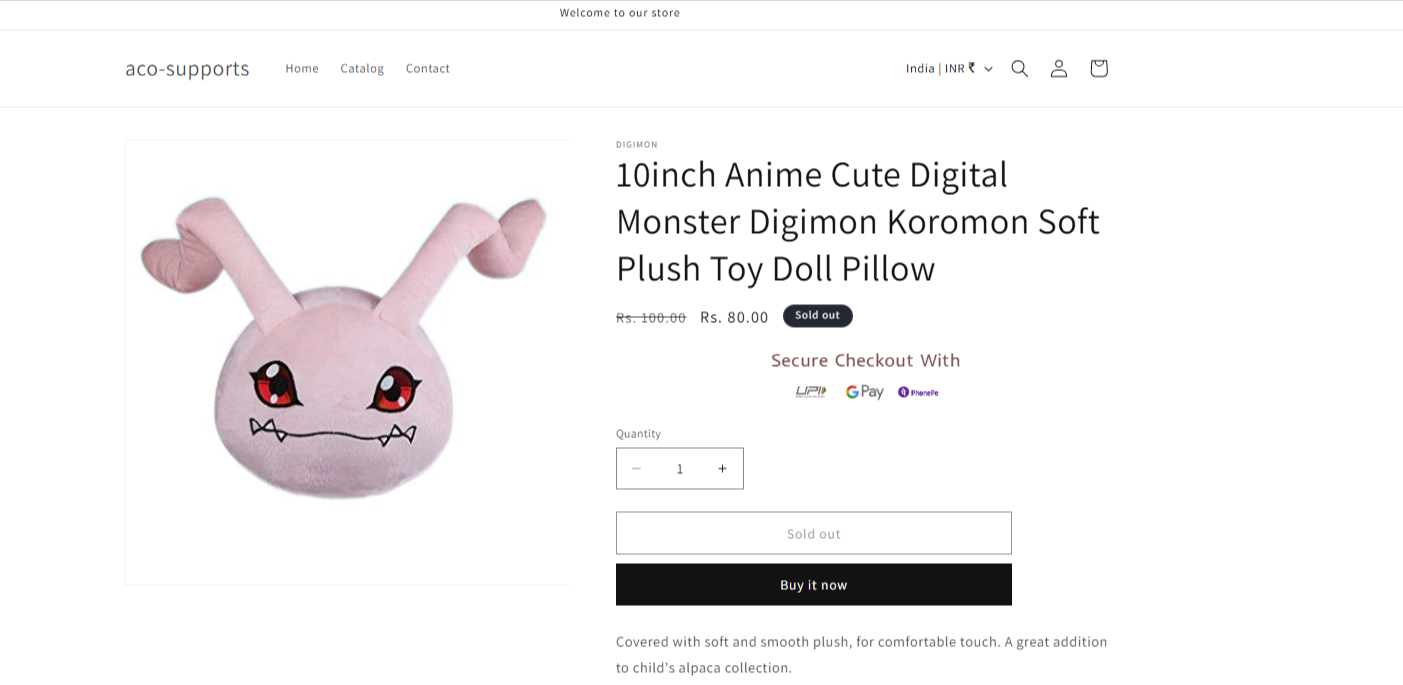
Once the configuration is complete, professional trust badges are automatically displayed across the product pages.
Customers can immediately recognise trusted payment methods and security assurances without searching for additional information. This helps reduce purchase hesitation, builds confidence in the brand, decreases repetitive customer enquiries, and encourages more shoppers to complete their purchases.
If you have questions about our plugin(s), are experiencing issues with any of our plugin





















 Login
Login
 Cart
Cart BUY THIS PLUGIN