Login
Login
 Cart
Cart
As a beginner in WordPress development, it is customary to make immediate changes on your live site. In fact, where else can you do that? There are various challenges associated with this practice.
The main one is that it is very public, and your site users can quickly notice anything wrong.
Almost all WordPress beginners start at this stage so do not feel left out. In fact, every leading website development company would have made this part of their process as this is a crucial thing to follow. In this article, we are discussing a better way of managing your WordPress website.
We talk about simply: setting up the right environment to start developing your website locally, the benefits of developing your website locally, and finally putting your local site on the internet.
Follow the steps keenly because you don’t want to start this process repeatedly because of missing one step.
ALSO READ: 10 Security Tips To Protect Your Websites from Hackers
Why Local Development?
Let us first understand why we need to use local WordPress development before we dive into the how.
There are many benefits that you get when you use local development:
- Local development gives you a chance to test your themes and plugins before putting them out on the live site, therefore removing the risk of getting site compatibility issues.
- Updates can go wrong on a live site. Therefore, in the local environment, you can update core WordPress and check if there are any updating issues before applying the live site changes.
- With localhost, you don’t depend on live internet to work. This means getting work done without a WI-FI connection, but you will need it later when uploading the site.
- Better site performance is guaranteed because there are no limitations to internet connections.
These benefits sound good. Now let us see what it takes to build the environment.
Steps to Create a Local Environment for WordPress Development
Prerequisites
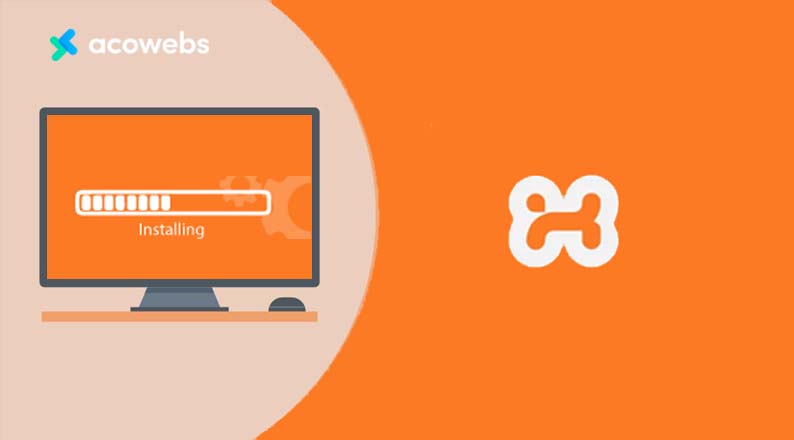
There are several programs that you can use to set up a local WordPress development environment. This article shall use XAMPP (Cross-platform, Apache, MySQL, PHP/Perl).
This package has every necessity to install and use WordPress locally. Apache is an open-source solution to serve as a server. Additionally, MySQL and PHP are the backbones of running a WordPress site.
Follow this link to download XAMPP software.
How to Install XAMPP
- Open the installation package and run the software installer. If prompted to allow the software because it is from an unknown source, click yes to continue.
- Choose the following command to install: Apache, MySQL, PHP, and phpMyAdmin. These are the only required components to uncheck the rest unless you have specific reasons to download them.
- Select the destination folder where your site will be located. Choose a location that is easy to access.
- The information from Bitnami is not a big deal so that you can ignore it.
- Once the installation is finished, select the start control panel.
Once the installation is finished, then you are ready to use the control panel. On opening it, you usually need to confirm whether to allow the app to run through the firewall and click yes; This is mandatory for it to work.
Click the start buttons for both Apache and MySQL. Sometimes you might get errors that other programs are using the same ports as XAMPP. It is necessary to stop them and restart XAMPP.
Usually, the main problem could be related to Skype, so head to Tools-Options-connections to solve the matter. In the config tab under the control panel, you can enable automatic startups for the required components.
Now is time to check whether our local server is up and running. Head over to your browser and type the following in the URL: http://localhost.
How to Install WordPress
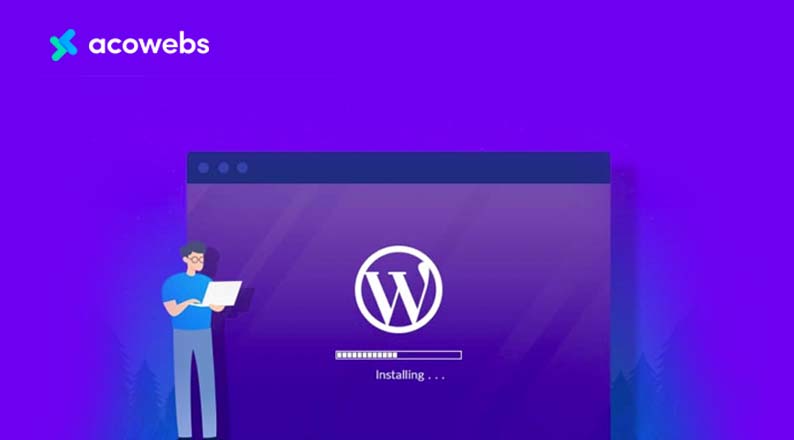
WordPress is installed the same way as a web server is, the only difference being that you do this on your local drive and not through an FTP server.
First, we create a database for WordPress via phpMyAdmin. To navigate to this page, type the following on the URL bar: http://localhost/phpmyadmin. Proceed to create a WordPress database user with a username and password.
The next step is to install WordPress in the htdocs folder of XAMPP. You can download the latest version of WordPress here, then unzip the files into the htdocs folder.
To begin the installation, on the URL bar of your browser, type the following: http://localhost/newdirectoryname.
That’s it. We have a running version of the website on our web server. Time to install a theme, create pages, change styles, and do what you enjoy doing.
We shall talk about how to migrate your site from localhost to a live server.
ALSO READ: Why WordPress is the Best Platform To Build Your Business or Startup Website
Migrate The Website From Localhost to Live Server
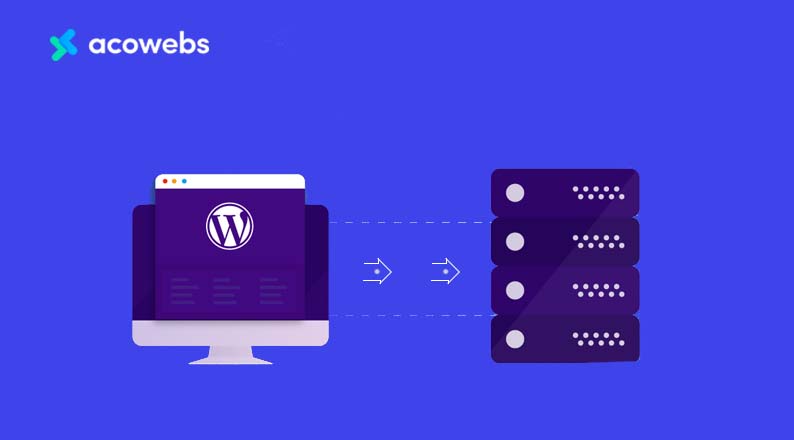
Do you feel it’s time for your site to go live? Once it looks perfect, the next thing would be to share it with the world. In this section, we explain two ways that you can use to migrate your site to a live server.
The first one uses a plugin, which is recommended for beginners, while the second method is doing manual migration. It is up to you to choose a method that best suits you. Let’s do this.
Before we start, you need to have a few things in place:
- Let me assume that you already have your localhost website up, and you have full access rights.
- You have a hosting provider where to upload your site. There are many options to choose from, such as Bluehost, HostGator, and Site ground. I recommend using Bluehost since WordPress officially recommends it.
- You have an FTP in place for uploading content to the live site.
ALSO READ: What SSL Encryption is and how it Works in WooCommerce
Use a Plugin to Migrate the Website From Local to Live Server
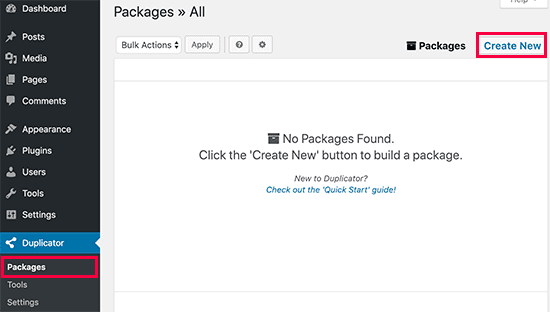
Install Duplicator plugin
The first step on localhost is to download and install the plugin. Once it is activated, go to the Duplicator>Packages page to create a new package.
After clicking next, the plugin will run several tests to ensure that everything is as it should be. If every item is marked suitable, continue by clicking build.
Depending on the contents of the site, this can take some time. Leave the tab left open till this step is completed.
After the build is complete, there are two download options to choose from: for installer and for archive package. For downloading the files to local machine, click ‘one click download.’
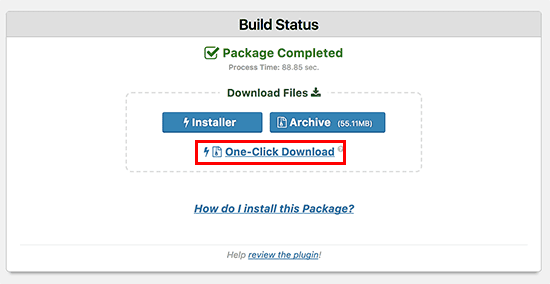
The archive file contains the full copy of the website. It contains all core files, themes, plugins, uploads, images, and a WordPress database backup.
The installer has a script for automating the migration by unpacking the archive.
ALSO READ: Top 8 Rich Snippets For WordPress In 2019
Create a Database on the Live Site
Now let’s create a live server database.
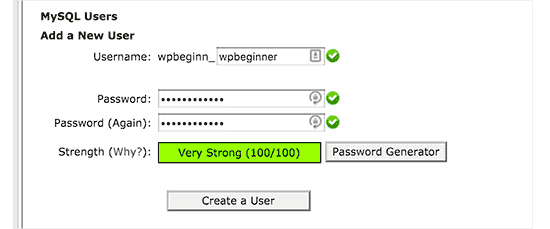
You need to scroll to the hosts’ admin cPanel dashboard and navigate to the database section. Create a new database, then scroll down to the MySQL users section. Provide a username and password for the new user.
The next step is to assign the user to a database. In the section ‘add user to database,’ select the user you just created and select a database, then click Add.
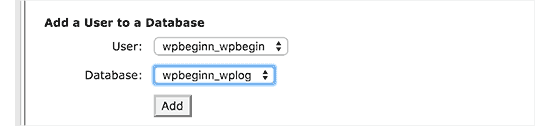
Keep note of the database username and password because your database is ready to host a site.
Uploading Files from Local to Live site
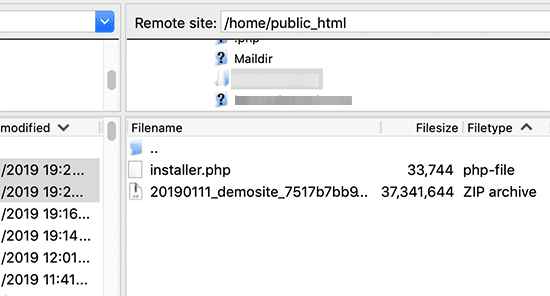
The next step is uploading archive and installer files from your local machine to the live host.
First, run the FTP client on your computer and ensure the root folder is empty. Take note that some hosting providers will install WordPress for you, so make sure to clean that up.
Using Duplicator, upload both downloaded files into the empty directory.
Run the Migration Script
Once you have uploaded the files, enter the following web address: http://mydomain.com/installeer.php to open the duplicator migration wizard.
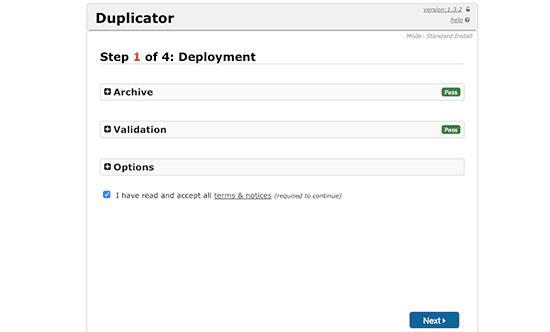
The installer scans the archive file to validate the test. After accepting terms and conditions, click next to continue.
On clicking next you will be prompted to enter your database user details, probably the localhost; therefore, you need to enter the credentials you created earlier.
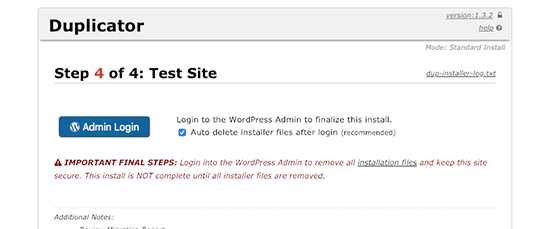
The duplicator plugin will automatically import your backup into the live server database after clicking next. It automatically detects your live site URL and its path.
The transfer was a success. The plugin will show a completion screen and direct you to visit the admin page.
ALSO READ: WordPress And Security – Is WordPress Good Enough For eCommerce Websites?
Manual Transfer of WordPress from Local to Live Server
This method is suitable if the first method does not work for you or you prefer to do things manually, which is fantastic.
Export the Local WordPress Database
The first thing is using phpMyAdmin to export the WordPress database on your local disk.
On your phpMyAdmin page, select your database and click Export at the top menu bar.
We recommend doing a quick export rather than custom to start downloading your database.
Uploading WordPress Files to Live Site
The next thing is to migrate all website content to the live site.
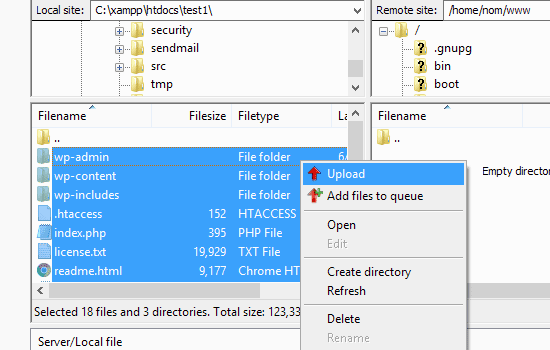
First, connect to your live site account, then upload the contents into the correct directory.
You can upload the WordPress files to the live server, by selecting the local WordPress files.
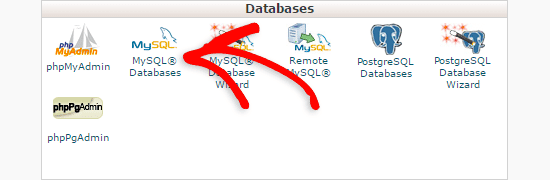
Creating a MySQL Database on the Live Site
Most popular hosting providers have a cPanel where you can manage your account. Let us see how we can create a database using cPanel.
Once logged in to your account, click MySQL databases.
The next screen will prompt you to enter the name of your database.
Next, you have to create a new user and set privileges. I recommend granting the user all the privileges.
Importing WordPress Database to the Live Site
On the cPanel of your live host, scroll to phpMyAdmin, and this shows you the databases created.
On the top menu, click import, choose file, and select the database created earlier.
Once you press Go, phpMyAdmin will begin importing your WordPress database.
Change the Website URL
The next thing is to change the database site URL so that it connects with the live site.
Still, in the phpMyAdmin page, look for wp_options in the just imported database.
Click the Browse button next to it to open a page with fields in the wp_options table.
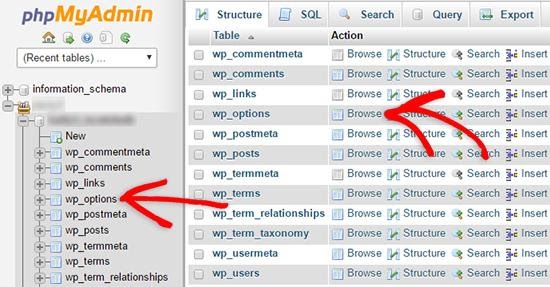
In the options_name, look for the site URL. On the far left of the beginning row, click the edit field.
An edit window appears and in the field option_value that contains something like http://localhost/test, replace this URL with your new site URL, e.g., https://mydomain.com.
Click the Go button to save it.
Setting Up the Live Website
We have successfully imported our database, and now it’s time to take care of configuration settings.
If you try to access your site at this time, you are probably getting an error connecting to the database.
Fixing this error is just editing the wp-config.php file.
Using an FTP client, connect to your user account using the credentials you created earlier, edit the file, save it and upload it back to the server.
Your website should be live now if you try to access it.
On the cPanel, click Settings>general and then select save changes to ensure the URL is connected.
That was it. We successfully migrated a WordPress website from localhost to a live server. Your site is now up and runs smoothly.
ALSO READ: WordPress 5.7 Release; New And Updated Features And Specifications
Summary
Running WordPress on the local machine is extremely beneficial. You are able to modify site content, make an update, test your theme and plugin before loading them on live site, and much more.
Additionally, the software is open-source meaning no additional costs to use it.
In this article, we have looked at the steps to set up a local environment for WordPress development. We have further looked at two ways of migrating your site from local machine to a live host on the internet to make it visible to anyone.
We hope that this article has made everything easy for you. If you are a beginner it might sound tough at first, but believe me, the benefits of using local WordPress development outweigh the learning burden.
You are now ready to take your skills to a top-notch!
If you got tips on enhancing local WordPress development feel free to leave your comment in the section below.
Acowebs are developers of Woocommerce bulk discounts that will help you add bulk discounts to products in your stores. It also has developed various other plugins like the popular plugin for managing the checkout form fields in WooCommerce, called Woocommerce Checkout Manager, which is highly feature-oriented yet lightweight and fast. There is also a free version of this plugin available in the WordPress directory named WooCommerce Checkout Field Editor.