Login
Login
 Cart
Cart
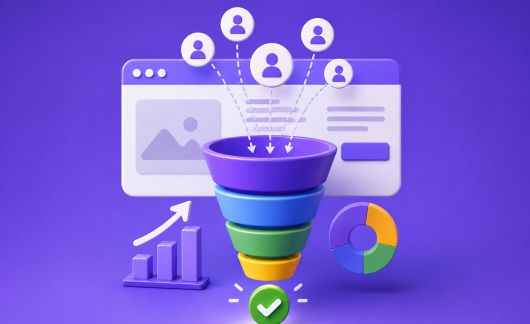
We do a lot to drive visitors to our site. From maintaining regular blog posts to promoting our site to every possible place that we can. Eventually, we do get a lot of traffic, but very few of them convert into customers. It sucks, right?
Ever wonder why so many of your visitors only turn into so few customers? Well, there could be many reasons for that. But most of them are not in your capacity to change. What you can change, is optimizing your checkout page.
Why? Because, as many as 75% abandon their cart and leave without buying anything from your site. Imagine how many of them you could’ve converted with an effective checkout page?
So how do we optimize our checkout page or more specifically WooCommerce checkout page for better conversion? The answer brings us to the theme of this article and we can’t wait to share some must-implement-now type of tips & tricks with you.
Why is Checkout Page Important?
The checkout page is termed by many as the most important page after the homepage. But many disagree and say that the checkout page is even more than the homepage. Because this is the page where you sell.
Every single visitor to this page is valuable and optimizing this page can be the best thing you can do to increase your sales figure.
However, I am not here to judge if a checkout page is indeed more important than the homepage of a website. Rather, we want to let you know how much impact a checkout page has on conversion from visitors to customers.
If you can make a user-friendly checkout page, it is bound to return you a good number of sales. Here user-friendly can be many things from reducing an unnecessary field from your checkout page to slightly changing the design of your checkout page.
These little changes combined can turn your checkout page into an effective one.
Tips for Optimizing WooCommerce Checkout Page
WooCommerce is the largest eCommerce tool for not just WordPress, but it is by far the most used eCommerce technology worldwide. The impact of this awesome plugin on modern eCommerce is invaluable.
However, that doesn’t mean it can always be perfect in every possible area. The checkout page of WooCommerce is one such area that can be tweaked to get a better result.
Now we will share with you some tips that will help you optimize your checkout page to be a conversion-machine.
Are you excited? We know we are!
ALSO READ: How To Customize WooCommerce Checkout Page – A Handy Guide
Hiding Unnecessary Fields
Taking a customer to the checkout page is one long battle. However, about 75% of people abandon their carts during online shopping. So you are basically losing on your precious customers that you fought so hard to bring in.
To make this a bit more specific, about 21% of people abandon their cart, just because they felt the checkout process is too long or complicated.
One thing that can help you cope up with that, is hiding unnecessary fields from your checkout page. If not absolutely necessary, don’t ask for any information. Make it simple and easy.
However, as there is no official way to remove WooCommerce checkout fields, you might feel a problem removing unnecessary fields if you own a WooCommerce-powered eCommerce site.
But what you can do is using a third-party plugin, WooCommerce Checkout Field Editor to disable the unnecessary fields from your checkout page and make it shorter.
Showing Inline Error Messages
Imagine being a customer and filling up all the details only to see your filled-up details getting rejected for one simple space between your email.
That happens because in WooCommerce there is no way to show error messages in line. You can only see your error messages on top.
However, you can use third-party plugins to show inline error messages. This will allow your customers to easily understand the errors while they are filling up the fields.
Allowing Guest Checkout
You don’t have to open an account if you want to buy something from a physical shop. So why would you bother your customer by forcing them to do that on an eCommerce?
Turning off the mandatory registration to buy a product and offering a guest checkout policy to your customer can help increase your sales.
So, if you don’t have a guest checkout process in place as of now, consider adding this option soon on your WooCommerce store.
Additionally, offer sign up using social media, which is comparatively faster and needs just 2 to 3 clicks and no information to be filled out.
Adding Credit Card Logos and Trust Badges
If you can use multiple payment methods and credit card support for taking payments, users get both a sense of assurance and lesser reasons to not buy from you.
It’s important to show the logo of all the payment methods that you support, as you might have seen the same on every popular eCommerce site.
Now add to that some trust badges like Norton Secured or McAfee secured, and people will want to trust you even more. And as soon as people start to trust you, they will start buying from you even more.
ALSO READ: How to Use Psychology to Shape Your E-commerce Success
Adding Options to Fast Complete Order
Add a dedicated option to quickly complete an order alongside the add to cart.
The fast complete will directly go to the checkout page unlike the add to cart button and an already compact checkout list will increase the customer experience even more significantly.
Letting the User Update or Modify Cart amount During Checkout Page
Yes, you have offered customers the add to cart option alongside every order, but give them one more chance to reconsider anyways. Allow the option to add or remove some of the products even on the checkout page.
Rather than losing out on the whole order, it’s better to take the risks of losing one or two products, don’t you think?
Recommending Related Products before Checkout
Did you notice how Amazon shows some clever suggestions to buy some more related products while checking out?
Well, even if you don’t have the capabilities to do that on the scale of Amazon, there are good reasons to add a Related Products feature on checkout. This way you will have more visibility of your products and can increase the chance of selling some more products.
Adding Exit Intent Pop-up
Exit-intent popups are one of the best ways to prevent customers from abandoning the site. While popups can be extremely irritating, studies show that an estimated 10 to 15% of customers buy the product after seeing the exit-intent popups.
However, it is true that one of the biggest reasons behind the increase in sales is offering people a discount while they intend to leave their cart.
So your exit intent popups should be based on a special discount to prevent customers from exiting.
Implementing Royalty Points and Reward
When a customer buys from you, they want to feel personal. Once someone buys a product from you, you can offer him/her something like royalty or reward points.
These royalty points or reward points shall be redeemed later to buy other products from the site.
This way, you can encourage customers to buy from you.
Displaying Order Number & Contact Number at the Checkout Page
Reassure the customers that they are buying from a trusted site, by displaying order number and dedicated contact number on the checkout page.
This way, they can get a sense that they are in the right hands, and you will take care if something unexpected happens.
It is also a good indicator of customer service.
Adding a Flashing Browser Tab
Flashing browser tabs can be a good way to battle the high cart abandonment rate. In case you don’t know how they work, here’s a short summary.
If a user goes to another tab, leaving behind an abandoned cart, you can make the tab blink or display custom text.
A cleverly written copy like “You forgot something” can entice a lot of users to come back to the tab and probably buy it.
Including Product Ratings and Testimonials on Checkout Page
Many visitors continue to the checkout page, without thinking if they need the product or not. However, it is at the end of the line aka the checkout page that they start thinking if they should or should not buy the product.
So make their thought process easier by showing them your reviews and some previous user testimonials. This will surely make their purchase decision easier, as people like to follow what other people are doing.
Offer Free Shipping for Bulk/high Amount Purchases
Offering the customers free shipping for purchase of bulk quantity or high amount can be a defining factor for purchase decision making.
Everyone knows that from a customer’s perspective, free shipping is one of the most crucial factors when buying a product.
ALSO READ: How Shipping Costs Affect E-Commerce Conversion Rates
$X from $Y
Just one little sentence on your checkout page can increase your sales by 1.5x. Studies by several sources indicate that a single sentence – “Was $10, Now $5”, can do a miracle for sales improvement.
This is a pure impact on human psychology. Our brain constantly tries to get us the best and math like this makes it very easy for the brain.
After all, everyone likes a good deal (even on paper), don’t you think?
Showing an Approximate Shipping Date on the Checkout Page
Customers don’t like to stay in suspense. So don’t put them into one. Display an approximate shipping date on the checkout page and deliver within the promised date.
Fast shipping is one of the top priorities for online buyers, but even if you can’t provide the fastest delivery, don’t overpromise.
Sending Abandoned Cart Emails
Sending abandoned cart emails can lure back a lot of customers that left from the checkout page. According to statistics, the average conversion rate from abandoned cart email is on average 3 to 5%. Pretty huge, considering that you’d have 0% of them for not sending a single email!
Promoting Return Policy & Customer Service on Checkout Page
Customers don’t buy from a place that they don’t trust. That is one of the biggest reasons that Amazon gets so many sales, why a small store gets none, despite offering a lower price on a similar product.
Let me tell you why that happens. Yes, they don’t trust the latter, whereas Amazon is already a trustworthy brand.
So what should you do? Gain their trust.
What’s the first step? Offer return policy and promise exceptional customer service.
Yes, a return policy can be a huge factor for buying or not buying a product. And, as for customer service, we all know how important that is.
Offering Multiple Payment Options
According to studies, as much as 10% of cart abandonment happens due to problems with payment. This could be the lack of payment options, no mobile payment option, or even a matter like credit card decline.
So, we suggest you offer as many popular payment options as you can so that no matter what payment option the customer is used to, he/she can always find one that suits them.
It is also important that you support payment from mobile devices, as most of the shopping nowadays happens from mobile. Surprisingly, the most number of cart abandonment also happens on mobile devices, which now stands at 85%!
ALSO READ: 10 Ways to Protect eCommerce Customer Data
Removing Everything Unnecessary from the Checkout Page
The checkout page is the final destination. This is the page you want to take your customers to. However, sadly this is also the page they leave the most. Which is the whole point of this article.
Now, one of the reasons customers leave that cart and exit from the site is because of the distraction. When you have finally lured your customer to the checkout page, don’t overwhelm them with many details.
A simple page with just the necessary details to fill up and no gorgeous design is the perfect example of a high-performing checkout page. Not everything needs to be decorated like a Christmas tree!
Customizing WooCommerce Checkout Page Completely
WooCommerce checkout page is not the most thoughtful checkout page ever. So consider customizing the labels and fields and make it a bit more creative.
However, customizing a WooCommerce checkout page is not possible by default, so you’ll have to learn to code or take help from a plugin, which brings us to our next section.
WooCommerce Checkout Field Editor – The Best Plugin for Customizing WooCommerce Checkout Page
There are two major ways to customize the WooCommerce checkout field. One of them is by coding (you have to learn PHP to do that), another is by taking help from a plugin.
As most of our readers do not know or are unlikely to learn to code just edit the checkout field, the best way to customize our checkout page is by using a plugin called WooCommerce Checkout Manager by Acowebs.
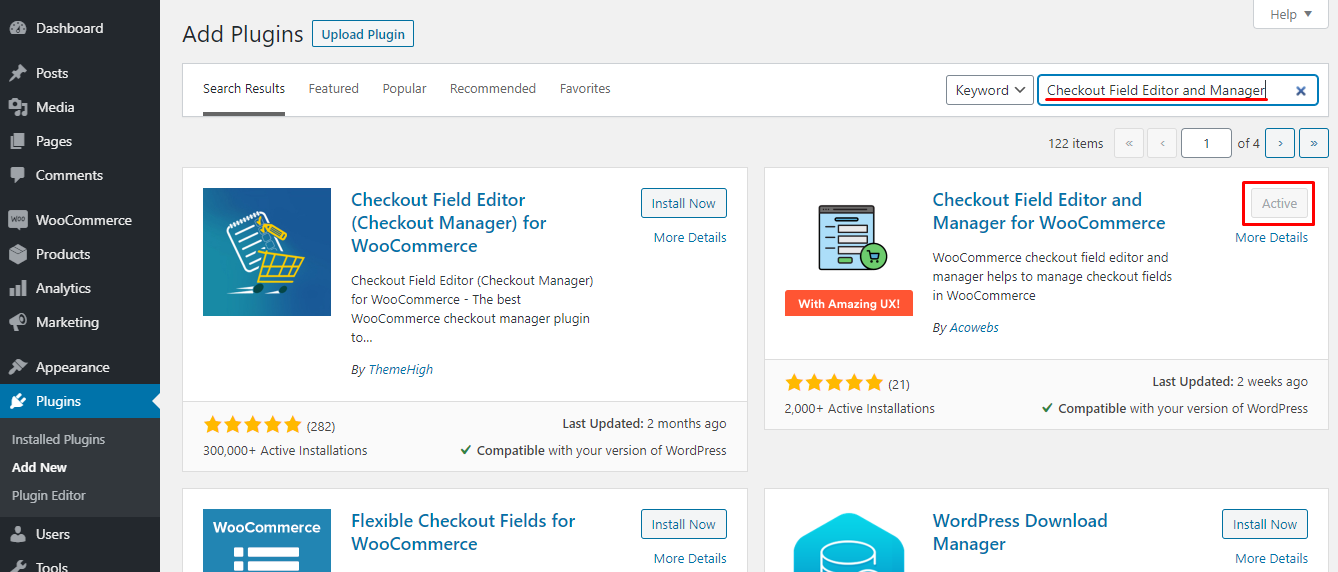
Now, to use the Checkout Field Editor plugin, we need to install the plugin from WordPress repository first. You can do that by visiting WordPress Admin Dashboard > Plugins > Add New. Now type in “Checkout Field Editor and Manager” on the search box.
Once you find it, install and activate it following the on-screen button.
The first is always the easiest, so without wasting much time, let’s head on to the main task.
How to Add New Fields
Adding new fields to the checkout page is the first thing you might need. To do this, you’ll have to go to the Checkout Fields option first. This option is located at WP Admin Dashboard > WooCommerce > Checkout Fields.
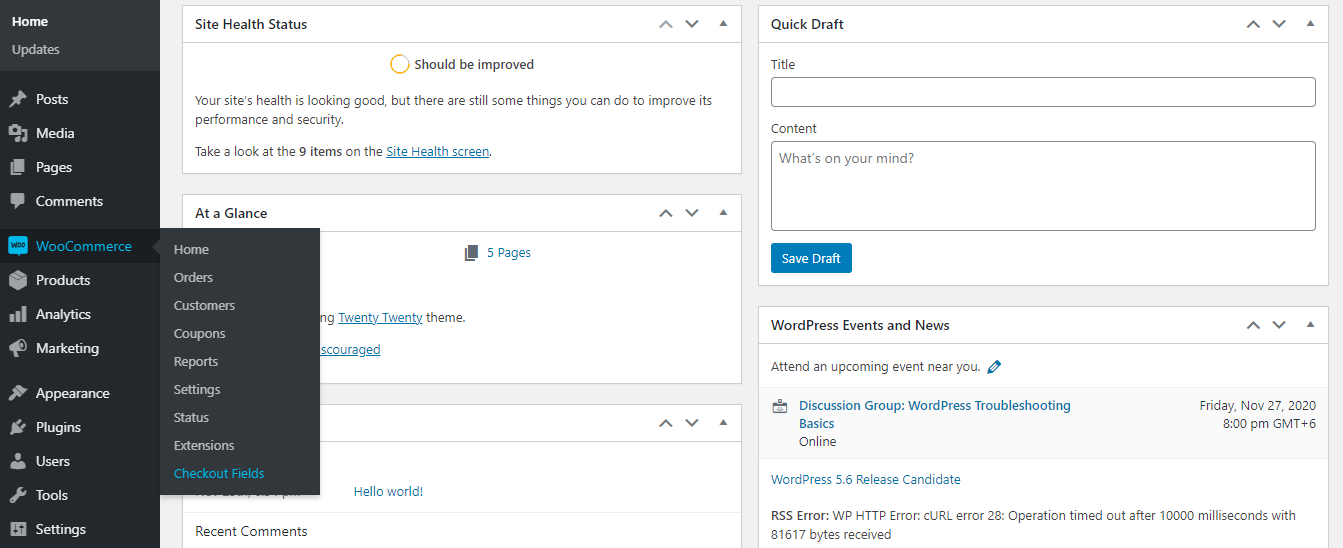
In total, 9 types of fields are available to insert here, so choose one that you need.
For example, you might want to add a field called “Company Description”, where the customer will have to input a text as an answer. Here’s how you can do that.
Please note that the process for adding other types of blocks is the same as the above process.
How to Delete a Field
Now the second most important part of customizing the WooCommerce checkout page is deleting a field. Deleting a field from your checkout page using Checkout Field Editor and Manager is quite easy to do. First, navigate to the Checkout Fields page.
You can see the current list of fields for checkout on this page. Just click on the Cross button of any fields just like we did below and that field will be removed from the list.
It is needed to be remembered that, following this way, you can only delete fields that you created using the plugin itself.
So if you are planning to delete a default field provided by WooCommerce Checkout Field Editor, just disable it from the option rather than trying to delete it.
How to Mark a Field as Required
A lot of time, we need some necessary options on the checkout page. So If you need that for a certain field, visit the Checkout Fields option once again and select the field that you want to set as required.
Now if you look at the right side, you will find the General option appears once you select the field. Scroll down and turn on “Is Required” and you are done.

This can also be done while creating a new field, following the same way.
How to Modify Field Area
Modifying the area of a field is not something you might be very familiar with, but it is certainly something that you see quite often.
If you have ever noticed the “Name” field on any contact page, more often than not, there are two (or three) fields in a single line for First Name, Last Name.
So how can you do that? It is pretty easy! From the Checkout Field page, you can click on any field and you’ll find the Minus and Plus button on the top right.
Now use one that you need depending on your goal, as we did below. And the field will contract or extract within no time.
Rearranging the Fields
Now you might also need to rearrange the set fields. If you need to do that, just visit the Checkout Field option once again.
Now click any field that you want to rearrange and drag it wherever you want to. If you need help understanding, the below image can help you out.

Conditional Logic Based Fields
Now, all the fields that we worked with were basic fields. However, using WooCommerce Checkout Field Editor and Manager plugin you can also modify the advanced fields.
There are some fields that depend on conditional logic and display variable results relying on the user input or other data. Product price and tax amount are two such fields. Both of them depend on the product the customer chooses.
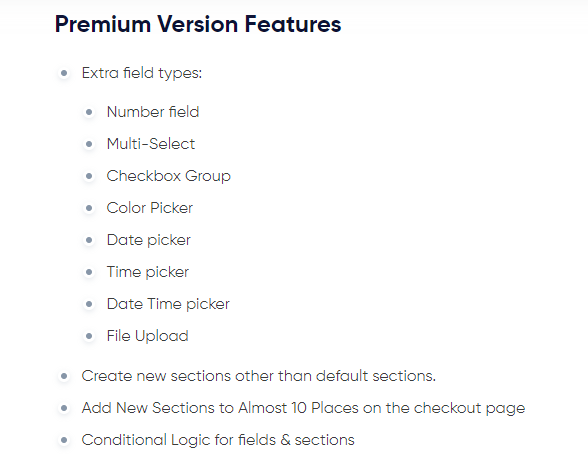
Using Checkout Field Editor and Manager, you can modify these types of fields that depend on conditional logic very easily. But in order to do that, you’ll have to purchase the premium version of this plugin.
The premium version of Checkout Field Editor and Manager costs just $32, so buying it is not a big expenditure at all. This also comes with a free version named WooCommerce Checkout Field Editor.
Time to Optimize Your WooCommerce Checkout Page
Optimizing your checkout page is an unpopular task, but one that will serve you in the long run.
For years, eCommerce experts tried to find out where exactly the customers decide to leave a site? What is the endpoint for what kind of people? And check out seemed to be one of the pages from where people leave the most.
So generally you may wonder how we can change this and what could be the result. Well, the truth is most people will leave on the checkout page, no matter what you do.
But there is always a small percentage of people that you convert if you optimize your checkout page to fill their needs.
While optimizing your checkout page for this small percentage may seem like an arduous task that can return very little value, you have to keep in mind that the number of people that leave a site on the checkout page is huge.
So this small percentage takes up a big number when you count the conversion.
Optimizing the WooCommerce checkout page is, however, another lengthy task if you don’t use a plugin. WooCommerce Checkout Field Editor and Manager is by far the most useful plugin that can help you optimize and improve most of the important parts of the checkout page.
So if you haven’t yet started optimizing your WooCommerce checkout page yet, the best time is now. The price of the plugin starts at just $32!
Let me know what worked out the best for you if you tried optimizing your checkout page or if you face any problems customizing WooCommerce checkout pages.
Acowebs are developers of Woocommerce dynamic pricing that will help you add bulk discounts to products on your stores. It also developed the plugin for adding various extra product fields which is called Woocommerce custom fields, that are lightweight and fast. You can easily update your store with these add-ons and enjoy a hassle-free experience, check out the best options for additional Woocommerce custom product addons.